
Puede probar los elementos del calentador de agua usted mismo con solo unas pocas herramientas básicas. Asegúrese siempre de cortar la alimentación en el disyuntor antes de comenzar, ya que la seguridad debe ser lo primero. La prueba le permite identificar rápidamente problemas comunes con su calentador de agua y le ayuda a decidir si necesita reparaciones.
Consejo de seguridad: Nunca intente probar los elementos del calentador de agua. mientras la unidad tenga alimentación. Este paso lo protege de riesgos eléctricos.
Pasos de seguridad antes de probar el calentador de agua
Comprensión de los riesgos eléctricos
Riesgos de trabajar con circuitos activos
Trabajar con circuitos activos lo expone a graves riesgos eléctricos. Se enfrenta a un riesgo significativo de descarga eléctrica cuando prueba o inspecciona los elementos del calentador de agua sin desconectar la alimentación. Las unidades de calentadores de agua eléctricos funcionan a 240 voltios, lo que puede causar lesiones graves o incluso ser mortal. Las personas no capacitadas nunca deben intentar realizar pruebas en circuitos activos. Desconecte siempre los cables de alimentación antes de comenzar cualquier trabajo para evitar descargas.
Precauciones de seguridad con agua y electricidad
El agua y la electricidad crean una combinación peligrosa. Incluso una pequeña cantidad de humedad puede aumentar el riesgo de descarga. Debe mantener su área de trabajo seca y libre de agua. Retire todas las joyas y accesorios metálicos antes de comenzar. Use guantes aislados y gafas de seguridad para protegerse del contacto accidental con piezas eléctricas o residuos. Si no está seguro de algún paso, consulte a un profesional para evitar riesgos innecesarios.
Cómo apagar el calentador de agua
Localización y accionamiento del disyuntor correcto
Usted debe apague la alimentación en el disyuntor antes de comenzar. Localice el panel de disyuntores de su hogar y encuentre el disyuntor etiquetado para el calentador de agua. Accione este disyuntor a la posición “apagado”. Para los modelos de calentadores de agua eléctricos, este paso garantiza que no fluya electricidad hacia la unidad durante la prueba.
Verificación de que la alimentación está apagada con un comprobador
Después de accionar el disyuntor, verifique siempre que la alimentación esté realmente apagada. Use un comprobador de voltaje sin contacto para revisar los terminales y cables dentro del panel de acceso. Sostenga el comprobador cerca de los cables; si el comprobador no se enciende ni emite un pitido, el circuito es seguro para tocar. Verificar dos veces con un comprobador de voltaje evita el contacto accidental con electricidad activa.
⚡ Consejo: Nunca confíe únicamente en la etiqueta del disyuntor. Confirme siempre con un comprobador de voltaje antes de tocar cualquier cable.
Reunir herramientas y equipo de seguridad
Herramientas Esenciales para la Prueba
Necesita las herramientas adecuadas para probar un elemento del calentador de agua de manera segura y precisa. Reúna los siguientes elementos antes de comenzar:
- Multímetro configurado en ohmios/resistencia para medir la continuidad del elemento
- Comprobador de voltaje sin contacto para confirmar que la alimentación está apagada
- Destornillador para retirar paneles de acceso y desconectar cables
Una linterna puede ayudarle a ver dentro de la unidad, y una toalla o trapo mantendrá su área de trabajo limpia.
Equipo de seguridad recomendado
El equipo de protección personal es esencial para su seguridad. Use guantes aislados para protegerse contra descargas eléctricas. Las gafas de seguridad protegen sus ojos de chispas o residuos. Elija ropa de fibra natural, que resiste la fusión en caso de arcos eléctricos. Mantenga su área de trabajo despejada y organizada para minimizar los riesgos. Inspeccione siempre los cables en busca de daños visibles antes de comenzar.
🛡️ Nota: Si descubre cables dañados o se siente incómodo en algún momento, deténgase y contacte a un profesional con licencia.
Accediendo al elemento del calentador de agua
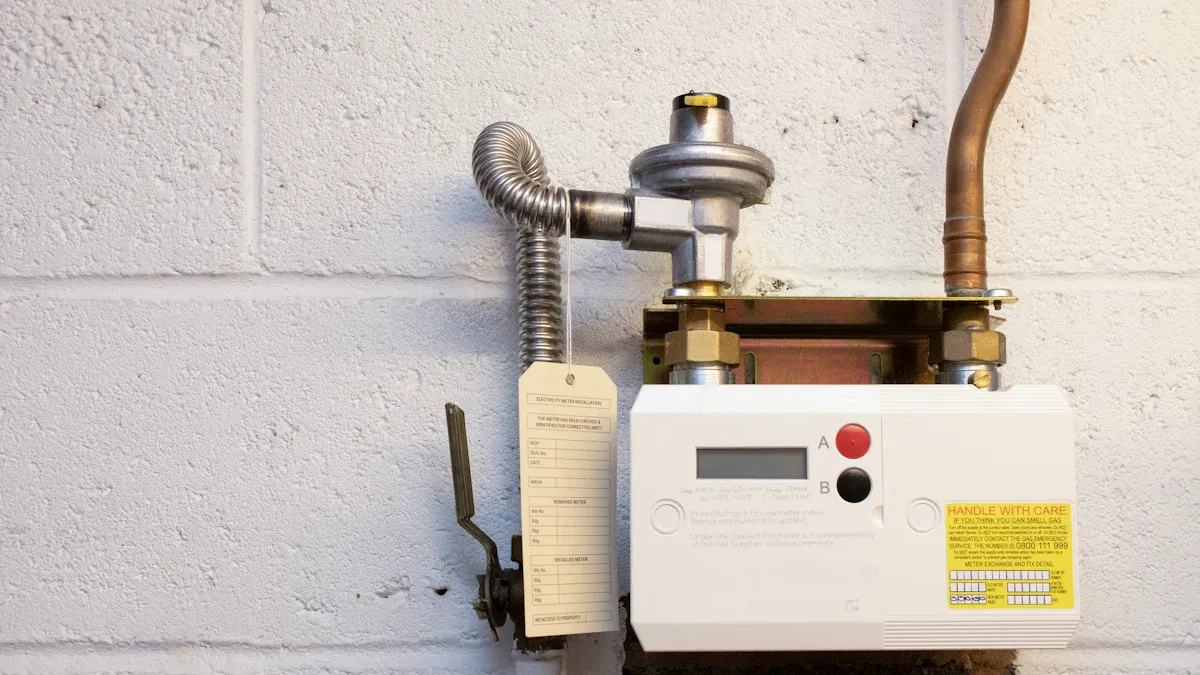
Antes de poder probar un elemento del calentador de agua, debe acceder a él de manera segura. Este proceso implica retirar paneles y aislamiento, luego localizar los elementos calefactores correctos dentro de su calentador de agua.
Retiro de paneles de acceso y aislamiento
Identificación de las ubicaciones de los paneles en su calentador de agua
La mayoría de los calentadores de agua eléctricos tienen dos paneles de acceso: uno cerca de la parte superior y otro cerca de la parte inferior. Estos paneles cubren los elementos calefactores superior e inferior. Generalmente los encontrará en la parte frontal del tanque. Busque cubiertas metálicas rectangulares aseguradas con tornillos. Use un destornillador para retirar estos tornillos y colóquelos en un lugar seguro. Si tiene problemas para encontrar los paneles, consulte el manual de su calentador de agua para ver un diagrama.
Manejo y almacenamiento seguro del aislamiento
Una vez que retire los paneles de acceso, verá una capa de aislamiento. Este aislamiento mantiene el calor dentro del tanque y protege los elementos calefactores. Con cuidado, retire el aislamiento para exponer el cableado y los terminales. Evite rasgar o dañar el aislamiento, ya que necesitará volver a colocarlo más tarde. Coloque el aislamiento en una superficie limpia y seca, lejos del agua o los residuos.
🛠️ Consejo: Tome una foto de la disposición del aislamiento y los paneles antes de retirarlos. Este paso le ayuda a recordar cómo volver a ensamblar todo después de la prueba.
Localización de los elementos superior e inferior
Reconocimiento de los terminales del elemento
Después de mover el aislamiento, verá los terminales de los elementos calefactores. Cada elemento del calentador de agua tiene dos tornillos o pernos con cables adjuntos. Estos terminales conectan el elemento al suministro eléctrico. También puede notar un termostato cerca, pero concéntrese en los dos terminales por ahora. Asegúrese de no tocar ningún cable hasta que confirme que la alimentación está apagada.
Diferencias entre los elementos superior e inferior
La mayoría de los calentadores de agua residenciales utilizan dos elementos calefactores: uno superior y uno inferior. El elemento superior calienta el agua primero, luego el elemento inferior mantiene la temperatura. El elemento superior generalmente se encuentra detrás del panel superior, mientras que el elemento inferior está detrás del panel inferior. Algunos modelos solo tienen un elemento, pero los diseños de dos elementos son más comunes. Conocer la ubicación y función de cada elemento le ayuda a probar y diagnosticar problemas con precisión.
Si nota corrosión o acumulación de minerales en los terminales, es posible que deba limpiarlos antes de la prueba. Use un paño seco y evite usar agua cerca de las piezas eléctricas.
Desconexión de los cables del elemento del calentador de agua
Marcado y retiro seguro de cables
Etiquetado de Cables para un Reensamblaje Fácil
Antes de desconectar cualquier cable, tómese un momento para etiquetar cada uno. Use cinta adhesiva o etiquetas pequeñas para marcar dónde se conecta cada cable. Escriba un código simple o color para que coincida con el terminal y el cable. Este paso asegura que pueda volver a conectar todo correctamente después de la prueba. También puede tomar una foto clara de la configuración del cableado con su teléfono. Las referencias visuales le ayudan a evitar confusiones durante el reensamblaje.
Evitar daños durante la desconexión
Use un destornillador con mango aislado para aflojar los tornillos que sujetan los cables en su lugar. Tire suavemente de cada cable desde su terminal. Evite tirar o torcer los cables, ya que esto puede causar roturas internas o aflojar los conectores. Si un cable se siente atascado, muévalo ligeramente mientras tira. Mantenga todos los tornillos y piezas pequeñas en un recipiente seguro. Manipule los cables por su aislamiento, no por los extremos metálicos expuestos, para evitar dobleces o deshilachados accidentales.
🛡️ Consejo: Siempre verifique dos veces que la alimentación esté apagada antes de tocar cualquier cable. La seguridad es lo primero.
Inspección en busca de daños visibles
Signos de cables quemados o sueltos
Después de retirar los cables, inspecciónelos de cerca en busca de cualquier signo de daño. Los problemas comunes incluyen:
- Puntos quemados o ennegrecidos en el aislamiento del cable o los terminales
- Conexiones sueltas que se mueven o se caen fácilmente
- Piezas metálicas corroídas o verdosas
- Hilos de cable deshilachados o expuestos
- Grietas, deformaciones o decoloración en el propio elemento del calentador de agua
Estos problemas pueden interrumpir el flujo eléctrico y reducir la eficiencia de calefacción. Los elementos quemados a menudo causan calefacción insuficiente, mientras que problemas de cableado como cortocircuitos pueden disparar el disyuntor.
Qué hacer si encuentra daños
Si nota algún cable quemado, suelto o corroído, no intente reutilizarlos. Los cables dañados pueden provocar cortocircuitos eléctricos o incluso riesgos de incendio. Reemplace cualquier cableado defectuoso con cable nuevo y de la capacidad adecuada. Si ve grietas, roturas o residuos pesados en el elemento del calentador de agua, considere reemplazar el elemento. Para daños graves o si no está seguro de la reparación, contacte a un electricista o fontanero con licencia. La ayuda profesional garantiza que su calentador de agua funcione de manera segura y eficiente.
⚠️ Alerta: Nunca ignore los daños visibles. Abordar estos problemas de manera oportuna evita problemas mayores y mantiene su sistema de agua caliente confiable.
Cómo probar el elemento calentador de agua con un multímetro
Probar su elemento del calentador de agua 使用万用表可以帮助您快速诊断加热问题,并确定是否需要更换。您可以按照以下步骤 安全且准确地测试热水器加热元件 在家中完成。.
Configuración del multímetro
选择正确的欧姆量程
您需要将万用表设置为 最低电阻(欧姆,Ω)档位 在开始之前。大多数数字万用表都有专用的欧姆符号。此设置允许您准确测量加热元件的电阻。如果您的万用表有多个欧姆量程,请选择可用的最低档位。该量程可为热水器元件中预期的电阻值提供最精确的读数。.
Prueba de precisión del multímetro
在测试加热元件之前,请检查万用表的准确性。将两个探针接触在一起。显示屏应显示为零或非常接近零。此步骤确认您的万用表工作正常,并将为您提供可靠的结果。如果您看到不同的读数,请更换电池或查阅万用表手册。.
⚡ Consejo: 在测试热水器元件之前,请务必再次检查万用表的设置 测试热水器 元件。错误的设置可能导致错误读数。.
Medición de resistencia y continuidad
Colocación de sondas en los bornes de los elementos
要测试加热元件,请将一个探针放在元件的每个裸露螺丝或端子上。确保您已经断开端子上的电线,并且电源已关闭。将探针牢固地固定到位,以获得稳定的读数。您应该 同时测试上下两个加热元件 以确保识别出任何故障部件。.
读取并记录显示屏读数
在探针接触端子时查看万用表显示屏。一个功能正常的电热水器元件通常显示 10到30欧姆之间的电阻值. 。记录每个元件的读数。如果您看到的读数超出此范围,则可能需要更换该元件。始终测试两个加热元件,因为任何一个都可能导致热水问题。.
📝 Nota: 拍照或记下您的读数以备将来参考。此记录有助于您跟踪 变化,如果您需要再次测试热水器元件 的话。.
Interpretación de los resultados de las pruebas
热水器元件的正常欧姆范围
您测量的电阻值取决于加热元件的功率。请参考下表:
| Potencia (W) | Tensión (V) | Resistencia Típica (Ohmios) |
|---|---|---|
| 3000 | 240 | ~19.2 |
| 3800 | 240 | ~15.2 |
| 4500 | 240 | ~12.8 |
一个典型的4500瓦元件应显示 大约13欧姆. 。如果您的读数在10到30欧姆之间,您的元件可能状况良好。.
零读数、低读数或无穷大读数的含义
当您测试加热元件时,理解万用表读数至关重要。使用下表解释您的结果:
| Lectura de resistencia | Significado del estado del elemento del calentador de agua |
|---|---|
| 0 ohmios | Elemento en cortocircuito; requiere reemplazo. |
| 10 a 30 ohmios | El elemento es funcional. |
| Resistencia infinita | Circuito abierto; el elemento está defectuoso y debe reemplazarse. |
零读数或非常低的读数意味着元件存在短路,并且不安全。无穷大读数意味着元件已损坏或烧毁。只有正常范围内的读数才表示元件按预期工作。.
测试对地短路
También debe 测试对地短路, ,这可能导致断路器跳闸或热水器故障。为此,请将万用表设置为电阻档位。将一个探针放在加热元件的一个端子上,另一个探针放在热水器的金属外壳上。对两个端子重复此过程。如果您看到任何非无穷大电阻的读数,则元件存在对地短路,需要更换。.
🚨 Alerta: 如果您发现对地短路,在更换故障元件之前,请勿尝试使用热水器 更换故障元件. 。此问题可能造成严重的电气危险。.
Siguiendo estos pasos, podrá diagnosticar con confianza 测试热水器元件并诊断 大多数常见问题。了解如何 测试加热元件使您能够维护热水器 并避免意外的冷水淋浴。.
Reensamblaje del calentador de agua después de la prueba
将电线重新连接到元件
Doble comprobación de todas las conexiones
在完成工作之前,您需要确保每根电线都回到其正确的端子。再次检查您的标签或参考照片。确认每根电线与其原始位置匹配。如果您的热水器使用三芯电缆,您可能会看到一根 带帽的白线. 。此电线不用于240伏连接,因此请将其安全地盖上,并专注于 两根黑色火线. 。这些电线必须牢固地连接到元件端子。.
正确固定端子
使用螺丝刀拧紧每个端子螺丝。确保电线牢固地压在螺丝下方,且没有裸露的铜线露出。松动的连接可能导致过热或电气故障。如果在拧紧时感觉到任何阻力,请停止并检查是否有螺纹错位或碎屑。牢固的连接可确保安全高效的运行。.
⚡ Consejo: 拧紧后,务必轻轻拉动每根电线。如果电线移动,请重新拧紧端子。.
Sustitución de aislamiento y paneles de acceso
将绝缘材料放回原位
重新连接电线后,, 更换绝缘材料 您之前移除的。将其紧密地贴合在元件和恒温器周围。如果您的绝缘材料有切口,请将其与检修面板和接线对齐。此步骤有助于保持热水器的能源效率并保护内部组件。.
牢固拧紧面板螺丝
将金属检修面板放置在绝缘材料上。插入螺丝并拧紧,直到面板与水箱齐平。不要过度拧紧,因为这可能会损坏螺纹或面板。牢固的面板可防止灰尘和湿气进入电气部件。.
🛠️ Nota: 如果您在拆卸前标记或拍摄了面板的布置,请使用您的参考确保所有部件都回到原位。.
恢复电源并检查运行情况
Volver a conectar el interruptor
完成重新组装后,返回您的断路器箱。将热水器的断路器拨回“开”位置。某些型号在恒温器或元件附近有一个重置按钮。. 按住此按钮 直到您听到咔嗒声。如果您执行了重置,请在恢复电源前等待几分钟。.
监控热水器是否正常运行
恢复电源后,监控热水器是否正常运行。大约30分钟后,聆听加热的声音或检查附近水龙头是否有热水。如果您没有热水或注意到异常噪音,请重复重置过程或咨询专业人员。正确的监控可确保您的维修成功且系统安全运行。.
🚨 Alerta: 如果您检测到任何烧焦味、断路器跳闸或没有热水,请立即关闭电源并寻求专家帮助。.
如果热水器元件测试正常时的故障排除
Si su 热水器元件测试 dentro del rango normal pero aún tiene problemas con el agua caliente, debe buscar otras posibles causas. El termostato, acumulación de sedimentos, o problemas más graves como fugas pueden ser los responsables.
Revisión del termostato
Señales de fallo del termostato
Puede notar varias señales que apuntan a un problema con el termostato. Si el agua está demasiado caliente, demasiado fría o la temperatura cambia inesperadamente, el termostato podría ser el culpable. A veces, ajustes incorrectos del termostato provocan temperaturas del agua inconsistentes. Un termostato averiado también puede hacer que el agua nunca se caliente o que se caliente peligrosamente. En un calentador de agua eléctrico, un termostato que funciona mal a menudo provoca estos síntomas incluso cuando el elemento calefactor funciona correctamente.
🔎 Consejo: Siempre revise primero la configuración del termostato. El valor predeterminado de fábrica suele ser 120°F. Si su agua está demasiado fría, intente aumentar el termostato a 140°F y espere aproximadamente una hora. Si la temperatura no cambia, probablemente tenga un termostato defectuoso.
Cómo probar el termostato
Puede pruebe el termostato usando un multímetro digital. Siga estos pasos:
- Corte la alimentación eléctrica del calentador de agua en el disyuntor.
- Retire el panel de acceso, el aislamiento y la protección de seguridad para exponer el termostato y los elementos calefactores.
- Configure su multímetro en el rango de ohmios más bajo.
- Coloque una sonda en el terminal común del termostato superior y la otra en el terminal que alimenta el elemento calefactor superior. Un termostato que funciona muestra resistencia cero, lo que indica continuidad.
- Mueva la sonda al terminal del elemento calefactor inferior. Si el termostato superior funciona, el multímetro debería mostrar resistencia infinita.
- Presione el botón de reinicio del termostato y pruebe de nuevo. Ahora, el terminal del elemento calefactor superior debería mostrar resistencia infinita, lo que significa que la energía se ha transferido al elemento inferior.
- Si sus lecturas no coinciden con estos resultados, el termostato está defectuoso y necesita ser reemplazado.
⚠️ Alerta: Si no está seguro acerca de probar el termostato, contacte a un profesional para obtener ayuda.
Inspección de acumulación de sedimentos u otros problemas
Efectos de los sedimentos en la calefacción
La acumulación de sedimentos es un problema común tanto en modelos de calentadores de agua a gas como eléctricos. Minerales como el calcio y el magnesio se depositan en el fondo del tanque, formando una capa que reduce la eficiencia de calefacción. Los sedimentos pueden cubrir el elemento calefactor, haciendo que se desgaste más rápido y caliente de manera menos efectiva. Puede escuchar ruidos de retumbo o chasquidos, notar temperaturas de agua más bajas, o ver una disminución en el flujo de agua caliente. Los sedimentos también aumentan la tensión en el tanque, provocando fugas y acortando la vida útil de su calentador de agua.
Consejos de Limpieza y Mantenimiento
Debería lavar su calentador de agua al menos una vez al año, o con más frecuencia si tiene agua dura. Para purgar el tanque:
- Apague la energía del calentador de agua..
- Abra un grifo de agua caliente para ayudar a drenar el tanque.
- Cierre el suministro de agua fría.
- Conecte una manguera a la válvula de drenaje y diríjala a una zona de desagüe segura.
- Abra la válvula de drenaje y deje que el agua y los sedimentos fluyan hacia afuera.
- Abra el suministro de agua fría para eliminar los sedimentos restantes.
- Repita hasta que el agua salga clara.
- Cierre la válvula de drenaje, retire la manguera, abra el suministro de agua fría y restablezca la alimentación eléctrica.
La purga regular mejora la eficiencia, reduce el ruido y ayuda a prevenir fugas. También puede instalar un prefiltro de sedimentos para reducir la acumulación.
Cuándo llamar a un profesional
Problemas eléctricos importantes
Si su calentador de agua eléctrico aún no produce agua caliente después de revisar el elemento y el termostato, debe llame a un profesional. El cableado expuesto, los problemas eléctricos persistentes o un termostato defectuoso requieren atención experta. Nunca intente reparar líneas de gas o componentes eléctricos sin la capacitación adecuada.
Fugas o daños estructurales
Las fugas indican problemas graves. Si ve agua acumulándose alrededor del calentador o nota óxido y corrosión, apague la alimentación eléctrica y el suministro de agua inmediatamente. Contacte a un profesional para inspeccionar y reparar la unidad. Las fugas persistentes, los ruidos extraños o un calentador de agua viejo (más de 8-12 años) también justifican una evaluación profesional. Los profesionales garantizan la seguridad, previenen daños mayores y ayudan a extender la vida útil de su calentador de agua.
Consejos de mantenimiento para la longevidad del elemento del calentador de agua
Mantener su calentador de agua en óptimas condiciones requiere cuidado y atención regulares. Puede extender la vida útil de sus elementos calefactores y mantener un rendimiento eficiente siguiendo un programa de mantenimiento constante y abordando los problemas a tiempo.
Programa regular de pruebas e inspecciones
Con qué frecuencia probar los elementos del calentador de agua caliente
Debe seguir una rutina de mantenimiento estructurada para garantizar que su calentador de agua funcione de manera segura y eficiente. Aquí hay un programa recomendado:
- Programe una inspección profesional de los elementos de su calentador de agua una vez al año.
- Incluya la prueba tanto del termostato como de los elementos calefactores durante esta revisión anual.
- Purgue el tanque al menos una vez al año. Si vive en un área de agua dura, considere purgarlo dos veces al año.
- Realice reparaciones inmediatas ante el primer signo de problema para evitar daños mayores.
🗓️ Consejo: Las inspecciones anuales le ayudan a detectar problemas menores antes de que se conviertan en problemas mayores.
Señales de advertencia a las que prestar atención
Manténgase alerta a los indicadores tempranos de que su calentador de agua necesita atención. Las señales de advertencia comunes incluyen:
- Temperaturas fluctuantes del agua o agua demasiado caliente o fría
- Ruidos inusuales como chasquidos o retumbes provenientes del tanque
- Agua descolorida u oxidada
- Suministro reducido de agua caliente o tiempo de recuperación lento
- Corrosión visible o acumulación de minerales en los elementos calefactores
- Disparo frecuente del interruptor automático
Si observa alguno de estos problemas, programe una inspección exhaustiva y considere probar el termostato y los elementos calefactores de inmediato.
Prevenir problemas futuros
Limpieza del tanque para eliminar sedimentos
La acumulación de sedimentos es una causa principal del fallo prematuro de los elementos calefactores. Minerales como el calcio y el magnesio se depositan en el fondo del tanque, obligando a los elementos a trabajar más y sobrecalentarse. Puede prevenir esto realizando un lavado regular del tanque:
- Desconecte la alimentación eléctrica y el suministro de agua.
- Conecte una manguera a la válvula de drenaje y diríjala a una zona de desagüe segura.
- Abra la válvula y deje que el agua y los sedimentos fluyan hasta que el agua salga clara.
- Cierre la válvula, retire la manguera y restablezca el suministro de agua.
El lavado anual mantiene la eficiencia y reduce la tensión en los elementos calefactores.. En zonas con agua dura, aumente la frecuencia a dos veces al año.
Verificación de Corrosión y Desgaste
La corrosión puede dañar tanto el tanque como los elementos calefactores. Inspeccione la varilla de ánodo cada tres a cinco años y reemplácela si observa desgaste significativo u óxido.. La varilla de ánodo se sacrifica para proteger el tanque y los elementos de la corrosión. Además, revise si hay signos de óxido, fugas o aislamiento desgastado. Ajuste el termostato a un rango seguro, idealmente entre 120°F y 140°F,, para evitar sobrecalentamientos y prolongar la vida útil de su calentador de agua.
🔧 Nota: Las inspecciones profesionales pueden identificar problemas ocultos y garantizar que todos los componentes, incluidos el termostato y los elementos calefactores, funcionen correctamente.
Siguiendo estos consejos de mantenimiento, puede evitar reparaciones costosas, mejorar la eficiencia y asegurar que su calentador de agua proporcione agua caliente confiable durante años.
Puede realizar la prueba de los elementos del calentador de agua en casa si sigue los pasos de seguridad y utiliza las herramientas adecuadas.
- Siempre apague la energía y use equipo de protección para evitar accidentes.
- Inspecciones rutinarias, como revisar fugas o sonidos inusuales, le ayudan a detectar problemas a tiempo.
- Lavar los sedimentos y monitorear la corrosión mantienen su calentador de agua eficiente y seguro.
- Si nota agua de color oxidado, olores a cableado quemado o pérdida rápida de agua caliente, Contacte con un profesional.
El mantenimiento regular garantiza agua caliente confiable y protege su inversión.
PREGUNTAS FRECUENTES
¿Con qué frecuencia debe probar los elementos de su calentador de agua caliente?
Debería pruebe los elementos de su calentador de agua caliente una vez al año. Las pruebas anuales le ayudan a detectar problemas a tiempo y mantener un funcionamiento eficiente.
¿Se puede probar un elemento del calentador de agua sin un multímetro?
No, necesita un multímetro para medir la resistencia y verificar la continuidad. Esta herramienta le brinda resultados precisos y garantiza su seguridad durante la prueba.
¿Qué significa si su elemento muestra resistencia cero?
Una lectura de resistencia cero significa que el elemento tiene un cortocircuito. Debe reemplazar el elemento inmediatamente para evitar riesgos eléctricos.
¿Es seguro reemplazar un elemento del calentador de agua usted mismo?
Puede reemplazar un elemento del calentador de agua si sigue todos los pasos de seguridad. Apague siempre la energía, use equipo de protección y verifique su trabajo dos veces. Si no se siente seguro, llame a un profesional.
¿Por qué su calentador de agua sigue disparando el interruptor?
Un calentador de agua que dispara el interruptor puede tener un elemento en cortocircuito, cableado defectuoso o un problema con el termostato. Pruebe cada componente para encontrar la causa.
¿Qué herramientas necesitas para probar un elemento del calentador de agua?
Necesita un multímetro digital, un probador de voltaje sin contacto y un destornillador. Los guantes aislantes y las gafas de seguridad brindan protección adicional.
¿La acumulación de sedimentos puede dañar el elemento calefactor?
Sí, la acumulación de sedimentos puede cubrir el elemento y hacer que se sobrecaliente. Lave regularmente su tanque para prevenir este problema y extender la vida útil de su calentador de agua.

