Cluster Page ? ~2002 Wörter ? Global ? Schritt-für-Schritt + Sicherheit ? FAQ: 4
Der Austausch eines GE-Ofenheizelements ist in der Regel unkompliziert: Strom abschalten, defektes Element entfernen, Verkabelung sorgfältig übertragen und das korrekte Ersatzelement installieren. Die beiden häufigsten Fehler sind die Bestellung des falschen Elements (Spannungs-/Leistungs-/Geometrie-Fehlanpassung) und das Hinterlassen loser Anschlüsse, die später überhitzen.
Technischer Kontext: TUTCO beschreibt ein Heizelement als konstruierte Komponente (leitfähige + isolierende Materialien sowie Anschlüsse) und weist darauf hin, dass die Lebensdauer des Heizers von den Betriebsbedingungen und der Integration abhängt – nicht nur von der Drahtqualität. https://tutco.com/conductive/heating-elements
- Symptome eines defekten GE-Ofenheizelements
- Werkzeug- und Ersatzteile-Checkliste
- Sicherheitsschritte (Strom abschalten + überprüfen)
- Schritt-für-Schritt: Austausch des Back- oder Bräunungselements
- Überprüfungen nach der Installation und erster Heiztest
- So kaufen Sie das richtige Element (Spezifikations-Checkliste)
- FAQ (4)
- Referenzen & erforderliche Links
| Symptom | Wahrscheinliche Ursache | Schnelle Bestätigung |
|---|---|---|
| Ofen heizt nicht beim Backen | Backelement offen/verbrannt, Verkabelungs-/Relaisproblem | Sichtbarer Bruch/Blasenbildung; Durchgangsprüfung bei ausgeschaltetem Strom |
| Bräunung funktioniert nicht | Bräunungselement defekt, Steuerungsproblem | Sichtbare Schäden; Durchgangsprüfung |
| Ungleichmäßiges Garen / lange Vorheizzeit | Element teilweise defekt, schlechte Verbindung, Sensor-/Steuerungsproblem | Anschlüsse auf Verfärbung/Lockerheit prüfen |
Tabelle 1 – Wenn ein Heizelement physisch beschädigt oder elektrisch unterbrochen ist, ist in der Regel ein Austausch erforderlich.
- Schraubendreher oder Nuss-Schlüssel (variiert je nach Modell)
- Multimeter (zur Bestätigung empfohlen)
- Arbeitshandschuhe
- Multimeter (empfohlen)
- Korrektes GE-kompatibles Back- oder Bräunungselement
- Neue hochtemperaturbeständige Flachstecker (falls vorhandene Anschlüsse lose/verbrannt sind)
Tipp: Wenn ein Anschluss dunkel verfärbt ist oder sich locker auf dem Elementanschluss anfühlt, ersetzen Sie ihn – lose Verbindungen erzeugen Wärme am Stecker.
- Schalten Sie den Ofen AUS am Sicherungsautomaten (verlassen Sie sich nicht auf das Bedienfeld).
- Bestätigen Sie, dass der Ofen spannungsfrei ist (ausgeschaltetes Display reicht nicht aus; überprüfen Sie es nach Möglichkeit mit einem Messgerät).
- Berühren Sie keine freiliegenden Anschlüsse, bis die Stromfreiheit bestätigt ist.
Beispiel für Sicherheitsdisziplin: Die Elementaustauschanleitung von Whirlpool betont die Einhaltung von Sicherheitsetiketten/-handbüchern, die Überprüfung des korrekten Ersatzes anhand von Spannung/Leistung und die Sicherstellung fester Drahtverbindungen. Obwohl für Warmwasserbereiter geschrieben, gelten dieselben bewährten Verfahren für Öfen. Quelle.
Entfernen Sie die Ofenroste. Suchen Sie das Backelement am Boden des Ofeninnenraums; das Bräunungselement befindet sich oben.
Die meisten Elemente sind mit Schrauben an der Rückwand des Ofeninnenraums befestigt. Stützen Sie das Element, während die Schrauben herauskommen, damit es nicht herunterfällt und die Verkabelung belastet.
Ziehen Sie das Element vorsichtig zu sich heran, um die Drahtenden freizulegen. Vermeiden Sie ruckartiges Ziehen – Drähte können hinter der Isolierung verschwinden.
Verwenden Sie eine Spitzzange, um die Flachstecker gerade von den Anschlüssen abzuziehen (ziehen Sie nicht an der Drahtisolierung). Wenn die Stecker hitzegeschädigt sind, planen Sie deren Austausch.
Übertragen Sie jeden Stecker auf den entsprechenden Anschluss. Stellen Sie einen festen Sitz sicher. Lose Verbindungen können Widerstandserwärmung am Stecker verursachen.
Verlegen Sie die Drähte vorsichtig zurück durch die Öffnung, positionieren Sie das Element und befestigen Sie die Schrauben wieder. Setzen Sie die Roste wieder ein.
- Bestätigen Sie, dass alle Stecker fest und vollständig eingerastet sind.
- Stellen Sie sicher, dass das Element die Ofenauskleidung nicht unbeabsichtigt berührt.
- Bestätigen Sie, dass keine Werkzeuge oder Verpackungen im Ofeninnenraum zurückgelassen wurden.
- Stellen Sie die Stromversorgung am Leistungsschalter wieder her.
- Stellen Sie den Ofen auf eine niedrige/mäßige Backtemperatur für die erste Überprüfung ein.
- Achten Sie auf ungewöhnliche Gerüche, Lichtbögen oder sofortiges Auslösen des Schutzschalters. Tritt etwas davon auf, schalten Sie den Strom aus und überprüfen Sie die Verbindungen erneut.
Die Anleitung von Whirlpool sagt ausdrücklich, dass die Stromkabel ausgetauscht und die Drahtverbindungen fest sein müssen, und warnt vor dem Einschalten zum falschen Zeitpunkt. Diese Betonung spiegelt eine grundlegende Ausfallart von Widerstandsheizern wider: Schlechte Verbindungen und falsche Betriebsbedingungen können einen Heizer schnell zerstören. Quelle.
- Modellkompatibilität (Verwenden Sie die Modellnummer des Backofens)
- Nennspannung/Leistungsaufnahme (Korrekte elektrische Nennwerte für das Gerät)
- Form/Geometrie (Länge, Biegungen, Position der Halterung)
- Anschlussart (Flachsteckergröße/-ausrichtung)
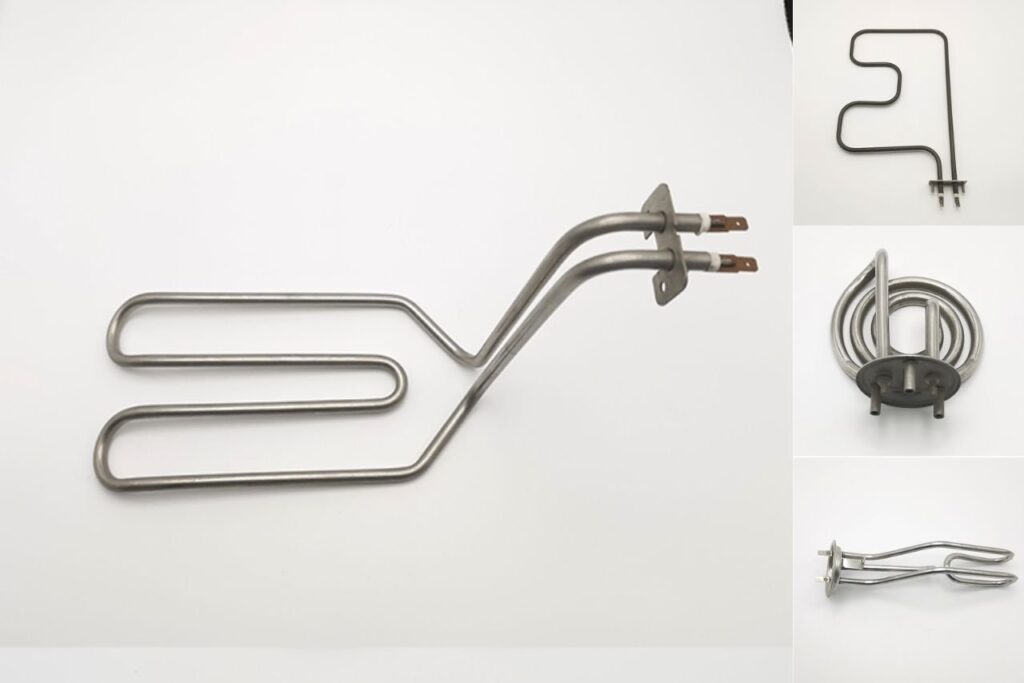
Ein Hinweis zur Vielfalt der Heizelemente: JINZHO fasst Heiztechnologien unter Heizelement, Heizungsrohre und Heizplatte.
In vielen Fällen ja – sofern der Strom sicher getrennt werden kann und das Element von der Backofenhöhle aus zugänglich ist.
Typische Anzeichen sind sichtbare Blasen/Brüche und ein Unterbrechungsmesswert mit einem Multimeter (keine Durchgangsprüfung) bei ausgeschaltetem Strom.
Häufige Ursachen sind lockere Anschlüsse (Hotspots an Steckern), falsche Nennwerte/Geometrie oder zugrunde liegende Steuerungsprobleme, die das Element überhitzen. Referenz.
Nicht automatisch. Ersetzen Sie nur das defekte Element. Wenn der Backofen jedoch älter ist und beide Elemente sichtbaren Verschleiß oder Heizleistungsprobleme aufweisen,.
- TUTCO-Heizelemente (Definition + Heizelementlebensdauer und Integration): https://tutco.com/conductive/heating-elements
- Whirlpool Heizelement austauschen (Ersatzspannung/-leistung prüfen; feste Verbindungen; sichere Einschaltreihenfolge): https://www.whirlpoolwaterheaters.com/support/help/element-was-out-of-range/24
- Heizungsrohre
- Heizplatte
- Heizfolie
- Elektrokessel-Heizung
- Beispielspezifikation für 1000W-Steckheizelement
Haftungsausschluss: Dies sind allgemeine Hinweise. GE-Modelle variieren. Befolgen Sie stets die Serviceanleitung des Geräts und die lokalen Elektrosicherheitsvorschriften.

