
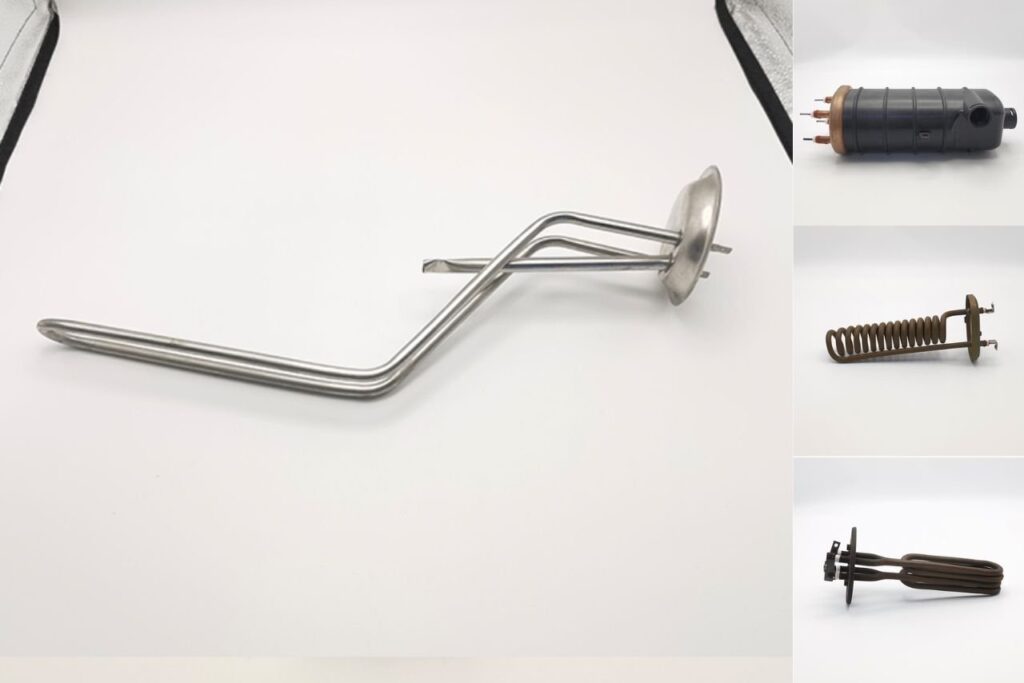
This step-by-step workflow replaces a Whirlpool electric dryer heating element while reducing the two most common failure patterns seen after DIY repairs: powering a new element with restricted airflow, and installing an element that does not match the dryer s voltage/wattage or mounting geometry. The process also verifies the heater circuit (thermal fuse/thermostats/wiring) so the repair solves the root cause rather than only the symptom.
- Fast answer (what correct replacement really means)
- Tools and parts list
- Safety rules before opening the dryer
- Pre-checks that prevent wasted parts
- Step-by-step replacement procedure
- Post-repair validation and test cycle
- How to prevent repeat heater failure
- 電爐透過將空氣吹過電阻式加熱元件(通常是安裝在框架絕緣體上的線圈)來加熱空氣。
- Sources cited & outbound links
A 烘乾機加熱元件 is a designed assembly conductive resistance alloy plus an insulating/support framework and terminals intended to deliver heat safely into airflow. TUTCO defines a 發熱元件 as a component composed of both electrically conductive and insulating material, designed to serve a heating purpose. (Source) For a 惠而浦烘乾機, correct replacement therefore means:
- Correct electrical rating (matches the appliance requirement) and correct physical fitment
- Correct installation (clearance, seating, no coil rubbing)
- Correct operating conditions (strong airflow; clean vent path; covers installed)
This chart is a practical field checklist, not a manufacturer warranty dataset. It reflects common service outcomes.
Whirlpool s published heater replacement steps for water heaters include Verify new element against the unit s voltage and wattage, and warn not to restore power until safe operating conditions are met. Although that page is for water heaters, the safety principle transfers to dryer heaters: match specs and avoid energizing the system before it is ready (for dryers, the ready condition is primarily airflow and correct reassembly). Source.
- Nut driver or socket set (common sheet-metal screws)
- Screwdrivers (Phillips/flat)
- Needle-nose pliers (spade terminals)
- Vacuum and crevice tool (lint removal)
- Multimeter (continuity/ohms checks)
- Work gloves (sharp edges)
- Correct 加熱元件 總成(依型號而定)
- Optional: thermal fuse, thermostats (if testing shows they are open)
- Optional: replacement terminals/pigtail harness if connectors are heat-damaged
Users typically search with phrases like Whirlpool dryer not heating, dryer heating element replacement, thermal fuse test, high limit thermostat, ,以及 vent clogged symptoms.
- Disconnect power: unplug the dryer or switch off the breaker.
- Verify power is off (meter or tester).
- Allow the dryer to cool if it was running.
- Keep lint away from the heater area (lint is combustible).
- Reinstall all covers before any test run.
A new element can fail quickly if the vent is restricted. Before removing parts, confirm strong exhaust at the exterior vent and inspect the vent hose for crushing or excessive length.
Many no heat calls are caused by an open 熱熔斷器 or failed thermostat, not the element. If the dryer runs but does not heat, continuity testing of the thermal fuse and thermostats is recommended before purchasing parts.
| 檢查項目 | 檢查重點 | 為何重要 | Action if failed |
|---|---|---|---|
| Outdoor exhaust airflow | Weak flow, flap not opening | Low airflow overheats heater and trips safeties | Clean/repair vent path before heater swap |
| Thermal fuse continuity | 開路 | Stops heat even if element is good | Replace fuse and fix overheating cause |
| 元件导通性 | Open circuit / broken coil | Direct no-heat cause | Replace element assembly |
| Terminal condition | Discolored, loose, oxidized spades | Creates localized resistance heating | Replace terminals/pigtails |
Table 1 Pre-checks that reduce repeat failures and unnecessary parts returns.
惠而浦烘乾機 platforms vary. Many electric models provide rear-panel access to the heater housing; others require front/lower service access. The steps below describe a common technician workflow. For exact fastener locations, use the unit s model number and service documentation.
- Unplug or breaker off.
- Pull the dryer away from the wall to access the rear and vent connection.
- Remove the vent hose (if needed) and check for lint buildup.
Remove the rear panel screws (common) or the front/lower access panel (platform dependent). Keep screws grouped by panel to avoid mixing lengths.
- Identify the heater housing and attached thermostats/fuse.
- Photograph connectors and wire routing before disconnecting anything.
- Label wires with tape if more than two similar connectors exist.
This reduces miswiring risk and improves first-time fix rate.
- Pull spade connectors straight off by gripping the connector body (not the wire insulation).
- If a terminal is heat-damaged (darkened or loose), plan to replace it.
Remove the fasteners that retain the heater housing cover/element assembly. Slide the element out carefully to avoid bending the frame or allowing coil contact with metal surfaces.
- Vacuum lint in the heater area, blower path, and cabinet base.
- Inspect thermostats and thermal fuse mounts for debris and secure contact.
- Seat the new element fully (no distortion of the housing).
- Reinstall fasteners evenly.
- Reconnect wires firmly; replace loose connectors.
- Reinstall all covers/panels before any test run.
The discipline to match ratings and secure wiring is consistent with Whirlpool s broader heater replacement guidance (verify replacement; ensure tight wire connections; do not energize under unsafe conditions). 參考資料.
A supervised test cycle confirms stable heating and airflow. If the dryer overheats, stop and correct venting.
- Run a timed heat cycle for 10 C15 minutes.
- Confirm warm exhaust and stable cycling behavior (no immediate shutdown).
- Check outdoor exhaust flow; weak flow indicates vent restriction.
- After shutting down, check connectors for abnormal heat (carefully).
- Keep the vent path clear; lint restriction is a leading cause of overheating.
- Replace heat-damaged terminals rather than reusing them.
- Do not install close enough heater parts; match correct rating and geometry.
Heater engineering references note that heater life is influenced by oxidation, deformation, and temperature cycling; running hotter than designed (often due to airflow restrictions) accelerates failure. 參考資料.
For product teams evaluating heater options across appliances, Jinzhong presents multiple categories including 加熱管, 加熱板, ,以及 加熱膜, plus integrated 壓鑄加熱解決方案. The company describes 30+ years of experience and large-scale production capacity on its homepage. 加熱元件製造商.
Yes. The motor can run while the heater circuit is interrupted by an open thermal fuse/thermostat, a broken 發熱元件, damaged wiring, or a supply issue.
Not automatically. It should be tested. If open, it must be replaced and the underlying overheating cause (often restricted airflow) must be corrected.
Common causes are unresolved vent restriction, loose terminals creating hot spots, or installing the wrong element rating/fitment.
Yes. Whirlpool s replacement guidance in other heater contexts explicitly calls out verifying voltage/wattage against the appliance data plate; the same matching principle applies to dryer heaters. 參考資料.
No. For example, a plug-in radiator/towel warmer element may publish specs like 1000W, IP67, UL approval, and ABS/stainless construction, but it is engineered for a different environment and mounting method and is not a dryer replacement part. 參考資料.
If wiring is melted, breakers trip, overheating occurs quickly, or electrical testing is not comfortable, a qualified technician should be used.
- TUTCO-Farnam heating element definition, materials, frameworks, heater life factors: https://tutco.com/conductive/heating-elements
- Whirlpool Water Heaters support heater replacement discipline (verify voltage/wattage; secure wiring; avoid unsafe energizing): https://www.whirlpoolwaterheaters.com/support/help/element-was-out-of-range/24
- Jinzhong (JINZHO) manufacturer positioning and product category context: https://jinzho.com/, 加熱元件, 加熱元件工廠, 壓鑄加熱解決方案
- Hudson Reed example heater product specs (1000W, IP67, UL, ABS & stainless, warranty): https://usa.hudsonreed.com/1000-plug-in-watt-electric-heating-element-76309
Citation note: This article is original and written for practical repair guidance. Sources are referenced for definitions, safety principles, and published specifications; source text is not reproduced.
Disclaimer: Educational content only. Dryer designs vary by model. Follow the model-specific service documentation and local electrical safety practices.

