If your Whirlpool dryer won t heat, heats intermittently, or overheats, the culprit is often in the heater circuit: heating element, thermal fuse, thermostats, wiring, airflow, or power supply. This guide walks you through a safe, logical diagnosis and the most common repairs without guesswork.
- 1) Symptoms & what they usually mean
- 2) Safety checklist (read first)
- 3) Quick checks before disassembly
- 4) Step-by-step diagnostic flow
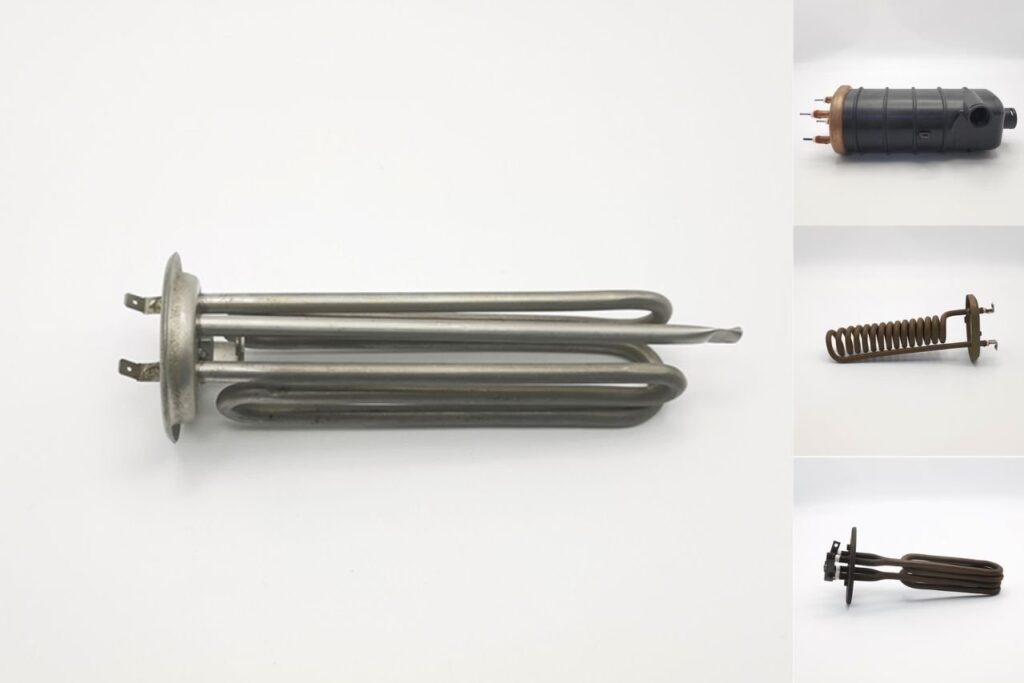
- 5) Testing the heating element (and why it fails)
- 6) Thermal fuse / thermostat issues (common Whirlpool causes)
- 7) Airflow problems that mimic a bad element
- 8) Replacing the heating element (general process)
- 9) Choosing the right replacement element
- 10) How to prevent repeat failures
- 11) When to call a technician
- 12) Related resources & heating element options
- Open heating element (broken coil)
- Blown thermal fuse / open thermostat
- Power issue (dryer motor runs on 120V, heat needs full supply on many electric dryers)
- Broken wire, loose spade connector, or burnt terminal
- Restricted venting causing overheating and safety cutouts
- Weak/dirty airflow (lint buildup, crushed vent)
- Thermostat cycling abnormally
- Vent restriction (most common)
- Element partially shorted to housing (can cause odd cycling)
- Drum seals / airflow path leaks
- Severe vent restriction or clogged lint screen housing
- Element coil touching metal (short to ground)
- Lint accumulation near heater housing
- Unplug the dryer (or switch off breaker/fuses).
- Let the dryer cool if it was recently running.
- Wear gloves: sheet metal edges are sharp.
- If you smell gas: this guide is for electric heating element issues; stop and follow gas safety procedures for gas dryers.
- Clean the lint screen thoroughly.
- Run the dryer for a few minutes and check exhaust outside: is airflow strong and warm (when heating)?
- Inspect the vent hose behind the dryer: not crushed, kinked, or full of lint.
- If you suspect restriction, temporarily disconnect the vent and test a short run (monitor closely). If drying improves, fix the venting.
Many electric dryers can still tumble with a reduced supply condition, but the heater circuit won t energize properly. If you recently had an outage, breaker trip, or electrical work, verify supply and breaker condition.
If venting is restricted, the dryer may overheat and open a safety device then you ll have no heat until repaired/reset (depending on part type).
Typical Whirlpool electric dryers place the heating element in a heater housing, plus one or more thermostats and a thermal fuse in the airflow path.
If a thermal fuse is open, replacing only the heating element won t restore heat. You must fix the underlying overheating/airflow problem too.
A broken coil reads open; a coil touching metal can short and cause overheating or constant heat symptoms.
Look for heat damage, looseness, or corrosion at spade terminals. A loose connector can heat up and fail under load.
A heating element is not just wire that gets hot. It s an assembly of electrically conductive material and insulating/support material designed to create heat safely. TUTCO describes how elements can be suspended, embedded, or supported, and how that changes heat transfer and reliability. Many appliance heaters use metallic resistance alloys such as Fe-Cr-Al and Ni-Cr(Fe), which can reach red-hot temperatures (around 600 C and above) in the right conditions. (Source)
- Coil break (open circuit): normal wear, vibration, hot spots.
- Overheating from poor airflow: causes element sagging and contact with metal, or blows thermal protection.
- Short to housing: element touches grounded metal, leading to abnormal heating behavior and repeated safety trips.
- Terminal overheating: loose connection increases resistance and heat at the terminal (burnt spades/wires).
In dryers, the root cause is frequently airflow restriction: lint buildup, blocked vent, long duct runs, or crushed flex hose. Fixing the fuse/thermostat without fixing airflow often leads to repeat failure.
- Clothes are hot but still damp after a full cycle
- Outside exhaust airflow is weak
- Dryer area feels humid, or lint is accumulating around the dryer
- Thermal fuse failures keep happening
- Clean lint screen housing and internal ducting (lint can build up beyond the filter).
- Replace crushed or overly long flex vent with a short, smooth, properly routed duct if possible.
- Clean the entire vent run to the exterior termination.
- Confirm the exterior flap opens freely and isn t blocked by pests/debris.
- Disconnect power.
- Access heater housing (rear panel or front/lower access depending on model).
- Photograph wiring before removing any connectors.
- Remove heater housing if required; extract the element assembly.
- Inspect for lint and heat damage; clean thoroughly before reassembly.
- Install the new element and ensure it is seated correctly and not touching the housing improperly.
- Reconnect wires tightly. Whirlpool s guidance in other heating-element contexts stresses tight wire connections and correct ratings apply the same discipline here. (Source)
- Reassemble panels and run a supervised test cycle.
- Use your dryer s model number to find the exact element assembly (shape, mounting, terminals).
- Don t upgrade wattage unless the manufacturer specifies compatibility incorrect wattage can overheat wiring and safety devices.
In other heating applications, Whirlpool explicitly says to verify voltage and wattage against the unit data plate before installation. That mindset match ratings applies equally well here. (Source)
- Clean lint screen every load.
- Deep-clean vent path periodically.
- Keep vent runs short and smooth where possible.
- Ensure terminals are tight and not heat-damaged.
- Replace burnt connectors/wiring don t reuse cooked spades.
- Listen for abnormal blower noise (airflow reduction can be mechanical).
- You measure incorrect supply voltage at the dryer receptacle/breaker (power issue upstream).
- Wiring is charred, melted, or you see signs of arcing.
- The dryer overheats rapidly or trips breakers repeatedly.
- You replaced the element and fuse but still have no heat (control board/timer/relay diagnostics may be needed).
For deeper understanding of heater materials, element frameworks, and tradeoffs (watt density, environment, installation), see TUTCO s overview of heating elements. It explains suspended vs embedded vs supported elements and why material choice and environment impact lifespan. (Source)
If you re comparing heater specifications in general materials, ingress protection, approvals retail listings can show what good documentation looks like. For example, Hudson Reed s 1000W plug-in heating element lists power (1000W), IP rating (IP67), UL approval, materials (ABS & stainless), and warranty (2 years). This is not a Whirlpool dryer element, but it s a useful illustration of the kinds of specs you should look for and match correctly. (Source)
If you re sourcing heater components at manufacturing scale (OEM/ODM) rather than fixing a single dryer, Jinzhong s catalog includes: Heating Element, Heating Tubes, Heating Plate, Heating Film, and Die Casting Heating Solutions.
Jinzhong positions itself as an electric heating element manufacturer in China with 30+ years experience, certifications (e.g., ISO9001/14001 and others listed on-site), and large-scale capacity. (Source)
Reply with your Whirlpool dryer model number (from the door jamb label) and your symptom (no heat / weak heat / overheating), and I ll tailor the diagnostics order and the most likely parts to check first.

