Replacing an Amana electric dryer heating element is a structured service procedure: fully isolate electrical power, confirm the replacement element is correct for the dryer’s model and rating, document wire locations, remove lint that can restrict airflow, replace the heating element assembly without deforming supports or terminals, restore all heater duct covers, and perform a controlled first heat test. Because a heating element is an engineered **assembly** (conductive alloy plus insulating/support framework and lead connectors), installation quality and airflow conditions directly affect safety, performance, and service life.
Related resources: Heating Element, Heating Element manufacturer, Heating Element Factory, Die Casting Heating Solutions.
- Identify the correct dryer type and the correct heating element
- Common “no heat” symptoms vs. likely causes
- Safety and preparation
- Tools and materials
- Step-by-step replacement procedure (most Amana electric dryers)
- Post-replacement checks and basic electrical tests
- How to prevent repeat heater failures
- FAQ (6 questions)
- References and outbound links
Identify the correct dryer type and the correct heating element
A heating element replacement applies to electric dryers. Gas dryers use a burner system rather than an electric heater coil assembly. Therefore, the first requirement is confirming the dryer is electric and then verifying the exact part number for the model/series.
Verification rules (do this before disassembly)
- Locate the model/serial data plate and record the model number.
- Order a heater designed for that model family (shape, mounting, terminal orientation).
- Confirm **voltage** and **wattage** requirements against the appliance rating information and the part listing.
- Confirm included components (heater housing, element only, or element plus thermostats) to avoid missing pieces mid-repair.
Why rating verification matters
Manufacturer-style service instructions for other heating equipment explicitly call for verifying the replacement element by checking the data plate for voltage and wattage. The appliance differs, but the discipline is the same: install only a correct-rated element intended for the equipment.
Section summary
Correct part selection is the first safety step: model match, physical interface match, and electrical rating match.
Common “no heat” symptoms vs. likely causes
A failed heating element is a common cause of “tumbles but no heat,” but it is not the only cause. Thermal cutoffs, thermostats, poor connectors, restricted airflow, or supply problems can produce the same customer complaint.
| Observed symptom | Likely cause | What to check first |
|---|---|---|
| Tumbles, no heat | Open heating element, open thermal fuse/cutoff, open hi-limit thermostat | Element continuity + thermal fuse continuity (power off) |
| Heat starts then stops | Airflow restriction causing overheating and cycling; weak connections heating up | Vent restriction, lint buildup, terminal tightness |
| Breaker trips on heat | Short to chassis, damaged wiring/terminal, element contacting housing | Visual inspection for arcing marks; professional diagnosis if needed |
Section summary
“No heat” is a system symptom; replacing the element is most effective when airflow and safety devices are evaluated at the same time.
Safety and preparation
Dryer heating circuits operate at high current and can cause shock or fire if worked on energized or reassembled incorrectly. A disciplined sequence should be followed: de-energize, verify safe access, document wiring, and avoid bypassing protective devices.
Mandatory safety practices
- Unplug the dryer or turn off the dedicated breaker (do not rely on the control panel).
- Allow the heater duct area to cool before contact.
- Do not bypass **thermal fuse**, **thermal cutoff**, or **high-limit thermostat** for testing.
- Do not energize the dryer with heater covers removed unless the official procedure explicitly permits it and the technician is qualified.
Section summary
Safe work requires full power isolation, cool-down, and respect for safety devices and covers.
Tools and materials
- Nut driver set / socket set
- Phillips/flat screwdrivers
- Needle-nose pliers
- Vacuum + soft brush
- Multimeter (ohms/continuity)
- Replacement spade terminals (if existing terminals are heat-damaged)
- Correct heating element assembly for the model
Section summary
The multimeter and lint-cleaning tools materially improve repair quality and reduce repeat failures.
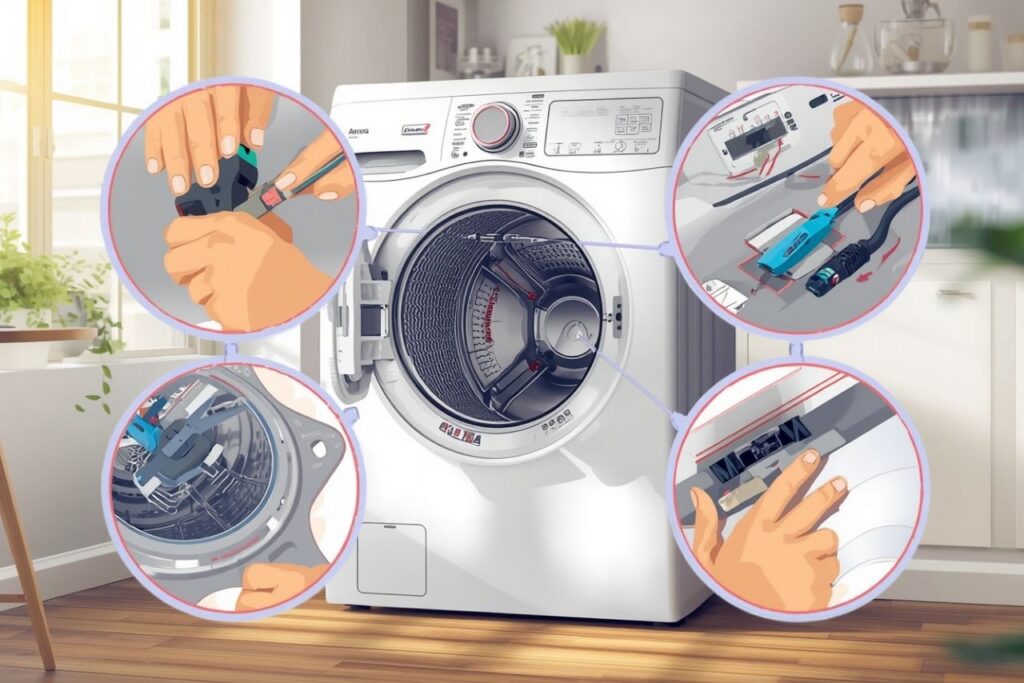
Step-by-step replacement procedure (most Amana electric dryers)
Access methods vary (rear panel, lower front, or side access). The following steps focus on universally safe and repeatable practices rather than model-specific fastener locations.
Step 1 — Remove access panel(s) to reach the heater housing
- Confirm power is off (unplugged/breaker off).
- Move the dryer for safe access to the rear or lower service area.
- Remove the appropriate panel screws and set hardware aside in order.
Step 2 — Document and label wires
Heating elements are not “just coils.” Engineering references define a heating element as an assembly including insulating framework and lead connectors. For service work, that means wiring/terminal accuracy is part of the repair—not an afterthought.
- Photograph every connection at the heater terminals and adjacent thermostats/cutoffs.
- Label wires if there is any ambiguity (e.g., same color wires).
Step 3 — Remove lint from the heater duct area and airflow path
Dryer heaters are sensitive to airflow. Airflow restriction drives higher element temperature (higher effective **watt density** on the element surface), increasing failure risk.
- Vacuum lint from the heater housing exterior and duct seams.
- Clean the lint filter housing and visible ducting.
- Inspect the vent for crushing, kinks, or packed lint.
Step 4 — Disconnect heater wires and inspect terminals
- Remove spade connectors by gripping the connector body (not the wire).
- Inspect for heat discoloration, looseness, or melted insulation.
- Replace compromised terminals; reusing damaged connectors often causes repeat failures.
Step 5 — Remove the old heating element assembly
- Remove screws securing the heater cover/retainer.
- Withdraw the element carefully to avoid bending supports and insulators.
- Compare the new assembly to the old one (mounting, terminal orientation, clearances).
Step 6 — Install the new element with correct seating and clearance
In TUTCO’s framework language, a dryer heater behaves like a supported/suspended wire element within an insulating/metal framework: it must not sag into contact with its housing.
- Seat the element so it is centered and properly supported.
- Ensure insulators/spacers are in their original positions.
- Tighten mounting hardware without twisting the frame.
Step 7 — Reconnect wiring and reinstall all covers
- Reconnect wires exactly as documented.
- Confirm terminals are fully seated and secure.
- Reinstall heater housing covers and the cabinet panel(s).
Reassembly rule
Heater covers and insulation pieces are part of the engineered airflow and safety system. Restoring them before energizing the dryer is a best practice analogous to other heater instructions that warn against energizing an element under unsafe conditions.
Section summary
A high-quality replacement includes lint removal, terminal integrity checks, correct element seating, and full restoration of heater covers before energizing.
Post-replacement checks and basic electrical tests
Post-repair verification should combine visual inspection with basic electrical confirmation (power off) and then a controlled heat run (power on).
Power-off checks (recommended)
- Verify no loose wires or connectors.
- Verify element is not touching the metal housing.
- Use a multimeter to check heater continuity (element should not be open).
- Check continuity of the thermal fuse/cutoff devices if heat is still absent.
Controlled first heat run (power on)
- Restore power (plug in / breaker on).
- Run a short timed heat cycle.
- Confirm warm exhaust and strong airflow at the outlet within a few minutes.
- Stop immediately if there is arcing smell, smoke, or abnormal noises.
Section summary
Verification is complete when the dryer heats normally and maintains stable cycling with strong exhaust airflow.
How to prevent repeat heater failures
Heating element longevity is influenced by operating conditions and environment. For dryers, the “environment” includes lint, airflow restriction, and connector quality. A heater that runs hotter than intended (due to restricted airflow) oxidizes and degrades faster.
| Risk factor | Why it kills elements | Prevention action |
|---|---|---|
| Restricted airflow | Raises element temperature; accelerates oxidation and failure | Clean vent path; verify exterior hood is clear; maintain lint filter housing |
| Loose terminals | Creates resistive hot spots at connectors; can arc and melt wiring | Replace heat-damaged terminals; ensure tight connections |
| Wrong element rating | Alters heat output and system temperature balance | Verify voltage/wattage and model fit before installation |
| Damaged supports/insulators | Allows sagging/contact, creating shorts or hot spots | Install without bending the framework; confirm clearances |
LSI / semantic keywords used in context
**dryer heating element**, **heating coil**, **thermal fuse**, **high-limit thermostat**, **continuity test**, **multimeter**, **airflow restriction**, **vent cleaning**, **watt density**, **resistive heating**, **Joule heating**, **nichrome alloy**, **insulating framework**.
Section summary
Most repeat failures come from airflow restriction or poor electrical connections; cleaning and terminal discipline are part of the repair.
FAQ
1) Is the heating element always the cause of “no heat” on an Amana dryer?
No. “No heat” can be caused by an open heating element, but also by an open thermal fuse/cutoff, a failed thermostat, wiring issues, or a supply problem. Testing continuity (power off) helps avoid replacing parts unnecessarily.
2) Can the dryer be tested with panels removed?
Panels and heater covers influence airflow and safety. Unless the official service procedure explicitly allows a live test with specific guards in place, testing should be performed after reassembly.
3) What is the most common reason a new element fails again quickly?
Airflow restriction (lint buildup, blocked vent, crushed duct) is one of the most common root causes. Restricted airflow raises element temperature and accelerates failure.
4) Should terminals be replaced when replacing the element?
If terminals show heat discoloration, looseness, or melted insulation, they should be replaced. Loose or damaged terminals can overheat and cause repeat failures.
5) Why is it important to verify voltage and wattage for the replacement part?
Heating elements are designed for a specific electrical load. Installing an incorrect-rated element changes heat output and can upset safety control behavior; service instructions in other heating systems explicitly stress rating verification.
6) What is the fastest maintenance action that improves heater life?
Keeping the vent path and lint system clean is often the highest-impact action. Strong airflow reduces heater operating temperature and supports stable cycling.
Conclusion
A durable Amana dryer heating element replacement is not just a part swap. The best results come from verifying correct specifications, preserving wiring accuracy with photos/labels, cleaning lint and restoring airflow, installing the element assembly with correct support and clearance, and reassembling all heater covers before energizing. This approach aligns with engineering definitions of heating elements as designed assemblies operating within a broader thermal and safety system.
References and outbound links
Heating element engineering concepts (assemblies, alloys, supported/suspended/embedded frameworks, environment/contaminants, watt density and longevity):
https://tutco.com/conductive/heating-elements
Heating element replacement sequencing and “verify correct replacement” principle (used as a method reference):
https://www.whirlpoolwaterheaters.com/support/help/element-was-out-of-range/24
Product-family context (heating tubes/plates/films and modular heating categories):
https://jinzho.com/
https://jinzho.com/product-category/heating-element/
https://jinzho.com/product-category/heating-element/heating-tubes/
https://jinzho.com/product-category/heating-element/heating-plate/
https://jinzho.com/product-category/heating-element/heating-film/
https://jinzho.com/product-category/die-casting-heating-solutions/
https://jinzho.com/product-category/electric-heater-parts/electric-boiler-heater/
Example of spec-style listing (wattage/material/IP/UL/warranty) used to reinforce specification discipline:
https://usa.hudsonreed.com/1000-plug-in-watt-electric-heating-element-76309
Disclosure: This article is educational and model-agnostic. Panel locations, fastener counts, and heater housing layouts differ by Amana dryer model. For model-specific disassembly and wiring, the manufacturer service documentation should be followed.

