Pillar Page ? Elektrische Warmwasserbereiter-Wartung ? Feld-Austauschanleitung
Austausch des Heizelements für einen Speicherwassererwärmer wird am besten als kontrollierter Arbeitsablauf behandelt: Identifizieren, ob das Element tatsächlich die Fehlerquelle ist, Spannung und Leistung, Austauschen des abgedichteten Elements in einem entleerten Tank, Trockenfeuerung.
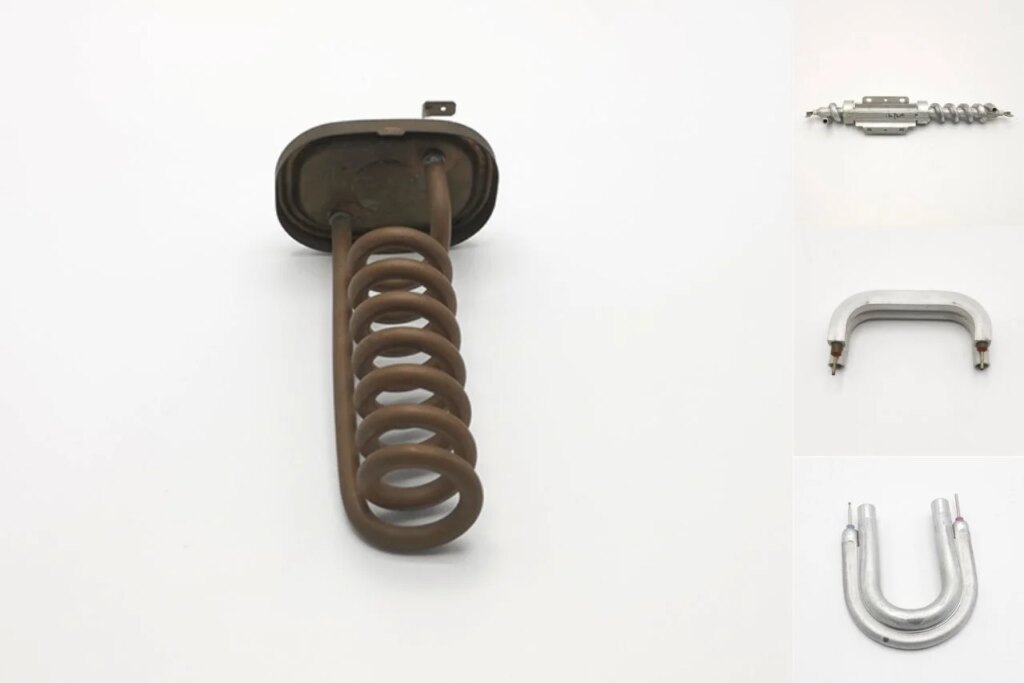
Was ein Heizelement ist (und warum Konstruktionsdetails wichtig sind)
In technischer Hinsicht ist ein Heizelement nicht nur ein Stück Legierung, das „heiß wird“. Es ist eine Baugruppe, die elektrisch leitfähiges Material mit Isoliermaterialien und.
Praktische Übersetzung für Warmwasserbereiter
- Zwei Elemente mit derselben Leistung können sich unterschiedlich verhalten, wenn eines eine höhere Wattdichte (mehr Watt pro Oberfläche) aufweist.
- Elementgeometrie (gerade vs. rückgefaltet vs. gewellt) beeinflusst die Oberfläche und die Toleranz gegenüber Kalkablagerungen.
- Materialauswahl und Mantelkonstruktion beeinflussen die Korrosionsbeständigkeit unter spezifischen Wasserchemien.
In diesem Leitfaden verwendete LSI-Begriffe: Tauchsieder, Element des elektrischen Wassererhitzers, Wattdichte, Mineralische Kalkablagerungen, Masseschluss, Dichtungsleckage.
Häufige Fehlermodi: Kalkablagerungen, Korrosion, Verkabelungserwärmung und Trockenlauf
Im Feldeinsatz, Heizelemente fallen aus einer kurzen Liste von Gründen aus, die sich über Marken und Regionen hinweg wiederholen. Die teuersten Ergebnisse sind selten „mysteriös“;.
Fehlermodi, die häufig einen Austausch rechtfertigen
- Unterbrechung Element (keine Durchgang)
- Kurzschluss zur Erde das bei Wärmeanforderung einen Schutzschalter auslöst
- Starke Kalkablagerungen, die zu Überhitzung und vorzeitigem Durchbrennen führen
- Mantelkorrosion oder Lochfraß, der zum Ausfall führt
Sieht aus wie das Element, ist es aber oft nicht
- Thermostatausfall oder Fehlkalibrierung
- Lose Anschlussklemmen, die lokale Erwärmung und Lichtbogenbildung verursachen
- Sedimente reduzieren die Wiederaufheizrate (Wärme wird geliefert, aber langsamer)
- Probleme auf der Sanitärseite (Mischventilverhalten, Tauchrohrprobleme)
Trockenlauf: Der schnellste Weg zu einer wiederholten Reparatur
Die offizielle Schritt-für-Schritt-Austauschanleitung von Whirlpool warnt davor, die Stromversorgung einzuschalten, es sei denn, der Tank ist vollständig gefüllt und die gesamte Luft entfernt. Trockenbrand. Dies ist ein Prozessfehler, kein Problem der Teilequalität.
Diagnose vor dem Austausch: Vermeidung von „Teilekanonen“-Reparaturen
Ein professioneller Reparaturansatz bestätigt die Fehlerursache, bevor ein Tank entleert wird. Der Austausch eines Elements ohne Diagnose kann Arbeitszeit verschwenden und die eigentliche Ursache verschleiern,.
Evidenzbasierte Prüfungen (nicht markenspezifisch)
- Symptommuster bestätigen: kein heißes Wasser vs. begrenztes heißes Wasser (Zweikreis-Verhalten)
- Isolierung der Verkabelung und Festigkeit der Anschlüsse prüfen (Wärmeverfärbung ist ein Hinweis)
- Die Nennleistung des Geräts bestätigen Spannung und Leistung auf dem Typenschild vor dem Kauf von Teilen
Kurze technische Referenz: Erwarteter Elementwiderstand
Für Widerstandsheizung gilt eine ungefähre Erwartung von ( R ca. V^2/P ). Beispiel: 240V und 4500W ergibt etwa 12,8 Ω. Die Messwerte variieren je nach Elementdesign und Prüfmethode.
So wählen Sie das richtige Ersatzelement aus (Spannung, Leistung, Geometrie, Materialien)
Die Austauschschritte von Whirlpool weisen ausdrücklich darauf hin, zu überprüfen, ob das neue Element das richtige Ersatzteil ist, indem das Typenschild des Warmwasserbereiters herangezogen wird für Spannung und Leistung. Diese Anweisung ist ein praktischer Grundpfeiler: Sie reduziert das Risiko von Fehlanpassungen und verhindert vermeidbare Schutzschalterauslösungen oder schlechte Wiederaufheizleistung.
Auswahl-Checkliste
| Parameter | Was abzugleichen ist | Warum dies in der Praxis wichtig ist |
|---|---|---|
| Stromspannung | Die Angaben des Typenschilds beachten (üblicherweise 120 V oder 240 V) | Falsche Spannung verändert Last und Wärmeabgabe; kann Schutzauslösung oder Minderleistung verursachen |
| Wattzahl | Die Nennleistung in Watt einhalten, es sei denn, der Hersteller genehmigt Alternativen | Höhere Wattzahl kann thermische Belastung erhöhen; niedrigere Wattzahl verlängert die Aufheizzeit |
| Montage / Gewinde | Einschraubgewinde und Dichtfläche müssen übereinstimmen | Nichtübereinstimmung führt zu Undichtigkeiten oder unsicherem Sitz |
| Geometrie | Gerade Ausführung vs. Falt-/Wellenform; Niedrigleistungsdichte-Ausführungen in Betracht ziehen | Beeinflusst Oberfläche, Kalktoleranz und lokale Heißstellen |
| Materialien | Mantel und Anschlüsse müssen für die Wasserchemie geeignet sein | Korrosionsbeständigkeit variiert; schlechte Übereinstimmung verkürzt die Lebensdauer |
| Dichtung | Korrekte neue Dichtung verwenden (empfohlen) | Die meisten Undichtigkeiten nach der Wartung gehen auf Dichtungsschäden oder Nichtübereinstimmung zurück |
Wie gute Spezifikationen aussehen (Einzelhandelsbeispiel)
Produktlisten, die leicht vergleichbar sind, geben in der Regel Leistung, Materialien und Sicherheitsbewertungen an. Die Seite von Hudson Reed für Steckelemente zeigt ein klares Beispiel für Spezifikationsfelder:.
Quelle: Hudson Reed Produktseite.
Aus ingenieurtechnischer Sicht entscheiden Legierung und Umgebung dennoch über die Lebensdauer
TUTCO weist darauf hin, dass Heizelemente in Geräten üblicherweise metallische Widerstandslegierungen wie Fe-Cr-Al und Ni-Cr(Fe) verwenden, und dass scheinbar kleine Unterschiede (einschließlich Spurenelemente).
Schritt-für-Schritt-Austauschablauf (Whirlpool-konforme Reihenfolge)
Der folgende Arbeitsablauf folgt der Struktur von Whirlpools veröffentlichten Schritten zum Austausch des Heizelements und wird in einem globalen, markenneutralen Format dargestellt.
Wichtige Regel
Schalten Sie den Strom erst ein, wenn der Tank vollständig gefüllt und die gesamte Luft entfernt ist. Whirlpools Anleitung gibt an, dass ein vorzeitiges Einschalten das obere Element durchbrennen lassen kann (Trockenbrand).
Vorgehen (Ablauf)
1) Wasser zuerst abkühlen lassen
Laufen lassen heißes Wasser bis es kühl wird, um Verbrühungsrisiken zu reduzieren (Whirlpool weist darauf hin, dass dies 10 Minuten oder länger dauern kann).
2) Kaltwasserzufuhr absperren
Das Kaltwasserabsperrventil schließen.
3) Sicher ablassen
Einen Gartenschlauch an das Ablassventil anschließen und an einen geeigneten Ort ablassen. Das Öffnen eines Warmwasserhahns kann das Ablassen beschleunigen. Wenn Sedimente das Ablassventil verstopfen, kann ein qualifizierter Techniker erforderlich sein.
4) Altes Element entfernen
Bei Bedarf die Abdeckung und Isolierung entfernen, die Kabel abklemmen und das Element mit einem Elementschlüssel oder einer 1 1/2″-Tiefbettnuss (wie von Whirlpool angegeben) entfernen.
5) Ersatzteil überprüfen
Bestätigen, dass das neue Element mit den Angaben auf dem Typenschild des Heizgeräts übereinstimmt für Spannung und Leistung.
6) Gewinde reinigen und Dichtung einbauen
Tankgewinde mit einem Lappen reinigen. Eine neue Dichtung einbauen. Whirlpool empfiehlt außerdem, einen Tropfen Spülmittel zur Schmierung der Dichtung beim Festziehen zu verwenden, um Beschädigungsrisiken zu reduzieren.
7) Neues Element einbauen und festziehen
Handfest anziehen, dann mit dem Schlüssel/Nuss nachziehen. Übermäßiges Anziehen vermeiden, das die Abdichtung beeinträchtigen kann.
8) Verkabelung wieder anschließen und Abdeckungen montieren
Stromkabel wieder anschließen und auf festen Sitz der Verbindungen achten. Isolierung und Abdeckungen wieder anbringen, um Stromschlag- und Brandrisiken zu reduzieren.
9) Tank wieder befüllen und Luft vollständig entlüften
Ablassventil schließen und Kaltwasser aufdrehen. Whirlpool weist an, den Strahlregler am nächsten Warmwasserhahn zu entfernen, Warmwasser laufen zu lassen, bis ein voller Strahl kommt, drei Minuten die gesamte Luft zu entfernen.
10) Auf Undichtigkeiten prüfen
Das Element auf Undichtigkeiten prüfen. Bei Undichtigkeit leicht nachziehen. Bleibt die Undichtigkeit bestehen, Wasser ablassen, Dichtung prüfen/ersetzen und wieder einbauen.
11) Strom wieder einschalten
Erst nachdem der Tank voll ist und die Luft entfernt wurde, den Strom wieder einschalten. Whirlpool weist darauf hin, dass das Aufheizen bis zu zwei Stunden dauern kann.
Vermeidung wiederholter Ausfälle: Wasserchemie, Leistungsdichte, Wartungsrhythmus
Ein Ersatzteil ist nur so zuverlässig wie die Umgebung, in der es betrieben wird. TUTCO betont, dass verschiedene Materialien je nach Umgebung unterschiedlich reagieren,.
Wenn hartes Wasser vorherrscht
- Kalkmanagement priorisieren (regelmäßige Spülung, wo angemessen und durchführbar).
- Heizelement-Designs in Betracht ziehen, die Heißstellen reduzieren und Wattdichte (anwendungsspezifisch) verwalten.
- Halten Sie Sollwerte angemessen; übermäßige Temperatur beschleunigt Kesselsteinbildung und Spannung.
Wenn Korrosion dominiert
- Wählen Sie Materialien entsprechend der Wasserchemie; die Auswahl des Mantels ist nicht kosmetisch.
- Überprüfen Sie Verkabelung und Anschlüsse (elektrisch) Erwärmung an Verbindungen kann Element ausfall vortäuschen.
- Untersuchen Sie gegebenenfalls den allgemeinen Zustand des Tanks (systembezogene Faktoren führen zu wiederholten Rückrufen).
OEM- und Beschaffungsperspektive: Zuverlässigkeit in Heizkomponenten integrieren
Für OEMs und Gerätemarken führen Elementausfälle zu Garantiebelastungen und Reputationsrisiken. Starke Lieferanten zeigen Breite (damit die Lösung zum Produkt passt), Zertifizierungsbereitschaft und konsistente Prozesskontrolle. Jinzhong positioniert sich als ein in China ansässiger Lieferant für elektrische Heizkomponenten mit mehr als 30 Jahren Erfahrung, globalen Zertifizierungsansprüchen (z. B. ISO-Systeme und Produktkonformität) sowie One-Stop-Fertigung über Druckguss, Stanzen, CNC und Oberflächenbehandlung.
Katalogstruktur und wo jede Technologie passt
- Hersteller von Heizelementen Überblick: Positionierung, Fähigkeiten und Produktabdeckung.
- Heizelement Kategorie-Hub: breites Komponentensortiment über Anwendungen hinweg.
- Heizungsrohre Für hocheffiziente ummantelte/rohrförmige Formate, die in Geräten und Industrieanlagen verwendet werden.
- Heizplatte Optionen für kompakte, gleichmäßige Wärmeleitflächen.
- Heizfolie Für dünnprofilige, schnell reagierende Designs (Dünn-/Dickschichtvarianten).
- Druckguss-Heizlösungen Für integrierte Heizkörper in Kaffeemaschinen und Kompaktkesseln.
Qualitätssignale, die Beschaffungsteams typischerweise prüfen
- Zertifizierungssatz und Prüfbarkeit (Qualitäts-, Umwelt-, Sicherheitssysteme; regionsspezifische Zulassungen). Prozessfähigkeit: Integration von Druckguss + CNC + Oberflächenbehandlung kann Durchlaufzeit und Lieferantenanzahl reduzieren.
- Kapazitätsangaben: Jinzhong nennt skalierte Ausbringung (z. B. „3 Millionen Heizelemente pro Monat“ auf Kategorieseiten) und One-Stop-Lieferziele.Anwendungseignung: spezielle Kategorien wie Elektroboiler-Heizungen weisen auf Spezialisierung für kompakte thermische Module hin.
- Zusätzliche Unternehmensinformationen werden präsentiert zu:Wo sich „Boiler-Heizmodul“ von Tauchheizkörpern unterscheidet.
- Speicherwassererwärmer verwenden in der Regel Einschraub-Tauchheizkörper. Kompaktgeräte (Kaffeemaschinen, Dampfgeneratoren, Luftbefeuchter) nutzen dagegen oft integrierte Kesselmodule und Druckguss-Heizkörper. Jinzhong trennt diese Produktfamilien, einschließlich einer Kategorie und Druckguss-Lösungslisten, was für OEMs hilfreich ist, die über mehrere Produktlinien hinweg standardisieren.Was ist der wichtigste einzelne Schritt, um einen sofortigen Ausfall eines neuen Elements zu verhindern?.
Sicherstellen, dass der Tank vollständig gefüllt und alle Luft entfernt ist, bevor die Stromversorgung wiederhergestellt wird. Whirlpools Verfahren warnt ausdrücklich davor, dass vorzeitiges Einschalten das obere Element durchbrennen lassen kann, und weist an, das Wasser für volle 3 Minuten laufen zu lassen. Heizelement-Fabrik.
FAQ
Mineralablagerungen verringern die Wärmeübertragung und können das Element zwingen, bei höheren Oberflächentemperaturen zu arbeiten, was Oxidation und Materialverschleiß beschleunigt. Die Kontrolle von Kesselstein und die Auswahl geeigneter Geometrie und Wattdichte helfen, wiederholte Ausfälle zu reduzieren.
Die folgende Quelle
Konzeptionelle Grafik, die veranschaulicht, wie Kesselstein die Oberflächentemperatur des Elements und das Risiko erhöht.
Are all 1000W heating elements comparable across applications?
Referenzen und ausgehende Links
The following sourc
Teilen :

Mari Cheng
Hallo zusammen, ich bin Mari Cheng, die "elektrische Heizungsperson" von Jinzhong Electric Heating Technology. Unsere Fabrik beschäftigt sich seit 30 Jahren mit elektrischen Heizkomponenten und hat mehr als 1.000 in- und ausländische Kunden bedient. In den folgenden Blogs werde ich über das wirkliche Wissen über elektrische Heizkomponenten, die Produktionsgeschichten in der Fabrik und die wirklichen Bedürfnisse der Kunden sprechen. Wenn Sie irgendwelche Fragen haben, bitte kommentieren Sie oder stoßen Sie mich direkt, ich werde Ihnen alles sagen, was ich weiß~
Ausgewählter Artikel
Brauchen Sie Hilfe?
Wenn Sie Fragen haben, wenden Sie sich bitte an uns, damit wir Ihnen helfen können. Wir werden auch das neueste Angebot und kostenlose Proben zur Verfügung stellen
