Pillar Page • Global audience • Air fryer care & reliability
A clean air fryer is safer, cooks more evenly, and smells better—but the heating element is the part you should clean carefully, not aggressively. This guide shows you how to maintain and clean an air fryer heating element without damaging the coil, the insulation, the temperature sensor, or the electrical connections.
- 1) How an air fryer heating element works (and why cleaning matters)
- 2) Identify your element type: coil, plate, tube, or film
- 3) Tools and cleaners: what to use (and what to avoid)
- 4) Cleaning schedule: after each use, weekly, and deep-clean
- 5) Step-by-step: safe heating element cleaning
- 6) Removing baked-on grease and carbon without scratching
- 7) Inspection checklist: signs of damage and when to stop
- 8) Troubleshooting: smoke, odors, uneven heat, and no-heat
- 9) How to extend element life (watt density, airflow, and contamination)
- FAQ
1) How an air fryer heating element works (and why cleaning matters)
An air fryer is essentially a compact convection oven: a fan moves air across a resistive heating element, then that hot air circulates around your food. The heating element is not “just a wire”—it’s a component built from conductive material (the part that turns electricity into heat via resistive/Joule heating) and insulating/support materials that keep it safe, correctly positioned, and electrically isolated.
This “conductive + insulating framework” concept matters for cleaning: grease, carbon, and moisture can compromise heat transfer, airflow, and insulation integrity. Even finger oils and chemical residues can accelerate corrosion or hot spots in high-temperature resistive alloys.
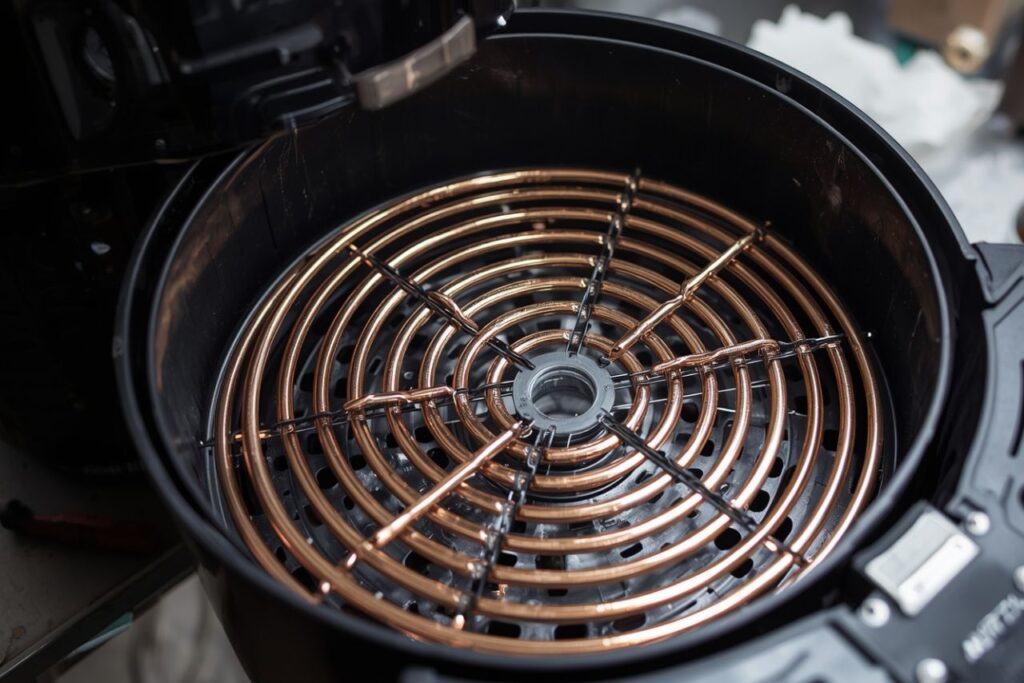
2) Identify your element type: coil, plate, tube, or film
Air fryers come in multiple heating architectures. Your cleaning approach depends on whether the heat source is exposed, sheathed, or bonded to a surface.
| Element style (common in appliances) | What it looks like in an air fryer | Cleaning implications |
|---|---|---|
| Open/supported coil | Visible coil or serpentine wire held by ceramic/mica supports | Most sensitive to scraping; avoid bending; clean with soft tools and minimal moisture |
| Sheathed “tube” element | Metal tube loop (often stainless) with terminals hidden in housing | More durable surface; still avoid flooding; focus on degreasing and wiping |
| Heating plate | Flat or contoured heated surface bonded to a thermal panel | Do not gouge coatings; uniform heat depends on good surface contact and clean airflow paths |
| Thin/thick film heater | Low-profile heater integrated into a substrate | Avoid harsh chemicals; protect edges, lead connections, and insulation layers |
Industrial heating product categories mirror these physical realities: “heating tubes” often use a metal sheath packed with insulating magnesium oxide (MgO) around resistance wire; “heating plates” aim for uniform surface heating with strong adhesion; films prioritize thin, flexible, fast, uniform heat. You don’t need to know the manufacturing details to clean an air fryer—but they explain why certain damage modes (scratching, moisture intrusion, chemical attack) matter.
3) Tools and cleaners: what to use (and what to avoid)
Recommended tools
- Microfiber cloths (dry + slightly damp)
- Soft nylon brush or soft toothbrush
- Non-scratch sponge
- Cotton swabs (tight corners)
- Wooden skewer or plastic scraper (gentle lifting of carbon)
- Small bowl of warm water + dish soap (for cloth wetting only)
Safe cleaners (typical)
- Mild dish soap (best default degreaser for routine cleaning)
- Baking soda paste (baked-on grease; gentle abrasive)
- Vinegar-water (light odor control; wipe only)
Always check your air fryer manual for approved cleaners, coatings, and dishwasher-safe parts.
- Oven cleaner / caustic degreasers (can attack metals, coatings, and insulation supports)
- Metal scouring pads / steel wool (scratches create hot spots and corrosion sites)
- Soaking the head unit (moisture can reach wiring, sensors, and insulation)
- Aerosol sprays directly upward into vents (drives liquid into electronics)
4) Cleaning schedule: after each use, weekly, and deep-clean
Most heating element problems in air fryers aren’t “mysterious failures”—they’re maintenance debt: layered grease becomes carbon; carbon smokes; smoke smells; users increase temp/time; residue bakes harder; airflow suffers; and the element runs hotter than intended.
| Frequency | What to do | Time |
|---|---|---|
| After each use | Empty crumbs/grease; wipe basket and drawer; quick wipe visible splatter (once cool) | 3–7 min |
| Weekly (or every 5–10 cooks) | Clean basket/drawer thoroughly; wipe interior; inspect element area for residue | 10–20 min |
| Deep-clean (monthly or as needed) | Careful element-area degrease; fan guard wipe (if accessible); odor reset | 20–45 min |
5) Step-by-step: safe heating element cleaning
Step 1 — Unplug and cool completely
- Unplug the air fryer from the wall. (Do not rely on the power button.)
- Let it cool until all surfaces are room temperature. Grease is easier to wipe when warm, but do not work around hot coils.
Step 2 — Remove and wash food-contact parts
- Remove the basket/crisper plate/drawer.
- Wash with warm water + dish soap. Rinse and dry fully.
- Remove large debris from the cavity with a dry paper towel or cloth.
Step 3 — Position the unit for safe access
Many air fryers have the element in the top. If your model allows, you can gently tip it back to see the element. The goal is visibility—not pouring liquid “up” into the head.
Step 4 — Dry clean first (debris removal)
- Use a dry microfiber cloth to remove loose crumbs.
- Use a soft nylon brush to lift dry carbon flakes (light pressure).
- Use cotton swabs around ceramic/mica supports and seams.
Step 5 — Degrease with minimal moisture (wipe, don’t spray)
- Mix a few drops of dish soap in warm water.
- Dampen (do not soak) a microfiber cloth; wring it out until it’s just barely wet.
- Wipe the element area gently. If it’s an exposed coil, focus on wiping adjacent metal and shields, not grinding on the coil.
- Follow with a clean damp cloth (water only) to remove soap film.
- Finish with a dry cloth.
Step 6 — Dry time before powering on
Leave the unit open to air-dry for at least 30–60 minutes (longer in humid environments). Then reinsert the basket/drawer and run a short empty cycle (if your manual allows) to burn off any remaining moisture—only after you’re confident there’s no standing water.
6) Removing baked-on grease and carbon without scratching
The “hard stuff” above the basket is usually polymerized oil and carbon. Your job is to soften and lift it—not to sandblast the element.
Method A: Baking soda paste (gentle, controllable)
- Make a paste: baking soda + a little water.
- Apply with a cotton swab or cloth to the surrounding metal surfaces (not deep into vents/wiring).
- Let sit 10–15 minutes.
- Wipe off with a slightly damp cloth, then dry.
Method B: Warm steam in the cavity (without wetting the head)
If your design allows, you can place a small heat-safe bowl of hot water in the basket area (unit unplugged) and close the drawer for 10 minutes to soften residue. Do not pour water into the head, and do not let water contact electrical areas.
Method C: Targeted lifting with wood/plastic (no metal tools)
Use a wooden skewer or plastic scraper to lift thick carbon from flat shields. If you feel resistance that would require “digging,” stop and soften the residue first—scratches become heat concentration points and corrosion starters.
7) Inspection checklist: signs of damage and when to stop
Normal / acceptable
- Light brown discoloration on metal surfaces
- Minor baked-on film that wipes off over time
- Even heating performance
Stop and investigate
- Cracked ceramic/mica supports
- Warped coil shape or coil sagging
- Flaking metal, pitting, or severe corrosion
- Burn marks near wiring or connectors
- Repeated tripping of GFCI/outlet or breaker
8) Troubleshooting: smoke, odors, uneven heat, and no-heat
Problem: Smoke during cooking
Likely causes: Grease on the element/shield; oil aerosol deposits; food drippings.
Fix: Deep-clean the element area using wipe-only degreasing. Reduce oil spray use; line the basket properly (without blocking airflow).
Problem: “Burnt plastic” smell
Likely causes: Residue on hot surfaces; cleaner residue; overheated food deposits.
Fix: Rinse-wipe again with plain water and dry. Run a short empty cycle only after everything is dry.
Problem: Uneven cooking / cold spots
Likely causes: Airflow restriction (grease film, blocked intake/exhaust, overloaded basket).
Fix: Clean vents and interior surfaces; avoid overcrowding; confirm fan is unobstructed.
Problem: No heat (fan runs, but food stays cold)
Likely causes: Open element, failed thermal fuse, control fault, connector issue.
Fix: This is not a cleaning issue. Unplug and consult service/manual. Avoid disassembly unless qualified.
9) How to extend element life (watt density, airflow, and contamination)
Heating element longevity is strongly affected by temperature, cycling, and environment. When the element runs hotter than intended, oxidation accelerates, resistance can drift, and supports can degrade. In compact appliances like air fryers, airflow is the main cooling mechanism for the element.
Practical life-extension habits
- Keep airflow paths clean: residue changes airflow and can create local hot spots.
- Minimize aerosol oil sprays: they deposit sticky films on hot metal that carbonize fast.
- Avoid harsh cleaners: caustics can attack metals and insulating supports; residues can smoke.
- Don’t run empty at max temp repeatedly: high watt density with limited airflow accelerates oxidation.
- Let it cool between high-temp batches: reduces thermal cycling stress.
FAQ
Can I use oven cleaner to remove tough grease from the heating element area?
It’s usually a bad idea. Oven cleaners are often caustic and can attack metals, coatings, and insulating materials or leave residues that smoke. Use mild dish soap wipe-downs, baking soda paste on surrounding surfaces, and patience.
Is it safe to spray degreaser directly onto the coil?
Avoid spraying into the head/coil area. Sprays can push liquid into wiring, sensors, and insulation. Apply cleaner to a cloth first, then wipe.
Why does my air fryer smoke more over time even if I clean the basket?
The top housing and element shield can accumulate invisible oil film that gradually carbonizes. A periodic deep-clean of the element area (wipe-only, minimal moisture) usually fixes this.
What’s the connection between “heating tubes/plates/films” and air fryers?
They’re categories of how heat is built and transferred. Tube-style heaters often use a metal sheath with insulation (like MgO) around resistance wire. Plates aim for stable, uniform surface heating and mechanical strength. Films are thin and uniform for tight spaces. Air fryers commonly use coil or sheathed elements, but the same maintenance principles apply: protect surfaces, insulation, and connections.
How do I know if I should replace the heating element instead of cleaning it?
If you have no-heat, repeated electrical trips, visible damage (cracks in supports, severe corrosion, burned connectors), or the element shape is distorted, cleaning won’t fix it. Stop using the unit and consult service options.
Disclaimer: This guide provides general maintenance information. Always follow your specific air fryer’s user manual, safety warnings, and service guidance. If electrical faults are suspected, consult a qualified technician.

