
故障したエアフライヤーを交換することができます 電熱線 エアフライヤーのプラグを抜き、加熱要素にアクセスし、損傷した部品を取り外し、新しい部品を取り付け、テストサイクルを実行することによって。. 金中電熱 生成します 家電製品の加熱素子 業界基準を満たしているため、常に信頼できるメーカーのコンポーネントを選択してください 発熱体メーカー.
ヒント: 修理を開始する前にエアフライヤーのプラグを抜き、安全のためメーカーの指示に従ってください。.
故障したエアフライヤー加熱要素の特定

エアフライヤー加熱要素の交換が必要な兆候
エアフライヤーの加熱要素の交換が必要な時期を認識することで、最適な調理性能と安全性を維持できます。メーカーは、部品の故障を示すいくつかの頻繁な症状を報告しています。以下の表を参照してください。 一般的な兆候とその説明:
| 症状 | 説明 |
|---|---|
| 不均一または不安定な加熱 | 食品が不均一に調理される、または通常より時間がかかる。これは熱分布が不良であることを示します。. |
| エアフライヤーがまったく加熱しない | ユニットの電源は入るが熱を発生しない。これは加熱コイルの焼き切れが原因である可能性があります。. |
| 目に見える損傷または変色 | 加熱要素の黒ずみやひび割れなどの摩耗の兆候は、劣化を示します。. |
| 動作中の焦げる臭い | 焦げる臭いは、加熱コイルの過熱または異物の付着を示唆しており、交換の可能性があります。. |
| 頻繁な過熱または自動シャットオフ | 予期しないシャットオフは、加熱要素の熱過負荷または電気的故障を示している可能性があります。. |
| 異音または火花 | 加熱要素からの異常な音や火花は電気的故障を示しており、即時の対応が必要です。. |
熱がない、または加熱が不安定
エアフライヤーが希望の温度に達するのに苦労したり、まったく加熱しないことに気付く場合があります。ファンは作動するがユニットが熱を発生しない場合、電気加熱コイルに注意が必要な可能性があります。加熱が不安定だと、食品が十分に調理されなかったり、予想以上に時間がかかったりすることがよくあります。.
不均一な調理または焦げた食品
不均一な調理や焦げた食品は、対流加熱の不良を示しています。加熱要素が均等に熱を分散できない場合、食事の一部は調理されすぎ、他の部分は生のままになります。この症状は、調理時間の延長を伴うことがよくあります。.
目に見える損傷、ひび割れ、または変色
加熱要素に物理的な損傷がないか点検してください。ひび割れ、焼け跡、または黒ずみは、著しい摩耗を示します。メーカーは、さらなるアプライアンスの損傷を防ぐために、これらの兆候を定期的に確認することを推奨しています。.
交換前のエアフライヤーのトラブルシューティング
エアフライヤーの加熱要素を交換する前に、徹底的な トラブルシューティングプロセス. を実行してください。アプライアンス修理の専門家は、問題を確認し、他の原因を除外するためのいくつかの手順を提案しています。.
電源と設定の確認
- エアフライヤーが機能するコンセントに差し込まれていることを確認してください。.
- 電源コードとプラグに目に見える損傷がないか検査します。
- お使いのモデルにリセットボタンがある場合は、エアフライヤーをリセットしてください。.
他のエアフライヤーコンポーネントの点検
- ユニットの電源を入れたときにファンの音がするか確認してください。.
- 通気口を塞いでいる障害物がないか確認してください。.
- 内部部品にグリースのコーティングや黒い残留物がないか確認してください。.
マルチメーターによる発熱体のテスト
マルチメーターを使用して加熱要素の導通をテストしてください。エアフライヤーを電源から切り離し、加熱要素の端子にアクセスします。マルチメーターのプローブを端子に当て、読み取り値を確認します。導通がない場合は、加熱要素が故障しており交換が必要であることが確認されます。.
ヒント: 具体的なトラブルシューティング手順と安全ガイドラインについては、必ずメーカーのマニュアルを参照してください。.
加熱要素交換のためのエアフライヤーの準備
安全に関する重要な注意事項
エアフライヤーのプラグを抜く
修理を開始する前に、必ずエアフライヤーを電源から切り離す必要があります。アプライアンスのプラグを抜くことで、感電を防ぎ、安全を確保します。追加の保護として、キッチンの設定が許せば、回路ブレーカーで電源をオフにしてください。.
アプライアンスを完全に冷ます
エアフライヤーのプラグを抜いた後、アプライアンスが冷めるまで待ちます。内部部品が熱いうちに触ると火傷の原因になります。メーカーは、コンポーネントの取り扱いを開始する前に、ユニットを少なくとも30分間放置することを推奨しています。.
安全で明るい場所での作業
乾燥していて、散らかっておらず、明るい作業スペースを選んでください。適切な照明は、小さなネジやコネクタをはっきりと見るのに役立ちます。整理整頓されたエリアは、部品や工具を紛失するリスクを減らします。鋭利なエッジや破片から保護するために、保護手袋と安全ゴーグルを着用する必要があります。.
ヒント いずれかの手順に不安がある場合は、専門の技術者に相談してください。電気アプライアンスを扱う際は、常に安全を最優先にしてください。.
電気アプライアンス取り扱いの推奨安全基準:
- 感電を防ぐため、回路ブレーカーで電源を切るか、アプライアンスのプラグを抜いてください。.
- 内部部品に触れる前に、アプライアンスが完全に冷めるまで待ってください。.
- 鋭利なエッジや破片から保護するために、保護手袋と安全ゴーグルを着用してください。.
- 危険を避けるため、作業スペースは乾燥させ、散らからない状態に保ってください。.
- 開始する前に、すべての電源が切断されていることを確認してください。.
- いずれかの手順に不安がある場合は、専門家に相談してください。.
エアフライヤー加熱要素交換に必要な工具と部品
互換性のある交換用加熱要素
交換用の部品を選択してください お使いのエアフライヤーに適合する加熱素子 モデル。互換性により、適切な取り付けと機能が保証されます。対流加熱システムでは、正しい部品を使用することで、効率的な空気の流れと熱分布が維持されます。.
ドライバーとプライヤー
が必要だ。 プラスドライバー 蓋と加熱要素のネジを取り外し、固定するため。ラジオペンチは、小さな部品をつかんだり、狭い場所に届くのに役立ちます。元のネジが紛失または損傷した場合、交換用ネジが必要になることがあります。.
メーカーのマニュアルまたはガイド
メーカーのマニュアルを手元に置いてください。マニュアルには、お使いのエアフライヤーに固有の図解と段階的な手順が記載されています。また、特定のモデル(例: PowerXL MFC-AF-6.
など)では、加熱要素カバーや新しい蓋が必要かどうかも示されている場合があります。
- プラスドライバー
- ニードルノーズプライヤー
- 安全手袋
- 互換性のある交換用加熱素子
- 交換用ネジ(必要な場合)
- 加熱素子カバー(該当する場合)
- メーカーの取扱説明書
エアフライヤーの交換に適切に準備することで、 フライヤー発熱体 作業がよりスムーズかつ安全になることがわかります。電気加熱コイルを慎重に扱い、これらのガイドラインに従うことで、よくあるミスを回避できます。.
エアフライヤーの加熱素子へのアクセス
準備を行う際には、 エアフライヤーの加熱素子にアクセスするために, 、体系的な手順に従う必要があります。これにより、作業中の損傷を防ぎ、安全性を維持することができます。.
エアフライヤーを安全に開ける
バスケット、トレイ、アクセサリーの取り外し
まず、エアフライヤーから取り外し可能なすべての部品を取り外します。バスケット、トレイ、およびアクセサリーを取り出してください。この手順により、内部構造に明確にアクセスでき、取り外し可能な部品への偶発的な損傷を防げます。これらの部品は安全な場所に置いてください。.
外装ケーシングのネジの位置確認と取り外し
次に、外装ケーシングを固定しているネジの位置を確認します。ほとんどのエアフライヤーはプラスネジを使用しているため、対応するドライバーが必要です。各留め具を慎重に緩めてください。再組み立て時に必要となるため、ネジは整理して保管してください。ゴム足やステッカーの下に隠れたネジがあるモデルの場合は、取扱説明書で指示を確認してください。.
ヒント:取り外す前にネジの位置を写真に撮ってください。これにより、再組み立て時に各ネジの取り付け位置を覚えておくことができます。.
エアフライヤーを安全に開けるための推奨手順は以下の通りです:
- エアフライヤーの電源を切り、プラグを抜く 感電のリスクを排除します。.
- バスケット、トレイ、アクセサリーを取り外す。.
- プラスドライバーを使用してケーシングを開け、すべての部品を優しく扱う。.
- ネジや小さな部品はラベルを付けた容器に保管する。.
加熱素子アセンブリの露出
外装ケーシングの取り外し
ネジを取り外したら、外装ケーシングを優しく持ち上げるか、スライドさせて取り外します。一部のモデルでは配管や配線の取り外しが必要な場合があるため、注意して進めてください。過度な力を加えると、ケーシングにひびが入ったり、内部部品を損傷する可能性があります。抵抗がある場合は、メーカーの取扱説明書で具体的な指示を確認してください。.
加熱素子の位置と接続部の特定
ほとんどのエアフライヤーの内部では、 加熱素子は調理室の上部 に配置されています。電気加熱コイルが熱を発生させ、ファンがそれを室内全体に分散させて効果的な対流加熱を実現します。ファンアセンブリの近くにある金属コイルまたはプレートを探してください。素子に接続された配線が見える場合があり、交換時にはこれらを取り外す必要があります。.
- 多くの設計では、加熱素子は食品バスケットの上に位置し、迅速な熱伝達を可能にします。.
- 素子は通常、 調理設定に応じて180°Fから450°F, の温度に達します。.
注記:作業を進める前に、必ず接続部と取り付けポイントを点検してください。これにより、 加熱素子がエアフライヤーの他の部分とどのように統合されているかを理解できます。.
これらの手順に従うことで、安全に エアフライヤーの加熱素子 にアクセスし、次の交換段階に備えることができます。.
故障したエアフライヤー加熱素子の取り外し
故障した部品を取り外す段階に達したら、 エアフライヤーの加熱素子, 精度と細部への注意が不可欠です。内部コンポーネントの損傷や接続の誤配置を避けるため、各手順を慎重に扱う必要があります。.
配線とコネクタの取り外し
参考のための接続部のラベル付けまたは写真撮影
配線を取り外す前に、その配置を記録する時間を取りましょう。スマートフォンを使用して各接続ポイントを撮影してください。必要に応じて、マスキングテープとマーカーで各配線にラベルを貼ることもできます。この手順は、再組み立て時に正しい配置を覚えておくのに役立ちます。.
ヒント 明確な写真やラベルは混乱を防ぎ、配線を正確に再接続することを保証します。電気的な故障や不適切な加熱性能のリスクを低減します。.
配線とコネクタの安全な取り外し
まず、各コネクタをラジオペンチでしっかりとつかみます。端子から配線を外すために優しく引っ張ってください。急に引っ張ったりねじったりすると、コネクタが壊れたり、配線の絶縁体が損傷する可能性があるため避けてください。抵抗がある場合は、取り外す前に押す必要があるロックタブやクリップがないか確認してください。.
- 各配線に摩耗や腐食の兆候がないか点検する。.
- 取り外した配線は整理された状態で保管する。.
- 偶発的な短絡を防ぐため、コネクタを金属面から遠ざける。.
これらの手順に従うことで、安全性と整理整頓を維持できます。適切な配線管理により、新しい エアフライヤー加熱素子 をテストするためのもの。.
の取り付けが簡素化されます。
損傷した加熱素子の取り出し
取り付けネジまたは留め具の取り外し.
| ステップ | アクション | 必要な工具 |
|---|---|---|
| 加熱素子をエアフライヤーの内部フレームに固定しているネジまたは留め具の位置を確認します。プラスドライバーを使用して各ネジを緩め、取り外します。ネジは小さな容器やマグネットトレイに安全に保管してください。 | 留め具を特定する | プラスドライバー |
| 素子を固定しているすべてのネジまたはクリップを見つける | 留め具を取り外す | プラスドライバー |
| 各留め具を緩めるか、クリップを外す | 留め具を保管する | ラベルを付けた容器に入れる |
注: マグネットトレイ.
一部のモデルでは、ネジに加えてブラケットやクランプが使用されています。メーカーの取扱説明書で具体的な指示を参照してください。
故障した素子を慎重に持ち上げる.
すべての留め具を取り外したら、損傷した加熱素子を取り付け位置から優しく持ち上げます。コイルの曲がりやひび割れを防ぐため、素子は端を持ってください。素子が動かない場合は、ブラケットから緩めるために少し揺らしてください。.
コイル表面に直接触れることは避けてください。皮膚の油分が将来の加熱性能に影響を与える可能性があります。故障した素子は、点検または廃棄のために非導電性の表面に置いてください。.
これで取り外しプロセスが完了しました。この手順により、エアフライヤーは新しい加熱素子の取り付け準備が整い、効率的な対流加熱と信頼性の高い動作が回復します。

新しいエアフライヤー加熱素子の取り付け
取り付けポイントとブラケットへの位置合わせ
新しい発熱体を端を持って持ちます。エアフライヤー内部に配置し、発熱体の取り付け穴がユニット内部のブラケットまたはポストに合うようにします。コイル表面に直接触れないようにしてください。皮膚の油分が新しい部品の性能に影響を与える可能性があります。発熱体が平らに設置され、配線や他の部品に接触しないように、時間をかけて確認してください。適切な位置合わせは、将来の振動を防ぎ、均一な熱分布を確保します。.
ネジまたは留め具で発熱体を固定する
発熱体の位置を合わせたら、事前に取り外しておいたネジまたは留め具を使用して固定します。クロスねじを防ぐため、各ネジは手で挿入してください。ドライバーで、発熱体が安定するまで締め付けます。ねじ山を潰したり、取り付けブラケットにひびが入ったりする可能性があるため、締め付けすぎないように注意してください。軽く押したときに発熱体が動かないことを確認します。しっかりと固定することで、安全な動作と信頼性の高い加熱が保証されます。.
ヒント すべてのネジを元の位置に配置します。正しいネジを使用することで、エアフライヤーの構造的完全性を維持できます。.
配線とコネクタの再接続
各接続を正しく一致させる
配線は、以前の状態とまったく同じように新しいエアフライヤー発熱体に再接続する必要があります。分解時に撮影した写真や作成したラベルをガイドとして使用してください。各配線は元の端子に取り付ける必要があります。この手順は、安全性と性能の両方にとって重要です。お使いのモデルに高温リミットサーモスタットや温度ヒューズが含まれている場合は、これらの部品も今すぐ再取り付けてください。これらは、アプライアンスの過熱を防ぎます。.
確実でしっかりとした接続の確保
各配線を一致させた後、すべてのコネクタが端子にしっかりと取り付けられていることを確認します。接続が緩んでいると、電気アークや加熱不良の原因となることがあります。各コネクタに腐食や損傷の兆候がないか点検してください。摩耗しているものがあれば交換してください。すべての配線を可動部品や鋭利なエッジから遠ざけ、経年劣化を防ぎます。メーカーが配線図を提供している場合は、それを確認して作業内容を確認してください。.
正しい再接続を確認するためのチェックリストは以下の通りです。
- 写真やメモを使用して、各配線を元の端子に一致させます。.
- すべてのコネクタがしっかりと固定され、腐食がないことを確認します。.
- 高温リミットサーモスタットと温度ヒューズを再取り付けします。.
- 配線を可動部品や鋭利なエッジから遠ざけます。.
- 可能であれば配線図を確認します。.
注: 次の手順に進む前に、すべての接続を再確認してください。今、注意深く確認することで、後々の問題を防ぐことができます。.
これで、新しいエアフライヤー発熱体の取り付けと、必要なすべての配線の再接続が完了しました。この注意深いプロセスにより、エアフライヤーは安全で効率的な動作状態に戻ります。.
エアフライヤーの再組み立てとテスト
外側ケーシングとコンポーネントの再取り付け
すべてのネジとパネルの固定
新しい発熱体を取り付けました。次に、エアフライヤーを再組み立てする必要があります。分解手順を逆の順序で行うことから始めてください。この方法により、重要なコンポーネントを見逃すことを防げます。外側ケーシングをユニットに戻します。隙間や位置ずれを防ぐために、すべてのパネルを慎重に位置合わせしてください。ドライバーを使用して、各ネジを元の位置に固定します。パネルが安定するまでネジを締めますが、締めすぎないように注意してください。ケーシングの完全性を維持し、ぴったりとフィットさせることが目標です。.
ヒント: 再組み立て中は、ネジとパネルを整理してください。この習慣により、時間を節約し、小さな部品を紛失するリスクを減らせます。.
バスケットとトレイの再取り付け
外側ケーシングを固定したら、事前に取り外したバスケット、トレイ、およびその他のアクセサリーを再取り付けします。各ピースを所定のスロットにスライドさせて入れます。すべてがスムーズにフィットし、所定の位置にロックされることを確認してください。これらのコンポーネントを適切に取り付けることで、最適な空気の流れをサポートし、調理性能を向上させます。バスケットとトレイがスムーズに動き、発熱体を妨げないことを確認する必要があります。.
エアフライヤー発熱体のテスト
プラグを差し込み、電源を入れる
再組み立て後、エアフライヤーを信頼性のあるコンセントに差し込みます。ユニットの電源を入れ、コントロールパネルを観察します。デジタルディスプレイまたはコントロールノブが期待通りに反応することを確認してください。アプライアンスが使用可能な状態であることを示す明確な表示があることを確認します。.
適切な加熱のためのテストサイクルの実行
新しい発熱体の効果を確認する必要があります。予熱サイクルを実行することから始めてください。ディスプレイを観察し、エアフライヤーが設定温度に達するまでの時間を記録します。食品用温度計を使用して、庫内の実際の温度と設定値を比較してください。. 以下の表は、適切に機能する発熱体の 予想温度範囲を示しています。
| 温度(°F) | 温度(°C) | 説明 |
|---|---|---|
| 180 | 80 | エアフライヤーの最低設定値 |
| 400 | 200 | 効果的な調理のための最高設定値 |
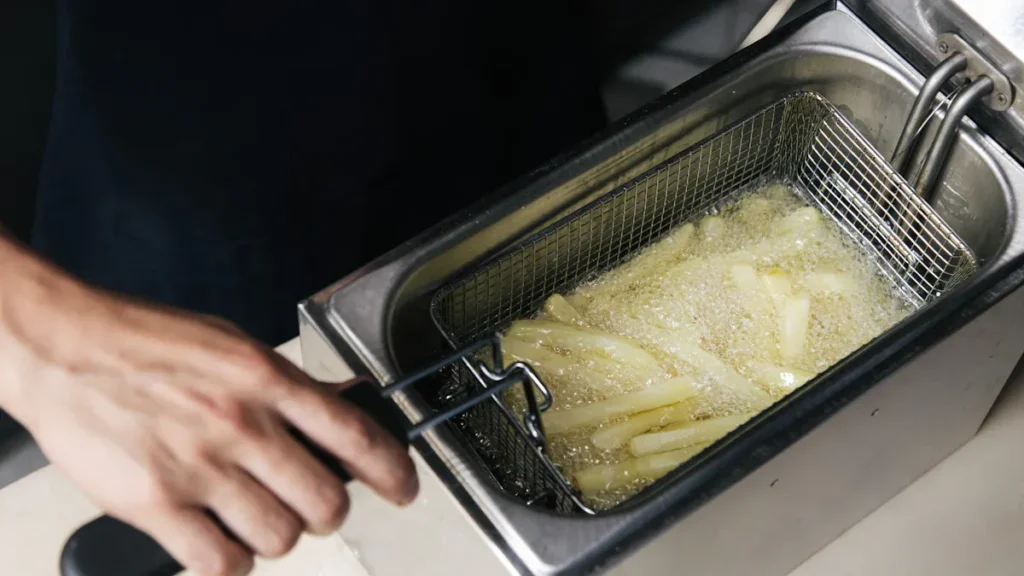
冷凍フライドポテトを調理して、調理プロセスをテストしてください。. フライドポテトが均一に、かつ予想時間内に調理されるか観察します。各ボタンやダイヤルの応答性を確認します。エアフライヤーがサイクル全体を通して正確な温度と時間を維持していることを確認します。これらの手順は、アプライアンスの迅速な調理能力を評価し、信頼性の高い動作を保証するのに役立ちます。.
注記: テスト中に問題に気付いた場合は、接続と組み立てを再確認してください。適切な取り付けは、安全で効率的な調理をサポートします。.
交換後の安全上のヒントとトラブルシューティング
すべての接続をダブルチェックする
新しい発熱体の取り付けが完了したら、すべての配線とコネクタを点検する必要があります。配線の緩みや誤接続は、エアフライヤーの誤動作や安全上のリスクを引き起こす可能性があります。参考写真やラベルを使用して、各接続を確認してください。緩んでいるように感じる配線がある場合は、カチッと音がするかしっかりと収まるまで、そっと押し込んでください。確実な接続は、適切な電流の流れを維持し、過熱を防ぐのに役立ちます。.
配線の緩みや誤接続を避ける
以下の手順に従って、一般的な配線ミスを回避できます。
- メモを使用して、各配線を元の端子に一致させます。.
- 各コネクタを軽く引っ張り、しっかりと固定されているか確認します。.
- 配線を可動部品や鋭利なエッジから遠ざけます。.
- 電源を入れる前に、腐食や損傷の兆候がないか点検します。.
ヒント: 今、作業内容を再確認することで、時間を節約し、将来の修理を防ぐことができます。.
エアフライヤーがそれでも動作しない場合の対処法
発熱体を交換してもエアフライヤーが動作しない場合は、さらにトラブルシューティングを行う必要があります。新しい部品を取り付けても、他の内部的な問題が原因で問題が解決しないことがあります。.
メーカーサポートへの相談
アプライアンスが加熱しない、または電源が入らない場合は、メーカーのサポートチームに連絡する必要があります。修理内容と実施したトラブルシューティング手順について詳細を提供してください。メーカーサポートは、高度な診断を案内したり、認定サービスセンターを推奨したりできます。温度ヒューズが切れているとフライヤーが加熱しなくなるため、温度ヒューズを確認する必要があるかもしれません。サポートチームは、発熱体が適切に取り付けられているかどうかの確認を求めることもあります。.
専門家による修理または交換の検討
メーカーサポートで問題が解決しない場合は、検討すべきいくつかの選択肢があります。
- エアフライヤーを平らで 安定した表面に置き、適切な動作を確保します。 バスケットをしっかりと挿入し、食品を詰め込みすぎないようにします。.
- レシピに推奨される温度に設定します。.
- 問題が続く場合は、メーカーに発熱体の点検を依頼します。.
- 専門の技術者に助けを求める必要があるかもしれません。内部の電気的故障や損傷した部品には、専門家の対応が必要な場合があります。アプライアンスの信頼性が低いままの場合は、より新しいモデルに交換することで、エネルギー効率と調理性能を向上させることができます。.
注記: 専門家による修理は、エアフライヤーが安全かつ効率的に動作することを保証します。.
トラブルシューティング手順.
| Troubleshooting Step | 実施すべき措置 |
|---|---|
| 加熱要素の点検 | 適切な設置と機能の確認 |
| サーモヒューズの点検 | 断線している場合は交換 |
| バスケットの設置状態を確認 | バスケットが正しく挿入されていることを確認 |
| 温度設定の調整 | 適切なレベルに設定 |
| メーカーに連絡 | 詳細な点検またはサポートを依頼 |
これらのトラブルシューティング手順に従うことで、投資を保護し安全な調理環境を維持できます。.
あなたはできる エアフライヤーの故障した加熱素子を交換する 際には、安全性とメーカーのガイドラインに細心の注意を払ってください。このアプローチにより、以下のような長期的な利点が得られます。
- 新しい機器を購入する代わりに修理することで費用を節約できます。.
- エネルギー効率が向上し、光熱費の削減につながる可能性があります。.
- 廃棄物を最小限に抑えることで環境への影響軽減に貢献できます。.
忍耐と精密な作業によって機器の性能が回復し、安全で信頼性の高い調理を楽しむことができます。.
よくあるご質問
エアフライヤーの加熱要素が故障しているかどうかはどのように判断しますか?
調理のむら、加熱不良、コイルの目視可能な損傷が確認されます。設定が正しいにもかかわらず食品が焦げたり生焼けの場合は、加熱要素の交換が必要な可能性が高いです。.
どのエアフライヤーモデルでも加熱要素を交換できますか?
ほとんどのエアフライヤーモデルで加熱要素の交換が可能です。修理を開始する前に、互換性と具体的な手順については必ずメーカーの取扱説明書を確認してください。.
交換時にはどのような安全対策を講じるべきですか?
エアフライヤーの電源プラグを抜き、完全に冷却させます。手袋と保護メガネを着用し、乾燥した明るい場所で作業してください。安全な取り扱いについては常にメーカーのガイドラインに従ってください。.
エアフライヤーの加熱要素交換には特別な工具が必要ですか?
プラスドライバー、ラジオペンチ、メーカー取扱説明書が必要です。一部のモデルでは追加工具が必要な場合があります。作業開始前に全ての部品と工具を整理してください。.
加熱要素の交換は調理方法に影響しますか?
加熱要素を交換することでエアフライヤーの性能が回復します。機器が均一かつ確実に加熱されるようになれば、従来の調理方法を継続して使用できます。.
熱風循環はエアフライヤーの性能にどのような影響を与えますか?
熱風循環は調理の均一性とカリッとした仕上がりを保証します。故障した加熱要素は気流を乱し、食感の悪化と不安定な調理結果を招きます。.
交換後もエアフライヤーが動作しない場合はどうすればよいですか?
全ての配線接続を確認し、設置手順を見直してください。問題が解決しない場合は、メーカーサポートに連絡するか、専門修理による詳細な診断を検討してください。.
加熱要素を交換せずに清掃することはできますか?
加熱要素の軽微な汚れは清掃可能です。ひび割れ、変色、または継続的な問題がある場合は、交換が最も安全な選択肢となります。.

