
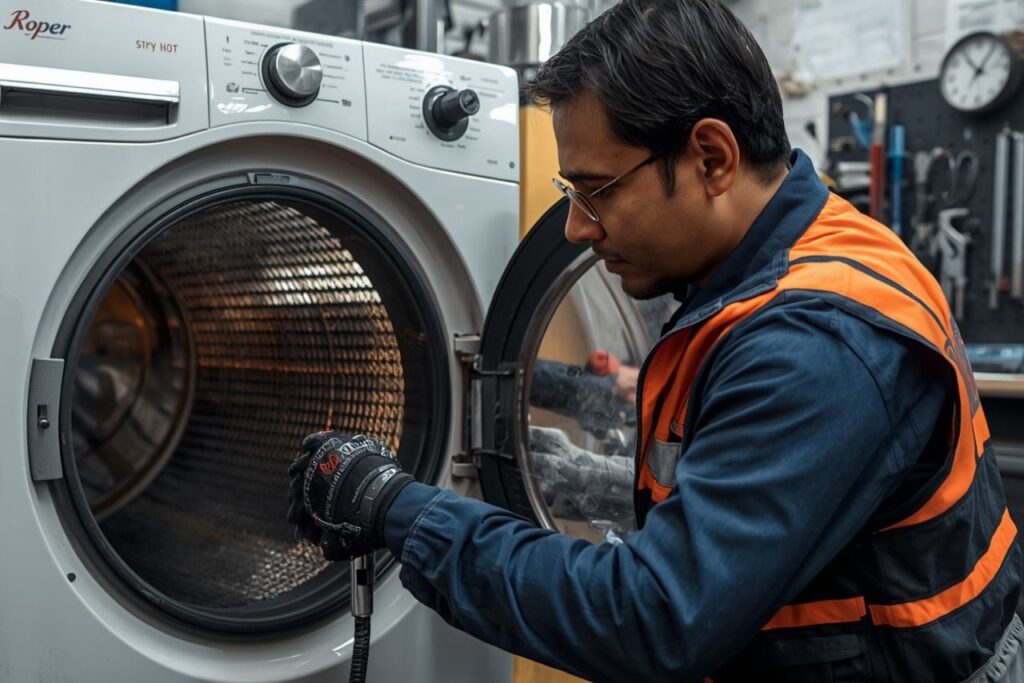
Safely testing a Roper dryer heating element is a structured process: confirm the dryer is an electric model, isolate power, access the heater housing, visually inspect for damage and airflow restrictions, then use a multimeter to check **continuity** and **resistance** across the element terminals while the unit is de-energized. If results are abnormal, the next step is verifying wiring and safety devices rather than “powering through” the fault. This approach treats the heating element as an engineered **assembly** (conductive alloy plus insulation/support and terminals) and prioritizes electrical safety, correct specification matching, and reliable heat performance.
Related links: Heating Element, Heating Element manufacturer, Heating Element Factory, Die Casting Heating Solutions.
- Identify the correct dryer type and heater style
- Safety setup (non-negotiable)
- Accessing the heating element area
- Visual and airflow inspection before meter tests
- Multimeter tests: continuity and resistance
- How to interpret results and what to test next
- Tables & charts (failure modes, decision matrix, spec discipline)
- FAQ (6 questions)
- References and outbound links
Identify the correct dryer type and heater style
Roper dryers exist as electric and gas variants. Heating-element testing applies to electric dryers; gas units use ignition and burner components. For electric dryers, the heater is typically a sheathed or open-coil element mounted inside a heater box/duct where airflow passes over it.
Why heater construction matters during testing
Engineering guidance describes a heating element as more than the resistive wire alone: it is a component assembly that includes a framework of insulating material and lead connectors. In practical troubleshooting, this means failures may occur at terminals, insulators, or supports—not only in the heating alloy.
Section summary
Confirm electric dryer type and treat the heater as an **assembly**, not just a “coil.”
Safety setup (non-negotiable)
Testing should be performed with the dryer fully de-energized. The safest baseline method is resistance/continuity testing using a multimeter with the power disconnected. Any live-voltage checks should be reserved for trained personnel and performed only with covers installed where required.
Critical safety reminders
- Disconnect power before removing panels.
- Do not energize the dryer with loose wiring, exposed terminals, or missing safety covers.
- Do not bypass thermal protection devices to “force heat.”
- Allow components to cool before handling (heater housings can retain heat).
Section summary
De-energized multimeter testing is the safest default; live testing is not required for basic element checks.
Accessing the heating element area
Access varies by Roper model and may be through the rear panel, lower front panel, or a dedicated heater cover. Regardless of access point, the best practice is to document wiring before disconnecting.
Access best practices
- Move the dryer to create safe rear/side access and avoid crushing the vent.
- Remove the appropriate panel to reach the heater housing.
- Take clear photos of wire positions at the heating element and nearby thermostats/thermal cutoffs.
Section summary
Correct access work is controlled and documented to prevent miswiring and rework.
Visual and airflow inspection before meter tests
Before the meter comes out, a visual inspection often reveals the root cause: burned terminals, broken coils, or severe lint accumulation. Heating elements are sensitive to their operating **environment**—in dryers, the practical environmental threats are lint, restricted airflow, and heat-damaged connectors.
What to inspect
- Element coil/sheath: breaks, hotspots, sagging, contact with metal housing.
- Insulators/supports: cracked ceramics, displaced supports, debris.
- Terminals: discoloration, looseness, melted spade connectors.
- Heater duct: lint buildup, blocked inlets/outlets.
- Vent path: crushed/kinked hose, clogged exterior hood.
LSI/semantic concepts used in this section
**electrical insulation**, **resistance wire**, **magnesium oxide (MgO)** (commonly used in embedded/sheathed heater constructions), **thermal cutoff**, **high-limit thermostat**, **airflow restriction**, **watt density** (as a driver of operating temperature and life).
Section summary
Visual inspection and airflow checks frequently identify the cause of heating failures before electrical testing begins.
Multimeter tests: continuity and resistance
The core safety advantage of ohms testing is that it does not require energizing the heater. A multimeter can confirm whether the heating element’s conductive path is intact and whether a short-to-chassis condition is likely.
Step-by-step: continuity / resistance across heater terminals
- Confirm the dryer is unplugged (or breaker is open).
- Disconnect at least one heater wire from the element terminal to avoid backfeeding through the circuit.
- Set the multimeter to resistance (Ω). If the meter is manual ranging, select a low-to-mid ohms range first.
- Touch one probe to each heater terminal.
- Record the resistance reading.
Step-by-step: check for short to chassis (ground fault screening)
- Keep the element wire(s) disconnected.
- Place one probe on a heater terminal and the other on bare metal chassis/ground.
- Repeat for the other terminal.
- Any measurable continuity to chassis indicates an unsafe condition requiring correction before power is restored.
Avoid “quick live tests” as a substitute for meter checks
Manufacturer service workflows in other heater contexts stress sequencing and reassembly (tight connections, covers secured) and warn against energizing under unsafe conditions. The analogous dryer rule is: do not energize the heater circuit with missing covers, loose terminals, or severe airflow restriction.
Section summary
Ohms testing verifies the heater’s conductive path and screens for chassis shorts without energizing the appliance.
How to interpret results and what to test next
Meter readings must be interpreted in context. Heating elements vary by design, but two patterns are consistent: an “open” element will not heat, and a short-to-chassis condition is unsafe and can trip breakers.
What “good” typically looks like
A functioning element normally shows a finite resistance value (not infinite/open). The exact ohms depends on the element wattage and voltage design. For additional discipline, it is appropriate to verify the correct replacement element by checking equipment rating data (voltage/wattage) rather than assuming “close enough.”
Next tests if the element appears OK
- Thermal fuse / thermal cutoff: continuity test.
- High-limit thermostat: continuity test at room temperature (model dependent).
- Cycling thermostat: verify switching behavior (advanced).
- Connectors: inspect for heat damage and tightness.
- Airflow: verify venting and blower path cleanliness.
Section summary
If the element passes, troubleshooting proceeds to thermal protection, wiring integrity, and airflow—common root causes of “no heat.”
Tables & charts (failure modes, decision matrix, spec discipline)
Table 1: Test results decision matrix
| Test | Result | Meaning | Action |
|---|---|---|---|
| Terminal-to-terminal resistance | Open / OL / infinite | Heating path broken | Replace heating element; also inspect airflow restriction and terminals to prevent repeat failures |
| Terminal-to-terminal resistance | Finite resistance | Element likely intact | Test thermal fuse/high-limit thermostat and inspect connectors/airflow |
| Terminal-to-chassis | Continuity / low resistance | Short-to-ground risk | Stop; correct insulation/clearance or replace element before energizing |
| Terminal-to-chassis | Open / no continuity | No obvious ground fault | Proceed to remaining diagnostics |
Table 2: Common failure modes and prevention
| Observed issue | Likely cause | Prevention strategy |
|---|---|---|
| Element open (no continuity) | Normal end-of-life oxidation/thermal cycling, localized overheating from poor airflow | Restore airflow; clean lint paths; ensure proper installation and stable supports |
| Repeated element failures | Airflow restriction raising operating temperature and effective watt density | Vent cleaning, blower housing cleanup, verify duct integrity |
| Burnt connectors | Loose spade fit creating resistive heating at the terminal | Replace terminals; ensure tight fit and correct crimping |
| Breaker trips | Short-to-chassis, damaged insulation, wiring fault | Inspect element clearance/insulators; repair wiring before energizing |
Table 3: Specification discipline (contextual example)
Product listings often emphasize fields such as power (W), materials, approvals, and ingress protection. While not dryer-specific, this reinforces the habit of verifying key specifications and not substituting a “similar-looking” part.
| Spec field | Why it is listed | How it applies to dryer element work |
|---|---|---|
| Power (W) | Defines designed heat output | Incorrect wattage can change heating performance and cycling behavior |
| Materials | Signals durability and insulation strategy | Terminals, supports, and insulation quality affect longevity |
| Approvals / compliance | Safety expectations for the market | Use reputable parts and correct replacements for safety and reliability |
Section summary
A decision matrix reduces guesswork; prevention focuses on airflow, connectors, and correct-spec parts.
FAQ
1) Can the heating element be tested without removing it?
Often yes, if the terminals are accessible. However, at least one wire should be disconnected from the element to avoid measuring through other circuit paths.
2) What is the safest first test for “no heat” on an electric Roper dryer?
The safest first test is a de-energized multimeter check for **continuity** across the element and the thermal fuse/thermal cutoff.
3) If the element has continuity, does that guarantee the dryer will heat?
No. The heater may be intact while a thermal cutoff, thermostat, wiring connection, or airflow-related high-limit cycling prevents heat from reaching stable operation.
4) Why does airflow matter when testing a heating element?
Airflow is the element’s practical cooling and heat-transfer mechanism. Restricted airflow can cause overheating, open thermal devices, and shorten element life.
5) Should a replacement element’s voltage and wattage be verified?
Yes. Service guidance in other heater applications explicitly calls for verifying voltage and wattage using the equipment data plate. The same discipline improves safety and reduces misapplication risk in dryer repairs.
6) Is it acceptable to energize the dryer with covers removed “just briefly”?
It is not recommended. Covers and insulation pieces help control airflow and reduce shock/fire risk. Testing should be done with proper reassembly unless a manufacturer procedure explicitly states otherwise.
Conclusion
Safe testing of a Roper dryer heating element prioritizes de-energized diagnostics: confirm the dryer type, document wiring, remove lint restrictions, and use a multimeter to check for terminal-to-terminal continuity/resistance and terminal-to-chassis shorts. Interpreting results through a decision matrix helps avoid unsafe “trial-and-error” energizing and points efficiently to the next likely culprits—thermal protection devices, connectors, and airflow. Treating the heater as a designed **assembly** and verifying correct specifications are the most reliable practices for preventing repeat failures.
References and outbound links
Heating element engineering concepts (assemblies, alloys, supported/suspended/embedded frameworks, environment/contaminants, watt density, longevity):
https://tutco.com/conductive/heating-elements
Service sequencing principles used as safety-method parallels (verify correct replacement by voltage/wattage; tighten connections; reinstall covers; avoid energizing under unsafe conditions):
https://www.whirlpoolwaterheaters.com/support/help/element-was-out-of-range/24
Product-family context for heating element technologies (tubes/plates/films and integrated thermal modules):
https://jinzho.com/
https://jinzho.com/product-category/heating-element/
https://jinzho.com/product-category/heating-element/heating-tubes/
https://jinzho.com/product-category/heating-element/heating-plate/
https://jinzho.com/product-category/heating-element/heating-film/
https://jinzho.com/product-category/die-casting-heating-solutions/
https://jinzho.com/product-category/electric-heater-parts/electric-boiler-heater/
Example spec listing used to reinforce “verify key fields” discipline (power, materials, approvals, IP rating, warranty):
https://usa.hudsonreed.com/1000-plug-in-watt-electric-heating-element-76309
Disclosure: This article is educational and model-agnostic. Panel access, wiring layouts, and safety-device configurations vary by Roper dryer model. Model-specific service documentation should be followed where available.

