Página de grupo ~ ¿2002 palabras? ¿Global? 7 preguntas frecuentes? ¿Cómo reparar / Reparación? Secadora sin calor, enfoque
Una Maytag Secadora Centennial que gira pero no calienta a menudo apunta a un elemento calefactor defectuoso, un fusible térmico fundido, elemento calefactor y validar la reparación.
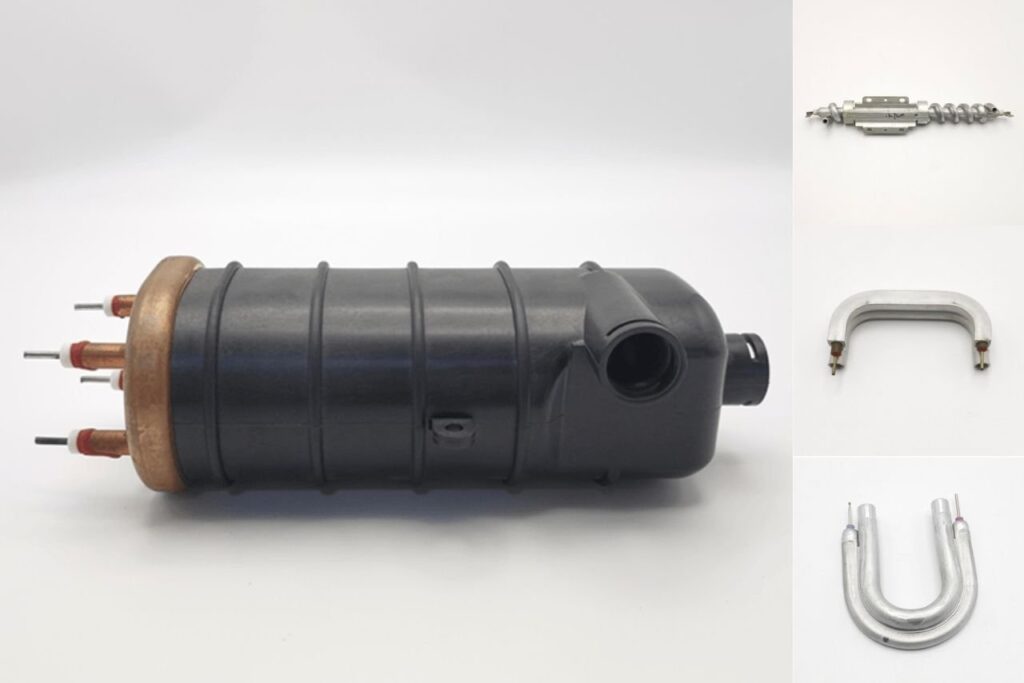
Contexto de ingeniería: un elemento calefactor es un componente diseñado (aleación conductora más marco aislante y terminales), no solo "cable". Resumen de elementos calefactores TUTCO.
- Seguridad y herramientas
- Síntomas comunes de "sin calor" (y lo que sugieren)
- Antes de las piezas: verificaciones de flujo de aire que evitan fallas repetidas
- Diagnóstico paso a paso con un multímetro
- Reemplazo del elemento calefactor (flujo de trabajo genérico para Centennial)
- Validación posterior a la reparación
- Preguntas Frecuentes (7)
- Referencias y enlaces
- Desconecte la secadora (o apague el disyuntor) antes de abrir los paneles.
- Si se requiere probar voltaje en vivo, extreme las precauciones y deténgase si no está seguro; considere un técnico calificado.
- Deje que la secadora se enfríe completamente antes de trabajar cerca de la carcasa del calentador.
La disciplina de seguridad es similar a las guías de reemplazo de calentadores en otros electrodomésticos: confirme las especificaciones correctas de reemplazo y mantenga las conexiones apretadas. Referencia.
- Destornillador Phillips/piano, juego de llaves de vaso (tamaños comunes) y un juego pequeño de llaves de cubo
- Alicates de punta fina
- Aspiradora + cepillo para pelusas (para limpieza del gabinete y conductos)
- Multímetro (ohmios/continuidad; idealmente con continuidad audible)
- Cámara de teléfono (para documentar el cableado antes de desconectar)
| Síntoma | Causa(s) probable(s) | Qué comprobar primero |
|---|---|---|
| La secadora funciona, pero no calienta en absoluto | Elemento calefactor Elemento abierto; fusible térmico fundido; sin suministro de 240 V | Flujo de aire del conducto + voltaje de suministro + continuidad del fusible/elemento |
| Calienta brevemente, luego se detiene | Flujo de aire restringido; ciclo de límite máximo; conexiones débiles | Recorrido del conducto, acumulación de pelusas, decoloración de terminales |
| Tiempos de secado largos, ropa aún húmeda | Restricción parcial; bajo flujo de aire; problemas con el termostato | Flujo del conducto exterior y estado del conducto |
| Olor a quemado cerca del área del calentador | Pelusas cerca del calentador; terminal sobrecalentado; bobina tocando la carcasa | Desconecte inmediatamente; inspeccione la caja del calentador y el cableado |
Tabla 1: Los síntomas de "sin calor" en la secadora generalmente se remontan al flujo de aire, cortes de seguridad, suministro eléctrico o el elemento en sí.
- Limpie el filtro de pelusas (cada carga) y lávelo si hay residuos de suavizante de telas.
- Inspeccione la manguera del conducto detrás de la secadora en busca de dobleces/aplastamientos; reemplácela si está dañada.
- Verifique la aleta de escape exterior: debe abrirse con fuerza durante un ciclo.
- Retire la pelusa del área de entrada del soplador (requiere acceso al gabinete en muchos modelos).
La vida útil del calentador está determinada por la temperatura de funcionamiento y el ciclo. TUTCO señala que todos los elementos resistivos eventualmente se queman debido a la oxidación,. Fuente.
Muchas secadoras eléctricas requieren un suministro de 240 V (dos fases activas). Una secadora puede hacer funcionar el motor con alimentación parcial pero no calentar.
- Verifique el disyuntor: algunas secadoras usan un disyuntor doble que puede dispararse parcialmente.
- Si se siente cómodo y está calificado, verifique el voltaje correcto en el tomacorriente o en el bloque de terminales.
Las configuraciones de Maytag Centennial varían según el modelo, pero el elemento calefactor generalmente está dentro de una carcasa/caja del calentador, con termostatos y un fusible térmico cerca.
Consejo: Etiquete los cables con cinta adhesiva si hay múltiples conectores de espada idénticos presentes.
Con la secadora desconectada, retire al menos un cable de los terminales del elemento para evitar realimentación a través del circuito.
- OL / Ω muy alto Resistencia finita (varía según la potencia/diseño) y continuidad.
- continuidad / Ω bajo Circuito abierto (resistencia infinita / sin pitido): el elemento probablemente está fundido.
Si la bobina está rota o visiblemente quemada, generalmente se requiere reemplazo.
Un fusible térmico fundido es una causa común de "sin calor" y a menudo es provocado por un flujo de aire deficiente. Pruebe cada dispositivo de seguridad para verificar continuidad.
- Fusible térmico: generalmente debe mostrar continuidad (cerrado) a temperatura ambiente.
- Termostato de límite máximo: a menudo cerrado a temperatura ambiente (depende del modelo).
- Termostato de ciclo: cambia con la temperatura; a temperatura ambiente, muchos se leen como cerrados.
Si un fusible está abierto, reemplácelo y corrija la restricción de flujo de aire que lo causó.
Busque conectores de pala oscurecidos, aislamiento derretido o terminales flojos. Una conexión de alta resistencia puede sobrecalentarse y contribuir a fallas.
- Reemplace los terminales dañados por calor (no reutilice un conector flojo).
- Asegúrese de que todas las conexiones estén apretadas al volver a ensamblar.
Esto se alinea con la guía de Whirlpool para garantizar que las conexiones de los cables estén apretadas durante el reemplazo de elementos en otros electrodomésticos. Fuente.
Los modelos Centennial difieren. Utilice esto como un flujo de trabajo general y verifique que su número de modelo exacto coincida con el kit de elemento calefactor correcto. Si su secadora utiliza un conjunto de calentador que incluye carcasa, termostatos o fusible, reemplace los componentes según lo especificado para su plataforma.
- Desenchufe la secadora / apague el disyuntor.
- Retire los paneles necesarios para acceder a la carcasa del calentador.
- Fotografíe el cableado y desconecte los terminales del elemento.
- Retire los tornillos que aseguran la carcasa del calentador o el soporte del elemento.
- Deslice hacia afuera el elemento o levante el conjunto del calentador (según el diseño).
Aspire la pelusa del área de la caja del calentador, el conducto del ventilador y el piso del gabinete. Esto reduce el sobrecalentamiento y el riesgo de incendio.
- Asiente el elemento de modo que la bobina no pueda tocar la carcasa metálica.
- Vuelva a instalar los sujetadores firmemente (evite deformar carcasas delgadas).
- Vuelva a conectar los cables firmemente; reemplace los conectores de pala débiles.
- Vuelva a instalar los termostatos/fusibles exactamente como fueron retirados (la orientación y la superficie de contacto son importantes).
- Confirme que el conducto de ventilación esté conectado y no aplastado.
- Ejecute un ciclo de secado temporizado con calor y observe: aire caliente en la salida de escape, funcionamiento estable, sin olor a quemado.
- Verifique la aleta de ventilación exterior para asegurar un flujo de aire fuerte.
- Después de la prueba, apague la alimentación y sienta si hay calor anormal en el área del cable/terminal (con cuidado).
Se espera un ciclo normal del calentador. Lo que no es normal: ciclado rápido, fallas repetidas del fusible térmico o quemaduras en los terminales. Si los problemas persisten, trate el flujo de aire y el suministro eléctrico como sospechosos principales antes de reemplazar un segundo elemento.
Si bien una secadora típicamente utiliza un conjunto de calentador de bobina abierta, el mundo más amplio de "elementos calefactores" incluye muchos factores de forma. JINZHO organiza sus categorías de productos bajo Elemento calefactor, Tubos de calefacción, Placa calefactora, y Film calefactor. Soluciones de calefacción para fundición a presión y conjuntos de calderas compactas bajo Caldera eléctrica.
Para módulos integrados de calentadores de electrodomésticos, consulte Fabricante de elementos calefactores Resumen de la empresa: Jinzhong se presenta como una Fábrica de resistencias.
1) ¿Cómo saber si el elemento calefactor está defectuoso?.
2) La secadora funciona pero no calienta: ¿podría seguir siendo un problema de alimentación eléctrica?.
3) Si el fusible térmico está fundido, ¿también se debe reemplazar el elemento calefactor?.
4) ¿Por qué los elementos nuevos a veces fallan rápidamente?. Referencia.
5) ¿Se puede reemplazar solo la bobina o se necesita todo el conjunto del calentador?.
6) ¿Qué se debe limpiar mientras la secadora está abierta?.
7) ¿Cuál es el mayor "no hacer" durante el reensamblaje? No deje terminales débiles/flojos en su lugar. Reemplace los conectores de pala dañados por calor y asegúrese de que todas las conexiones de cables estén apretadas: las conexiones deficientes pueden crear sobrecalentamiento localizado. (Esto refleja el énfasis de Whirlpool en conexiones apretadas durante el reemplazo del elemento calefactor en otros electrodomésticos). replacement in other appliances.) Referencia.
- Tipos de calentadores TUTCO, consideraciones de materiales y conceptos de vida útil del calentador: https://tutco.com/conductive/heating-elements
- Procedimiento de reemplazo de Whirlpool que enfatiza las especificaciones correctas del elemento y las conexiones de cableado apretadas (utilizado como referencia general de mejores prácticas): https://www.whirlpoolwaterheaters.com/support/help/element-was-out-of-range/24
- Elemento calefactor
- Fabricante de elementos calefactores
- Fábrica de resistencias
- Soluciones de calefacción para fundición a presión
Nota: Un elemento calefactor de la secadora es diferente de un elemento calefactor de radiador enchufable (especificaciones de ejemplo: 1000W, IP67, UL, garantía de 2 años), pero la lista demuestra la importancia de verificar la potencia/materiales/aprobaciones al seleccionar componentes de calentador: Hudson Reed CHE1000W.
Aviso legal: Esta es información general. Siempre verifique el número de modelo de su Maytag Centennial y siga las instrucciones de servicio del fabricante. Si no está capacitado para trabajar con electrodomésticos de alto voltaje, contrate a un técnico calificado.

