
Sie können den Deckel Ihres PowerXL-Heißluftfrittierers mit einfachen Werkzeugen zu Hause austauschen. Der Heizelement aus Jinzhong Elektroheizung bietet zuverlässige Leistung für Heizelemente für Haushaltsgeräte. Unternehmen geschätzt wird. Viele Hersteller von Heizelementen konstruierte Teile für eine einfache Montage. Sie benötigen nur wenige Schritte, um Ihr Gerät wiederherzustellen und sicheres Kochen zu gewährleisten.
Kurzcheckliste: Was Sie für den Austausch des PowerXL-Heißluftfrittierer-Deckels benötigen
Bevor Sie mit dem Austausch des Deckels beginnen, sollten Sie alle erforderlichen Werkzeuge und Teile bereitlegen. Die Vorbereitung hilft Ihnen, Verzögerungen zu vermeiden und sorgt für einen reibungslosen Reparaturvorgang an Ihrem PowerXL-Heißluftfrittierer.
Wichtige Werkzeuge
Sie benötigen die folgenden Werkzeuge für einen sicheren und effizienten Deckelaustausch:
- Kreuzschlitzschraubendreher
Verwenden Sie dies, um Schrauben am Deckel und am Heizelement zu lösen und zu befestigen. - Spitzzange
Diese helfen Ihnen, kleine Teile zu greifen und enge Stellen zu erreichen. - Schutzhandschuhe
Schützen Sie Ihre Hände vor scharfen Kanten und heißen Oberflächen.
Tipp: Das Tragen von Handschuhen verringert das Risiko versehentlicher Schnitte oder Verbrennungen während der Reparatur.
Ersatzteile
Stellen Sie sicher, dass Sie die korrekten Ersatzteile für Ihr Modell haben:
- Neuer Deckel für PowerXL MFC-AF-6, eine Heizelementabdeckung oder einen neuen Deckel benötigen.
Bestätigen Sie vor dem Kauf die Kompatibilität mit Ihrem Heißluftfrittierer. - Ersatzschrauben (falls erforderlich)
Einige Schrauben können beim Entfernen verloren gehen oder beschädigt werden. - Heizelementabdeckung (falls Ihr Modell eine enthält)
Überprüfen Sie die Bedienungsanleitung Ihres Heißluftfrittierers, ob dieses Teil erforderlich ist.
| Teilename | Zweck | Anmerkungen |
|---|---|---|
| Neuer Deckel | Ersetzt beschädigten oder abgenutzten Deckel | Modellspezifisch |
| Ersatzschrauben | Befestigen Deckel und Komponenten | Optional, falls erforderlich |
| Heizelementabdeckung | Schützt das Heizelement | Nur für bestimmte Modelle |
Vorbereitungsschritte
Sie sollten Ihren Arbeitsplatz und das Gerät vorbereiten, bevor Sie beginnen:
- Arbeitsplatz reinigen und freiräumen
Entfernen Sie Unordnung, um den Verlust kleiner Teile zu vermeiden. - Heißluftfrittierer ausstecken
Vom Stromnetz trennen, um die Sicherheit zu gewährleisten.
Anmerkung: Stecken Sie Ihren PowerXL-Heißluftfrittierer vor Beginn jeglicher Reparatur immer aus, um elektrische Gefahren zu vermeiden.
Schritt-für-Schritt-Anleitung zum Austausch des PowerXL-Heißluftfrittierer-Deckels
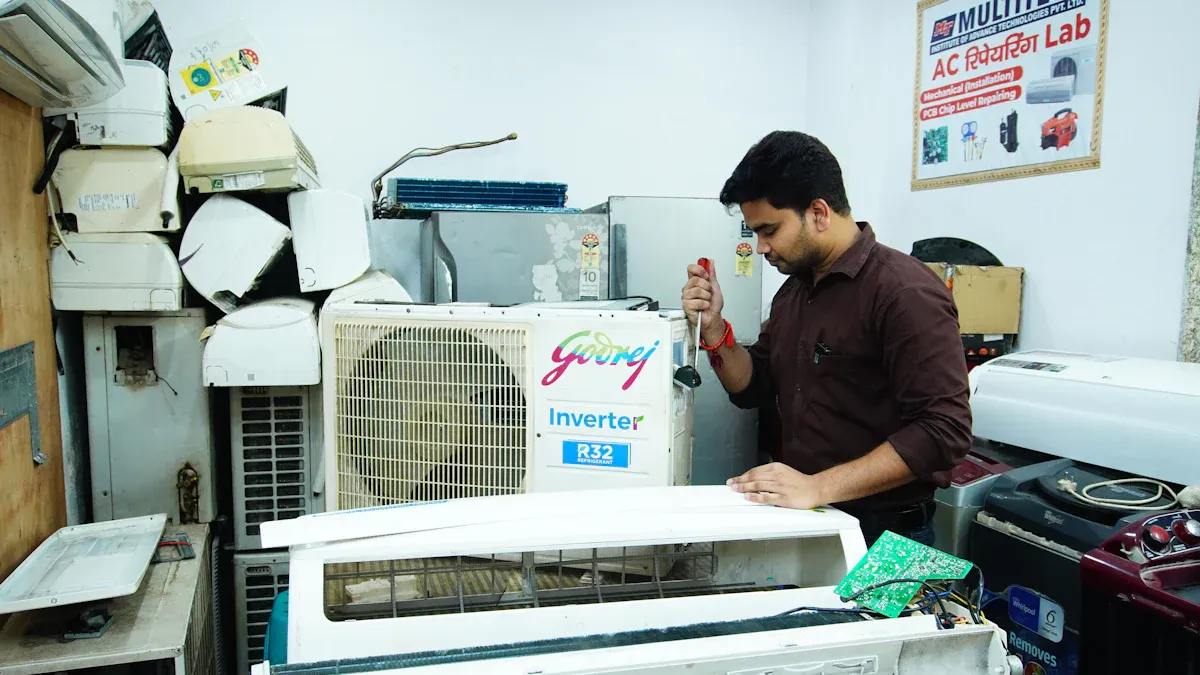
Der Austausch des Deckels an Ihrem PowerXL-Heißluftfrittierer erfordert keine fortgeschrittenen technischen Fähigkeiten. Sie können den Vorgang mit Geduld und Liebe zum Detail abschließen. Befolgen Sie jeden Schritt sorgfältig, um eine sichere und erfolgreiche Reparatur zu gewährleisten.
Erste Schritte
Ausstecken und den Heißluftfrittierer vollständig abkühlen lassen
Sie sollten immer damit beginnen, Ihren PowerXL-Heißluftfrittierer auszustecken. Warten Sie, bis das Gerät abgekühlt ist, bevor Sie Komponenten berühren. Heiße Oberflächen können Verbrennungen verursachen, daher steht die Sicherheit an erster Stelle.
Tipp: Wenn Sie Ihren Heißluftfrittierer kürzlich benutzt haben, lassen Sie ihn mindestens 30 Minuten abkühlen. Berühren Sie die Außenseite, um zu bestätigen, dass sie sicher zu handhaben ist.
Korb und Zubehör entfernen
Öffnen Sie den Deckel und nehmen Sie den Korb heraus. Entfernen Sie alle Einsätze oder Roste im Garraum. Legen Sie diese Teile in einem sauberen Bereich beiseite. Dieser Schritt gibt Ihnen freien Zugang zum Deckel und Heizelement.
Entfernen des alten Deckels
Oberen Deckel abnehmen (keine Clips erforderlich)
Heben Sie den oberen Deckel vorsichtig an. Die meisten PowerXL-Heißluftfrittierer-Modelle verwenden keine Clips, sodass Sie den Deckel ohne Werkzeug entfernen können. Legen Sie den Deckel auf eine weiche Oberfläche, um Kratzer zu vermeiden.
Schrauben finden und entfernen, die den Deckel sichern
Finden Sie die Schrauben, die den Deckel halten. Verwenden Sie einen Kreuzschlitzschraubendreher, um jede Schraube zu lösen und zu entfernen. Bewahren Sie die Schrauben in einem kleinen Behälter oder einer magnetischen Ablage auf. Verlorene Schrauben können Ihre Reparatur verzögern.
| Schritt | Benötigtes Werkzeug | Aktion |
|---|---|---|
| Schrauben lokalisieren | Kreuzschlitzschraubendreher | Alle Deckelschrauben identifizieren |
| Schrauben entfernen | Kreuzschlitzschraubendreher | Herausschrauben und sicher aufbewahren |
Die rote Klemme vom Heizelement abschrauben
Suchen Sie die rote Klemme, die am Heizelement befestigt ist. Verwenden Sie eine Spitzzange, um sie abzuschrauben. Gehen Sie vorsichtig mit der Klemme um, um eine Beschädigung der Drähte zu vermeiden.
Heizelementhalterung bei Bedarf entfernen
Einige Modelle enthalten eine Heizelementhalterung. Wenn Ihr PowerXL-Heißluftfrittierer dieses Teil hat, entfernen Sie es, indem Sie die Schrauben lösen. Legen Sie die Halterung mit den anderen Komponenten beiseite.
Alten Deckel vorsichtig abheben
Halten Sie den Deckel mit beiden Händen. Heben Sie ihn gerade nach oben und vom Heißluftfrittierer-Körper weg. Vermeiden Sie Gewaltanwendung, da dies das Heizelement oder andere innere Teile beschädigen kann.
Einbau des neuen Deckels
Neuen Deckel mit dem Heißluftfrittierer-Körper ausrichten
Nehmen Sie den neuen Deckel und positionieren Sie ihn über der Öffnung. Stellen Sie sicher, dass die Kanten mit dem Körper Ihres PowerXL-Heißluftfrittierers ausgerichtet sind. Die korrekte Ausrichtung gewährleistet einen sicheren Sitz und optimale Leistung.
Anmerkung: Wenn der Deckel nicht bündig sitzt, überprüfen Sie auf zurückgebliebene Rückstände oder falsch ausgerichtete Teile.
Deckel mit Schrauben sichern
Setzen Sie die zuvor entfernten Schrauben ein. Ziehen Sie jede Schraube mit dem Kreuzschlitzschraubendreher fest. Ziehen Sie nicht zu fest an, da dies die Gewinde beschädigen oder den Deckel reißen lassen kann.
Heizelementhalterung und rote Klemme wieder anbringen
Wenn Sie die Heizelementhalterung entfernt haben, setzen Sie sie wieder in ihre ursprüngliche Position ein. Befestigen Sie sie mit Schrauben. Schließen Sie die rote Klemme mit einer Spitzzange wieder am Heizelement an. Bestätigen Sie, dass alle Verbindungen fest und stabil sind.
Alarm: Lose Verbindungen können die Heizleistung beeinträchtigen. Überprüfen Sie jede Klemme und jede Schraube doppelt, bevor Sie zum nächsten Schritt übergehen.
Sie haben nun die wichtigsten Schritte zum Austausch des Deckels Ihrer PowerXL Heißluftfritteuse abgeschlossen. Bringen Sie alle zuvor entfernten Abdeckungen, Körbe oder Zubehörteile wieder an. Testen Sie das Gerät, um den ordnungsgemäßen Betrieb zu bestätigen.
Wiederanbringen der Komponenten
Bringen Sie die Heizelementabdeckung wieder an (falls entfernt)
Sie sollten prüfen, ob Ihr Modell über eine Heizelementabdeckung verfügt. Wenn Sie dieses Teil zuvor entfernt haben, ist jetzt der Zeitpunkt, es wieder anzubringen. Halten Sie die Abdeckung mit beiden Händen und richten Sie sie an den Befestigungspunkten über dem Heizelement aus. Führen Sie jede Schraube in die dafür vorgesehene Bohrung ein. Ziehen Sie die Schrauben mit Ihrem Kreuzschlitzschraubendreher fest. Achten Sie darauf, nicht zu fest anzuziehen, da dies die Abdeckung beschädigen oder das Gewinde überdrehen kann.
Tipp: Setzen Sie jede Schraube an ihrer ursprünglichen Position ein. Diese Vorgehensweise gewährleistet einen sicheren Sitz und vermeidet unnötige Spannungen am Kunststoffgehäuse.
Nachdem Sie die Abdeckung befestigt haben, überprüfen Sie den Bereich um das Heizelement. Achten Sie auf Lücken oder nicht bündige Kanten. Die Abdeckung sollte bündig am Innenraum anliegen. Ein korrekter Sitz schützt das Heizelement vor Speiseresten und gewährleistet einen sicheren Betrieb.
Setzen Sie den Korb und das Zubehör wieder ein
Sobald Sie mit den internen Komponenten fertig sind, können Sie mit dem Korb und dem Zubehör fortfahren. Schieben Sie den Korb zurück in den Garraum. Stellen Sie sicher, dass er reibungslos entlang der Führungen gleitet. Wenn Ihre PowerXL Heißluftfritteuse zusätzliche Einschübe oder Roste enthält, setzen Sie diese an den richtigen Positionen ein.
- Überprüfen Sie doppelt, dass jedes Zubehörteil flach aufliegt und den Deckel nicht am Schließen hindert.
- Ordnen Sie das Zubehör wie in Ihrem Benutzerhandbuch gezeigt an, um eine optimale Luftzirkulation zu gewährleisten.
Alarm: Üben Sie niemals Gewalt aus, um den Korb oder die Einschübe an ihren Platz zu bringen. Eine Fehlausrichtung kann die Führungen beschädigen oder verhindern, dass der Deckel richtig abdichtet.
Sie haben nun die Hauptkomponenten Ihrer Heißluftfritteuse wiederhergestellt. Nehmen Sie sich einen Moment Zeit, um die Außen- und Innenflächen mit einem weichen, trockenen Tuch abzuwischen. Dieser Schritt entfernt Fingerabdrücke und Staub und verleiht Ihrem Gerät ein sauberes Finish, bevor Sie seine Leistung testen.
Häufige Fehler und wie man sie bei Reparaturen an der PowerXL Heißluftfritteuse vermeidet
Bei Reparaturen können Fehler passieren, aber die meisten Probleme lassen sich durch sorgfältige Aufmerksamkeit vermeiden. Das Verständnis häufiger Fehler hilft Ihnen, die Sicherheit zu wahren und Ihr Gerät effizient wiederherzustellen.
Sicherheitsmaßnahmen überspringen
Vergessen, die Heißluftfritteuse vom Stromnetz zu trennen
Sie müssen Ihr Gerät vor Beginn einer Reparatur immer von der Stromquelle trennen. Wenn Sie die PowerXL Heißluftfritteuse eingesteckt lassen, riskieren Sie einen Stromschlag oder Kurzschluss. Dieser einfache Schritt schützt Sie und Ihr Zuhause.
Das Gerät nicht abkühlen lassen
Heiße Oberflächen können Verbrennungen verursachen. Sie sollten die Heißluftfritteuse vollständig abkühlen lassen, bevor Sie innere Teile berühren. Wenn Sie diesen Prozess überstürzen, erhöht sich die Verletzungsgefahr.
Sicherheitsorganisationen haben ernsthafte Risiken dokumentiert, die mit Überhitzung und fehlenden Sicherheitsmechanismen bei Heißluftfritteusen verbunden sind.
Die vier untersuchten Modelle – der Power AirFryer 360, 360 XL, Deluxe und Plus – sollen ein fehlerhaftes Design aufweisen, das dazu führt, dass die Geräte überhitzen und Temperaturen erreichen, die hunderte Grad über dem liegen, was für Heißluftfritteusen als sicher gilt. Das Fehlen eines funktionierenden Sicherheitsmechanismus, der das Gerät bei Überhitzung abschaltet, erhöht die Brandgefahr weiter. Diese Mängel machen die Produkte für ihren vorgesehenen Zweck, Lebensmittel zuverlässig und sicher zu garen, ungeeignet.
Falsche Installation
Falsche Ausrichtung des neuen Deckels
Die korrekte Ausrichtung gewährleistet eine dichte Abdichtung und einen ordnungsgemäßen Betrieb. Wenn Sie den Deckel falsch ausrichten, bemerken Sie möglicherweise eine schlechte Erhitzung oder Luftzirkulation. Überprüfen Sie immer, ob die Kanten mit dem Gehäuse übereinstimmen, bevor Sie die Schrauben festziehen.
Zu festes oder zu lockeres Anziehen der Schrauben
Schrauben halten den Deckel und die Komponenten an Ort und Stelle. Wenn Sie zu fest anziehen, riskieren Sie, das Kunststoffgehäuse zu beschädigen oder das Gewinde zu überdrehen. Wenn Sie zu locker anziehen, kann sich der Deckel während des Gebrauchs lose anfühlen oder klappern. Verwenden Sie beim Festziehen einen sanften, aber festen Griff.
| Fehler | Folge | Lösung |
|---|---|---|
| Falsch ausgerichteter Deckel | Schlechte Abdichtung, ungleichmäßige Erhitzung | Kanten vor dem Befestigen ausrichten |
| Zu fest angezogene Schrauben | Beschädigter Deckel, überdrehte Löcher | Schrauben sanft anziehen |
| Zu locker angezogene Schrauben | Loser Deckel, Klappern | Auf festen Sitz prüfen |
Verlust von Kleinteilen
Nicht den Überblick über Schrauben und Komponenten behalten
Kleinteile wie Schrauben und Anschlüsse sind leicht zu verlegen. Der Verlust dieser Teile kann Ihre Reparatur verzögern oder Sie zwingen, Ersatz zu kaufen. Sie sollten ein magnetisches Tablett oder einen kleinen Behälter verwenden, um alle entfernten Teile aufzubewahren.
- Legen Sie jede Schraube an einen dafür vorgesehenen Platz.
- Zählen Sie Ihre Komponenten vor und nach der Reparatur.
- Überprüfen Sie den Arbeitsbereich doppelt auf herumliegende Teile.
Tipp: Das Organisieren Ihrer Teile reduziert Stress und beschleunigt den Zusammenbau.
Indem Sie diese Fehler vermeiden, verbessern Sie Ihre Reparaturerfahrung und verlängern die Lebensdauer Ihres Geräts. Sorgfältige Vorbereitung und Liebe zum Detail machen jeden Schritt sicherer und effektiver.
Sicherheitsüberprüfungen nach dem Austausch des Deckels der PowerXL Heißluftfritteuse

Nachdem Sie den Deckelaustausch abgeschlossen haben, sollten Sie immer eine Reihe von Sicherheitsüberprüfungen durchführen. Diese Schritte helfen Ihnen zu bestätigen, dass Ihre PowerXL Heißluftfritteuse korrekt und sicher funktioniert. Sorgfältige Inspektion und Tests können zukünftige Probleme verhindern und sicherstellen, dass Ihr Gerät die besten Ergebnisse liefert.
Visuelle Inspektion
Überprüfen Sie den Bereich um den Deckel auf Lücken oder lose Teile
Beginnen Sie mit der Untersuchung der Stelle, an der der neue Deckel auf das Gehäuse der Heißluftfritteuse trifft. Achten Sie genau auf sichtbare Lücken oder nicht bündige Kanten. Lücken können Wärme entweichen lassen oder zu ungleichmäßigem Garen führen. Fahren Sie mit den Fingern sanft entlang der Naht, um lose Stellen zu ertasten. Wenn Sie Bewegung oder Instabilität bemerken, müssen Sie möglicherweise den Deckel anpassen oder die Schrauben nachziehen.
Stellen Sie sicher, dass alle Schrauben und Anschlüsse fest sitzen
Überprüfen Sie jede Schraube und jeden Anschluss, den Sie während der Installation wieder befestigt haben. Verwenden Sie Ihren Schraubendreher, um zu prüfen, ob jede Schraube fest sitzt, aber nicht überdreht ist. Lose Schrauben können zu Klappern führen oder sogar dazu, dass sich der Deckel während des Gebrauchs löst. Untersuchen Sie den roten Anschluss und alle anderen elektrischen Verbindungen. Jeder Anschluss sollte fest an Ort und Stelle sitzen, ohne freiliegende Drähte.
Tipp: Ein sicherer Deckel und feste Verbindungen tragen dazu bei, eine gleichmäßige Erhitzung und Luftzirkulation aufrechtzuerhalten.
Leistungstest
Stecken Sie die Heißluftfritteuse ein und schalten Sie sie ein
Sobald Sie Ihre Sichtprüfung abgeschlossen haben, stecken Sie die Heißluftfritteuse wieder in eine zuverlässige Steckdose. Schalten Sie das Gerät ein und beobachten Sie das Bedienfeld auf normales Startverhalten. Das Display sollte aufleuchten und der Lüfter sollte zu laufen beginnen.
Achten Sie auf ungewöhnliche Geräusche oder Gerüche
Achten Sie genau darauf, während die Heißluftfritteuse hochfährt. Hören Sie auf seltsame Geräusche wie Klappern, Summen oder Klicken. Diese Geräusche können auf ein loses Teil oder eine falsch ausgerichtete Komponente hinweisen. Riechen Sie an der Luft um das Gerät. Wenn Sie Brandgerüche wahrnehmen oder Rauch sehen, schalten Sie die Heißluftfritteuse sofort aus und ziehen Sie den Netzstecker. Diese Anzeichen können auf elektrische Probleme oder unsachgemäßen Zusammenbau hindeuten.
- Häufiges Nutzerfeedback hebt hervor, dass die Höhe des Glasdeckels manchmal die Größe der Lebensmittel begrenzt, die Sie garen können. Beispielsweise mussten einige Benutzer größere Stücke, wie Schweinebraten, zuschneiden, damit sie unter den Deckel passen. Dies hat zwar keine Auswirkungen auf die Sicherheit, aber es ist wichtig zu überprüfen, dass der Deckel bündig aufliegt und nicht gegen Ihre Lebensmittel drückt.
Funktionstest
Führen Sie einen kurzen Garzyklus durch
Stellen Sie die Heißluftfritteuse auf eine niedrige Temperatur ein und führen Sie einen kurzen Garzyklus durch, z. B. fünf Minuten. Mit diesem Test können Sie das Gerät in Aktion beobachten, ohne zu riskieren, Lebensmittel zu verkochen oder zu beschädigen. Achten Sie auf einen reibungslosen Betrieb und hören Sie, ob der Lüfter mit gleichmäßiger Geschwindigkeit läuft.
Überprüfen Sie die ordnungsgemäße Erhitzung und Luftzirkulation
Öffnen Sie den Deckel nach dem Testzyklus vorsichtig. Fühlen Sie nach warmer Luft und prüfen Sie, ob das Heizelement wie erwartet funktioniert. Stellen Sie sicher, dass die Luftzirkulation stark und gleichmäßig ist. Wenn Sie Kältezonen oder schwache Luftzirkulation bemerken, überprüfen Sie die Ausrichtung des Deckels und alle Verbindungen erneut.
Die Durchführung dieser Sicherheitsüberprüfungen nach jeder Reparatur hilft Ihnen, Probleme frühzeitig zu erkennen und Ihre PowerXL Heißluftfritteuse effizient laufen zu lassen.
Fehlerbehebung bei Problemen mit dem Deckelaustausch der PowerXL Heißluftfritteuse
Wenn Sie nach dem Austausch des Deckels Ihrer Heißluftfritteuse auf Probleme stoßen, können Sie die meisten Probleme durch sorgfältige Fehlersuche beheben. Die Behebung dieser häufigen Herausforderungen stellt den sicheren und effizienten Betrieb Ihres Geräts sicher.
Deckel sitzt nicht richtig
Überprüfen Sie die Ausrichtung des Deckels
Wenn der neue Deckel nicht wie erwartet sitzt, überprüfen Sie zunächst seine Ausrichtung. Setzen Sie den Deckel direkt über die Öffnung und stellen Sie sicher, dass alle Kanten mit dem Gehäuse der Heißluftfritteuse übereinstimmen. Selbst eine leichte Fehlausrichtung kann verhindern, dass der Deckel abdichtet. Passen Sie die Position an, bis der Deckel bündig mit dem Gehäuse abschließt.
Untersuchen Sie den Bereich auf zurückgebliebene Rückstände oder Hindernisse
Manchmal können kleine Verpackungsteile, altes Dichtungsmaterial oder Speisereste das Schließen des Deckels blockieren. Überprüfen Sie den Rand und die Innenseite des Deckels auf Hindernisse. Entfernen Sie alles, was einen festen Sitz verhindert. Die Reinigung des Bereichs vor der Installation hilft, dieses Problem zu vermeiden.
Heißluftfritteuse schaltet sich nicht ein
Stellen Sie sicher, dass alle Verbindungen fest sitzen
Wenn Ihre PowerXL Heißluftfritteuse nach dem Deckelaustausch nicht angeht, überprüfen Sie jede von Ihnen wieder angeschlossene Verbindung. Stellen Sie sicher, dass der rote Anschluss und alle anderen Kabel fest sitzen. Lose oder unterbrochene Kabel können die Stromversorgung unterbrechen.
Überprüfen Sie die Stromquelle und die Steckdose
Sie sollten auch das Netzkabel und die Steckdose überprüfen. Untersuchen Sie das Kabel auf sichtbare Schäden. Stecken Sie das Gerät in eine andere Steckdose, um elektrische Probleme in Ihrer Küche auszuschließen. Wenn die Heißluftfritteuse immer noch nicht angeht, sehen Sie sich die folgende Tabelle mit zusätzlichen Ursachen und Lösungen an, die von Reparaturtechnikern identifiziert wurden:
| Ursache | Beschreibung | Empfohlene Maßnahme |
|---|---|---|
| Netzkabel | Probleme mit dem Netzkabel können verhindern, dass die Heißluftfritteuse mit Strom versorgt wird. | Auf Beschädigungen prüfen und gegebenenfalls ersetzen. |
| Einschaltknopf | Ein defekter Einschaltknopf kann verhindern, dass sich die Heißluftfritteuse einschaltet. | Reinigen oder ersetzen Sie den Knopf, wenn er feststeckt oder beschädigt erscheint. |
| Überlastungsschutz (Thermischer Schutz) | Diese Sicherheitsfunktion kann aktiviert werden, wenn das Gerät überhitzt. | Lassen Sie die Heißluftfritteuse 30 Minuten bis eine Stunde abkühlen, bevor Sie es erneut versuchen. |
| Interne Komponenten | Probleme mit internen Teilen wie dem Heizelement oder der Steuerplatine können Stromprobleme verursachen. | Konsultieren Sie einen Techniker für Reparaturen oder Austausch. |
Wenn Sie alle externen Faktoren überprüft haben und das Gerät weiterhin nicht reagiert, benötigen Sie möglicherweise professionelle Hilfe.
Ungewöhnliche Geräusche oder Gerüche
Stoppen Sie sofort und überprüfen Sie das Gerät
Ungewöhnliche Geräusche oder Gerüche während des Betriebs deuten auf ein Problem hin. Schalten Sie die Heißluftfritteuse aus und ziehen Sie sofort den Netzstecker. Die weitere Verwendung des Geräts könnte weitere Schäden verursachen oder eine Sicherheitsgefahr darstellen.
Überprüfen Sie die Installationsschritte auf Fehler
Gehen Sie jeden Schritt Ihres Deckelaustauschs durch. Achten Sie auf lose Schrauben, falsch ausgerichtete Teile oder Kabel, die das Heizelement berühren. Korrigieren Sie alle Fehler, bevor Sie die Heißluftfritteuse wieder verwenden. Wenn Sie die Ursache des Problems nicht finden können, suchen Sie Hilfe bei einem qualifizierten Techniker.
Tipp: Das frühzeitige Beheben von Problemen verhindert langfristige Schäden und sorgt für Sicherheit in Ihrer Küche.
Wann Sie professionelle Hilfe für PowerXL Heißluftfritteusen-Reparaturen suchen sollten
Sie fühlen sich vielleicht sicher bei der Durchführung grundlegender Reparaturen, aber einige Situationen erfordern Fachkenntnisse. Zu erkennen, wann man aufhören und Hilfe suchen sollte, kann Zeit, Geld und Frustration sparen. Es schützt Ihr Gerät auch vor weiteren Schäden.
Anhaltende Probleme
Elektrische Probleme nach dem Austausch
Wenn Sie nach dem Austausch des Deckels elektrische Probleme bemerken, sollten Sie das Gerät nicht weiter verwenden. Anzeichen sind flackernde Lichter, nicht reagierende Bedienelemente oder das Gerät schaltet sich nicht ein. Elektrische Fehler können ernsthafte Sicherheitsrisiken darstellen, einschließlich Brandgefahr. Sie sollten die Heißluftfritteuse von der Steckdose trennen und keine weiteren eigenen Fehlersuchen durchführen. Ein zertifizierter Techniker hat die Werkzeuge und die Ausbildung, um elektrische Fehler sicher zu diagnostizieren und zu reparieren.
Beschädigte oder defekte Komponenten
Manchmal können Sie während des Reparaturvorgangs defekte oder beschädigte Teile entdecken. Rissiges Plastik, verbogene Heizelemente oder ausgefranste Kabel erfordern spezielle Aufmerksamkeit. Der Versuch, diese Probleme ohne die richtigen Fähigkeiten zu beheben, kann den Schaden verschlimmern. Sie sollten einen professionellen Reparaturdienst oder den Hersteller um Rat fragen. Die Verwendung des Geräts mit beschädigten Komponenten kann zu schlechter Leistung oder sogar Verletzungen führen.
Garantiehinweise
Überprüfen Sie Ihren Garantiestatus, bevor Sie mit Reparaturen beginnen
Bevor Sie mit einer Reparatur an Ihrer PowerXL Heißluftfritteuse beginnen, lesen Sie Ihre Garantievereinbarung durch. Die Herstellerrichtlinien besagen, dass Sie riskieren, Ihre Garantie zu verlieren. , wenn Sie selbst Reparaturen versuchen oder interne Komponenten manipulieren. Nur qualifizierte Techniker sollten Reparaturen durchführen, die unter die Garantie fallen. Dies stellt sicher, dass Sie Ihren Versicherungsschutz behalten und unerwartete Kosten vermeiden.
Hinweis: Bewahren Sie Ihren Kaufbeleg und Ihre Garantiedokumente immer an einem sicheren Ort auf. Diese Aufzeichnungen helfen Ihnen, Ihren Versicherungsschutz zu überprüfen, wenn Sie einen Anspruch geltend machen müssen.
Kontaktieren Sie den PowerXL-Support für Beratung
Wenn Sie sich bezüglich Ihrer Garantie unsicher sind oder Hilfe bei einer Reparatur benötigen, wenden Sie sich an den PowerXL-Support. Das Unternehmen bietet mehrere Möglichkeiten, Unterstützung zu erhalten:
- Rufen Sie den Kundendienst unter 973-287-5106 für sofortige Hilfe an.
- Senden Sie eine E-Mail an empowercustomerservice@spectrumbrands.com, wenn Sie weitere Fragen haben.
- Wenn Sie innerhalb von zwei Wochen keine Antwort bezüglich eines Austauschs oder einer Rückerstattung erhalten, rufen Sie den Kundendienst erneut unter 973-287-5106 an.
Sie sollten diese Schritte immer befolgen, um sicherzustellen, dass Sie genaue Informationen und Unterstützung erhalten. Der PowerXL-Support kann Sie durch den Reparaturprozess führen oder bei Bedarf einen professionellen Service arrangieren.
Tipp: Die rechtzeitige Inanspruchnahme professioneller Hilfe schützt Ihre Investition und sorgt für Sicherheit in Ihrer Küche.
Wartungstipps für eine langlebigere PowerXL Heißluftfritteusen-Abdeckung
Wenn Sie den Deckel Ihrer Heißluftfritteuse in einem Top-Zustand halten, können Sie jahrelang sicheres und effizientes Kochen genießen. Sie können diese Wartungstipps befolgen, um die Lebensdauer Ihres PowerXL Heißluftfritteusen-Deckels zu verlängern und die beste Leistung Ihres Geräts zu erhalten.
Regelmäßige Reinigung
Wischen Sie den Deckel nach jedem Gebrauch ab
Sie sollten den Deckel nach jeder Kochsitzung reinigen. Verwenden Sie ein weiches, feuchtes Tuch, um Fett, Krümel und Speisereste zu entfernen. Diese einfache Gewohnheit verhindert Ablagerungen, die die Abdichtung und Heizleistung des Deckels beeinträchtigen können. Wenn Sie hartnäckige Flecken bemerken, verwenden Sie ein mildes Spülmittel, das in Wasser verdünnt ist. Spülen Sie das Tuch gründlich aus, bevor Sie den Deckel erneut abwischen.
- Entfernen Sie den Deckel von der Heißluftfritteuse, bevor Sie ihn reinigen.
- Trocknen Sie den Deckel mit einem sauberen Handtuch, um Wasserflecken zu vermeiden.
Tipp: Die regelmäßige Reinigung des Deckels reduziert Gerüche und hält Ihre Küche hygienisch.
Vermeiden Sie aggressive Chemikalien, die den Deckel beschädigen können.
Sie müssen starke Reinigungsmittel, Scheuerschwämme oder Bleichmittel vermeiden. Diese Produkte können die Oberfläche zerkratzen oder das Material des Deckels schwächen. Verwenden Sie ausschließlich milde Reinigungsmittel und weiche Schwämme. Bei Verwendung aggressiver Chemikalien riskieren Sie, die Beschichtung zu schädigen und die Lebensdauer Ihres Deckels zu verkürzen.
| Reinigungstyp | Für Deckel geeignet? | Anmerkungen |
|---|---|---|
| Mildes Spülmittel | ✅ | Mit warmem Wasser verwenden |
| Essiglösung | ✅ | Vor Gebrauch verdünnen |
| Bleichmittel | ❌ | Vermeiden, kann Schäden verursachen |
| Scheuerschwämme | ❌ | Können die Oberfläche zerkratzen |
Überprüfen Sie stets die Herstelleranleitung für zugelassene Reinigungsprodukte.
Richtige Handhabung
Öffnen und schließen Sie den Deckel behutsam
Sie sollten den Deckel bei jeder Nutzung Ihrer Heißluftfritteuse vorsichtig handhaben. Heben und senken Sie den Deckel langsam, um Belastungen der Scharniere und Dichtungen zu vermeiden. Zuschlagen oder gewaltsames Bewegen des Deckels kann Risse oder Fehlausrichtungen verursachen. Falls der Deckel klemmt, überprüfen Sie vor dem Anwenden von Druck auf Speisereste oder falsch positionierte Teile.
- Verwenden Sie beide Hände zur Unterstützung des Deckels beim Öffnen oder Schließen.
- Prüfen Sie die Scharniere auf einwandfreie Beweglichkeit.
⚠️ Behutsame Handhabung verhindert unbeabsichtigte Schäden und gewährleistet einen dichten Verschluss.
Bewahren Sie die Heißluftfritteuse an einem sicheren, trockenen Ort auf
Sie müssen Ihr Gerät an einem Ort lagern, der frei von Feuchtigkeit und extremen Temperaturen ist. Wassereinwirkung kann Rost verursachen oder Kunststoffkomponenten schwächen. Wählen Sie einen Platz auf Ihrer Arbeitsplatte oder in einem Schrank, an dem die Heißluftfritteuse nicht angestoßen oder fallen gelassen wird.
- Halten Sie die Heißluftfritteuse von Spülen und Herden fern.
- Vermeiden Sie es, schwere Gegenstände auf dem Deckel zu stapeln.
Durch sachgemäße Lagerung Ihrer PowerXL Heißluftfritteuse schützen Sie den Deckel und andere Teile vor unnötigem Verschleiß.
Indem Sie diese Wartungshinweise befolgen, tragen Sie dazu bei, dass der Deckel Ihrer Heißluftfritteuse länger hält und zuverlässig funktioniert. Konsequente Pflege unterstützt sicheres Kochen und erhält den Wert Ihres Geräts.
Sie können Reparaturen am PowerXL Heißluftfritteusen-Deckel mit Zuversicht durchführen, wenn Sie diese klaren Schritte befolgen. Sammeln Sie Ihre Werkzeuge, bleiben Sie geduldig und arbeiten Sie sorgfältig. Sie stellen die Leistung Ihres Geräts wieder her und gewährleisten einen sicheren Betrieb. Regelmäßige Wartung hält Ihre Küche reibungslos am Laufen. Kümmern Sie sich um Ihre Ausrüstung, und Sie genießen jeden Tag köstlichere Mahlzeiten.
FAQ
Wie oft sollten Sie den PowerXL Heißluftfritteusen-Deckel austauschen?
Sie sollten den Deckel nur austauschen, wenn Sie Risse, Verformungen oder eine schlechte Abdichtung feststellen. Regelmäßige Kontrolle hilft, Probleme frühzeitig zu erkennen. Die meisten Benutzer benötigen bei sorgfältiger Handhabung des Deckels keinen häufigen Austausch.
Können Sie Ersatzdeckel von Drittanbietern verwenden?
Sie sollten ausschließlich Deckel verwenden, die für Ihr PowerXL-Modell konzipiert sind. Deckel von Drittanbietern passen möglicherweise nicht richtig oder könnten Ihre Garantie erlöschen lassen. Überprüfen Sie stets die Kompatibilität vor dem Kauf eines Ersatzteils.
Was sollten Sie tun, wenn sich der Deckel nach der Installation locker anfühlt?
Überprüfen Sie jede Schraube auf festen Sitz. Stellen Sie sicher, dass der Deckel mit dem Gehäuse der Heißluftfritteuse ausgerichtet ist. Falls das Problem weiterhin besteht, prüfen Sie auf beschädigte Gewinde oder fehlende Teile. Setzen Sie den Deckel bei Bedarf erneut ein.
Ist es sicher, die Heißluftfritteuse mit einem beschädigten Deckel zu betreiben?
Alarm: Verwenden Sie Ihre Heißluftfritteuse niemals mit einem rissigen oder gebrochenen Deckel. Beschädigte Deckel können Wärmeverlust, ungleichmäßiges Garen oder Sicherheitsrisiken verursachen. Tauschen Sie den Deckel aus, bevor Sie das Gerät wieder verwenden.
Wie reinigen Sie den PowerXL Heißluftfritteusen-Deckel?
- Entfernen Sie den Deckel vom Gerät.
- Wischen Sie mit einem weichen, feuchten Tuch und mildem Seifenmittel ab.
- Trocknen Sie ihn gründlich, bevor Sie ihn wieder anbringen.
Vermeiden Sie Scheuerschwämme oder aggressive Chemikalien, um Schäden zu verhindern.
Beeinflusst der Austausch des Deckels die Garantie Ihrer Heißluftfritteuse?
Überprüfen Sie Ihre Garantiebedingungen, bevor Sie mit Reparaturen beginnen. Selbstreparaturen können den Garantieanspruch erlöschen lassen. Wenn Ihr Gerät unter Garantie steht, wenden Sie sich vor dem Austausch von Teilen an den PowerXL-Support für Anleitung.
Welche Werkzeuge benötigen Sie für den Deckelaustausch?
| Werkzeug | Zweck |
|---|---|
| Kreuzschlitzschraubendreher | Entfernen und sichern Sie Schrauben |
| Spitzzange | Handhaben Sie kleine Komponenten |
| Schutzhandschuhe | Schützen Sie Ihre Hände |
Sammeln Sie diese Werkzeuge, bevor Sie mit der Reparatur beginnen.

