Schritt-für-Schritt-Anleitung: Heizelement am Warmwasserbereiter sicher wechseln
Der sichere Austausch von Heizelementen ist eine Prozessdisziplin, keine einzelne Handlung. Der kostspieligste Fehler ist die Wiederherstellung der Stromversorgung, bevor der Tank vollständig gefüllt und die Luft entfernt ist. Whirlpool warnt davor, dass dies das obere Heizelement durchbrennen lassen kann. Trockenbrand. Dieser Leitfaden legt eine praxisorientierte Abfolge dar, die evidenzbasierte Sicherheitsschritte priorisiert, Lecks minimiert und Nacharbeiten reduziert.
- Schnellcheckliste (vor Beginn)
- Werkzeuge, Teile und zu erfassende Daten
- Verfahren: 20-stufiger sicherer Austausch-Workflow
- Kritische Fehlerpunkte (Trockenbrand, Lecks, falsche Nennwerte)
- Warum Heizelemente ausfallen und was wiederholte Ausfälle reduziert
- Verwandte Heiztechnologien (Rohre, Platten, Folien, Druckgussmodule)
- FAQ
- Zitierte Quellen und ausgehende Links
Schnellcheckliste (vor Beginn)
Verbrühungsschutz
Heißwasser laufen lassen, bis es kühl ist
Ablasssteuerung
Schlauch + Ablassventil
Korrektes Teil
Typenschildabgleich
Trockenbrandvermeidung
Luft 3 Minuten lang entlüften
- Bestätigen, dass der Austausch Heizelement den Nennwerten des Geräts Spannung und Leistung auf dem Typenschild entspricht.
- Entwässerung planen (Schlauchweg, Eimergröße oder Bodenablauf).
- Zugang zur Heizelementabdeckung und zum Verdrahtungsraum sicherstellen.
- Zeit für Nachfüllen und Entlüften einplanen; die letzten Schritte nicht überstürzen.
Werkzeuge, Teile und zu erfassende Daten
Mindestwerkzeuge (gemäß Whirlpool-Workflow)
- Gartenschlauch (an Ablassventil anschließen)
- Heizelementschlüssel oder 1 1/2" Tiefenstecknuss
- Lappen (Gewinde des Tanks reinigen)
- Flachkopfschraubendreher (für einige Entleerungsventile)
Teile und Verbrauchsmaterialien
- Korrektes Ersatzheizelement + Dichtung
- Spülmittel (Whirlpool empfiehlt, Tropfen die Dichtung zu schmieren)
- Optional: Ersatzdichtung (hilft, Ausfallzeiten zu vermeiden, falls die erste Dichtung beschädigt ist)
Was zu dokumentieren ist (EEAT: nachvollziehbare Belege)
Vor der Demontage die Spannung und Wattzahl des Typenschilds notieren und ein klares Foto der Verdrahtungsanordnung machen. Whirlpool verlangt ausdrücklich, das neue Element anhand des Typenschilds auf Spannung und Wattzahl zu überprüfen.
Verfahren: 20-stufiger sicherer Austausch-Workflow
Die folgende Abfolge spiegelt die veröffentlichten Schritte von Whirlpool wider, da die Reihenfolge das Risiko kontrolliert. Sie unterstützt auch einheitliche Schulungen und minimiert Nacharbeiten für Serviceteams.
| Schritt | Aktion | Warum es wichtig ist (kontrolliertes Risiko) |
|---|---|---|
| 1 | Einen Warmwasserhahn öffnen und laufen lassen, bis das Wasser kühl ist (kann 10+ Minuten dauern). | Reduziert Verbrühungsrisiko vor dem Ablassen. |
| 2 | Kaltwasserzufuhr AUS schalten. | Verhindert Nachfüllen während des Entleerens. |
| 3 | Einen Gartenschlauch an das Ablassventil anschließen und zu einem Abfluss/nach draußen/einem Eimer führen. | Kontrolliert den Abfluss, reduziert Überschwemmungsrisiko. |
| 4 | Ablassventil öffnen. Das Öffnen eines Warmwasserhahns hilft beim schnelleren Ablassen. Bei Bedarf vollständig ablassen. | Schafft sichere Bedingungen zum Entfernen des Heizelements; Whirlpool warnt, dass Ablagerungen das Ablassen behindern können. |
| 5 | Altes Heizelement mit einem Elementschlüssel entfernen oder 1 1/2" Tiefenstecknuss. | Das richtige Werkzeug reduziert Gewindeschäden und Abrundungen. |
| 6 | Überprüfen, ob das neue Element korrekt ist, indem das Typenschild auf Spannung und Wattzahl bezogen wird. | Verhindert Fehlanpassung, Leistungsprobleme und vorzeitigen Ausfall. |
| 7 | Tankgewinde mit einem Lappen reinigen. | Reduziert Leckagerisiko durch Schmutz. |
| 8 | Dichtung am Heizelement anbringen. | Primäre Abdichtung der Tanköffnung. |
| 9 | Dichtung mit Tropfen Spülmittels für Handabwasch einfetten. | schmieren. Hilft, Dichtungsschäden beim Anziehen zu vermeiden (Leckageprävention). |
| 10 | Heizelement einbauen und handfest anziehen; mit Schraubenschlüssel/Nuss festziehen. | Stellt korrekten Sitz ohne Schräggewinde sicher; endgültiges Drehmoment dichtet die Dichtung ab. |
| 11 | Stromkabel wieder anschließen; feste Verbindungen sicherstellen. Strom erst wiederherstellen, wenn der Tank vollständig gefüllt ist. | Verhindert Trockenbrand und reduziert Überhitzung an losen Anschlüssen. |
| 12 | Ablassventil schließen; Kaltwasser EINSCHALTEN, um den Tank nachzufüllen. | Stellt den Wasserstand wieder her, um die Heizelemente zu bedecken. |
| 13 | Strahlregler am nächsten Warmwasserhahn entfernen. | Ermöglicht das Ausspülen von Schmutz und unterstützt die Luftentfernung. |
| 14 | Warmwasserhahn öffnen; laufen lassen, bis ein voller Strahl kommt, dann vollen Strahl für DREI MINUTEN. | laufen lassen. Whirlpool gibt an, dass dies die Luft entfernt; vorzeitiges Einschalten kann das obere Heizelement durchbrennen lassen (Trockenbrand). |
| 15 | Warmwasserhahn schließen und Strahlregler wieder einsetzen. | Stellt den normalen Betrieb der Armatur wieder her. |
| 16 | Neues Heizelement auf Lecks prüfen; bei Leckage nachziehen. Falls Leckage bestehen bleibt, ablassen und Dichtung prüfen, bei Beschädigung ersetzen. | Stoppt Wasserschäden und verhindert Korrosion im Elektrikraum. |
| 17 | Ersetzen Sie den Kunststoffschutz (falls vorhanden). | Elektrischer Schutz und Isolationsmanagement. |
| 18 | Ersetzen Sie die Isolierung. | Reduziert Wärmeverluste und schützt den Kabelraum. |
| 19 | Ersetzen Sie die Heizelementabdeckung; sichern Sie alle Abdeckungen. | Whirlpool warnt, dass dies die Brand- und Stromschlaggefahr verringert. |
| 20 | Schalten Sie die Stromversorgung am Sicherungsautomaten wieder EIN (oder ersetzen Sie die Sicherungen). Warten Sie bis zu zwei Stunden auf die Aufheizung. | Normale Wiederherstellung; vermeidet voreilige Schlussfolgerungen auf „keine Heizung“. |
Kritische Fehlerpunkte (Trockenbrand, Lecks, falsche Nennwerte)
Trockenbrand (teuerster Fehler)
Whirlpools Hinweis besagt, dass die Stromversorgung erst wiederhergestellt werden darf, wenn die gesamte Luft entwichen ist und der Tank vollständig gefüllt ist. Wird die Spannung zu früh angelegt, brennt das obere Element durch (Trockenbrand). DREI MINUTEN.
Leckage-Nachdichtschleife (häufige Nacharbeit)
Whirlpool empfiehlt, so lange nachzuziehen, bis das Leck stoppt; kann es nicht gestoppt werden, entleeren Sie den Tank und überprüfen Sie die Dichtung auf Beschädigungen. Eine beschädigte Dichtung sollte ersetzt und das Element wieder eingebaut werden.
Falsche Teileauswahl (vermeidbar)
Whirlpool verlangt die Überprüfung des Ersatzelements durch Bezugnahme auf das Typenschild für Spannung und Leistung. Dies reduziert das Risiko einer Fehlanpassung und vermeidet unnötige Arbeit. IP67 und UL-zugelassen für seine Anwendung.
Warum Heizelemente ausfallen und was wiederholte Ausfälle reduziert
Technischer Kontext (warum EEAT wichtig ist)
TUTCO definiert ein Heizelement als eine Komponente, die aus elektrisch leitfähigen und isolierenden Materialien aufgebaut ist, und betont, dass es mehr als nur die Legierung ist; es ist eine Baugruppe, die Rahmen und Anschlussleitungen umfasst. Spurenelementen die Leistung und Lebensdauer signifikant verändern kann.
- Kalk und Ablagerungen können die Wärmeübertragung verringern und die Elementtemperatur erhöhen.
- Lose Anschlüsse erhöhen den Übergangswiderstand und die lokale Erwärmung.
- Umweltkontaminanten können die Lebensdauer verkürzen, wenn die Legierung schlecht angepasst ist.
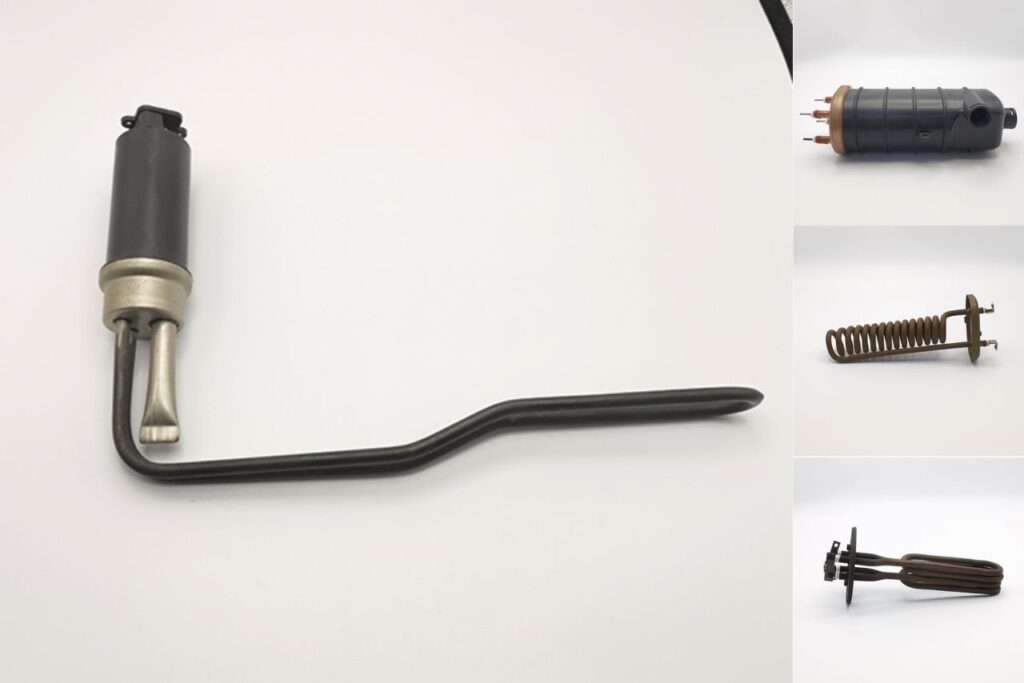
Verwandte Heiztechnologien (Rohre, Platten, Folien, Druckgussmodule)
Wie Heizgerätefamilien verschiedenen Produkten zugeordnet werden
In residentialen Warmwasserspeichern ist das austauschbare Tauchheizelement typischerweise eine Form von Rohrheizelement,. Im weiteren Geräteökosystem erweitern sich Heizgerätedesigns auf Rohre, Platten, Folien und integrierte Druckgussmodule. Heizungsrohre, Heizplatte, Heizfolie, Und Druckguss-Heizlösungen.
- Heizungsrohre (z. B. Wasserheizrohr, Kesselheizrohr, Fritteusenheizelement)
- Heizplatte (z. B. Wasserkocher-Heizplatte, Kaffeemaschinen-Heizplatte, Geschirrspüler-Heizelement)
- Heizfolie (z. B. Dickfilm-Heizplatte/-rohr, Dünnfilm-Heizung)
- Druckguss-Heizlösungen (z. B. Druckguss-Heizteile und Kesselwärmetauscher für kompakte Geräte)
- Elektrokessel-Heizung (z. B. Kessel/Dampferzeuger, verwendet in Luftbefeuchtern, Dampfbacköfen und Kaffeesystemen)
Interne Navigation (erforderliche Ankertexte)
Für Leser, die Optionen vergleichen oder in großem Maßstab beschaffen, bieten die folgenden Seiten einen strukturierten Überblick: Heizelement, Hersteller von Heizelementen, Heizelement-Fabrik, Druckguss-Heizlösungen.
FAQ
Wie lange sollte der Tank nach dem Austausch des Elements aufheizen?
Whirlpool weist darauf hin, dass es dauern kann zwei Stunden für das Aufheizen des Tanks nach Wiederherstellung der Stromversorgung, abhängig von der anfänglichen Wassertemperatur und der Heizleistung.
Was ist der wichtigste Sicherheitsschritt, um die Zerstörung eines neuen Elements zu verhindern?
Stellen Sie die Stromversorgung erst wieder her, wenn der Tank vollständig gefüllt und die gesamte Luft entfernt ist. Whirlpool warnt, dass bei zu frühem Anlegen der Spannung das obere Element durchbrennt aufgrund von Trockenbrand.
Warum verlangt Whirlpool das Entfernen des Luftsprudlers während des Nachfüllens?
Whirlpool gibt an, dass das Entfernen des Luftsprudlers am nächsten Warmwasserhahn es ermöglicht, Ablagerungen in der Rohrleitung beim Entlüften auszuspülen und hilft, den Tank vollständig zu füllen.
Was sollte vor dem Kauf eines Ersatzelements überprüft werden?
Whirlpool weist an, das korrekte Ersatzteil durch Bezugnahme auf das Typenschild des Warmwasserbereiters für Spannung und Leistung.
Warum fallen ähnlich aussehende Heizelemente unterschiedlich oft aus?
TUTCO stellt fest, dass Widerstandslegierungen verschiedener Hersteller unterschiedliche Spurenelementen (Verunreinigungen oder Verbesserungen) enthalten können, die die Eigenschaften und die Lebensdauer wesentlich verändern, insbesondere unter anspruchsvollen Umgebungsbedingungen.
Zitierte Quellen und ausgehende Links
- Whirlpool Warmwasserbereiter Ersetzen Sie das Heizelement (Schritte, Trockenbrandwarnung, Entlüftungszeit): https://www.whirlpoolwaterheaters.com/support/help/element-was-out-of-range/24
- TUTCO – Definition von Heizelementen, Materialüberlegungen und Zuverlässigkeitsfaktoren: https://tutco.com/conductive/heating-elements
- Hudson Reed – Beispiel für veröffentlichte Heizgerätekomponentenspezifikationen (1000W, IP67, UL-zugelassen) und Preisangaben: https://usa.hudsonreed.com/1000-plug-in-watt-electric-heating-element-76309
- Jinzhong – Referenzierte Kategorieseiten für den Kontext der Heizgerätefamilie und zur internen Navigation: Heizungsrohre, Heizplatte, Heizfolie, Druckguss-Heizlösungen, Elektrokessel-Heizung

