Пошаговое руководство: безопасная замена нагревательного элемента водонагревателя
Замена нагревательного элемента — это процессная дисциплина, а не единичное действие. Самая дорогостоящая ошибка — восстановление подачи электроэнергии до полного заполнения бака и удаления воздуха. Whirlpool предупреждает, что это может привести к перегоранию верхнего элемента. сухому нагреву. Данное руководство представляет практическую последовательность действий, основанную на доказательных мерах безопасности, минимизирующую утечки и снижающую необходимость в переделках.
- Быстрый контрольный список (перед началом)
- Инструменты, детали и данные для сбора
- Процедура: 20-шаговый безопасный процесс замены
- Критические точки отказа (сухой нагрев, утечки, несоответствие характеристик)
- Причины выхода элементов из строя и способы снижения повторных отказов
- Связанные технологии нагрева (трубки, пластины, плёнки, литые модули)
- ЧАСТО ЗАДАВАЕМЫЕ ВОПРОСЫ
- Цитируемые источники и внешние ссылки
Быстрый контрольный список (перед началом)
Контроль ожогов
Откройте горячую воду до остывания
Управление сливом
Шланг + сливной клапан
Правильная деталь
Сверьте с табличкой данных
Предотвращение сухого нагрева
Удаление воздуха в течение 3 минут
- Подтвердите, что замена Нагревательный элемент соответствует номинальным характеристикам устройства, указанным напряжения и мощности на табличке данных.
- Спланируйте слив (маршрут шланга, объём ведра или слив в полу).
- Убедитесь в доступе к крышке элемента и монтажному отсеку проводки.
- Выделите время на заполнение и удаление воздуха; не торопитесь на завершающих этапах.
Инструменты, детали и данные для сбора
Минимальный набор инструментов (по методике Whirlpool)
- Садовый шланг (подключается к сливному клапану)
- Ключ для элемента или Глубокий торцевой ключ на 1 1/2"
- Ветошь (для очистки резьбы бака)
- Плоская отвертка (для некоторых сливных клапанов)
Детали и расходные материалы
- Правильный заменяемый элемент + прокладка
- Средство для мытья посуды (Whirlpool рекомендует каплей для смазки прокладки)
- Опционально: запасная прокладка (помогает избежать простоев при повреждении первой прокладки)
Что документировать (EEAT: подтверждаемые доказательства)
Перед разборкой запишите напряжение и мощность с таблички данных и сделайте чёткое фото схемы проводки. Whirlpool прямо требует сверять новый элемент с табличкой данных по напряжению и мощности.
Процедура: 20-шаговый безопасный процесс замены
Приведённая ниже последовательность соответствует опубликованным шагам Whirlpool, так как порядок действий контролирует риски. Это также обеспечивает единообразие обучения и минимизирует переделки для сервисных бригад.
| Шаг | Действие | Почему это важно (контролируемый риск) |
|---|---|---|
| 1 | Откройте кран горячей воды и оставьте до остывания воды (может занять 10+ минут). | Снижает риск ожогов перед сливом. |
| 2 | Перекройте подачу холодной воды. | Предотвращает повторное заполнение во время слива. |
| 3 | Подключите садовый шланг к сливному клапану и направьте в слив/на улицу/в ведро. | Контролирует сброс, снижает риск затопления. |
| 4 | Откройте сливной клапан. Открытие крана горячей воды ускоряет слив. Слейте полностью по мере необходимости. | Создаёт безопасные условия для извлечения элемента; Whirlpool предупреждает, что осадок может засорить слив. |
| 5 | Извлеките старый элемент с помощью ключа для элементов или Глубокий торцевой ключ на 1 1/2". | Правильный инструмент снижает повреждение резьбы и округление. |
| 6 | Убедитесь, что новый элемент корректен, сверившись с табличкой данных по напряжению и мощности. | Предотвращает несоответствие, проблемы с производительностью и преждевременный выход из строя. |
| 7 | Очистите резьбу бака ветошью. | Снижает риск утечки из-за загрязнений. |
| 8 | Установите прокладку на элемент. | Основное уплотнение для отверстия бака. |
| 9 | Смажьте прокладку с помощью каплей средства для мытья посуды. | Помогает избежать повреждения прокладки при затяжке (предотвращение утечек). |
| 10 | Установите и затяните элемент вручную; затяните ключом/головкой. | Обеспечивает посадку без перекоса резьбы; окончательный момент затяжки уплотняет прокладку. |
| 11 | Подключите силовые провода; обеспечьте надёжные соединения. Не восстанавливайте подачу электроэнергии до полного заполнения бака. | Предотвращает сухому нагреву и снижает перегрев на ослабленных клеммах. |
| 12 | Закройте сливной клапан; включите подачу холодной воды для заполнения бака. | Восстанавливает уровень воды для погружения элементов. |
| 13 | Снимите аэратор на ближайшем кране горячей воды. | Позволяет удалить загрязнения и способствует удалению воздуха. |
| 14 | Откройте кран горячей воды; оставьте до появления полной струи, затем дайте полной струе течь в течение ТРИ МИНУТЫ. | Whirlpool заявляет, что это удаляет воздух; преждевременное включение питания может привести к перегоранию верхнего нагревательного элемента (сухой нагрев). |
| 15 | Закройте кран с горячей водой и установите аэратор обратно. | Возвращает устройство в нормальный режим работы. |
| 16 | Проверьте новый элемент на наличие утечек; при обнаружении утечки подтяните. Если утечка сохраняется, слейте воду и осмотрите прокладку, при повреждении замените. | Предотвращает повреждение водой и коррозию в электрическом отсеке. |
| 17 | Замените пластиковый защитный кожух (при наличии). | Электрическая защита и управление изоляцией. |
| 18 | Замените изоляцию. | Снижает потери тепла и защищает кабельный отсек. |
| 19 | Установите крышку нагревательного элемента; закрепите все крышки. | Whirlpool предупреждает, что это снижает риск возгорания и поражения электрическим током. |
| 20 | Включите питание обратно на автоматическом выключателе (или замените предохранители). Дайте до двух часов на нагрев. | Нормальное восстановление; позволяет избежать преждевременных выводов об отсутствии нагрева. |
Критические точки отказа (сухой нагрев, утечки, несоответствие характеристик)
Сухой нагрев (самая дорогостоящая ошибка)
Уведомление Whirlpool гласит, что не следует восстанавливать подачу электроэнергии, пока не будет удален весь воздух и бак не будет полностью заполнен. Если питание будет подано преждевременно, верхний элемент перегорит (сухому нагреву). ТРИ МИНУТЫ.
Цикл повторной посадки уплотнения (частая доработка)
Whirlpool рекомендует затягивать до прекращения утечки; если утечку не удается остановить, слейте воду из бака и осмотрите прокладку на предмет повреждений. Поврежденную прокладку следует заменить и переустановить элемент.
Неправильный выбор детали (предотвратимо)
Whirlpool требует проверять заменяемый элемент, сверяясь с табличкой с данными водонагревателя для определения напряжения и мощности. Это снижает риск несоответствия и позволяет избежать напрасной работы. степень защиты IP67, и Одобрение UL для его применения.
Причины выхода элементов из строя и способы снижения повторных отказов
Инженерный контекст (почему EEAT имеет значение)
TUTCO определяет нагревательный элемент как компонент, изготовленный из электропроводящих и изоляционных материалов, и подчеркивает, что это не просто сплав; это сборка, включающая каркас и выводные соединения. микропримесей может существенно изменить производительность и срок службы.
- Накипь и осадок могут снизить теплопередачу и повысить температуру элемента.
- Ослабленные клеммы увеличивают контактное сопротивление и местный нагрев.
- Загрязнители окружающей среды могут сократить срок службы, если сплав плохо подобран.
Связанные технологии нагрева (трубки, пластины, плёнки, литые модули)
Как семейства нагревателей соотносятся с различными продуктами
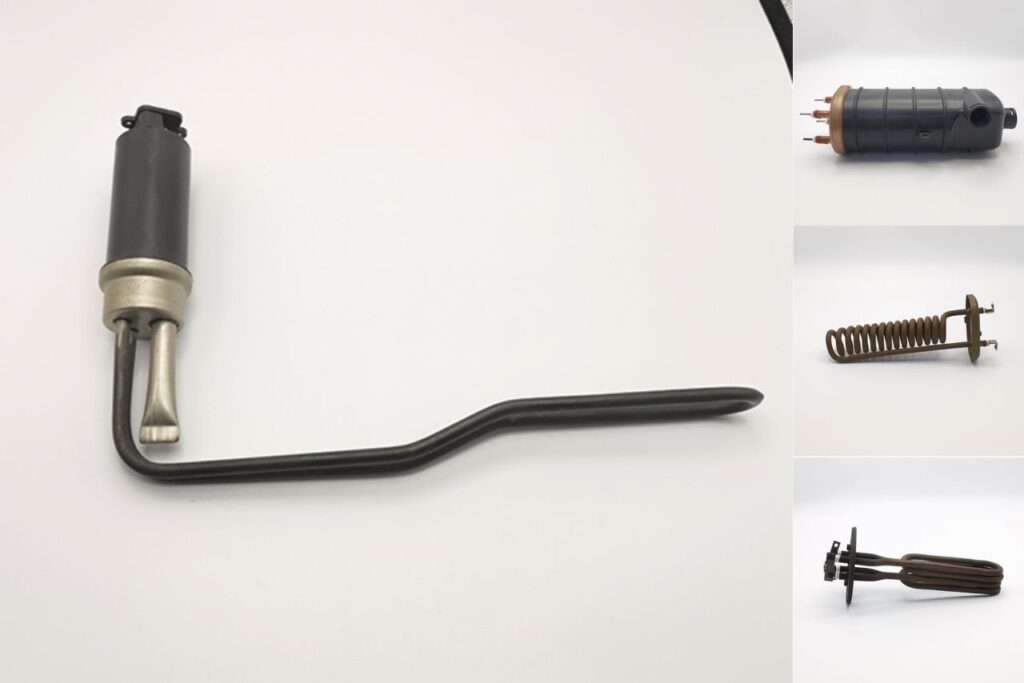
В бытовых накопительных водонагревателях сменный погружной элемент обычно представляет собой форму трубчатый нагревательный элемент. В более широкой экосистеме приборов конструкции нагревателей расширяются до трубок, пластин, пленок и интегрированных литых модулей. Нагревательные трубки, Нагревательная пластина, Нагревательная пленка, и Решения по нагреву при литье под давлением.
- Нагревательные трубки (например, трубка для нагрева воды, трубка для нагрева котла, нагревательный элемент фритюрницы)
- Нагревательная пластина (например, нагревательная пластина чайника, нагревательная пластина кофеварки, нагревательный элемент посудомоечной машины)
- Нагревательная пленка (например, толстопленочная нагревательная пластина/трубка, тонкопленочный нагреватель)
- Решения по нагреву при литье под давлением (например, литые нагревательные детали и теплообменники котлов для компактных приборов)
- Электрический котел-нагреватель (например, котлы/парогенераторы, используемые в увлажнителях, пароварках и кофейных системах)
Внутренняя навигация (требуемые якорные тексты)
Для читателей, сравнивающих варианты или осуществляющих закупки в больших объемах, следующие страницы предоставляют структурированный обзор: Нагревательный элемент, Производитель нагревательных элементов, Завод по производству нагревательных элементов, Решения по нагреву при литье под давлением.
ЧАСТО ЗАДАВАЕМЫЕ ВОПРОСЫ
Сколько времени должен нагреваться бак после замены элемента?
Whirlpool отмечает, что может потребоваться два часа для нагрева бака после восстановления питания, в зависимости от начальной температуры воды и мощности нагревателя.
Какой самый важный шаг безопасности для предотвращения повреждения нового элемента?
Не восстанавливайте подачу электроэнергии, пока бак не будет полностью заполнен и не удален весь воздух. Whirlpool предупреждает, что при преждевременной подаче питания верхний элемент перегорит из-за сухому нагреву.
Почему Whirlpool требует снимать аэратор во время заполнения?
Whirlpool заявляет, что снятие аэратора на ближайшем кране горячей воды позволяет вымыть мусор из водопровода при удалении воздуха и помогает полностью заполнить бак.
Что следует проверить перед покупкой сменного элемента?
Whirlpool предписывает проверять правильность замены, сверяясь с табличкой с данными водонагревателя для напряжения и мощности.
Почему внешне похожие нагревательные элементы выходят из строя с разной частотой?
TUTCO отмечает, что резистивные сплавы от разных производителей могут включать разные микропримесей (загрязняющие вещества или улучшения), которые существенно изменяют свойства и срок службы, особенно в сложных условиях окружающей среды.
Цитируемые источники и внешние ссылки
- Whirlpool Водонагреватели Замена нагревательного элемента (этапы, предупреждение о сухом нагреве, время продувки): https://www.whirlpoolwaterheaters.com/support/help/element-was-out-of-range/24
- TUTCO: определение нагревательного элемента, соображения по материалам и факторы надежности: https://tutco.com/conductive/heating-elements
- Hudson Reed: пример опубликованных спецификаций компонентов нагревателя (1000 Вт, IP67, одобрено UL) и ценообразование: https://usa.hudsonreed.com/1000-plug-in-watt-electric-heating-element-76309
- Jinzhong: категории страниц, на которые ссылаются для контекста семейства нагревателей и внутренней навигации: Нагревательные трубки, Нагревательная пластина, Нагревательная пленка, Решения по нагреву при литье под давлением, Электрический котел-нагреватель

