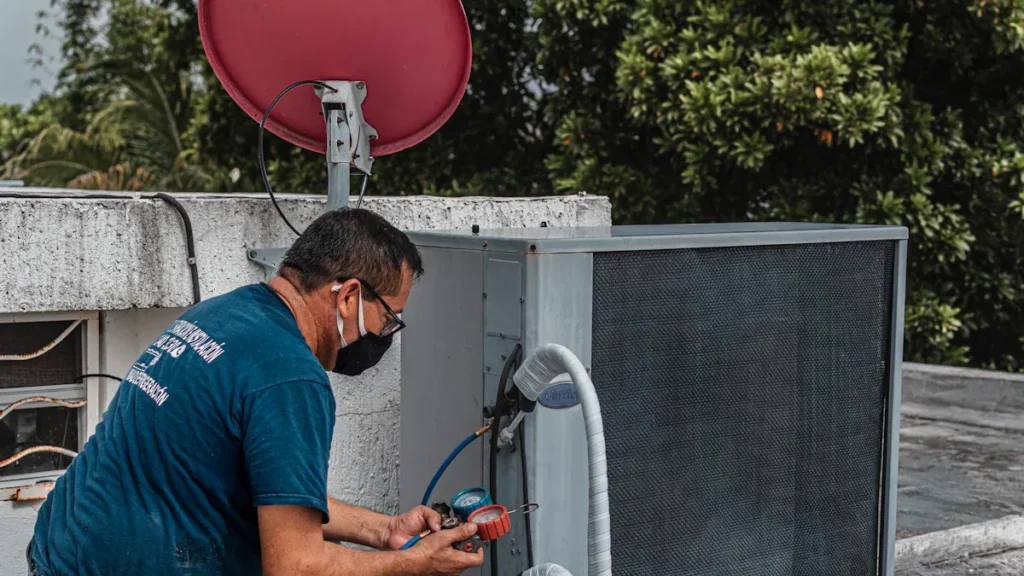

Чтобы проверить нагревательный элемент водонагревателя, необходимо выполнить несколько основных шагов. Сначала отключите питание водонагревателя в целях безопасности. Затем откройте доступ к нагревательный элемент элементу, сняв крышку. Используйте мультиметр для проверки целостности цепи и сопротивления. Надежные производители нагревательных элементов, такие как Электрическое отопление Цзиньчжун, предоставляют качественные нагревательные элементы бытовых приборов , которые делают этот процесс простым. Всегда уделяйте первостепенное внимание безопасности и точности на каждом этапе.
Меры безопасности при работе с водонагревателем
Прежде чем приступить к устранению неисправностей водонагревателя, необходимо серьезно отнестись к безопасности. Работа с электрическим водонагревателем сопряжена с рисками, но вы можете свести их к минимуму, выполнив несколько основных шагов.
Отключите питание водонагревателя
Найдите и отключите автоматический выключатель
Начните с поиска электрического щита вашего дома. Найдите автоматический выключатель, маркированный для вашего водонагревателя. Переведите его в положение “Выкл.”. Этот шаг предотвращает случайное поражение электрическим током во время работы.
Убедитесь, что питание отключено
Не полагайтесь только на автоматический выключатель. Используйте бесконтактный тестер напряжения или мультиметр для проверки клемм на водонагревателе. Убедитесь, что электрический ток отсутствует, прежде чем прикасаться к любым проводам или компонентам.
Совет: Никогда не пропускайте этот шаг. Даже небольшое количество остаточного электричества может привести к серьезной травме.
Подготовка к безопасному устранению неисправностей водонагревателя
Наденьте защитные перчатки и защитные очки
При работе с водонагревателем всегда следует надевать защитные перчатки и защитные очки. Перчатки защищают руки от острых краев и электрических контактов. Защитные очки защищают глаза от пыли, мусора или случайных искр.
Убедитесь, что рабочая зона сухая
Вода и электричество несовместимы. Прежде чем приступить к устранению неисправностей, проверьте, чтобы область вокруг водонагревателя была полностью сухой. Вытрите любые пролитые жидкости или протечки полотенцем. Сухое рабочее место помогает предотвратить короткие замыкания и снижает риск поскользнуться.
- Содержите область вокруг вашего электрического водонагревателя в сухости, чтобы предотвратить короткие замыкания.
- Используйте соответствующий номинал автоматического выключателя, указанный производителем.
- Убедитесь, что ваш электрический водонагреватель правильно заземлен для предотвращения поражения электрическим током.
- Не используйте водонагреватель, если он выглядит поврежденным или имеет утечки.
- Прочтите и поймите инструкции производителя и предупреждения по технике безопасности перед использованием.
Вы также должны убедиться, что ваш водонагреватель имеет знак безопасности и установлен лицензированным электриком. Никогда не подключайте водонагреватель к розетке с 3 контактами. Он должен быть напрямую подключен к электрической сети для безопасной работы.
Примечание: Планируйте ежегодные проверки и регулярное техническое обслуживание у профессионала. Это гарантирует, что ваш водонагреватель работает безопасно и эффективно.
Соблюдая эти меры предосторожности, вы защищаете себя и свой дом. Вы также создаете основу для эффективного устранения неисправностей водонагревателя.
Инструменты, необходимые для проверки нагревательных элементов

При подготовке к проверке водонагревателя вам понадобятся правильные инструменты для обеспечения точности и безопасности. Использование надлежащего оборудования помогает эффективно устранять неисправности и предотвращает ненужное повреждение вашего электрического водонагревателя.
Основные инструменты для проверки нагревательного элемента
Перед началом работы вам следует собрать несколько основных инструментов. Эти предметы позволяют получить доступ к нагревательным элементам и провести надежные испытания.
- Мультиметр: Этот прибор измеряет электрическое напряжение, сопротивление и силу тока. Вы используете его, чтобы проверить, правильно ли работает элемент вашего водонагревателя.
- Отвертка: Выберите плоскую или крестовую отвертку в зависимости от винтов панели доступа вашего водонагревателя. Этот инструмент позволяет открыть панель и добраться до нагревательных элементов.
- Изолента: Она может понадобиться для закрепления проводов после проверки или для изоляции открытых клемм.
- Бесконтактный тестер напряжения: Этот инструмент помогает убедиться, что к водонагревателю не поступает электричество, прежде чем вы прикоснетесь к каким-либо проводам.
Выбор и настройка мультиметра
Выберите цифровой мультиметр с четким дисплеем и надежной точностью. Установите мультиметр в режим измерения сопротивления (Ом) перед проверкой нагревательного элемента. Всегда проверяйте батарею мультиметра и тестируйте его работу на известной цепи. Этот шаг гарантирует получение правильных показаний при измерении элемента водонагревателя.
Отвертка для панелей доступа
Выберите отвертку, которая подходит к винтам на панели доступа вашего водонагревателя. В большинстве электрических водонагревателей используются винты с плоским или крестообразным шлицем. Аккуратно открутите панель с помощью отвертки. Поместите винты в безопасное место, чтобы вы могли собрать панель обратно после проверки.
Полезные дополнения для обслуживания водонагревателя
Вы можете сделать процесс устранения неисправностей более легким и безопасным, используя несколько дополнительных предметов. Эти дополнения улучшают видимость и поддерживают чистоту на рабочем месте.
Рабочий светильник для видимости
Переносной рабочий светильник освещает область вокруг водонагревателя. Хорошее освещение помогает четко видеть провода, клеммы и винты. Вы снижаете риск ошибок при работе в хорошо освещенном месте.
Полотенце или тряпка для чистоты
Держите полотенце или тряпку рядом, чтобы вытирать пыль или влагу. Чистое и сухое рабочее место предотвращает скольжение и защищает электрические компоненты внутри водонагревателя. Вы также избегаете загрязнения нагревательных элементов во время осмотра.
Совет: Организуйте свои инструменты перед началом работы. Вы экономите время и избегаете поиска предметов во время работы с водонагревателем.
Наличие правильных инструментов и дополнений гарантирует, что вы сможете проверить элемент водонагревателя безопасно и эффективно. Вы настраиваете себя на успешное устранение неисправностей и техническое обслуживание.
Доступ к нагревательному элементу водонагревателя

Прежде чем вы сможете проверить или заменить нагревательный элемент, вам необходимо получить к нему безопасный доступ. Этот процесс требует внимательного отношения к деталям и методичного подхода. Вы защищаете себя и свое оборудование, следуя каждому шагу по порядку.
Снимите панели доступа водонагревателя
Найдите и открутите панели
Панели доступа находятся на боковой стороне вашего водонагревателя. В большинстве бытовых моделей есть две панели — одна в верхней части и одна в нижней. Эти панели закрывают нагревательные элементы внутри бака. Используйте отвертку, соответствующую винтам панели. Поворачивайте каждый винт против часовой стрелки, пока не сможете снять панель. Работайте медленно, чтобы не сорвать резьбу винтов и не повредить панель.
Совет: Поместите небольшую емкость рядом для хранения винтов. Это предотвращает их скатывание или потерю во время процесса.
Отложите винты в безопасное место
После того как вы выкрутили винты, отложите их в емкость или на магнитный лоток. Хранение всех крепежных деталей в порядке обеспечивает плавную сборку в дальнейшем. Вы избегаете ненужных задержек и разочарований, поддерживая порядок на рабочем месте.
Откройте клеммы нагревательного элемента
Аккуратно отодвиньте изоляцию
После снятия панели доступа вы увидите слой изоляции, покрывающий внутренние компоненты. Аккуратно отодвиньте изоляцию, чтобы открыть проводку и клеммы. В некоторых водонагревателях используется стекловолоконная изоляция, в других — пенопластовая. Обращайтесь с изоляцией осторожно, чтобы не порвать и не сжать ее. Если в вашей модели есть пластиковый или картонный экран, поднимите его и отложите вместе с винтами.
Примечание: Всегда надевайте перчатки при работе с изоляцией. Это защищает вашу кожу от раздражения и сохраняет изоляцию intact для повторного использования.
Определите область расположения элемента
Убрав изоляцию, вы теперь можете видеть нагревательные элементы и их клеммы. В большинстве стандартных электрических водонагревателей вы найдете два нагревательных элемента— один в верхней и один в нижней части бака. Верхний элемент сначала нагревает воду в верхней секции. Как только верхняя часть достигает заданной температуры, активируется нижний элемент для нагрева оставшейся воды. Ищите металлическую пластину с двумя винтами и прикрепленными проводами; это отмечает местоположение каждого нагревательного элемента.
Теперь вы выполнили основные шаги для доступа к нагревательному элементу вашего водонагревателя.. Следуя данному процессу, вы обеспечиваете безопасную и эффективную проверку или замену.
Выявление и подготовка нагревательного элемента
Найдите и промаркируйте клеммы нагревательного элемента
Распознавание проводов и винтов
Когда вы откроете ваш водонагреватель, вы увидите несколько проводов, подключенных к винтам на нагревательных элементах. Эти провода передают электричество от термостата к элементам. Каждый винт фиксирует провод на месте. Вам следует искать два провода, прикрепленных к каждому нагревательному элементу. Винты обычно латунные или серебристые и расположены по обе стороны металлической пластины. Уделите время, чтобы изучить расположение. Этот шаг помогает избежать путаницы при повторной сборке.
Совет: используйте телефон, чтобы сделать быстрый снимок проводки перед тем, как что-либо отсоединять. Этот визуальный ориентир может сэкономить вам время в дальнейшем.
Определите верхний и нижний нагревательные элементы
Большинство бытовых электрических водонагревателей содержат два нагревательных элемента. Один вы найдете вблизи верха бака, а другой — вблизи дна. Верхний элемент сначала нагревает воду в верхней части. Как только верхний термостат достигает заданной температуры, активируется нижний элемент для нагрева остальной части бака. Оба элемента изготовлены из металлического сплава и часто имеют защитную оболочку для предотвращения коррозии. Вам следует определить, какой элемент вы планируете проверить или заменить, прежде чем продолжить.
- Электрические водонагреватели обычно имеют один или два нагревательных элемента.
- Верхний элемент нагревает верхнюю часть бака.
- Нижний элемент нагревает оставшуюся воду в баке.
- Оба элемента рассчитаны на долговечность и эффективность.
Отсоедините провода перед проверкой нагревательного элемента
Запомните расположение проводов для повторной сборки
Перед тем как снимать провода, необходимо запомнить их точное расположение. Вы можете использовать цветную изоленту или метки для маркировки каждого провода. Некоторые предпочитают нарисовать простую схему. Этот шаг гарантирует, что после проверки вы все правильно подключите обратно. Если пропустить этот шаг, вы рискуете допустить ошибки в проводке, которые могут повредить водонагреватель или вызвать его неисправность.
Безопасное снятие проводов с клемм
Перед проверкой необходимо отсоединить провода от нагревательного элемента. Следуйте этой рекомендуемой процедуре:
- Отключите электропитание водонагревателя. Этот шаг предотвращает поражение электрическим током и защищает нагревательный элемент.
- Снимите пластиковую крышку термостата. Эта крышка защищает электрические соединители и должна быть снята, прежде чем вы получите доступ к проводам.
- Отсоедините электрические провода от нагревательного элемента. С помощью отвертки ослабьте винты и аккуратно потяните провода от клемм.
Всегда перепроверяйте, что питание отключено, прежде чем прикасаться к проводам. Безопасность должна оставаться вашим главным приоритетом.
После отсоединения проводов вы готовы к проверке нагревательного элемента. Тщательная подготовка на этом этапе обеспечивает точные результаты и плавный процесс повторной сборки.
Как проверить нагревательный элемент с помощью мультиметра
Проверка нагревательного элемента мультиметром дает четкие ответы о его состоянии. Вы можете быстро определить, работает ли элемент или его необходимо заменить. Этот процесс требует тщательной настройки и внимания к деталям.
Настройка мультиметра для диагностики водонагревателя
Выберите режим измерения сопротивления (Ом)
Перед проверкой нагревательного элемента необходимо правильно настроить мультиметр. Выполните следующие шаги для подготовки устройства:
- Включите мультиметр.
- Установите его на Настройка минимального значения Ом (Ω). Этот режим позволяет точно измерить сопротивление нагревательного элемента.
Совет: Всегда используйте самый низкий диапазон сопротивления для наиболее точных показаний. Этот шаг гарантирует, что вы обнаружите даже малейшие изменения в нагревательном элементе.
Проверьте работоспособность мультиметра
Перед началом убедитесь, что ваш мультиметр работает исправно. Соедините два щупа вместе. На дисплее должно отобразиться значение, близкое к нулю. Если вы не видите изменений или получаете неожиданное значение, замените батарею или проверьте щупы на наличие повреждений. Надежный мультиметр предотвращает ошибки при диагностике.
Проверка нагревательных элементов на целостность и сопротивление
Разместите щупы на клеммах элемента
Теперь вы можете проверить нагревательный элемент на целостность и сопротивление. Убедитесь, что питание отключено, а провода отсоединены. Поместите по одному щупу на каждую клемму нагревательного элемента. Держите щупы плотно для обеспечения стабильного контакта.
Примечание: Никогда не прикасайтесь к металлическим частям щупов во время проверки. Эта мера предосторожности защищает вас от поражения электрическим током и обеспечивает точность показаний.
Считайте и запишите значения сопротивления
Наблюдайте за дисплеем мультиметра. Исправный нагревательный элемент покажет определенное значение сопротивления, зависящее от его мощности и напряжения. Используйте таблицу ниже для сравнения ваших показаний:
| Мощность (Вт) | Напряжение (В) | Сопротивление (Ω) |
|---|---|---|
| 2400 | 240 | 24 |
| 3000 | 240 | 19.2 |
| 3500 | 240 | 16 |
| 4500 | 240 | 12.8 |
| 5500 | 240 | 10-11 |
Если ваши показания соответствуют ожидаемому сопротивлению, нагревательный элемент работает правильно. Если мультиметр показывает ноль или бесконечное сопротивление, элемент вышел из строя. Вам следует заменить его для восстановления нормальной подачи горячей воды.
Соблюдайте крайнюю осторожность при проверке нагревательного элемента водонагревателя. Всегда подтверждайте, что питание отключено, перед началом работы. Если вы чувствуете неуверенность на каком-либо этапе, обратитесь к специалисту.
Теперь вы завершили процесс проверки нагревательного элемента. Этот метод помогает выявить неисправные нагревательные элементы и способствует эффективной диагностике водонагревателя.
Интерпретация результатов проверки элементов водонагревателя
Понимание показаний исправного нагревательного элемента
Типичные значения сопротивления в зависимости от мощности
При проверке нагревательного элемента необходимо сравнить показания мультиметра с ожидаемым диапазоном сопротивления. Большинство исправных нагревательных элементов показывают сопротивление между 10 и 30 Ом. Этот диапазон применим к стандартным элементам электрических водонагревателей. Вы также можете обратиться к таблице мощности и напряжения, приведенной ранее, для более точных значений.
| Мощность (Вт) | Напряжение (В) | Ожидаемое сопротивление (Ом) |
|---|---|---|
| 2400 | 240 | 24 |
| 3000 | 240 | 19.2 |
| 3500 | 240 | 16 |
| 4500 | 240 | 12.8 |
| 5500 | 240 | 10-11 |
Если ваши показания находятся в диапазоне 10–30 Ом, ваш нагревательный элемент, вероятно, работает как положено.
Признаки исправной работы нагревательного элемента
Вы можете подтвердить исправность нагревательного элемента, наблюдая следующие признаки:
- Мультиметр показывает значение сопротивления в диапазоне от 10 до 30 Ом.
- Показания соответствуют ожидаемому значению для мощности и напряжения вашего элемента.
- На мультиметре не отображается символ бесконечности или значение ноль.
- Водонагреватель стабильно производит горячую воду.
Исправный нагревательный элемент позволяет электричеству проходить через него, создавая тепло, необходимое для вашего водонагревателя. Если вы видите такие результаты, вы можете исключить нагревательный элемент как причину отсутствия горячей воды.
Выявление неисправных нагревательных элементов
Результаты с нулевым или бесконечным сопротивлением
Если ваш мультиметр показывает значение ноль или бесконечность, вы обнаружили проблему. Эти результаты указывают на неисправный нагревательный элемент. Вот как можно интерпретировать эти показания:
- Ноль Ом: Нагревательный элемент имеет внутреннее замыкание. Электрический ток проходит без сопротивления, что может привести к перегреву или срабатыванию автоматических выключателей.
- Бесконечность (∞) или OL: Нагревательный элемент имеет обрыв цепи. Электрический ток не может проходить, поэтому элемент не будет нагревать воду.
Неисправный нагревательный элемент — распространённая причина отсутствия горячей воды в электрических водонагревателях.
Дальнейшие действия при выходе элемента из строя
Если ваш нагревательный элемент не проходит проверку сопротивления или целостности цепи, необходимо принять меры. Следуйте этим шагам для эффективной диагностики нагревательного элемента:
- Отсоедините два провода от нагревательного элемента. Убедитесь, что провода не касаются друг друга или металлических деталей.
- Установите мультиметр в режим измерения сопротивления (Омы) и повторно измерьте сопротивление для подтверждения результата.
- Если показания остаются за пределами диапазона 10–30 Ом или отображают бесконечность, запланируйте замену нагревательного элемента.
- Приобретите замену, соответствующую техническим характеристикам вашего водонагревателя.
- Установите новый нагревательный элемент, подключите провода и закройте смотровые панели.
- Включите питание и проверьте работу водонагревателя.
Всегда перепроверяйте выполненную работу и убедитесь, что все соединения надёжны, перед включением питания. Если вы не уверены в каком-либо шаге, обратитесь к лицензированному специалисту.
Правильная интерпретация результатов тестирования позволяет диагностировать проблемы нагревательного элемента и восстановить стабильную подачу горячей воды. Этот процесс помогает поддерживать работоспособность электрического водонагревателя и избегать простоев.
Сборка и восстановление работы водонагревателя
После завершения тестирования или замены нагревательных элементов необходимо аккуратно собрать электрический водонагреватель. Правильная сборка обеспечивает безопасность и возобновление стабильной подачи горячей воды.
Подключение проводов к клеммам нагревательного элемента
Надёжное крепление проводов
Внимательно подключите провода к клеммам нагревательного элемента. Пайка не подходит для нихромовой проволоки, поскольку высокая температура внутри бака разрушит соединение. Вместо этого используйте винтовые клеммы на нагревательном элементе. Надёжно затяните каждый винт для фиксации провода. При обнаружении повреждённых проводов или ненадёжных соединений рассмотрите использование обжимных соединителей или замену всего нагревательного элемента для долговременного решения.
- Избегайте пайки нихромовых проводов.
- Используйте винтовые клеммы или обжимные соединители.
- Замените нагревательный элемент, если соединения кажутся ненадёжными.
Двойная проверка всех соединений
Перед включением питания проверьте каждое соединение на безопасность. Следуйте этим шагам, чтобы убедиться в надёжности:
- Используйте тестер напряжения, чтобы убедиться в отсутствии напряжения на клеммах.
- Проверьте каждый провод на наличие оголённых жил или ослабленных концов. Изолируйте оголённые участки изолентой или используйте соединительные колпачки.
- Закрепите кабели внутри распределительной коробки с помощью кабельных зажимов. Это предотвращает смещение и снижает риск повреждения.
- Проведите окончательный осмотр всей проводки, кабельных зажимов и крышки распределительной коробки. Убедитесь, что всё затянуто и надёжно закрыто.
Совет: двойная проверка работы предотвращает электрические риски и будущие неисправности.
Установка изоляции и панелей водонагревателя
Аккуратно установите изоляцию
Верните изоляцию на нагревательный элемент и термостат. Убедитесь, что изоляция покрывает все открытые металлические части, но не мешает проводке. Если ваш водонагреватель использует пластиковый или картонный экран, верните его на место.
- Разровняйте изоляцию, чтобы избежать зазоров.
- Убедитесь, что изоляция не касается электрических клемм.
Закрепите панели винтами
Совместите смотровую панель с отверстием на баке. Вставьте винты и надёжно затяните их. Держите панель на одном уровне с поверхностью, чтобы защитить внутренние компоненты от пыли и влаги.
Примечание: храните дополнительные винты или детали в безопасном месте для будущего обслуживания.
Включение питания и проверка работы водонагревателя
Включите автоматический выключатель
Вернитесь к электрощиту и переведите автоматический выключатель водонагревателя в положение “включено”. Это восстановит подачу питания.
Проверка корректного нагрева
Убедитесь, что водонагреватель работает правильно после сборки. Используйте этот контрольный список:
- Подтвердите, что водонагреватель подключён к щиту с помощью провода правильного сечения и подходящего автоматического выключателя..
- Проверьте все провода на физические повреждения, которые могут прервать подачу питания.
- Нажмите кнопку сброса на панели управления, если водонагреватель отключился.
- Если устройство не включается, сбросьте автоматический выключатель.
- Дождитесь нагрева бака, затем проверьте стабильность подачи горячей воды из крана.
При обнаружении проблем, таких как отсутствие горячей воды или срабатывание выключателей, отключите питание и проверьте соединения. Обратитесь к специалисту, если не можете решить проблему.
Следуя этим шагам, вы обеспечите безопасную, эффективную работу электрического водонагревателя и стабильную подачу горячей воды.
Проверка нагревательного элемента водонагревателя — это простой процесс, если тщательно выполнять каждый шаг. Регулярные проверки помогают избежать распространённых ошибок, таких как забывание отключить питание или или игнорирование неисправных термостатов.. Регулярное обслуживание даёт несколько преимуществ:
- Продленный срок службы и повышенная эффективность
- Снижение счетов за коммунальные услуги.
- Раннее выявление проблем, предотвращение дорогостоящего ремонта.
Безопасность остаётся главным приоритетом. Если вы не уверены, лицензированные сантехники предлагают диагностику, ремонт и комплексные услуги по установке.
Рекомендуется ежегодное тестирование, но в домах с жёсткой водой или высоким потреблением проверку следует проводить каждые три–шесть месяцев. Пренебрежение обслуживанием может привести к повышенным энергозатратам и повреждениям от воды. Переход на эффективные модели также снижает воздействие на окружающую среду.

Вы можете использовать это руководство для уверенной и безопасной диагностики водонагревателя.
ЧАСТО ЗАДАВАЕМЫЕ ВОПРОСЫ
Как часто следует проверять нагревательный элемент водонагревателя?
Проверяйте нагревательный элемент водонагревателя раз в год. При нестабильной температуре воды или её отсутствии протестируйте элемент немедленно. Регулярные проверки помогают предотвратить внезапные поломки.
Какие признаки указывают на неисправность нагревательного элемента водонагревателя?
Вы можете заметить теплую воду вместо горячей, полное отсутствие горячей воды или частые срабатывания автоматического выключателя. Необычные шумы из бака также могут указывать на проблему. Проверка нагревательного элемента подтвердит неисправность.
Можно ли проверить нагревательный элемент водонагревателя без мультиметра?
Для точных результатов необходим мультиметр. Визуальный осмотр сам по себе не может подтвердить электрические неисправности. Мультиметры измеряют сопротивление и целостность цепи, что необходимо для диагностики проблем с элементом.
Безопасно ли самостоятельно проверять нагревательный элемент водонагревателя?
Вы можете безопасно проверить элемент, если соблюдаете все меры предосторожности. Всегда отключайте питание и используйте защитное снаряжение. Если вы не уверены, обратитесь к лицензированному специалисту.
Какое значение сопротивления указывает на исправность нагревательного элемента?
| Мощность (Вт) | Напряжение (В) | Сопротивление (Ω) |
|---|---|---|
| 4500 | 240 | 12.8 |
| 5500 | 240 | 10-11 |
Показание в диапазоне от 10 до 30 Ом обычно означает, что элемент исправен.
Нужно ли сливать воду из бака для проверки нагревательного элемента?
Для проверки сливать воду из бака не требуется. Слив необходим только в случае, если вы планируете заменить нагревательный элемент. Для проверки требуется доступ к клеммам, а не к внутренней части бака.
Что делать, если оба элемента проверены и исправны, но горячей воды по-прежнему нет?
Проверьте термостаты на наличие неисправностей. Осмотрите соединения проводки на предмет повреждений. Если не удается найти причину, вызовите лицензированного сантехника или электрика для дальнейшей диагностики.

