
Quando l'asciugatrice Maytag smette di produrre calore, probabilmente si trova ad affrontare un fastidioso ritardo nel bucato. Un elemento riscaldante difettoso causa spesso questo problema in un elettrodomestico Maytag. È possibile ripristinare le prestazioni dell'asciugatrice con gli strumenti giusti e i passaggi di riparazione adeguati. Agire per risolvere il problema e mantenere i vestiti asciutti dopo ogni ciclo.
Asciugatrice Maytag che non riscalda: confermare che l'elemento riscaldante sia il problema
Quando l'asciugatrice Maytag ha smesso di riscaldarsi, è necessario confermare la causa principale prima di iniziare qualsiasi riparazione. L'elemento riscaldante spesso si guasta, ma anche altri componenti possono portare a una mancanza di calore. Riconoscendo i sintomi giusti ed eseguendo controlli rapidi, è possibile evitare sostituzioni di parti non necessarie e ripristinare efficacemente le prestazioni dell'asciugatrice.
Segnali che l'elemento riscaldante dell'asciugatrice Maytag è rotto
I vestiti rimangono bagnati dopo un ciclo completo
Potresti notare che i tuoi vestiti rimangono umidi o bagnati anche dopo aver eseguito un ciclo di asciugatura completo. Questo sintomo indica spesso un problema di riscaldamento. L'elemento riscaldante dell'asciugatrice è responsabile della generazione del calore necessario per asciugare il bucato. Quando si guasta, l'aria all'interno del tamburo rimane fredda e i vestiti non si asciugano come previsto.
L'asciugatrice funziona ma non produce calore
Se l'asciugatrice si accende, ruota il tamburo e completa i cicli ma non produce calore, l'elemento riscaldante potrebbe essere la causa. Secondo le linee guida del produttore e gli esperti di riparazione, un elemento riscaldante rotto impedisce all'asciugatrice di riscaldare l'aria, con conseguente asciugatura inefficace. Si potrebbe anche notare un aumento delle bollette energetiche, poiché l'asciugatrice funziona più a lungo senza asciugare correttamente i vestiti.
Codici di errore o spie di avviso
Alcuni modelli Maytag visualizzano codici di errore o spie di avviso quando il sistema di riscaldamento funziona male. Questi avvisi possono indicare un problema con l'elemento riscaldante o componenti correlati. Consultare sempre il manuale dell'utente per interpretare correttamente questi codici.
Suggerimento: Se si vedono codici di errore, annotarli prima di scollegare l'asciugatrice. Queste informazioni possono aiutare te o un tecnico a diagnosticare il problema più rapidamente.
Controlli rapidi prima di sostituire l'elemento riscaldante
Prima di sostituire l'elemento riscaldante, eseguire alcuni controlli essenziali. Molti problemi possono causare il mancato riscaldamento di un'asciugatrice Maytag, quindi una diagnosi approfondita fa risparmiare tempo e denaro.
Controllare l'alimentazione elettrica e le impostazioni dell'asciugatrice
Innanzitutto, verificare che l'asciugatrice sia collegata saldamente e che le impostazioni siano corrette. A volte, un semplice errore come selezionare un ciclo di aria fredda o senza calore può far sembrare che l'asciugatrice non funzioni. Inoltre, assicurarsi che la porta si chiuda correttamente, poiché alcuni modelli non riscaldano se l'interruttore della porta non è attivato.
Ispezionare l'interruttore automatico e i fusibili
Un interruttore automatico scattato o un fusibile bruciato può interrompere l'alimentazione all'elemento riscaldante. Controllare il quadro elettrico di casa e ripristinare eventuali interruttori scattati. Sostituire i fusibili bruciati se necessario. I problemi di alimentazione elettrica sono una causa comune dei guasti al riscaldamento nelle asciugatrici.
Escludere il fusibile termico e i termostati
Il fusibile termico e i termostati proteggono l'asciugatrice dal surriscaldamento. Se uno dei due componenti si guasta, l'asciugatrice smetterà di riscaldarsi. Utilizzare un multimetro per testare questi componenti per la continuità. Se non mostrano continuità, sostituirli prima di considerare l'elemento riscaldante. I professionisti della riparazione di elettrodomestici raccomandano di controllare questi componenti perché sono colpevoli frequenti insieme all'elemento riscaldante.
- La Cause più comuni del mancato riscaldamento di un'asciugatrice Maytag includono:
- Elemento riscaldante difettoso
- Fusibile termico guasto
- Termostati difettosi (ciclici e di limite massimo)
- Problemi di alimentazione elettrica
- Sfiati ostruiti o impostazioni errate
Seguendo questi passaggi, è possibile identificare con precisione se l'elemento riscaldante o un'altra parte è responsabile del mancato riscaldamento dell'asciugatrice Maytag.
Come riparare: raccogliere strumenti e parti di ricambio per l'asciugatrice Maytag
Prima di iniziare qualsiasi riparazione, è necessario raccogliere gli strumenti e le parti giuste. Avere tutto pronto aiuterà a completare il lavoro in modo efficiente e sicuro. Questa sezione spiega cosa serve e come scegliere l'elemento riscaldante di ricambio corretto per l'asciugatrice Maytag.
Strumenti essenziali necessari
Cacciaviti a croce e a testa piatta
Serviranno sia cacciaviti a croce che a testa piatta per rimuovere e installare le viti sui pannelli dell'asciugatrice. Questi strumenti aiutano ad accedere ai componenti interni senza danneggiare le viti o l'elettrodomestico.
Chiave a bussola o chiave a tubo
Un avvitatore a bussola o una chiave a bussola consente di rimuovere i bulloni che fissano l'elemento riscaldante e altre parti. Scegliere la dimensione corretta per il modello specifico per evitare di rovinare l'hardware.
Multimetro per testare la continuità
Un multimetro è essenziale per testare la continuità elettrica. Può essere utilizzato per verificare se l'elemento riscaldante, il fusibile termico o i termostati funzionano. Questo strumento aiuta a confermare quale parte deve essere sostituita prima di procedere.
Guanti da lavoro e occhiali di sicurezza
Indossare guanti da lavoro e occhiali di sicurezza per proteggere mani e occhi durante la riparazione. I bordi taglienti all'interno dell'asciugatrice possono causare lesioni. L'equipaggiamento di sicurezza protegge anche da polvere e detriti.
Gli esperti di riparazione di elettrodomestici raccomandano un cacciavite multiplo come strumento più importante per sostituire un elemento riscaldante in un'asciugatrice Maytag. Questo strumento consente di gestire diversi tipi di viti durante lo smontaggio e il rimontaggio. Scollegare sempre l'asciugatrice o spegnere l'interruttore automatico prima di iniziare qualsiasi riparazione per prevenire incidenti elettrici.
Scelta dell'elemento riscaldante corretto
Individuare il numero di modello dell'asciugatrice Maytag
È necessario trovare il numero di modello dell'asciugatrice prima di acquistare una parte di ricambio. Il numero di modello si trova solitamente su un'etichetta all'interno del telaio della porta o sul pannello posteriore. Annotarlo o scattare una foto per riferimento.
Acquistare un elemento riscaldante di ricambio compatibile
Quando si acquista un nuovo elemento riscaldante, abbinare il numero di parte del produttore al modello dell'asciugatrice. Scegliere sempre una parte OEM (Original Equipment Manufacturer) per garantire una corretta vestibilità e funzionalità. Ad esempio, la Maytag DE482 utilizza l'elemento riscaldante OEM (240V) con numero di parte WPY313538. Questa parte è compatibile anche con alcuni modelli Jenn-Air e Kenmore.
- Utilizzare la parte OEM corretta previene:
- Prestazioni di riscaldamento incoerenti o scadenti.
- Danni ad altri componenti interni dovuti a sovraccarico di lavoro.
- Safety hazards, such as exposure to live electrical current.
Using an incompatible heating element can lead to longer drying times, damage to your appliance, or even electrical risks. Always double-check the part number before making a purchase.
By preparing the right tools and selecting the correct replacement part, you set yourself up for a successful repair. You now know how to fix your Maytag dryer with confidence and safety.
Maytag Dryer Repair: Safety Precautions Before You Start
Before you begin any dryer repair, you must take safety seriously. Following the right precautions protects you from electrical hazards, burns, and other common risks. Maytag and appliance safety organizations recommend several essential steps to keep you and your home safe during the repair process.
Disconnect Power and Prepare the Work Area
Unplug the Dryer or Turn Off Power at the Breaker
È necessario disconnect all power to your dryer before starting any repair. Unplug the appliance from the wall outlet or switch off the circuit breaker that supplies electricity to the dryer. This step prevents accidental electrical shocks and eliminates the risk of burns from live wires. Many safety incidents during DIY repairs occur because people forget to disconnect power. Always double-check that the dryer cannot turn on while you work.
Suggerimento: If you own a gas dryer, shut off the gas supply as well. This action prevents gas leaks and reduces the risk of explosions.
Move the Dryer for Easy Access
Move your dryer away from the wall to create enough space for the repair. You need clear access to the back or front panel, depending on your model. Position the dryer on a flat, stable surface to prevent tipping. A well-organized workspace helps you avoid accidents and makes the repair process smoother.
Proteggi Te Stesso e la Tua Casa
Wear Safety Gear
Personal protective equipment (PPE) is essential for safe dryer repair. Wear work gloves to protect your hands from sharp edges and hot surfaces. Safety glasses shield your eyes from dust and debris. Many professionals recommend these items because they reduce the risk of cuts, burns, and eye injuries. You should also wear closed-toe shoes to protect your feet from falling tools or parts.
Clear the Area Around the Dryer
Remove any flammable materials, such as laundry, cleaning supplies, or paper, from the area around your dryer. A clutter-free workspace lowers the risk of fire and makes it easier to move around safely. Keep your tools organized and ensure the area is well-lit. If you notice any unusual smells, sparks, or noises from your dryer, stop the repair immediately and seek professional help.
Nota: Regularly cleaning the lint trap and vent not only improves dryer performance but also reduces fire hazards during and after repairs.
By following these safety precautions, you create a safer environment for your dryer repair. You also reduce the risk of injury and protect your home from potential hazards. If you ever feel unsure about any step, consider contacting a trained professional for assistance.
How to Fix: Access and Test the Maytag Dryer Heating Element
Opening the Dryer Cabinet
Remove the Back or Front Panel
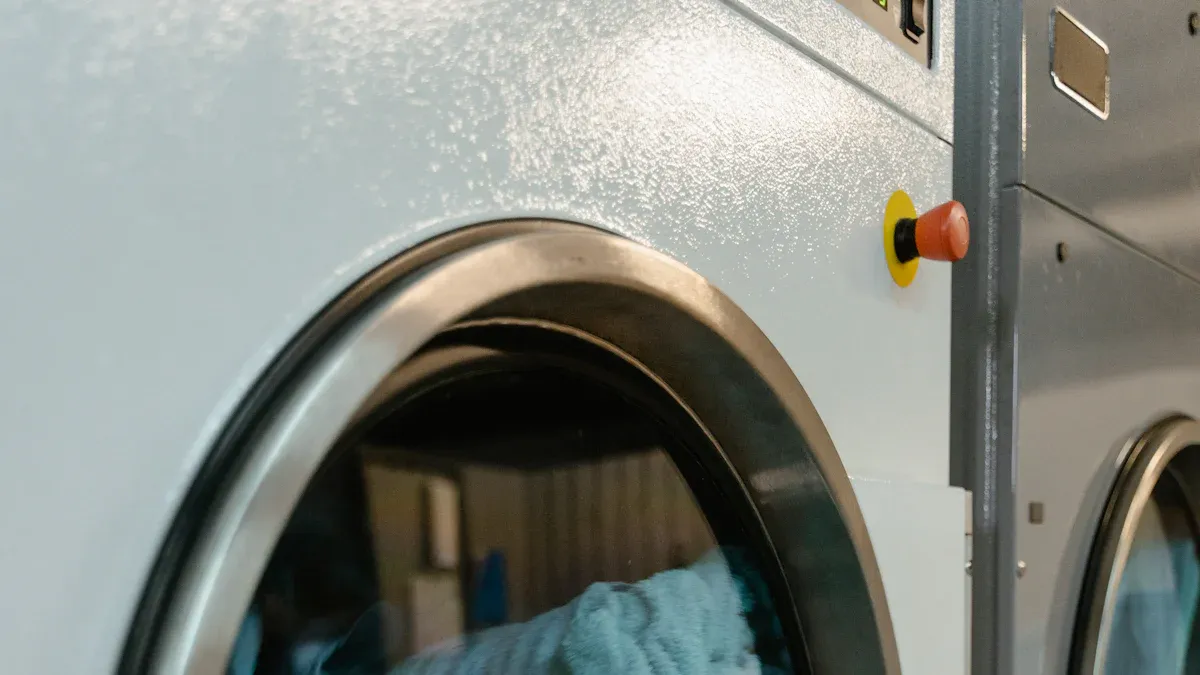
You need to open your dryer cabinet to reach the heating element. Always start by unplugging the dryer from the power source. This step protects you from electrical shock. Next, remove the lint screen and set it aside. Use a Phillips head screwdriver to take out the screws that secure the top panel, usually found at the back of the dryer.
Lift the top panel and prop it against a stable surface. Carefully disconnect any wiring harnesses and the control panel from the cabinet. Locate and remove the screws holding the front panel in place—these are typically at the top and bottom. Disconnect the door switch wiring harness before lifting and removing the front panel. If your model requires it, remove the screws that secure the drum to the rear bulkhead and carefully lift out the drum.
Suggerimento: Keep all screws and small parts in a container. This practice prevents losing essential hardware during reassembly.
Locate the Heating Element Assembly
Once you have removed the necessary panels, locate the heating element assembly. In most Maytag models, you will find the heating element at the back of the dryer, inside a metal housing. The assembly often looks like a coiled wire or a metal box with terminals for electrical connections. Take a moment to inspect the area for dust or lint buildup, which can affect performance.
Testing the Heating Element for Faults
Use a Multimeter to Check for Continuity
Testing the dryer heating element with a multimeter helps you confirm if it is faulty. Set your multimeter to the 200-ohm resistance setting. Find the heating element leads—these are usually three red wires attached to the coil. Touch the multimeter probes to the two leads on the heating coil.
If the multimeter displays a numerical value, the heating element has continuity and is likely working. If you see no reading, the element is faulty and needs replacement. Always consult your manufacturer’s guide if you are unsure about the part locations.
Nota: Always unplug the dryer before testing any electrical components. This step ensures your safety.
Look for Visible Breaks or Burn Marks
Visual inspection can reveal obvious signs of a failed heating element. Look for any visible breaks in the coil or burn marks on the metal housing. If you notice unusual smells or signs of burning, the heating element or its connecting wires may have overheated or sustained damage. Intermittent heating or a dryer that does not heat up at all often points to these issues.
- Common visual signs of a faulty heating element include:
- Broken or separated coil wires
- Dark burn marks on the element or housing
- Melted or discolored terminals
If you find any of these signs, you should replace the heating element to restore your Maytag dryer’s performance.
Nota: If you feel unsure about any step in the process, consult your dryer’s manual or contact a professional technician for guidance.
How to Fix: Replace the Faulty Heating Element in Your Maytag Dryer

Replacing a faulty heating element is a critical step in restoring your dryer’s heat and performance. You need to follow a systematic approach to ensure safety and efficiency. This guide will walk you through the process, from removing the old heating element to installing the new one.
Rimozione del vecchio elemento riscaldante
Scollegare i Fili e le Viti di Montaggio
Start by making sure the dryer is unplugged. Safety comes first. Put on sturdy work gloves to protect your hands from sharp edges inside the cabinet. Move the dryer away from the wall to access the back or front panel, depending on your model.
Follow these steps to disconnect the wires and mounting screws:
- Open the dryer door and remove the screws near the door on both sides.
- Gently pull off the front panel by gripping the outside edges.
- Locate the heating element under the drum, usually on the right side.
- Remove the cover that protects the heating element. This cover is typically secured by a 1/4 inch hex screw.
- Unscrew the 1/4 inch hex head screw holding the heating element to the floor of the cabinet.
- Remove the screw at the back of the heater housing on the top, which secures it to the back wall.
- Before disconnecting the wires, take a clear photo of the wiring connections. This step helps you reconnect everything correctly later.
- Carefully disconnect the wires from the heating element terminals.
Suggerimento: Use a small container to keep all screws and fasteners organized during the repair.
Carefully Remove the Heating Element
Once you have disconnected the wires and removed all mounting screws, you can extract the heating element. Grip the element firmly and pull it straight out of the housing. If your model has a high-heat thermostat attached to the element, remove it and set it aside for transfer to the new part.
Inspect the old heating element for visible damage, such as broken coils or burn marks. This inspection confirms that you have identified the correct cause of your Maytag dryer’s heating problem.
Installazione del nuovo elemento riscaldante
Secure the New Element in Place
Before you install the new heating element, transfer the high-heat thermostat from the old element to the new one if required. Position the new heating element in the same orientation as the original.
Follow these steps to secure the new element:
- Slide the new heating element into the housing, making sure it fits snugly.
- Align the mounting holes and insert the 1/4 inch hex head screws to secure the element to the floor and back wall.
- Reattach the cover over the heating element and tighten the screw.
Nota: Double-check that the new element sits firmly in place and does not move when you touch it.
Reconnect Wires and Fasteners
Now, reconnect the wires to the new heating element. Use the photo you took earlier as a reference to ensure each wire connects to the correct terminal. Secure all connections tightly to prevent electrical issues.
Continue with these steps:
- Attach the high-heat thermostat to the new element if you have not done so already.
- Reinstall the front panel by aligning it with the cabinet and pressing it into place.
- Insert and tighten all screws you removed earlier.
- Move the dryer back into position and plug it in.
Nota: After reassembly, run the dryer empty for a short cycle to confirm the new heating element works. Listen for unusual noises and check for proper heat output. Once you verify normal operation, test the dryer with a small load of damp clothes to ensure full functionality.
By following these steps, you complete the core of your Maytag dryer repair. You now know how to fix a faulty heating element and restore reliable heat to your appliance.
Maytag Dryer Not Heating: Reassemble and Test After Repair
Putting the Dryer Back Together
Reattach Panels and Screws
You need to reassemble your Maytag dryer carefully to ensure safe and efficient operation. Follow these steps to put everything back in place:
- Slide the drum back into the cabinet, using the belt to guide it toward the rear. Before you do this, apply fresh grease to the back shaft that supports the drum. This step reduces friction and extends the life of your appliance.
- Reinstall the plastic support on the front top rail.
- Secure the top front panel by tightening the screws inside the panel.
- Press in the tabs with a screwdriver and lower the dryer’s top from the front.
- Attach the small rear panel, making sure the belt hangs loosely.
- Loop the belt around the motor and tensioner, ensuring proper alignment.
- Double-check that all mounting screws and fasteners are tight.
Suggerimento: Keep all screws and small parts organized during reassembly. This practice prevents delays and ensures you do not miss any critical components.
Restore Power and Connections
Once you have reattached all panels and secured the drum, restore the power and connections:
- Plug the dryer back into the wall outlet or switch the circuit breaker back on.
- If you own a gas model, turn the gas supply back on.
- Confirm that all wiring harnesses and connectors are firmly attached.
Always verify that the area around the dryer is clear before restoring power. This step helps prevent accidental damage or fire hazards.
Testing for Proper Operation
Run a Test Cycle to Check for Heat
After you finish reassembling the dryer, you must confirm that the repair was successful. Start by running an empty test cycle:
- Set the dryer to a high-heat setting.
- Let it run for 5–10 minutes.
- Open the door and check if the drum feels warm.
If you notice heat inside the drum, your new heating element works as intended. If the dryer does not heat, you may need to review your installation or check for other issues.
Confirm Normal Dryer Function
To ensure your dryer operates safely and efficiently, perform these additional checks:
- Verify the dryer receives 220 volts at the junction block where the power cord connects.
- Test all thermostats and thermal fuses with a multimeter, even if you recently replaced them.
- Inspect the motor connections, especially the two red wires. They must be secure.
- Check the centrifugal switch inside the motor. A faulty switch can prevent the heating element from receiving power.
If you complete these steps and the dryer still does not heat, consider that the motor may require replacement. Consult your user manual or a professional technician for further guidance.
By following these steps, you learn how to fix your Maytag dryer and restore reliable heat. Careful reassembly and thorough testing ensure your appliance runs safely and efficiently.
Preventing Future Maytag Dryer Heating Element Issues
Maintenance Tips for a Healthy Dryer
Clean the Lint Filter and Vent Regularly
You can extend the life of your Maytag appliance by following a consistent cleaning routine. Regular maintenance helps prevent your dryer from overheating and reduces the risk of the heating element failing. Appliance experts recommend these steps:
- Clean the lint filter after every load. This simple habit maintains airflow and keeps your dryer running efficiently.
- Wash the lint screen with soap and water every week or two. Fabric softener and dryer sheets can leave residue that blocks airflow.
- Vacuum the lint trap housing once a month. Lint can escape the filter and build up inside the housing, leading to overheating.
- Schedule a professional cleaning of the exhaust vent at least once a year. If you do heavy laundry loads, consider more frequent cleanings.
Suggerimento: A clogged vent is one of the most common reasons a Asciugatrice Maytag stopped heating up. Keeping the vent clear ensures proper airflow and protects the heating element.
Avoid Overloading the Dryer
You should avoid overloading your dryer. Large, heavy loads restrict airflow and force the heating element to work harder. This extra strain can cause the element to overheat and fail prematurely. Instead, dry smaller loads and allow space for air to circulate. You will notice better drying results and fewer repairs over time.
- Regularly inspect the heating element for visible damage or burn marks.
- Check the washing machine connected to your dryer. Balanced loads and proper spin cycles help reduce moisture, making drying easier and less stressful on the heating element.
When to Call a Professional for Maytag Dryer Repair
Persistent Heating Problems After DIY Repair
If your Maytag dryer continues to have heating issues after you have replaced the heating element and cleaned the vent, you may face a more complex problem. Persistent failures often point to faulty thermostats, electrical shorts, or a malfunctioning motor switch. These issues require diagnostic tests and specialized tools.
- Call a professional if your appliance remains unresponsive or shows signs of electrical problems.
- Unusual noises, burning smells, or repeated thermal fuse failures signal deeper faults that need expert attention.
Electrical or Safety Concerns
You should never attempt repairs that involve electrical hazards or gas connections unless you have proper training. Handling wiring or control board issues without expertise can lead to injury or fire. Gas dryers present additional risks, such as leaks or carbon monoxide exposure.
Nota: DIY repairs can void your warranty. Certified technicians have the knowledge and tools to fix your Maytag appliance safely and efficiently.
| Aspetto | Riparazione professionale | Riparazione fai-da-te |
|---|---|---|
| Fascia di Costo della Manodopera | $100 to $190 per hour | No labor cost, only personal time |
| Total Repair Cost Range | Approximately $100 to $550 | Cost of parts only (varies by OEM or generic) |
| Success Rate | Higher due to expertise and quality parts | Good if instructions followed carefully |
You protect your investment and safety by knowing when to call a professional. If you feel uncertain about any repair, seek expert help to avoid further damage.
Replacing your Maytag dryer’s heating element restores reliable heat and improves drying performance. You save time and money by handling this repair yourself, thanks to the user-friendly design. Regular maintenance, such as cleaning lint filters and vents, extends the life of your appliance. If you face persistent issues or safety concerns, reach out to a professional technician for expert support.
| Key Takeaway | Beneficio |
|---|---|
| Facilità di installazione | Simple process with basic tools, reducing repair costs |
| Prestazioni di riscaldamento | Consistent heat ensures even drying and fewer cold spots |
| Longevità | Durable parts last 5–10 years with proper care |
If you feel unsure at any step, professional services and online resources offer guidance and peace of mind.
FAQ
How often should you replace the heating element in your Maytag dryer?
You should replace the heating element only when it fails. Most elements last 5–10 years with proper care. Regular maintenance, such as cleaning the lint filter and vent, helps extend its lifespan.
Can you use a generic heating element in your Maytag dryer?
You should always use an OEM (Original Equipment Manufacturer) heating element. Generic parts may not fit correctly or provide reliable performance. OEM parts ensure safety and compatibility with your specific model.
What tools do you need to replace a Maytag dryer heating element?
You need a Phillips screwdriver, flathead screwdriver, nut driver or socket wrench, multimeter, and work gloves. These tools help you safely access, test, and replace the heating element.
Why does your Maytag dryer keep blowing the thermal fuse?
A clogged vent or lint buildup often causes repeated thermal fuse failures. Restricted airflow leads to overheating. Clean the lint filter and vent regularly to prevent this issue.
Is it safe to repair your Maytag dryer yourself?
You can safely repair your dryer if you follow all safety precautions. Always disconnect power before starting. Wear protective gear. If you feel unsure, contact a professional technician.
How do you know if the heating element is bad without a multimeter?
You can look for visible signs like broken coils or burn marks on the heating element. If your dryer runs but produces no heat, the element may be faulty. However, a multimeter provides the most accurate diagnosis.
What should you do if your dryer still does not heat after replacing the heating element?
Check the thermal fuse, thermostats, and power supply. Make sure all wires connect securely. If the problem continues, consult a professional. Other components may need inspection or replacement.
Can a clogged vent cause your Maytag dryer to stop heating?
Yes. A clogged vent restricts airflow, causing the dryer to overheat and shut off the heating element. Clean the vent regularly to maintain proper dryer function.
Suggerimento: Regular maintenance prevents most heating problems and extends your dryer’s life.

