
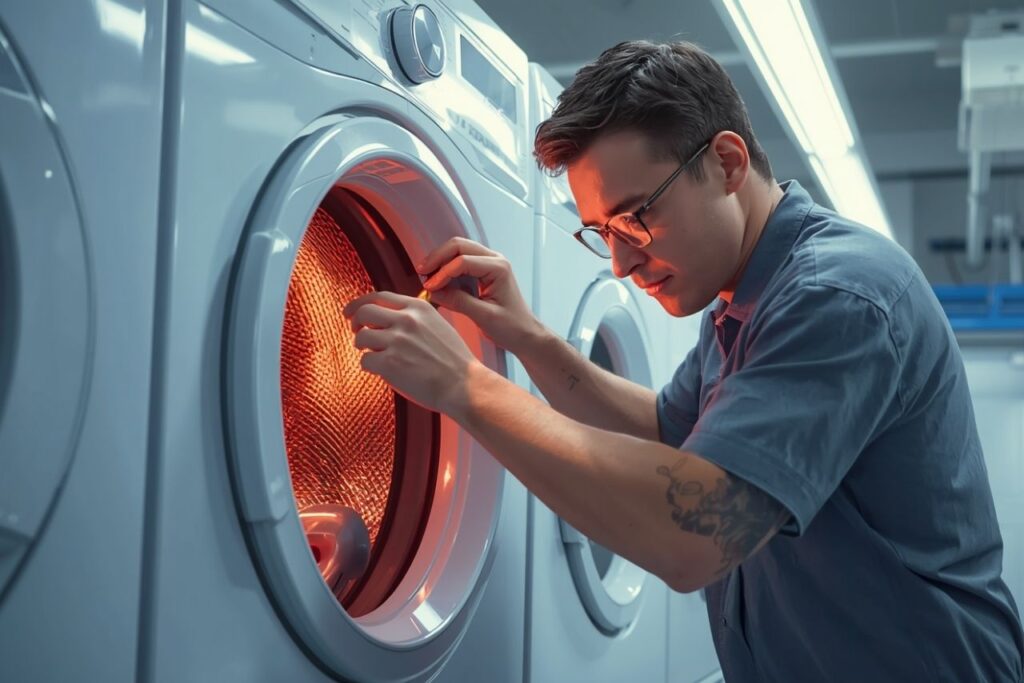
Testing a Frigidaire electric dryer heating element is most accurate when it is treated as a system check—not only a coil check. The workflow that produces the fewest false positives is: confirm safe power isolation, access the heater circuit, visually inspect the element framework and terminals, measure electrical continuity/resistance with a multimeter, then interpret results alongside common “no-heat” contributors such as **thermal fuse** status, **high-limit thermostat** operation, and **airflow restriction**. Engineering references emphasize that a heating element is an assembly (conductive alloy plus insulating/support structure and lead connectors), which is why terminal condition and mechanical support can matter as much as the wire itself.
Relevant product and manufacturing references: Heating Element, Heating Element manufacturer, Heating Element Factory, Die Casting Heating Solutions.
- Heating element fundamentals (what is being tested)
- Symptoms that indicate testing is warranted
- Tools, measurements, and accuracy limits
- Testing workflow: visual + electrical checks
- How to interpret results (decision tables)
- When the element “tests good” but there is still no heat
- If replacement is necessary: sourcing and quality controls
- FAQ (6)
- Citations and outbound links
Heating element fundamentals (what is being tested)
The heating element in an electric dryer converts electrical energy to heat via **resistive heating** (also called **Joule heating**). A key engineering point is that a “heating element” is not only the resistance alloy; it is an engineered component that includes a framework of insulating material and the lead connectors/terminals that attach the element to the circuit. This matters during diagnosis because failures may occur at the coil, at a terminal interface, or from mechanical deformation that causes the coil to contact the heater housing.
What a good test confirms
An unbroken conductive path
Continuity and stable resistance across the element terminals indicate the coil is not open.
What a basic test does NOT prove
Correct heat delivery under load
Airflow, cycling controls, and connectors can still prevent adequate heating even when continuity is present.
Why connectors matter
Resistance heating at terminals
Loose or oxidized terminals can overheat, arc, and mimic an element failure.
Section summary
The target of testing is the entire **heater circuit** performance, starting with the element’s continuity and mechanical integrity.
Symptoms that indicate testing is warranted
Most owners begin testing after “tumbles but no heat,” long dry times, or intermittent heat. In a Frigidaire electric dryer, these symptoms may originate in the element, but they may also come from safety cutoffs (such as a **thermal fuse**) or from airflow problems that force the heater to cycle off early.
- No heat on any heat setting, drum turns normally
- Long dry times despite hot settings
- Burning smell or visible scorching near heater duct (stop use until inspected)
- Heat comes and goes (possible cycling/overheat condition)
- Breaker trips (possible short to chassis or wiring fault)
Safety boundary for diagnosis
Dryer heater circuits draw high current. Any measurement or inspection must start with reliable power isolation. Manufacturer-style service instructions for other heating appliances emphasize verifying correct replacement ratings (voltage/wattage) and ensuring secure wiring before restoring power; the same safety discipline is relevant when handling dryer heater terminals.
Section summary
“No heat” is a symptom, not a diagnosis; testing should consider airflow and safety devices that intentionally stop heating.
Tools, measurements, and accuracy limits
A professional-quality test uses a digital multimeter with a reliable ohms/continuity function, basic hand tools for access panels, and adequate lighting for inspection. The measurement objective is straightforward: determine whether the element is electrically continuous and whether resistance is plausible for an appliance heater coil.
| Tool | Purpose | Accuracy tip |
|---|---|---|
| Digital multimeter (ohms/continuity) | Check continuity and approximate resistance | Zero/compensate lead resistance if the meter supports it |
| Nut driver / screwdriver set | Access rear/front panels and heater housing | Track fastener locations; mismatched screws can distort panels |
| Needle-nose pliers | Remove spade terminals safely | Pull on the connector body, not the wire insulation |
| Vacuum + lint brush | Remove lint that contributes to overheating and cycling | Airflow restoration is part of a “valid” heater test |
LSI terms commonly used in high-performing service guides
**continuity test**, **ohms reading**, **resistance value**, **multimeter**, **heater housing**, **thermal cutoff**, **high-limit thermostat**, **terminal spade**, **dryer vents**, **lint blockage**, **open circuit**, **short to ground**.
Section summary
Continuity/resistance checks are necessary but not sufficient; airflow and connectors can still invalidate real-world heating performance.
Testing workflow: visual + electrical checks
A defensible testing workflow follows a simple principle: inspect first, then measure, then interpret results in context. This reduces mistakes such as measuring “through” other components or overlooking a burned terminal that intermittently opens under heat.
Step A — Confirm conditions for safe, meaningful testing
- Power is disconnected (unplugged or breaker off).
- Dryer has cooled; heater housing is safe to touch.
- Access panels are removed carefully, and wiring is photographed before disconnecting.
- Lint around the heater duct and blower area is removed to restore baseline airflow.
Step B — Visual inspection (high signal, low effort)
Visual inspection can identify failure modes that a continuity test alone may miss: broken coils, coil sag contacting the metal housing, brittle/charred insulators, and overheated spade terminals. Because heating elements are assemblies with frameworks and connectors, this inspection aligns with engineering definitions of how elements are built and fail.
| Inspection point | What to look for | What it implies |
|---|---|---|
| Coil integrity | Visible break, separated wire, collapsed coil | Likely open circuit; element replacement commonly required |
| Element alignment | Coil touching heater box, sagging, warped support | Risk of short-to-chassis and overheating |
| Terminals | Blue/black discoloration, melted plastic, loose fit | High-resistance connection; may fail under load even if continuity exists |
| Lint accumulation | Heavy lint in heater duct or blower path | Airflow restriction; can trigger overheat devices and shorten heater life |
Step C — Electrical test (continuity and resistance)
For accuracy, the element should be electrically isolated by removing at least one lead from the element terminal before measurement. The test then evaluates whether there is a continuous conductive path (continuity) and whether resistance is plausible for a dryer heater coil.
Interpretation guardrails
Exact resistance targets vary by model and heater design. The decisive finding for most field diagnostics is whether the circuit is open (infinite resistance / no continuity). When resistance is present, results must be interpreted alongside airflow and safety devices, because a heater can “test good” yet still be prevented from heating.
Section summary
A reliable test sequence is: safe isolation → visual inspection → isolate leads → continuity/resistance measurement → contextual interpretation.
How to interpret results (decision tables)
The tables below translate measurements into next actions. They are designed to reduce misdiagnosis, especially when multiple components interact.
Decision table 1 — Element continuity/resistance
| Observed reading | Most likely meaning | Recommended next step |
|---|---|---|
| No continuity / OL / infinite ohms | Element is open (broken conductive path) | Replace the element; inspect for airflow restriction that may have caused overheating |
| Continuity present with stable resistance | Element is not open; may still have system-level constraints | Test thermal fuse/high-limit; inspect terminals and airflow; verify supply |
| Unstable reading (jumps when wires are moved) | Loose terminal, fractured connector, or damaged lead | Repair/replace terminals and damaged wiring; re-test with leads isolated |
Decision table 2 — “Short-to-ground” sanity check
A heater coil should not be electrically connected to the metal heater housing. A short-to-chassis may trip breakers or produce intermittent faults.
| Check | Expected | If not expected |
|---|---|---|
| Element terminal → heater housing (ohms/continuity) | No continuity | Potential ground fault; stop and inspect alignment/insulators/wiring |
Section summary
“Open circuit” is the clearest element failure signature; anything else requires system-level checks before concluding the element is the root cause.
When the element “tests good” but there is still no heat
If continuity is present, the element may still not be energized due to safety devices or control logic responding to abnormal conditions. Engineering literature on heater solutions highlights that the heater must be designed and operated within environmental constraints; in dryers, the dominant environmental constraint is airflow.
| Category | What happens | High-probability contributor | What to check next |
|---|---|---|---|
| Safety cutoff | Heater power is interrupted to prevent overheating | Thermal fuse open, high-limit thermostat cycling | Continuity test safety devices (power off), verify airflow path is clean |
| Connector/lead fault | Voltage does not reach the element reliably | Loose spade terminal, heat-damaged wire | Inspect/replace terminals; confirm tight wire connections before powering |
| Airflow restriction | Element overheats, cycles off, or damages safety devices | Clogged vent, lint in housing, crushed duct | Clean lint path; verify strong exhaust flow at exterior vent |
| Power/supply issue | Motor runs but heater lacks correct supply | Incorrect supply condition can mimic heater failure | Confirm correct electrical supply per service practice; professional evaluation if uncertain |
Why airflow is a “measurement variable”
Heater engineering guidance frequently frames performance as the interaction of power, temperature, and environment. In convective systems, insufficient airflow can drive coil temperature higher than intended, shortening life and increasing cycling—sometimes making a functioning element appear defective in real use.
Section summary
A “good” element reading shifts diagnosis toward safety devices, connectors, and airflow—the three most common reasons heat does not appear.
If replacement is necessary: sourcing and quality controls
When the element is confirmed open or mechanically compromised, replacement becomes a procurement and quality-control task. Product listings for electric heaters commonly disclose key verification fields such as wattage, materials, ingress protection, approvals, and warranty/returns. Dryer elements are different products, but the sourcing discipline carries over: correct fit, correct electrical rating, robust terminals, and clear return path.
Procurement checklist (appliance-grade discipline)
- Confirm model compatibility (platform-specific heater housing)
- Verify required voltage and wattage from the appliance data plate when available
- Inspect terminal style and connector tightness expectations
- Prioritize suppliers with clear warranty/returns and traceable part numbers
- Replace heat-damaged spade terminals and brittle wiring during the same service event
How Jinzhong’s product categories map to heater engineering concepts
For product teams that design or source heating components across appliances, it helps to categorize solutions by heat-transfer mode and form factor: Heating tubes (tubular elements with insulated cores), heating plates (uniform surface heating modules), and heating films (thin, flexible heaters) are common categories described by manufacturers. For integrated, mechanically robust thermal modules, manufacturers also offer die-cast heater assemblies that combine metal casting with heater integration.
| Category | Typical strengths | Where it commonly fits |
|---|---|---|
| Heating tubes | Durability, insulation via MgO-style fillers, adaptable shapes | Kettles, ovens, water heaters, air heaters |
| Heating plates | Uniform surface heat distribution, mechanical strength | Cookers, irons, coffee makers, thermostatic equipment |
| Heating films | Ultra-thin, lightweight, conforms to tight/curved spaces | Defrosting, medical devices, precision insulation |
| Die-cast heating solutions | Integrated thermal module with strong mechanics; corrosion resistance | Appliances and industrial equipment requiring rigid integrated heaters |
| Electric boiler heater assemblies | High-power liquid heating; flange connections; anti-scaling focus | Commercial/industrial boilers and large-capacity liquid heating systems |
Section summary
Replacement success depends on correct fit and rating, plus connector and airflow corrections that protect the new element from early failure.
FAQ
1) Can continuity alone confirm a dryer heating element is healthy?
No. Continuity confirms only that the conductive path is not open. Heating performance depends on connectors, control cutoffs, and airflow conditions.
2) Why does a dryer sometimes have “no heat” even when the element has continuity?
The heater can be prevented from energizing by an open thermal fuse, a high-limit thermostat event, a wiring/terminal fault, or a control response to overheating caused by vent restriction.
3) What is the most common non-element reason for long dry times?
**Airflow restriction** is a leading driver. A partially blocked vent can reduce heat transfer and trigger safety cycling, producing long dry times even when the element itself is intact.
4) Why should at least one heater lead be removed before measuring resistance?
Removing a lead isolates the element from parallel paths through other components, which improves measurement validity and avoids misleading readings.
5) What should be done if terminals are discolored or loose?
Heat-discolored or loose terminals should be replaced. High-resistance connections can create localized heating, arcing, and intermittent open-circuit behavior under load.
6) When is professional service recommended?
Professional service is recommended when a breaker trips, a short-to-chassis is suspected, wiring is heat-damaged beyond simple terminal replacement, or when supply diagnostics are required.
Conclusion
A credible test of a Frigidaire dryer heating element combines engineering-aware inspection with disciplined measurement. The element should be treated as an assembly—coil, supports/insulators, and terminals—then validated with continuity and resistance checks performed under safe isolation. When results indicate an open circuit, replacement is justified; when continuity exists, diagnosis should expand to the thermal fuse, high-limit devices, terminals, and airflow. This approach reduces unnecessary part swaps and improves first-time fix rates.
Citations and outbound links (sources referenced)
Heating element engineering fundamentals (element as an assembly; alloys; supported/suspended/embedded frameworks; environment considerations; watt density and hidden costs):
https://tutco.com/conductive/heating-elements
Safe replacement discipline and rating verification principle (verify replacement by data plate voltage/wattage; ensure tight wire connections; restore power only under safe conditions):
https://www.whirlpoolwaterheaters.com/support/help/element-was-out-of-range/24
Manufacturer product-category context (custom heating elements, tubes/plates/films, certifications/production capability statements):
https://jinzho.com/
https://jinzho.com/product-category/heating-element/
https://jinzho.com/product-category/heating-element/heating-tubes/
https://jinzho.com/product-category/heating-element/heating-plate/
https://jinzho.com/product-category/heating-element/heating-film/
https://jinzho.com/product-category/die-casting-heating-solutions/
https://jinzho.com/product-category/electric-heater-parts/electric-boiler-heater/
Example of a consumer-facing heater specification format (wattage, materials, ingress protection, approvals, warranty/returns):
https://usa.hudsonreed.com/1000-plug-in-watt-electric-heating-element-76309
Editorial note: This article provides educational testing guidance. Exact panel access and component layouts vary by Frigidaire dryer model; always follow the applicable service documentation and safety practices.

