
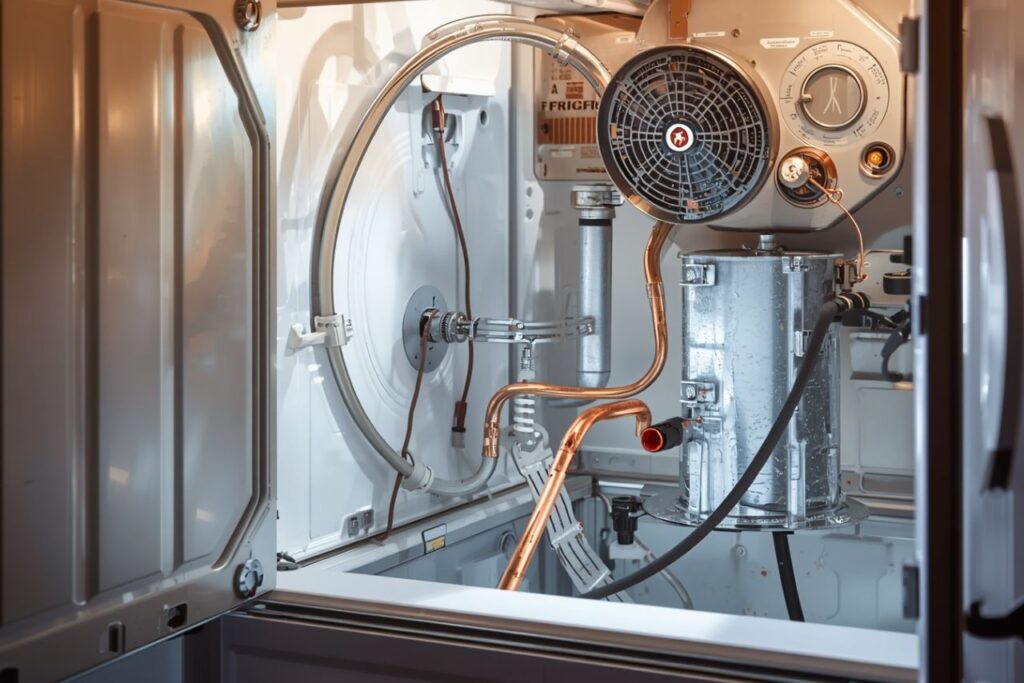
Replacing a Frigidaire electric dryer heating element is a safe and cost-effective repair when it is handled as a controlled workflow: the correct part is verified against the dryer’s model/data plate, the dryer’s **airflow path** is restored (lint, ducting, vent hood), the heating element assembly is installed with secure terminals and proper clearance, and the system is tested only after all covers are reinstalled. Industry engineering guidance emphasizes that a heating element is an **assembly** (conductive alloy plus insulating/support structure and lead connectors), so failures are often caused by connector heat, misalignment, or restricted airflow—not only a broken coil.
Internal links used in this guide: Heating Element, Heating Element manufacturer, Heating Element Factory, Die Casting Heating Solutions.
- Symptoms and diagnosis: confirm the element is the actual fault
- What “heating element” means in engineering terms
- Part selection: matching rating, form factor, and connector quality
- Tools and preparation checklist
- Replacement procedure: a model-agnostic workflow for Frigidaire electric dryers
- Post-repair verification: heat, airflow, and safety checks
- How to prevent repeat element failures (the airflow-first rule)
- FAQ (4)
- Sources and further reading
Symptoms and diagnosis: confirm the element is the actual fault
A Frigidaire electric dryer that tumbles but does not heat may have a failed **dryer heater coil**, but many “no-heat” calls are caused by upstream issues: an open **thermal fuse**, a failed high-limit thermostat, a wiring/terminal fault, or a severe vent restriction that has triggered protection devices. A high-quality repair begins with confirming the fault mode rather than installing parts by guesswork.
Decision table: “tumbles but no heat” triage
| Observed symptom | High-probability cause | Evidence to look for | Action path |
|---|---|---|---|
| Tumbles, no heat, normal airflow | Open heating element or open safety device | Failed continuity at element terminals; or open thermal fuse/high-limit | Confirm with meter; replace failed component(s); inspect connectors |
| Tumbles, weak exhaust, clothes take multiple cycles | Vent restriction causing overheat cycling or fuse trip | Hot cabinet, burning lint odor, crushed duct, blocked vent hood | Restore airflow first; then diagnose element and safety devices |
| Breaker trips when heat is selected | Short to chassis, pinched wire, element contacting housing | Scorching near heater box; damaged insulation; loose spades | Stop use; inspect wiring routing and element clearance; service if needed |
Section summary
A correct diagnosis pairs electrical verification (continuity and connector condition) with airflow verification, because airflow is a primary driver of heating element stress.
What “heating element” means in engineering terms
Engineering guidance defines a heating element as a component composed of both electrically conductive and insulating materials, designed to serve a heating purpose. It is not only the alloy wire: it also includes an insulating framework and lead connectors/terminals. In practical repair terms, this explains why a dryer can fail from a burned spade connector or a sagging coil contacting the heater housing.
Key concepts that matter in dryer repairs
- Resistive heating (also known as Joule heating) converts electrical energy into heat.
- Supported vs suspended element geometry affects sag, contact risk, and heat transfer behavior.
- Material properties change with temperature (resistance, expansion), influencing cycling durability.
- Environment (lint, humidity, contaminants) influences longevity; airflow dominates in dryers.
- Watt density (watts per heating surface area) is a practical proxy for thermal stress.
Why this matters for EEAT-level guidance
The most durable repairs address both the failed part and the operating conditions that caused it. Treating the element as an assembly supports better decisions on terminal replacement, mounting integrity, and airflow restoration—consistent with heater engineering best practices.
Section summary
Heating element reliability is a systems issue: the conductive alloy, insulation/support, terminals, and operating environment jointly determine service life.
Part selection: matching rating, form factor, and connector quality
Frigidaire dryer heater assemblies differ across platforms. The correct part must match the dryer’s model number and the heater housing geometry. Selection should also consider terminal quality and return/warranty policy, because incorrect fit is a common DIY failure point.
Procurement checklist (what to verify before ordering)
- Exact model match (data plate model number; platform-specific compatibility listing)
- Correct electrical rating (voltage and wattage) as required by the appliance
- Terminal style and tightness (proper spade fit; no loose “wiggle”)
- Heater housing form factor (mounting tabs, insulator locations, airflow channel alignment)
- Clear return/warranty terms to de-risk wrong-part orders
Evidence-based sourcing discipline
Manufacturer-style replacement instructions for other heating systems explicitly stress verifying that the new element matches voltage and wattage on the equipment data plate and ensuring wire connections are tight before restoring power. The appliance differs, but the verification principle is transferable to dryer heater replacement workflows.
Specification fields buyers should expect to see
| Spec field | Why it matters | Example of how listings present it |
|---|---|---|
| Power rating (W) | Impacts heat output and cycling behavior | Listings often state wattage prominently (e.g., “1000W”) |
| Materials | Affects temperature capability and corrosion resistance | Retail listings commonly specify casing materials and approvals |
| Safety approvals | Signals compliance testing and market suitability | Some products list approvals such as UL and ingress ratings |
| Warranty / returns | Reduces downtime and cost for wrong-fit orders | Clear 30-day return policies and warranty terms are common on reputable sellers |
Section summary
Best-in-class part selection combines model-specific fit verification with rating confirmation and connector integrity—supported by transparent warranty/returns.
Tools and preparation checklist
A professional-grade DIY approach uses a short, repeatable tool list and a defined preparation sequence. The preparation phase should include airflow cleaning because lint accumulation is both a performance issue and a fire risk.
Recommended tools (typical needs)
| Tool / item | Purpose | Notes |
|---|---|---|
| Multimeter | Continuity checks (element and safety devices) | Power off; verify open/closed circuits |
| Nut drivers / socket set | Cabinet and heater housing fasteners | Sizes vary by model |
| Needle-nose pliers | Spade terminal removal (grip connector body) | Avoid pulling wire insulation |
| Vacuum + lint brush | Lint removal from cabinet, duct, blower area | Supports safer temperatures and better airflow |
| Work light + gloves | Visibility and hand protection | Sheet metal edges can be sharp |
Safety boundary
Any sign of melted wiring, repeated breaker trips, or scorch marks near the heater box should be treated as an electrical safety issue. In those cases, qualified service evaluation is the safest path before energizing the dryer again.
Section summary
The minimum toolkit supports two outcomes: accurate electrical verification and complete lint/airflow restoration.
Replacement procedure: a model-agnostic workflow for Frigidaire electric dryers
Frigidaire electric dryers vary by chassis, but the workflow below holds across most platforms: isolate power, document wiring, remove heater assembly, inspect the environment and terminals, install the new element with correct support and clearance, restore all covers, then test under controlled conditions.
Step-by-step workflow
1) Isolate power and stage the workspace
- Disconnect the dryer from power (unplug or switch off the dedicated breaker).
- Move the dryer to access the rear vent and cabinet panels without straining the cord or ducting.
- Allow time for the heater area to cool if the dryer was recently running.
2) Open the cabinet and locate the heater housing
- Remove the relevant access panel(s) per model layout.
- Vacuum lint around the heater box before disturbing terminals.
3) Document wiring and inspect terminals
- Photograph all wire positions (element terminals, thermostats, thermal fuse locations).
- Remove spade connectors by gripping the connector body—not the wire.
- Replace any connector that appears loose, heat-discolored, or oxidized.
4) Remove the heating element assembly
- Unfasten the heater housing cover or retaining bracket.
- Withdraw the element carefully to avoid damaging insulators/supports.
- Inspect for coil contact points or burn marks inside the housing.
5) Clean the airflow path while access is available
This step is not “optional.” Restricted airflow is a major driver of elevated element temperature and repeated failures.
- Lint screen and lint chute
- Blower housing area (as accessible)
- Internal ducting near heater box
- Vent hose condition (kinks, crush points, length)
- Exterior vent hood flap operation
6) Install the new element (fit, clearance, and support)
Heater engineering references describe supported/suspended/embedded element integration and how contact points affect sag and heat transfer. In dryers, stable support and clearance reduce the risk of shorts and localized overheating.
- Seat the element in the heater channel as designed (centered, stable, and not touching housing walls).
- Confirm all insulators/spacers are in their intended positions.
- Secure the housing without warping the element frame.
7) Reconnect wiring and reassemble completely
- Reconnect wires exactly as documented in the photos.
- Confirm tight terminal fit and strain relief routing (no pinch points).
- Reinstall covers and panels; do not run the dryer with covers removed.
Section summary
The most repeatable workflow is document → remove → inspect → clean airflow → install with clearance → reconnect → fully reassemble.
Post-repair verification: heat, airflow, and safety checks
Verification should be staged to prevent “new part, same problem.” Controlled testing validates that heat output is present, airflow is strong, and abnormal cycling or electrical issues are not occurring.
Pre-power checklist
- All heater and cabinet covers installed and secured
- No loose wires; connectors fully seated
- Vent hose reconnected without kinks or crushing
- Lint screen installed
- Optional: continuity check results recorded (element and safety devices)
Quick “go/no-go” chart (risk factors for repeat failure)
The percentages below are a practical prioritization chart (not a claim of universal failure statistics). It reflects common field patterns: airflow restriction and terminal problems dominate repeat no-heat events.
Functional test (first heat cycle)
- Restore power and run a timed heat cycle for several minutes.
- Verify warm exhaust air and strong airflow at the exterior vent.
- Stop immediately if a breaker trips, arcing is observed, or a persistent burning odor occurs.
Post-test troubleshooting table
| Result | Interpretation | Next step |
|---|---|---|
| Heat + strong airflow | Repair successful; system conditions acceptable | Document the repair date; schedule periodic vent cleaning |
| No heat, airflow OK | Element may not be energized due to open safety device or wiring issue | Re-check wiring photos; continuity test thermal fuse/high-limit (power off) |
| Heat but weak airflow | High risk of repeat element failure and overheat events | Stop use; correct vent restriction; re-test |
Section summary
Verification is complete only when both heat output and airflow are confirmed under normal operating conditions with all covers installed.
How to prevent repeat element failures (the airflow-first rule)
Heater engineering discussions highlight “less obvious costs” such as premature failures caused by conditions that run the element hotter than intended. In a clothes dryer, the dominant condition is airflow. Restricting airflow increases element temperature, increases cycling stress, and can open safety devices.
Preventive actions mapped to failure mechanisms
| Failure mechanism | Typical indicator | Preventive action |
|---|---|---|
| High element temperature (watt density stress + poor convective cooling) | Clothes take longer; cabinet runs hot | Short, straight venting; routine duct cleaning; verify vent hood opens |
| Connector heating (loose spade = local resistance heating) | Melted connector, discoloration, intermittent heat | Replace terminals with correct size; ensure tight fit and proper crimp |
| Element contact (coil/frame touching housing) | Scorch marks inside heater box; breaker trip | Confirm supports/insulators; center the element; avoid frame deformation |
Where Jinzhong’s product perspective fits (context for OEMs and buyers)
Industrial manufacturers typically group **heating elements** into families such as **Heating Tubes**, **Heating Plates**, and **Heating Films** based on the heat transfer mode and integration needs. For example, tubular designs commonly combine resistance wire with an insulating powder inside a metal sheath, while thin-film solutions emphasize rapid response and uniform distribution. This guide focuses on dryer repair, but the same engineering principles—material choice, insulation, terminal integrity, and operating environment—apply across heating technologies.
Learn more about product families here: Heating Element and Die Casting Heating Solutions.
Section summary
The highest-leverage prevention step is airflow restoration, followed by terminal quality control and mechanical clearance verification.
FAQ
1) Is it safe to replace a dryer heating element as a DIY repair?
It can be safe when power is fully isolated, the correct replacement part is used, wiring is documented and restored correctly, and the dryer is tested only after full reassembly. Any melted wiring, recurring breaker trips, or scorch patterns should be treated as a sign to involve qualified service.
2) Why did a new heating element fail again within a short time?
The most common drivers are **airflow restriction** (lint or vent blockage) and **loose terminals** that generate localized heat and arcing. Correcting venting and replacing weak connectors materially improves element life.
3) What should be verified before ordering a replacement element?
At minimum: the dryer model number, the heater assembly form factor, and the required electrical rating. Manufacturer-style procedures in other heating products explicitly advise checking the equipment data plate for voltage and wattage and ensuring wire connections are tight before powering on.
4) What does “heating element” include besides the coil?
Engineering sources define a heating element as an assembly that includes the conductive alloy plus insulating/support materials and lead connectors. In practice, terminals and insulation can be failure points even when the coil wire appears intact.
Conclusion
A Frigidaire electric dryer heating element replacement is most successful when it is treated as a systems repair rather than a parts swap. Accurate model-based part selection, careful terminal inspection, and comprehensive airflow cleaning reduce the risk of repeat failures. After installation, controlled verification—confirming both heat and exhaust airflow—provides the clearest signal that the dryer is operating safely and efficiently.
Sources and further reading (citations and outbound links)
The references below were used to support factual statements about what a heating element is, how heating element frameworks affect heat transfer, why environment/airflow matters, and why rating verification and safe sequencing are essential. Product-category pages were referenced to accurately describe Jinzhong’s heating element families and manufacturing positioning.
-
Heating element engineering overview (component definition, suspended/embedded/supported frameworks, alloys, environment, watt density, cost considerations):
https://tutco.com/conductive/heating-elements -
Verification and safe sequencing principle for heating element replacement (verify voltage/wattage by data plate; tight wire connections; covers secured before power):
https://www.whirlpoolwaterheaters.com/support/help/element-was-out-of-range/24 -
Example of how reputable sellers present specifications (wattage, materials, UL approval, IP rating, warranty/returns):
https://usa.hudsonreed.com/1000-plug-in-watt-electric-heating-element-76309 -
Jinzhong product families and capabilities (heating element categories; manufacturing positioning):
https://jinzho.com/
https://jinzho.com/product-category/heating-element/
https://jinzho.com/product-category/heating-element/heating-tubes/
https://jinzho.com/product-category/heating-element/heating-plate/
https://jinzho.com/product-category/heating-element/heating-film/
https://jinzho.com/product-category/die-casting-heating-solutions/
https://jinzho.com/about/ -
Electric boiler heater product category context (high-power liquid heating positioning):
https://jinzho.com/product-category/electric-heater-parts/electric-boiler-heater/
Disclosure: This guide is educational and platform-agnostic. Exact disassembly steps vary by Frigidaire mode
Share :

