
Cluster Page ? ~2000 words ? Global ? 7 FAQs ? Works for most electric ovens (bake/broil elements)
Most electric ovens use two primary resistive heaters: a lower bake element and an upper broil element. Replacement typically involves shutting off power, removing a couple of mounting screws, carefully transferring the wiring, and installing the correct replacement element with tight, clean connections.
Engineering context: TUTCO defines a heating element as an assembly of conductive material plus insulating framework and connectors, designed for a heating purpose. That s why replacement success depends on the element et the terminals, insulation, and operating environment. https://tutco.com/conductive/heating-elements
| Signe | What you may see | What it often means |
|---|---|---|
| Visible damage | Crack, hole, blistered spot, broken section | Element is likely open and won t heat reliably |
| No heat in Bake or Broil | Oven stays cool in one mode | That element or its wiring/relay is not energizing |
| Uneven cooking / slow preheat | Long heat-up time; inconsistent browning | Weak element, poor connection, or sensor/control issue |
Table 1 If the element is physically damaged, replacement is usually the correct fix.
- Screwdriver or nut driver (varies by oven)
- Pince à bec long (pour les connecteurs à languette)
- Gants de travail
- Lampe de poche
- Multimeter (recommended for confirmation)
- Correct replacement element (bake or broil)
- High-temperature female spade terminals (if originals are loose/discolored)
- Petit récipient pour les vis
- Turn OFF the oven circuit at the breaker (double-pole breaker for many electric ranges).
- Do not rely on the oven control panel for safety.
- If possible, verify power is off with a meter before touching terminals.
Verify correct replacement and keep connections tight is emphasized in Whirlpool s element replacement instructions (water heater context), and it s equally relevant for oven elements: correct rating and solid terminals prevent early failures. https://www.whirlpoolwaterheaters.com/support/help/element-was-out-of-range/24
- Élément de cuisson: bottom of the oven cavity (main steady heat for baking).
- Élément de gril: top of the oven cavity (high radiant heat for browning).
Beaucoup ovens use tubular-style heating elements. TUTCO notes tubular heaters are commonly found inside electric kitchen ovens. Référence.
Take out racks for space. Some models have an element cover plate remove if needed.
Most bake/broil elements are fastened to the rear wall with 2 C4 screws. Support the element so it doesn t drop and stress wiring.
Pull just enough to access the wire leads. Avoid tugging wires can retract behind the oven liner insulation.
Take a clear photo. Then pull spade connectors straight off using pliers (grip the connector, not the wire).
If connectors are loose, discolored, or brittle, replace them. A loose terminal can overheat and burn the new element s connection point.
Attach wires firmly to the new element terminals. Ensure a snug fit. Then tuck wires back and reinstall the mounting screws.
Restore the oven interior to its normal condition before re-energizing.
- All connectors fully seated and tight
- No wires touching hot surfaces or pinched by panels
- Element not contacting metal in an unintended way
- All screws installed; no loose parts inside the cavity
- Turn the breaker back on.
- Run Bake at a moderate temperature for a short test.
- If you see arcing/sparking or smell burning plastic, shut off power and recheck terminals and wire routing.
- Oven model number compatibility
- Voltage and wattage rating (per appliance data plate/service docs)
- Shape/length/bends and mounting bracket geometry
- Terminal style and spacing
Whirlpool s guide highlights verifying replacement voltage/wattage from the data plate apply the same mindset here. Référence.
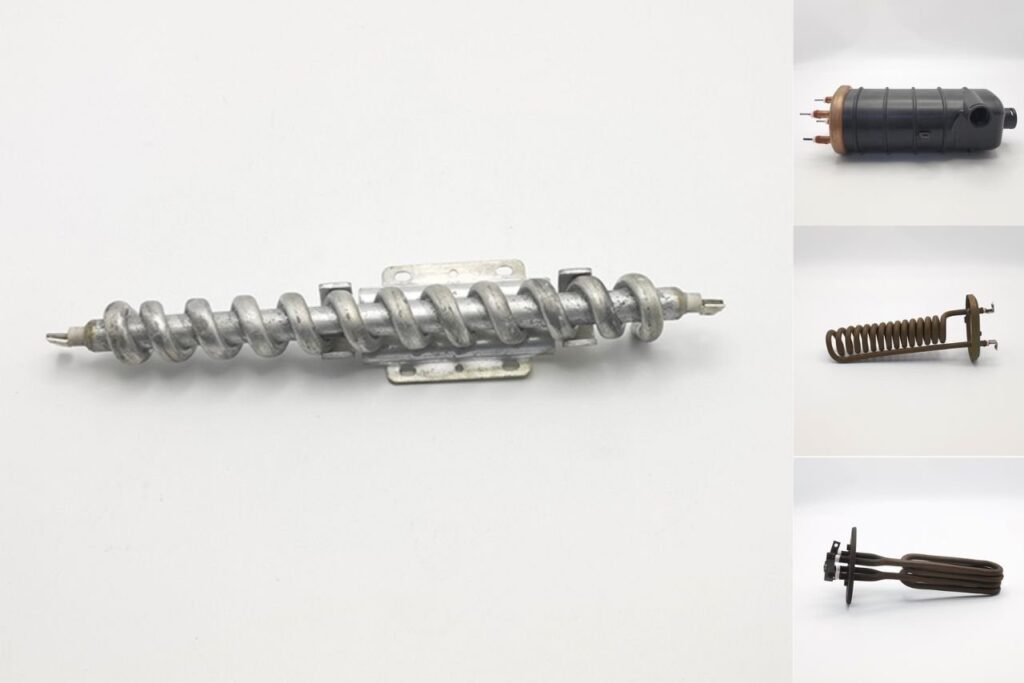
Heating element covers multiple constructions: tube heaters, heating plates, heating films, and integrated die-cast modules. JINZHO s catalog illustrates these families: Tubes de chauffage, Plaque chauffante, Film chauffant, Solutions de chauffage pour la coulée sous pression.
Seeing the range of heater types helps explain why you should never universal fit an oven element without matching the correct rating and geometry.
The Hudson Reed 1000W plug-in heating element listing includes key specs such as 1000W, la protection contre les intrusions IP67, Approuvé UL, materials (ABS + stainless steel), and a 2-year warranty. While this product is for radiators/towel warmers not ovens it shows what complete product information can look like when shopping for heating components. Source.
Often yes. Many bake/broil elements are removed from inside the oven cavity with a few screws. If access requires rear panels, you may need to slide the range out.
Not strictly, but it helps confirm the diagnosis (open circuit) and reduces unnecessary parts replacement.
Turn power off (if not already), use needle-nose pliers or a hook tool to retrieve them gently. Avoid damaging insulation or terminals.
Commonly due to a loose connector creating a resistance hot spot. Replace any heat-damaged spade terminals when installing the new element.
Only if it truly matches your oven s electrical rating and physical geometry. Otherwise you risk improper heating or unsafe operation. TUTCO notes design and material selection are intentional and application-specific. Référence.
Recheck the breaker and wiring connections first, then consider control/sensor issues. If you re seeing repeated failure or burnt wiring, stop and call service.
Use the correct replacement (voltage/wattage/fit) and ensure terminals are tight and not heat-damaged mirroring Whirlpool s guidance to verify specs and tighten connections. Référence.
- Élément chauffant
- Fabricant d'éléments chauffants
- Usine d'éléments chauffants
- Solutions de chauffage pour la coulée sous pression
- TUTCO heating element definition, types, and considerations: https://tutco.com/conductive/heating-elements
- Whirlpool element replacement best practices (verify voltage/wattage; tight connections; safe re-energizing): https://www.whirlpoolwaterheaters.com/support/help/element-was-out-of-range/24
- Hudson Reed – exemple d'annonce d'élément chauffant riche en spécifications : https://usa.hudsonreed.com/1000-plug-in-watt-electric-heating-element-76309
- JINZHO categories for heater families: Tubes de chauffage, Plaque chauffante, Film chauffant, Chaudière électrique
Disclaimer: This is a general guide. Ovens vary by model and region. Always follow the manufacturer s service instructions and local electrical safety requirements.

