
Cluster Page ? ~2000 words ? Global ? 8 FAQs ? DIY walkthrough (model-agnostic)
This walkthrough covers the common steps to diagnose and sustituir un elemento calefactor in an electric GE dryer. While panel locations vary by model, the underlying workflow is consistent: confirm airflow and power supply, inspect and test the heater circuit, replace the element (and any failed thermal safety), then validate operation with a supervised heat test.
Engineering context: a heating element is an engineered component (conductive alloy + insulating framework + connectors), not just wire. Operating conditions (airflow, temperature cycling, contaminants) strongly affect life. Referencia TUTCO.
| Síntoma | Causas comunes | Fast first check |
|---|---|---|
| Drum turns but no heat | Open heating element; thermal fuse open; missing 240V leg | Exterior vent airflow + breaker status |
| Calienta brevemente y luego se detiene | Overheating from restricted venting; cycling/high-limit issues | Vent hose condition, lint blockage |
| Very long dry times | Low airflow; partial restriction; weak heating circuit | Airflow at outdoor termination |
| Olor a quemado | Lint near heater; overheated terminals | Unplug and inspect heater housing and wiring |
Table 1 Dryer heat complaints often start as airflow problems, then become element/safety failures.
- Nut drivers / sockets (common on dryer panels)
- Phillips and flat screwdrivers
- Alicates de punta fina (conectores de horquilla)
- Vacuum + lint brush
- Multímetro (continuidad/ohmios)
- Correct GE heating element (by model number)
- Thermal fuse / thermal cut-off (often replaced with element if failed)
- High-limit or cycling thermostat (if diagnosed bad)
- High-temp spade terminals (if discolored/loose)
Best-practice reminder (from Whirlpool s element replacement guidance, different appliance but same principle): verify the replacement matches required voltage/wattage and keep wire connections tight. Fuente.
- Desconecte la secadora (o apague el disyuntor para instalaciones cableadas).
- Do not trust the control knob as an isolation device.
- Let the dryer cool; heater housings can stay hot.
- Wear gloves sheet metal edges are sharp.
General heater rule (illustrated by Whirlpool s do not energize until the tank is completely full warning to avoid dry-firing a water heater element): don t apply power until the environment and assembly are correct. For dryers, that means proper airflow, intact covers, and secure wiring. Referencia.
Verify strong airflow at the outdoor vent termination during a cycle. If airflow is weak, fix the vent before replacing the element. Restricted airflow causes overheating, safety trips, and premature heater failure.
Many electric dryers can tumble with partial power but won t heat if one hot leg is missing. Check for a half-tripped double breaker or a damaged cord/terminal block.
Look for broken coils, scorch marks, melted connectors, or lint packed near the heater. Any discolored terminals should be replaced.
Test the heating element and thermal safety devices for continuity with a multimeter. An open element or open fuse means no heat. Remove at least one wire from the component before testing to avoid false readings through parallel paths.
TUTCO explains that heater life is limited by oxidation, deformation, and changes in electrical resistance over time, and that environment and operating conditions strongly influence longevity. That s why airflow issues and high-temperature cycling are frequent upstream causes of dryer element failures. Fuente.
GE dryers vary (rear access, front access, lint filter position). Use your model number to find the exact panel removal steps and part number. The steps below describe the common workflow rather than a single model teardown.
Pull the dryer forward, disconnect the vent, and inspect for crushing or lint blockage.
Remove screws and set them aside by panel location. Open access to the heater housing and thermostats/fuses.
Take clear photos before disconnecting spade terminals. This prevents miswiring.
Disconnect element wires. Remove the fasteners holding the heater assembly/element and slide the element out. Vacuum lint around the heater area.
Any terminal that is loose or discolored should be replaced. Loose connections cause resistance hot spots, overheating, and intermittent failure.
Seat it exactly as the original so the coil cannot touch the metal housing. Reinstall covers and fasteners.
Push spade connectors fully onto terminals. Whirlpool s guidance in its heater replacement steps stresses that wire connections should be tight carry that habit over here. Fuente.
Ensure the vent is not kinked and the dryer is not pushed back hard enough to crush the duct.
- Restore power.
- Run a timed dry cycle with heat.
- Verify warm air at the exterior vent and normal cycling behavior.
- Stop if there is arcing, persistent burning smell, or repeated shutoff.
- Clean lint screen every load
- Deep-clean vent run periodically
- Minimize vent length and sharp elbows
- Replace loose/discolored spade terminals
- Route wires away from hot surfaces
- Confirm all covers are installed
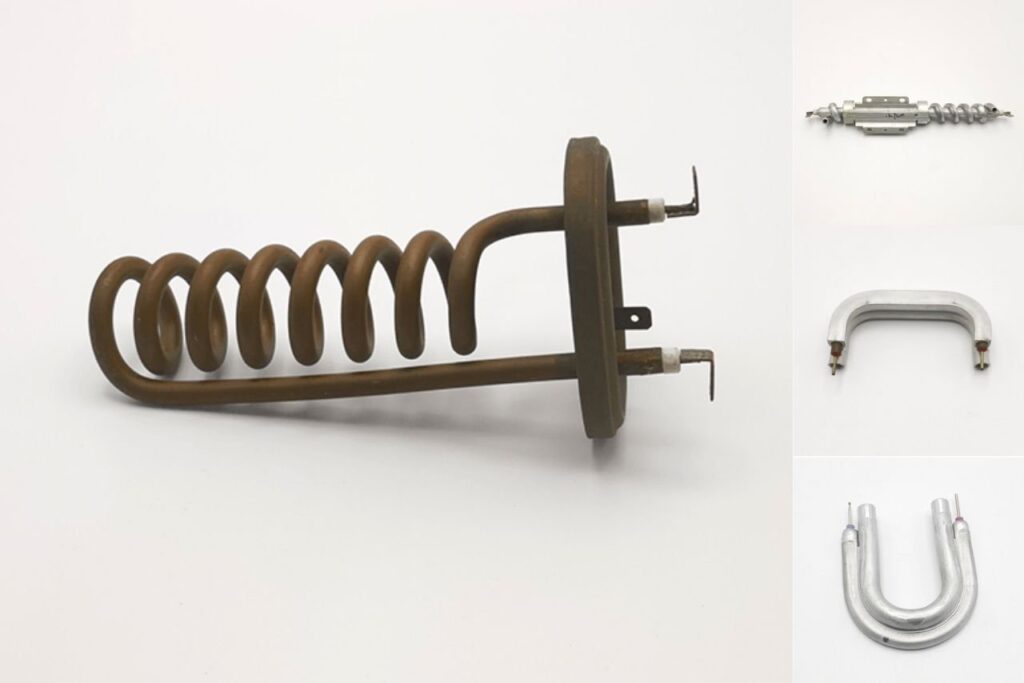
While dryers typically use open-coil heater assemblies, heating element can refer to many heater technologies (tubes, plates, films, and integrated modules). JINZHO organizes these families under: Elemento calefactor, Tubos de calefacción, Placa calefactora, Film calefactor, and integrated Soluciones de calefacción para fundición a presión.
Test for continuity with power disconnected. An open heating element will not show continuity. If the element tests good, test thermal fuses/thermostats next.
Some dryer motors and controls can run on partial supply, but the heater may require the full circuit. If it tumbles but won t heat, always consider supply issues.
If the fuse is open, yes otherwise the dryer still won t heat. If it s not open, replace only if the kit/service instructions recommend it for your model.
Restricted airflow and overheated/loose terminals are the most common. Heater life is strongly affected by temperature cycling and operating environment. Referencia.
Laws differ by region. For many homeowners it s a DIY task, but if wiring is burned, voltage testing is required, or you re unsure, hire a professional.
It s risky. Discoloration often indicates overheating and loss of spring tension. Replace them to prevent hot spots.
Some coils can glow under certain airflow and load conditions. Uneven glow, arcing, or burning odor is not normal stop and recheck airflow and seating.
Keep airflow strong clean vents end-to-end and prevent crushed ducting. Lower operating temperature and stable cycling extend heater life.
- TUTCO heating element definition, heater life, and integration considerations: https://tutco.com/conductive/heating-elements
- Whirlpool element replacement best practices (verify correct replacement; tight connections; safe power restoration): https://www.whirlpoolwaterheaters.com/support/help/element-was-out-of-range/24
- Hudson Reed example of a spec-forward heater listing (1000W, IP67, UL, materials, warranty) for a different application: https://usa.hudsonreed.com/1000-plug-in-watt-electric-heating-element-76309
- Elemento calefactor
- Fabricante de elementos calefactores
- Fábrica de resistencias
- Soluciones de calefacción para fundición a presión
Disclaimer: This is general information. GE dryer designs vary. Always use your model number and follow the applicable service instructions and local electrical safety rules.

