
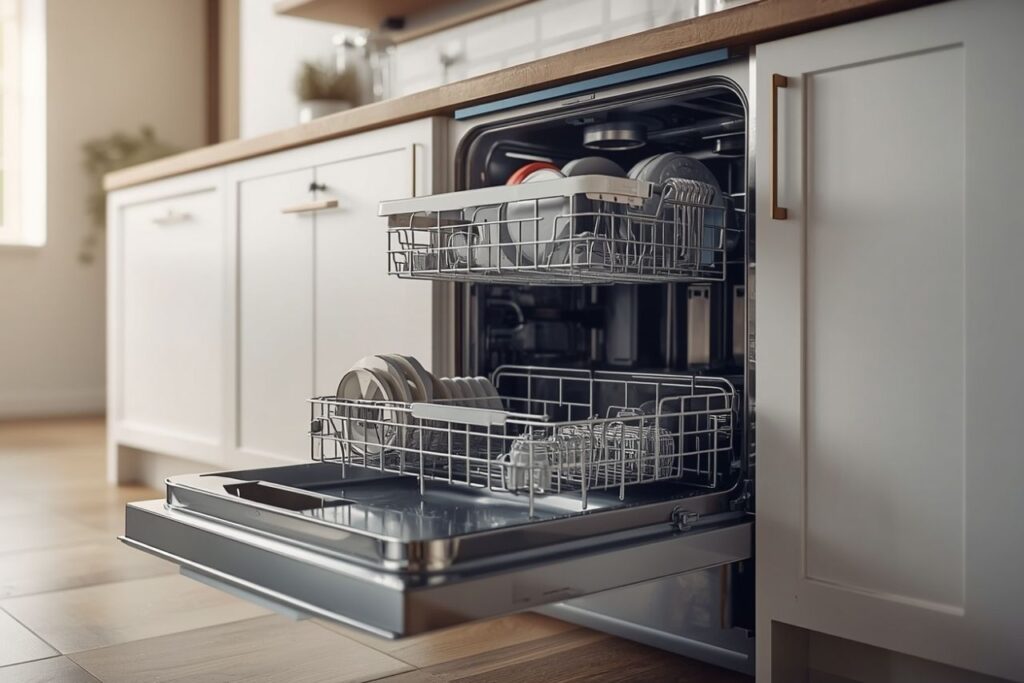
Replacing a Frigidaire dishwasher heating element is typically a “mid-cost” repair where the final spend is driven less by the metal part itself and more by diagnosis time, access difficulty, and the risk controls required to prevent repeat failures. A reliable cost analysis separates the job into (1) the **replacement element assembly**, (2) labor and service fees, (3) secondary parts that commonly fail with the heater, and (4) “hidden costs” such as rework, leaks, downtime, and warranty exposure—cost categories consistently highlighted in professional heater engineering discussions.
For readers comparing component types across appliances, Jinzhong’s product taxonomy is a useful reference point: Heating Element families include tubular styles, plates, and films; and integrated metal modules are covered under Die Casting Heating Solutions. Manufacturer background and production capabilities can be reviewed at Heating Element manufacturer and Heating Element Factory.
- Cost snapshot and what actually drives the bill
- What a dishwasher heating element really is (component-level view)
- A practical cost model (parts, labor, risk)
- Data tables: scenarios, line items, and decision thresholds
- How to reduce total cost without cutting safety
- When replacement is not the right financial decision
- Procurement checklist: reading specs like an engineer
- FAQ (7 questions)
- References and outbound links
Cost snapshot and what actually drives the bill
In most markets, consumers intuitively assume the heater “must be expensive.” In practice, the **unit price of the element** is often only one slice of the total. Costs rise when a technician must rule out control faults, poor wiring, or sensor failures, or when the dishwasher must be partially removed from cabinetry. This aligns with heater-industry guidance that the real cost includes integration and installation—lead connectors, fit, assembly effort, and the consequences of failure.
Section summary
A trustworthy estimate treats heater replacement as a system repair: diagnosis time, access, sealing, and post-install verification determine the final price.
What a dishwasher heating element really is (component-level view)
A heating element is not “just a wire.” Engineering definitions describe it as a **component** made from electrically conductive material plus insulating/support materials and lead connectors. Heat is produced via **resistive heating** (also called **Joule heating**). In appliance environments, alloy choice and construction determine durability under cycling, humidity, and contaminants.
Why this matters for cost
When customers buy the cheapest replacement coil, they often focus on the visible metal loop. However, the failure may be at the terminal connection, the insulation structure, or the element’s ability to withstand its operating environment. Heater engineering literature also notes that small alloy differences and trace elements can affect life—an important point when comparing low-cost aftermarket options to higher-control suppliers.
| Failure mode | What it looks like | Common cost impact | Prevention lever |
|---|---|---|---|
| Open circuit in element | No heat; drying and water temp performance drops | Part + labor; usually straightforward | Correct rating, quality construction, avoid “dry-fire”/overheat events |
| Terminal overheating | Burnt spade, melted connector, intermittent heating | Adds wiring repair time; may require harness work | Tight connections; replace heat-damaged terminals |
| Control/sensor fault misdiagnosed | Element replaced but symptoms persist | Rework/callback (hidden cost) | Structured diagnosis; verify resistance/continuity and error codes |
| Leak after reassembly | Water in base pan; error/stop; potential damage | High risk cost; remediation time | Correct gasket handling; controlled leak check |
Section summary
Understanding the heater as an engineered component helps explain why “cheap part pricing” can still produce an expensive repair after rework and water-risk events.
A practical cost model (parts, labor, risk)
The most defensible way to estimate total cost is a line-item model. This article uses a framework that service organizations use internally: Total Cost = (Parts) + (Labor & service fees) + (Consumables) + (Risk allowance for rework/leaks/wrong part) − (Warranty offsets when applicable).
Core inputs for the estimate
- Dishwasher model and heater design (loop element vs integrated heater assembly)
- Access level (freestanding vs tight built-in installation)
- Symptoms and diagnostic certainty (heater open vs ambiguous heating complaint)
- Local labor rates and trip/service-call norms
- Parts sourcing (OEM vs aftermarket; return policy; shipping lead time)
Verification discipline reduces wasted spend
Manufacturer-style heater procedures for other appliances emphasize a simple but crucial step: verify the replacement element matches the equipment data plate (voltage and wattage), ensure wire connections are tight, and secure covers before restoring power. That sequencing reduces damage and callbacks, which is ultimately a cost-control strategy.
Section summary
A structured model converts an uncertain repair into measurable levers: diagnosis certainty, access time, and risk controls.
Data tables: scenarios, line items, and decision thresholds
The tables below provide a reusable worksheet for estimating cost. The numeric ranges are designed for global readability (relative ranges and percentage splits) rather than a single-country price. Where a currency is used, it is presented as “typical consumer-facing service pricing” and should be adjusted to local conditions.
Scenario pricing bands (typical service-market ranges)
| Scenario | What’s included | Relative cost band | Why it lands here |
|---|---|---|---|
| DIY-capable part swap (high certainty) | Confirmed failed element + basic tools + no complications |
Low
| Cost mainly equals part + small consumables |
| Standard professional replacement | Diagnosis, install, basic verification, no cabinet removal |
Medium
| Labor is the primary component; reduced rework risk |
| Built-in / complex access + ambiguous symptoms | Extended diagnosis, pull-out, hose/electrical checks, leak testing |
High
| Time and risk allowances dominate |
Line-item worksheet (use for quotes and internal estimates)
| Cost line | Typical range | What to ask / verify | Cost-control action |
|---|---|---|---|
| Heating element / heater assembly | $30–$150+ (varies by model & sourcing) | Exact model match; correct voltage/wattage; terminal style; return policy | Prefer suppliers with clear spec disclosure and returns |
| Service call / dispatch | $0–$150 | Is a trip fee charged? Is it credited if repair proceeds? | Bundle diagnosis + repair in one visit where possible |
| Labor time | 0.5–2.5 hours | Access difficulty; built-in constraints; testing requirements | Provide model info + symptoms upfront to reduce onsite time |
| Consumables & small parts | $5–$40 | Gaskets, clamps, terminals, fasteners, seal integrity | Replace heat-damaged terminals during heater swap |
| Risk allowance (rework / leak event) | 0%–25% of total | Ambiguous diagnosis? Aftermarket part? Tight install? | Structured diagnosis and leak check reduce “hidden costs” |
Decision thresholds: repair vs replace (financially)
A purely economic decision compares repair cost to the remaining value and expected life. Without referencing a specific regional appliance-price index, a practical rule-of-thumb is to avoid heavy investment when multiple major failures are present or when leakage risk is elevated.
| Condition | Indicator | Financial implication | Recommended direction |
|---|---|---|---|
| Single, confirmed heater failure | Element open; other functions normal | High repair ROI | Repair |
| Heater failure + recurring leaks | Base pan water, corrosion, repeated seal issues | Risk of escalating cost and damage | Evaluate replacement |
| Ambiguous symptoms | Intermittent heating; control errors possible | Diagnosis time may exceed value | Get a fixed quote before proceeding |
| Multiple major components failing | Pump, control board, heater all suspected | Cost stack can exceed replacement value | Replace |
Section summary
Scenario and line-item tables make quotes comparable and reveal where the cost actually lives: access time, diagnosis certainty, and risk controls.
How to reduce total cost without cutting safety
The lowest-risk savings come from reducing diagnostic ambiguity and preventing callbacks. Heater engineering discussions explicitly call out “less obvious costs” such as installation effort, rework, and field replacement consequences.
Cost reductions that do not sacrifice reliability
- Provide complete appliance identification (model/serial, symptom timeline, error codes) before booking service.
- Request a line-item quote (part + labor + service call + warranty terms) to avoid surprises.
- Replace degraded terminals during the heater swap; connector hot spots are a common repeat-failure pathway.
- Insist on verification steps: correct element rating, tight connections, secure covers, and controlled post-install test.
False savings to avoid
- Skipping leak checks after disturbing seals or hoses
- Reusing heat-damaged spade connectors
- Choosing an unknown-source part with no return policy for a built-in installation
Section summary
The best savings come from preventing hidden costs: rework, callbacks, wrong-part orders, and leak events.
When replacement is not the right financial decision
Even when the heating element is genuinely failed, replacement may be a poor financial choice if there are signs of systemic deterioration: repeated leaks, heavy corrosion, or multiple major components nearing end-of-life. In those cases, heater replacement can be the first of several stacked repairs.
Practical red flags
- Water intrusion history around the base pan or electrical areas
- Multiple performance faults (poor wash + poor drain + heat issues)
- Unavailable parts or long lead times that extend downtime
Section summary
Heater replacement is highest value when the machine is otherwise healthy and leak risk is low.
Procurement checklist: reading specs like an engineer
A well-built heater listing does more than show price. It discloses specifications, approvals, ingress protection where relevant, warranty terms, and shipping/returns. For example, a consumer heating element listing in another category explicitly states wattage, materials, UL approval, ingress protection rating (IP), and warranty/returns—exactly the kind of transparency that reduces wrong-part purchasing and downstream costs.
| Spec / policy item | Why it matters | What “good” looks like |
|---|---|---|
| Voltage & wattage compatibility | Prevents underheat, overheat, or electrical mismatch | Explicit match to the appliance rating information |
| Materials & insulation strategy | Affects corrosion resistance and life under cycling | Clear materials disclosure; credible construction approach |
| Connector/terminal details | Loose interfaces create local hot spots | Correct terminal style + quality connectors |
| Warranty and returns | Wrong parts and early failures are real costs | Written return window and warranty coverage |
Where Jinzhong’s categories fit in (context for buyers and engineers)
For OEM and supply-chain readers, Jinzhong organizes heating solutions into categories that reflect how heat is delivered: tubular elements for efficient conduction with insulated sheaths (commonly using resistance wire + magnesium oxide), plates for uniform surface heating, films for thin flexible applications, and integrated die-cast modules combining metal strength with heat transfer. This kind of taxonomy helps teams choose the right heater architecture for the appliance, which reduces total lifecycle cost.
- Heating tubes: stainless/copper/alloy sheaths, MgO insulation, customizable shapes and wattages (good for high-efficiency conduction).
- Heating plates: stable, uniform surface heat distribution; mechanical strength under long-term temperature.
- Heating films: thin, flexible, low-voltage friendly; rapid and uniform heating for compact geometries.
- Die-cast heating modules: integrated thermal modules with metal die-casting for strength and heat transfer.
Section summary
Spec transparency and correct heater architecture selection reduce wrong-part risk and lifecycle expense.
FAQ
1) Is the heating element usually the most expensive part of the repair?
Not typically. In many service quotes, labor, diagnosis time, and access constraints dominate the total. The element cost matters, but the “all-in” price is driven by time and risk controls.
2) Why do some heater replacements fail again soon after installation?
Repeat failures often trace to connector hot spots (loose terminals), misdiagnosis (a control/sensor problem that remained), or installation quality issues such as sealing and reassembly. Engineering guidance emphasizes that a heating element includes terminals and insulating structure—not only the metal conductor.
3) What should be verified before powering the dishwasher back on?
A robust sequence includes confirming the correct replacement rating (voltage/wattage), ensuring wire connections are tight, securing covers, and performing a controlled functional test. This mirrors safety sequencing emphasized in manufacturer heater replacement instructions in other appliance categories.
4) Does aftermarket always mean lower total cost?
Not always. If a part has uncertain quality, ambiguous specs, or poor return policies, the hidden cost of rework can exceed the initial savings.
5) Is it worth replacing companion parts “while it’s open”?
It can be, but only when evidence supports it (heat-damaged terminals, degraded gaskets, known failure patterns for the model). Blanket part-swapping can inflate cost without improving reliability.
6) How does heater design influence durability?
Heater durability depends on materials, construction, and environment. Heater engineering sources explain that alloys have temperature-dependent properties and can be impacted by contaminants and cycling, while support/insulation strategies influence heat transfer and mechanical stability.
7) When should replacement of the entire dishwasher be considered?
Replacement becomes more attractive when multiple major components are failing, when leak risk is high, or when repair cost is a large share of the machine’s replacement value and expected remaining life.
Conclusion
A credible cost analysis for a Frigidaire dishwasher heating element replacement focuses on total spend rather than the sticker price of the coil. The most consistent cost drivers are labor time, diagnostic certainty, access difficulty, and the prevention of hidden costs—rework, leaks, and wrong-part delays. Using a line-item model, verifying the correct electrical rating, and treating the heater as an engineered component (conductor + insulation + connectors) produces more accurate quotes and fewer repeat repairs.
References and outbound links
The following sources were used for technical framing (what a heating element is, material/design considerations, installation/assembly impacts, and “hidden costs”), for safety/verification sequencing principles, and for illustrating best-practice spec disclosure and manufacturer product taxonomy. Outbound links are provided for transparency:
- Heating element engineering overview (definition as a component/assembly; alloys; supported vs embedded; watt density; environment; less obvious costs): https://tutco.com/conductive/heating-elements
- Safe replacement sequencing principles (verify correct element by voltage/wattage; tight connections; secure covers; restore power after safe condition): https://www.whirlpoolwaterheaters.com/support/help/element-was-out-of-range/24
- Jinzhong product taxonomy (heating tubes/plates/films and integrated die-cast modules; manufacturing positioning): https://jinzho.com/, https://jinzho.com/product-category/heating-element/, https://jinzho.com/product-category/heating-element/heating-tubes/, https://jinzho.com/product-category/heating-element/heating-plate/, https://jinzho.com/product-category/heating-element/heating-film/, https://jinzho.com/product-category/die-casting-heating-solutions/, https://jinzho.com/product-category/electric-heater-parts/electric-boiler-heater/
- Example of transparent product spec disclosure (wattage, materials, UL approval, IP rating, warranty/returns, shipping window): https://usa.hudsonreed.com/1000-plug-in-watt-electric-heating-element-76309
Editorial note (EEAT): This article presents a cost framework and scenario-based ranges suitable for global readers. Final pricing varies by model, region, labor rates, and diagnosis outcomes. For binding quotes, readers should obtain a line-item estimate from a qualified service provider.

