
You can test heating elements in your electric water heater quickly and safely at home. To test heating elements, follow these simple steps:
- Turn off power to the hot water heater at the breaker.
- Tháo bỏ tấm chắn và lớp cách nhiệt.
- Use a multimeter to test heating elements for continuity and ground faults.
Most homeowners find that learning how to test heating elements only requires a few basic tools and careful attention to safety.
Safety Precautions Before You Test Heating Elements
Before you begin any work on your 电热水器, you must take safety seriously. Electrical shock and injury remain the most common incidents reported during testing. You can avoid these risks by following strict safety procedures and using the right protective equipment.
Tắt nguồn điện cho bình nước nóng
Locating and switching off the circuit breaker
You should always disconnect power at the source before touching any internal parts of your water heater. Electric water heaters require a dedicated circuit breaker or switch. This breaker allows you to safely cut off electricity during maintenance or emergencies. Locate the correct breaker in your electrical panel. The label should indicate which breaker controls your water heater. Flip the switch to the “off” position to ensure no power flows to the unit.
Mẹo: Never rely on the thermostat or unplugging the unit. Only the circuit breaker guarantees complete disconnection.
Verifying power is off with a non-contact voltage tester
After switching off the breaker, you must confirm that the power is truly off. Use a non-contact voltage tester to check the wires and terminals inside the access panel. Hold the tester near the electrical connections. If the tester does not light up or beep, you can proceed. This step prevents accidental contact with live wires, which can cause severe injury.
个人安全措施
Using insulated tools and wearing safety gear
You should always use insulated tools when working on electrical equipment. Insulated screwdrivers and pliers reduce the risk of electrical shock. Safety organizations recommend wearing rubber and leather protective sleeves together to shield your arms. Leather EH-rated footwear protects your feet from electrical hazards. Choose clothing made from natural fibers like cotton or wool to minimize fire risk. Remove all jewelry and metal accessories before starting work.
- Wear nonconductive head protection if there is any risk of head injury.
- Use eye protection to guard against electric arcs or flying debris.
- Inspect all personal protective equipment for damage before use.
Double-checking for electricity before starting
Before you touch any heating elements or wiring, double-check for electricity. Use your voltage tester again on all exposed terminals. This extra step ensures your safety and aligns with industry standards such as NFPA 70E. Protective shields or barriers can also help prevent accidental contact with energized parts.
Ghi chú: Most safety incidents happen when someone skips these checks. Take your time and verify every step.
By following these precautions, you protect yourself from the most common hazards associated with testing a water heater. Proper preparation and attention to detail make the process safe and straightforward.
Tools Needed to Test Heating Elements in a Water Heater

Before you begin testing, you need the right tools and supplies. Using the proper equipment ensures accurate results and keeps you safe throughout the process.
Các công cụ thiết yếu cho công việc
Multimeter (set to ohms/resistance)
MỘT 万用表 is the most important tool for this task. You use it to measure resistance and check for continuity in the heating elements. Set your multimeter to the ohms or resistance setting. This allows you to determine if the element conducts electricity as it should. Industry experts recommend using the multimeter not only for testing the element but also for checking thermostat continuity and voltage across terminals. This step helps you identify faulty components quickly.
Screwdriver for removing access panels
You need a screwdriver to remove the access panels on your water heater. Most models require a Phillips or flathead screwdriver. Some situations call for a 4-in-1 screwdriver or even needle-nose pliers to handle stubborn screws or tight spaces. Removing these panels gives you access to the internal wiring and the heating elements.
Non-contact voltage tester for safety
MỘT 非接触式电压测试仪 is essential for your safety. Before you touch any wires or terminals, use this tool to confirm that the power is off. Hold the tester near the electrical connections. If the tester does not light up or beep, you can proceed. This simple check prevents accidental shocks and keeps you safe during the inspection.
Mẹo: Always test the voltage tester on a known live circuit before and after use to ensure it works properly.
Vật dụng hữu ích
Work gloves for protection
Work gloves protect your hands from sharp edges and hot surfaces inside the water heater. Choose gloves that fit well and allow you to grip tools securely. Wearing gloves also reduces the risk of cuts or scrapes when handling insulation or metal parts.
照明手电筒以提高能见度
A flashlight helps you see inside the dark spaces of your water heater. Good lighting makes it easier to spot wiring issues, loose connections, or signs of corrosion. You avoid mistakes and work more efficiently when you can see every detail clearly.
Here is a quick checklist of what you need:
| 拆卸检修面板与电线 | Mục đích |
|---|---|
| Đồng hồ vạn năng | Test resistance and continuity |
| Tua vít | 拆卸检修板 |
| Máy kiểm tra điện áp không tiếp xúc | 确认电源已切断 |
| Găng tay làm việc | 保护双手 |
| Đèn pin | Improve visibility inside the unit |
Gathering these tools before you start saves time and helps you complete the job safely. You follow industry best practices and reduce the risk of injury or error by preparing properly.
如何定位和接触热水器加热元件

Finding the Access Panels on Your Water Heater
Identifying upper and lower element panels
You need to find the access panels before you can test or replace any components. Most residential electric water heaters have two access panels—one for the upper element and one for the lower element. Manufacturers often place these panels on the front of the tank. You may notice that the upper panel sits higher, usually near the top third of the unit, while the lower panel sits closer to the bottom.
Access panels can appear in several locations throughout your home. You might find them near the furnace in manufactured homes. Some homes place them in the primary bedroom closet or inside a utility closet. Laundry rooms often contain these panels as well. In certain layouts, you may discover access panels hidden behind wall-like panels in hallways. If your home uses wallboards, look for batten strips around the panel. Homes with drywall construction often hide access panels inside closets or utility rooms. Newer homes typically keep all access panels inside, never on exterior walls.
Mẹo: If you cannot find the access panels right away, check closets, utility rooms, and laundry areas first. These spots are the most common locations for water heater access.
Safely Removing Panels and Insulation
Handling insulation without damage
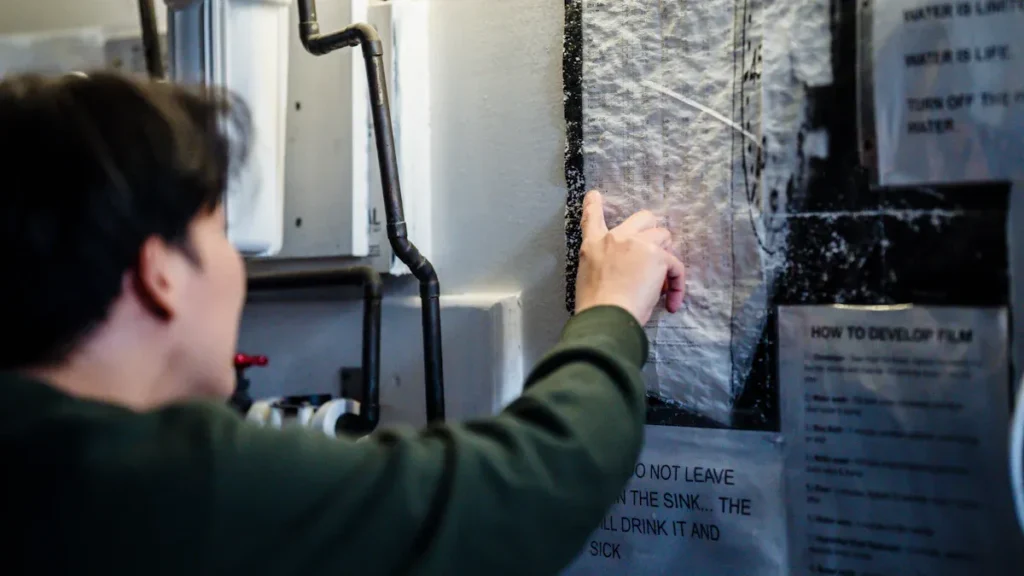
Once you locate the access panels, you need to remove them to reach the internal parts. Use a screwdriver to loosen and remove the screws holding the panel in place. Set the screws aside in a safe spot so you do not lose them. Gently pull the panel away from the water heater. Behind the panel, you will see a layer of insulation. This insulation helps the unit retain heat and operate efficiently.
Carefully peel back the insulation. Try not to tear or compress it. Damaged insulation can reduce the efficiency of your water heater. If the insulation uses a vapor barrier, fold it back gently. Avoid using sharp tools near the insulation to prevent accidental rips.
Exposing the heating element terminals
After you move the insulation, you will see the heating element terminals. These terminals connect the element to the electrical wiring. You should see two screws or bolts with wires attached. Make sure you do not touch any wires until you confirm the power is off. Good lighting helps you see the terminals clearly. A flashlight can make this step easier, especially in dimly lit spaces.
Ghi chú: Always keep the insulation and access panel nearby. You will need to reinstall them after you finish testing or replacing parts.
By following these steps, you can safely reach the components you need to test. Careful handling of panels and insulation protects both you and your water heater from unnecessary damage.
Cách kiểm tra bộ phận gia nhiệt bằng đồng hồ vạn năng
Testing electric water heater elements with a multimeter gives you clear answers about their condition. You can follow these steps to ensure accurate results and keep your water heater running efficiently.
Thiết lập đồng hồ vạn năng của bạn
选择正确的欧姆/电阻测量档位
Trước khi bắt đầu, hãy chắc chắn rằng bạn có 在断路器处关闭热水器的电源. 从加热元件上拆下一根导线以将其隔离。此步骤可防止其他电气元件的干扰并确保您的安全。.
设置万用表:
- Bật đồng hồ vạn năng của bạn.
- 选择欧姆(Ω)或电阻测量档位. 选择一个量程,例如200欧姆或1千欧。对于大多数热水器元件,最低档位效果最佳。.
- 确保将两个表笔接触在一起时显示屏读数为零。此检查可确认万用表工作正常。.
Mẹo: 在此过程中避免使用通断测试或二极管测试模式。电阻档位能提供最精确的电阻读数。.
测试加热元件的通断性
Đặt đầu dò vào các đầu cuối của phần tử
测试加热元件时,将一根表笔接触加热元件的每个端子(螺丝)。确保您已至少从端子上拆下一根导线。此步骤可隔离元件并防止误读。.
读取并理解显示屏读数
测试电阻时,对于大多数正常工作的元件,您的万用表应显示10至30欧姆之间的值。具体数值取决于热水器的电压和功率。例如,一个120伏、1000瓦的元件应显示约14欧姆。您可以使用公式 R = (V²) / P 来计算预期电阻,其中V为电压,P为功率(瓦特)。.
如果万用表显示正常范围内的读数,则元件工作正常。如果读数为零、极低或无穷大(通常显示为“OL”或“开路”),则元件存在故障需要更换。.
以下是 典型电阻值:
| 来源 | 典型电阻范围(欧姆) | Ghi chú |
|---|---|---|
| JustAnswer | 12-16 | 240V热水器元件典型读数 |
| SpaDepot指南 | 9-12(最高至20) | 大多数加热器的可接受范围 |
| CorroProTec博客 | 10-30 | 正常工作设备的典型范围 |
Ghi chú: 如果您的热水器有两个加热元件,请对第二个元件重复测试。.
检查热水器的接地故障
测试元件端子与金属罐体之间
当电流从元件泄漏到金属罐体时,即发生接地故障。此问题可能导致断路器跳闸或不安全运行。要检查接地故障,请遵循以下步骤:
- 。将两个表笔分别接触加热元件的两个端子螺丝。正常工作的元件应显示 电阻档位(Rx1k或类似档位).
- 将一根表笔接触加热元件的端子螺丝。.
- 将另一根表笔接触热水器罐体的任何裸露金属部分。.
- 对另一个端子螺丝重复此测试。.
如果在此测试中万用表显示任何电阻读数,则元件存在接地故障,必须更换。正常工作的元件在端子与罐体之间应无读数(电阻无穷大)。.
⚠️ Báo động: 在您 测试接地故障之前. 务必从元件端子上断开导线。此步骤可防止误读并确保您的安全。.
遵循这些步骤,您可以自信地测试加热元件并诊断大多数常见问题。准确的测试有助于您判断是否需要更换元件或检查热水器的其他问题。.
解读万用表结果
正常电阻读数的表现
当您使用万用表测试加热元件时,您希望看到的电阻值落在预期范围内。对于大多数家用热水器,健康的元件将显示10至30欧姆之间的电阻读数。此范围取决于您设备的具体功率和电压。您可以在热水器附带的标签或制造商手册中找到确切的规格。.
正常读数意味着加热元件能够正常导电。如果您看到如12、15或18欧姆的数值,您可以确信元件工作状态良好。该元件将高效且安全地加热水。您应始终将读数与您型号的预期值进行比较。如果不确定,请使用公式:
电阻(欧姆)=(电压 × 电压)÷ 功率(瓦特)
例如,一个240伏系统上的4500瓦元件应显示约12.8欧姆。如果您的读数与此计算结果相符,则您已确认元件的完整性。.
Mẹo: 如果您的热水器有两个加热元件,请务必测试上部和下部加热元件。一个故障元件会影响整个系统的性能。.
加热元件故障或短路的迹象
测试加热元件时,您可能会遇到表明存在问题的读数。如果万用表显示电阻为零或非常接近零,则元件内部已短路。这种情况意味着电流无阻力地流过元件,可能导致快速失效甚至触发断路器跳闸。.
如果显示屏显示“OL”、“开路”或无穷大电阻,则元件内部电路已断开。由于电流无法通过,元件无法加热水。您必须更换元件以恢复其正常功能。.
另一项关键测试是检查接地故障。将一根表笔接触元件端子,另一根接触金属罐体。如果您看到任何电阻值,则元件已对地短路。这种情况非常危险,需要立即更换。.
以下是解读您结果的快速参考表:
| 万用表读数 | Điều đó có nghĩa là gì | Hành động cần thiết |
|---|---|---|
| 10–30欧姆 | 正常,元件健康 | 无需操作 |
| 0或接近零 | 零欧姆 | 立即更换 |
| 无穷大/OL/开路 | 电路断开(开路) | 立即更换 |
| 对罐体显示任何数值 | 检测到接地故障 | 立即更换 |
⚠️ Báo động: 切勿继续使用加热元件故障或短路的热水器。您将面临电气危险和系统进一步损坏的风险。.
通过学习如何解读这些读数,您可以快速诊断问题并决定何时更换部件。根据这些结果采取行动,可以保护您的家庭并确保可靠的热水供应。.
热水器加热元件故障排查
无读数或无穷大电阻
可能的原因及后续步骤
当您测试加热元件时,如果万用表上 无穷大电阻 无读数或显示无穷大电阻,这明确表明存在问题。此结果意味着元件内部电路开路或断开。您可能因以下几个原因遇到此问题:
- 元件内部的线圈断裂,形成开路。.
- 腐蚀或针孔泄漏 加热棒护套破损导致进水,损坏加热线圈。.
- 水箱内部水垢或矿物质沉积会导致电阻读数不稳定或波动。.
- 护套上可见的孔洞确认加热棒已损坏,无需进一步测试。.
- 如果电阻读数超出正常 10–30欧姆 范围,则表明加热棒存在故障。.
故障排查请遵循以下步骤:
- 关闭热水器电源.
- 使用元件扳手旋出并取下旧加热元件。.
- Set your multimeter to the ohms setting.
- 将万用表表笔分别置于两个接线端子上。.
- 如果电阻读数为无穷大,请更换加热棒。.
- 测试上、下两个加热棒。.
- 如果两个加热棒测试均正常,请检查温控器或查看是否有水垢沉积。.
Mẹo: 断开电线前务必记清其位置,以便于重新组装。.
加热棒对地短路
含义及安全隐患
MỘT 加热棒对地短路 是指电流从加热棒直接流向金属水箱。可通过测量接线端子与水箱外壳之间的电阻来检测此故障。任何小于无穷大的电阻读数都证实存在短路。此故障会引发危险情况。热水器可能产生过热的水,导致严重烫伤或伤害风险。 能量切断(ECO)安全装置 可能会跳闸以防止过热,但您不应仅依赖于此。加热棒短路也可能导致水箱过早损坏并危及家庭安全。必须立即更换故障加热棒。.
⚠️ Báo động: 切勿忽视接地故障。此状况构成严重风险,需要立即采取行动。.
热水器中加热棒故障的其他迹象
异常噪音或水温不稳定
甚至在用万用表测试之前,您就可能注意到加热棒故障的迹象。请注意以下常见现象:
- 水龙头只出冷水, 通常是由于上部加热棒故障。.
- 温水表明上部加热棒存在问题。.
- 热水很快用完,指向下部加热棒故障。.
- 热水器启动时断路器跳闸,这可能意味着加热棒电流过大。.
- 热水不足或水温始终无法达到设定温度。.
- 水箱发出爆裂声或隆隆声, 通常由矿物质沉积引起。.
- 加热棒上有水垢或腐蚀,有时因干烧或沉积物导致。.
如果您发现任何这些问题,请检查加热棒并迅速处理,以恢复可靠的热水供应。.
Phải làm gì nếu bộ phận làm nóng nước của bạn bị lỗi
Thay thế bộ phận làm nóng bị lỗi
判断是否适合自行更换
如果您对电气系统操作感到自如并具备基本工具,可考虑自行更换故障加热棒。许多房主会进行此项维修,尤其是在问题明确且步骤简单的情况下。然而,您必须权衡自身经验和安全。如果缺乏信心或发现复杂问题,应寻求专业帮助。在知识不足的情况下尝试维修可能导致触电、火灾隐患或设备损坏。务必查看热水器的保修条款,自行维修可能使保修失效。.
⚠️ Mẹo: 如果您发现电气故障迹象、严重泄漏,或在基本故障排除后设备仍无反应,请联系持证技术人员。.
更换加热棒的基本步骤
您可以遵循以下 步骤安全地更换故障加热棒::
- 关闭断路器电源,并用电压测试仪确认断电。.
- 佩戴绝缘手套和安全护目镜。.
- 确保工作区域干燥,无涉水危险。.
- 准备工具:螺丝刀、活动扳手或套筒扳手、万用表、尖嘴钳和电压测试仪。.
- 准备替换部件:新加热棒、垫圈或O型圈、线缆连接器及清洁布。.
- 用万用表测试加热棒以确认其故障。.
- 排空内胆可防止更换过程中水流外溢并降低烫伤风险。.
- 将花园软管连接到排水阀并排空水箱。打开一个热水龙头以导入空气。.
- 拆下检修面板,断开加热棒上的电线。.
- 使用合适的扳手拆下故障加热棒。.
- 清洁垫圈安装区域并安装新垫圈。.
- 插入并牢固拧紧新加热棒,但切勿过度拧紧。.
- 关闭排水阀,打开冷水供应以注满水箱。保持一个热水龙头打开以排出空气。.
- 检查新加热棒周围是否有泄漏。.
- 恢复断路器供电并验证设备运行正常。.
🛠️ Ghi chú: 恢复供电前务必检查是否泄漏,以避免电气危险。.
何时应请专业人员维修热水器
需要专家协助的情况
某些情况需要 持证专业人员处理。. 如果您遇到电气故障、持续泄漏,或在基本检查后设备仍不加热,不应尝试自行维修。专业人员可确保维修符合建筑规范和安全标准。他们拥有识别隐藏风险的专业知识,并能使用专用工具进行精确作业。如果您怀疑燃气泄漏或注意到异常噪音,请立即联系技术人员。.
自行更换的风险
自行更换存在多项风险。. 您可能使制造商的保修失效,若未来出现问题将导致更高成本。安装不当可能引起触电、火灾或水损。您可能误判问题,导致临时性或无效的修复。专业人员提供保修保障、责任保险和高效服务。他们遵循当地规范,并以安全可靠的维修让您安心。.
⚠️ Báo động: 未经适当培训尝试复杂维修, 可能导致代价高昂的错误和安全隐患。如有疑问,请信赖持证水管工或电工。.
预防未来热水器元件故障
热水器定期维护建议
冲洗水箱以减少沉积物
每年至少冲洗水箱一次,可延长加热棒的使用寿命。水箱底部的沉积物会导致加热棒过热并过早损坏。冲洗水箱时,关闭电源和水源,将软管连接到排水阀,放水直至水流清澈。此简单步骤可清除长期积聚的矿物质和碎屑。您还可以防止异常噪音并提高加热效率。.
Mẹo: 冲洗水箱不仅能保护加热元件,还有助于维持水温稳定并降低能源成本。.
定期检查元件
定期检查可确保系统平稳运行。您应当 每年至少检查一次加热元件及其他组件. 。使用万用表测试电路通断性,并检查腐蚀或磨损迹象。拧紧所有松动的电气连接,确认保温包裹层完好。每3-5年检查阳极棒,若严重腐蚀或厚度不足半英寸则需更换。. 将温控器调节至建议的120°F(约49°C) 以防止过热。. 每年安排一次专业检查, ,特别是当设备使用超过十年时。.
- 每年冲洗水箱以清除沉积物。.
- 按需检查并更换阳极棒。.
- 每数月测试一次泄压阀。.
- 检查并调节温控器设定。.
- 紧固电气连接。.
- 为水箱和管道加装保温层以减少热量散失。.
- 安排年度专业检查。.
加热元件问题的早期预警迹象
需关注哪些迹象以及早发现问题
您可以在加热元件引发严重故障前察觉问题。请注意以下 早期预警迹象::
- 温水或始终无法完全加热的水。.
- 热水淋浴突然变冷。.
- 水箱发出异常嘶嘶声、爆裂声或滋滋声。.
- 用量未增却出现能源费用上涨。.
- 水龙头流出浑浊或锈色水。.
- 断路器或复位按钮频繁跳闸。.
若发现任何上述症状,请立即检查系统。注意热水器运行时的异常声响,监测水温稳定性。检查设备周围是否有积水或泄漏。及早处理这些问题有助于避免昂贵维修,并确保热水器安全运行。.
Testing electric water heater elements becomes straightforward when you follow each step carefully. Always prioritize safety by 关闭电源, 用测试仪确认断电, ,并使用绝缘工具。若在任何步骤中感到不确定,, 请联系专业人员进行检修。 应寻求专业帮助。. Bảo trì thường xuyên, 例如 冲洗水箱并检查阳极棒, 可预防重大问题, 延长热水器使用寿命。.
Remember: 持续的检查与及时维修能让您的热水器长期高效安全地运行。.
Câu hỏi thường gặp
Bạn nên kiểm tra các bộ phận của bình nước nóng bao lâu một lần?
Bạn nên test your water heater elements at least once a year. Regular checks help you catch problems early and keep your system running efficiently.
Bạn có thể kiểm tra bộ phận gia nhiệt của bình nước nóng mà không cần tháo nó ra không?
是的,您无需拆卸元件即可进行测试。只需在使用万用表前断开接线端子上的一根导线。.
热水器跳闸意味着什么?
跳闸通常表明加热元件短路或存在接地故障。复位断路器前应先测试元件和线路是否故障。.
测试元件需要排空水箱吗?
测试元件无需排空水箱。仅当需要更换故障元件时才需排水。.
Bạn cần những dụng cụ gì để kiểm tra bộ phận làm nóng nước?
您需要万用表、螺丝刀和非接触式电压测试仪。工作手套和手电筒也能帮助您更安全、更清晰地操作。.
故障温控器是否会产生与损坏元件相似的症状?
是的,故障温控器可能导致无热水或温度不稳定。应同时测试温控器和加热元件以确定真正问题。.
Có an toàn khi tự thay thế bộ phận làm nóng nước không?
如果您对基本的电工工作感到得心应手,可以自行更换 bộ phận làm nóng nước if you follow safety steps and feel confident with electrical work. If you feel unsure, you should call a licensed professional.
Mẹo: 开始任何维修前,务必关闭断路器电源并用电压测试仪确认断电。.

