
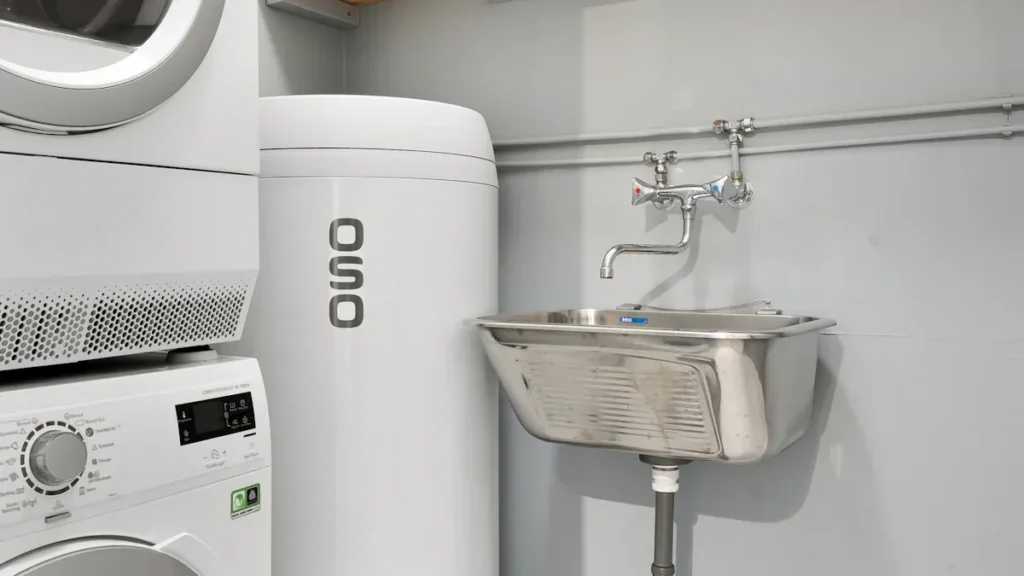
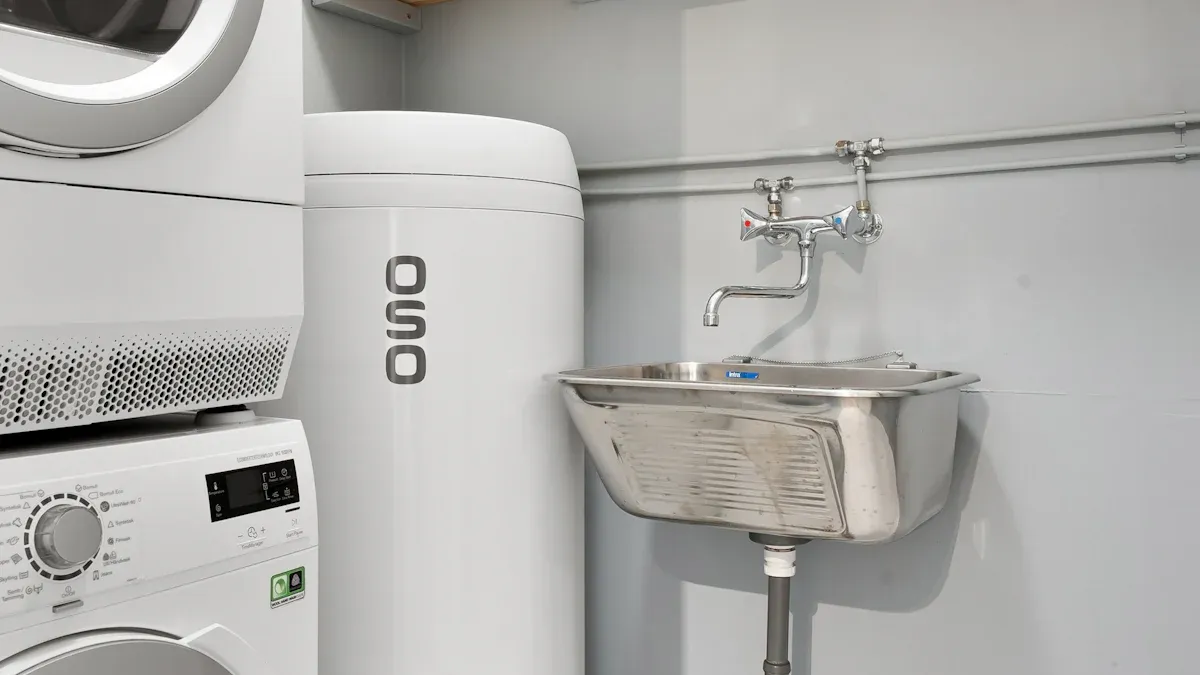
Você pode substituir o elemento de um aquecedor de água desligando a energia, drenando o tanque e trocando a peça defeituosa. A maioria dos proprietários gasta entre US$ 20 e US$ 60 em peças para fazer você mesmo, enquanto a mão de obra profissional pode elevar o custo para US$ 150 a US$ 300. Priorize sempre a segurança. Se você não se sentir seguro sobre como substituir o elemento ou lidar com componentes elétricos, entre em contato com um técnico licenciado.
Ferramentas e Materiais para Substituir o Elemento do Aquecedor de Água
Ao se preparar para substituir um elemento no seu aquecedor de água, você precisa das ferramentas e materiais. adequados. O uso de equipamentos apropriados garante um processo tranquilo e ajuda a evitar erros comuns.
Ferramentas Essenciais para Substituir o Elemento
扳手和螺丝刀
Você precisará de uma chave para elemento de aquecimento para remover e instalar o elemento. Esta ferramenta especializada se ajusta à maioria dos aquecedores de água padrão elementos de aquecimento e fornece a alavancagem necessária. Uma chave de fenda 4 em 1 ajuda a remover os painéis de acesso e desconectar os fios. Um alicate de bico fino pode auxiliar no manuseio seguro dos fios.
Multímetro para Testes
Um multímetro ou testador de continuidade permite verificar se o elemento funciona antes e depois da substituição. Você também deve usar um testador de tensão sem contato para confirmar que a energia está desligada antes de tocar em qualquer parte elétrica. Esta etapa protege você contra choques elétricos.
Balde e Toalhas para Limpeza
Água pode derramar durante o processo. Coloque um balde sob a válvula de drenagem para capturar a água ao esvaziar o tanque. Mantenha toalhas por perto para limpar qualquer derramamento e evitar danos por água na área ao redor do aquecedor.
Dica: Conecte uma mangueira de jardim à válvula de drenagem para facilitar a remoção da água. Este método direciona a água com segurança para longe da sua área de trabalho.
Peças de Reposição para o Aquecedor de Água
Escolhendo o Elemento de Aquecimento Adequado
Selecione um depende do número exato do modelo e da configuração do invólucro do aquecedor. A semelhança visual não é confiável para correspondência. A identificação deve começar na placa de dados da secadora. que corresponda à potência e ao tamanho da peça original. Usar a potência correta garante que o aquecedor de água opere de forma eficiente e segura. A maioria das lojas de ferragens possui uma variedade de elementos, então verifique a etiqueta ou o manual do seu aquecedor para obter as especificações.
Seleção de Juntas e Vedações
Sempre substitua a junta ou vedação ao instalar um novo elemento de aquecimento. Uma junta nova evita vazamentos e mantém uma vedação firme. Escolha uma junta compatível com o modelo do seu aquecedor de água para obter os melhores resultados.
Suprimentos Opcionais para Instalação
Fita de Teflon para Vedação
A fita de Teflon pode ajudar a obter uma vedação à prova d'água em conexões rosqueadas. Enrole a fita ao redor das roscas antes de instalar o novo elemento de aquecimento. Esta etapa reduz o risco de vazamentos.
Produtos de Limpeza
Leve materiais de limpeza, como panos e um limpador suave. Limpe a área ao redor da abertura antes de instalar o novo elemento de aquecimento. Remover detritos e sedimentos ajuda a junta a assentar corretamente e prolonga a vida útil do aquecedor de água.
Nota: Se o elemento parecer preso, você pode precisar de um cinzel frio e um martelo para soltá-lo. Tenha cuidado para não danificar o tanque.
Ter essas ferramentas e materiais prontos tornará a substituição do elemento do aquecedor de água mais segura e eficiente.
Precauções de Segurança Antes de Substituir o Elemento
Antes de iniciar qualquer trabalho no aquecedor de água, você deve tomar várias medidas de segurança importantes. Essas precauções protegem você contra choques elétricos, queimaduras e danos por água. Seguir cada etapa garante um processo de substituição mais seguro e eficiente.
Procedimentos de Desligamento de Energia para o Aquecedor de Água
Desligando a Eletricidade no Disjuntor
Sempre comece desligando a eletricidade do aquecedor de água no painel principal de disjuntores. Localize o disjuntor correto identificado para o seu aquecedor e mude-o para a posição “desligado”. Esta etapa evita contato elétrico acidental, que pode causar ferimentos graves.
Verificando se a Energia Está Desligada com Multímetro
Após desligar o disjuntor, use um multímetro para confirmar que nenhuma energia chega ao aquecedor de água. Ajuste o multímetro para a configuração de tensão apropriada e teste os terminais onde os fios se conectam ao elemento. Se a leitura mostrar tensão zero, você pode prosseguir com segurança. Nunca confie apenas no disjuntor — sempre verifique novamente com sua ferramenta.
Desligamento da Água e Prevenção de Danos
Localizando e Fechando a Válvula de Água
Encontre a válvula de abastecimento de água fria acima do seu aquecedor de água. Gire esta válvula no sentido horário para impedir que a água entre no tanque. Se o seu aquecedor tiver uma válvula de fechamento dedicada e ela não funcionar, você pode precisar fechar o abastecimento principal de água da sua casa.
Prevenindo Danos por Água Durante a Substituição
Danos por água representam um risco significativo durante a substituição do elemento. Se você não desligar o abastecimento de água, poderá enfrentar inundações ou vazamentos. Tome estas medidas para minimizar o risco:
- Desligue o abastecimento de água antes de iniciar qualquer trabalho.
- Se o aquecedor de água vazar, feche a válvula no aquecedor para reduzir o vazamento.
- Se a válvula estiver quebrada, feche o abastecimento principal de água para evitar inundações contínuas.
Dica: Coloque toalhas e um balde por perto para capturar qualquer água restante no tanque. Esta etapa simples ajuda a evitar bagunça desnecessária e protege seu piso.
Segurança Pessoal ao Substituir o Elemento do Aquecedor de Água
Usando Equipamento de Proteção
Use óculos de proteção e luvas ao trabalhar no aquecedor de água. Esses itens protegem seus olhos contra respingos e suas mãos contra bordas afiadas ou superfícies quentes. O equipamento adequado reduz o risco de ferimentos durante o processo de substituição.
Mantendo uma Área de Trabalho Segura
Mantenha seu espaço de trabalho limpo e organizado. Remova qualquer desordem ou riscos de tropeço ao redor do aquecedor de água. Certifique-se de que o piso permaneça seco para evitar escorregões. Uma boa iluminação ajuda a ver as conexões e componentes claramente, reduzindo a chance de erros.
Ao seguir essas precauções de segurança, você cria um ambiente mais seguro para si mesmo e para qualquer pessoa que o auxilie. A preparação cuidadosa garante que a substituição do elemento do aquecedor de água ocorra sem problemas e ajuda a evitar riscos comuns.
Drenando o Aquecedor de Água para Substituição do Elemento
Antes de substituir o elemento, você deve drenar o aquecedor de água adequadamente. Este processo evita vazamentos de água e permite que você trabalhe com segurança dentro do tanque. Siga estas etapas para preparar e drenar seu aquecedor de água de forma eficiente.
Preparando o Tanque do Aquecedor de Água
Resfriando a Água Quente
Comece deixando a água quente no tanque esfriar. A água quente pode causar queimaduras se for liberada repentinamente. Desligue o fornecimento de energia do aquecedor de água no painel do disjuntor. Aguarde pelo menos uma hora para que a água atinja uma temperatura segura. Se quiser acelerar o processo, abra uma torneira de água quente em sua casa. Essa ação ajuda a liberar parte da água quente e traz água mais fria.
Conectando uma Mangueira à Válvula de Drenagem
Localize a válvula de drenagem perto da parte inferior do aquecedor de água. Conecte uma mangueira de jardim padrão com segurança a essa válvula. Coloque a outra extremidade da mangueira em um ralo de piso, tanque de serviço ou área externa onde a água possa fluir com segurança para longe de sua casa. Certifique-se de que a mangueira esteja firmemente encaixada na válvula para evitar vazamentos.
Dica: Sempre verifique se a mangueira leva a uma área de drenagem segura. Evite drenar água em passarelas ou perto de tomadas elétricas.
Processo de Drenagem do Aquecedor de Água
Abrindo a Válvula de Drenagem
Abra a válvula de alívio de pressão do aquecedor de água. Esta etapa libera a pressão acumulada e evita a formação de vácuo dentro do tanque. Em seguida, abra a válvula de drenagem lentamente. A água quente começará a fluir pela mangueira. Monitore o fluxo e certifique-se de que a mangueira permaneça segura.
Gerenciando o Acúmulo de Sedimentos
Os sedimentos frequentemente se acumulam no fundo do tanque. Após a água parar de fluir, abra brevemente a válvula de fornecimento de água fria. Essa ação elimina qualquer sedimento restante. Continue o enxágue até que a água saia limpa pela mangueira. A remoção de sedimentos ajuda a manter a eficiência do aquecedor e previne problemas futuros.
Verificações Finais Após a Drenagem
Garantindo a Drenagem Completa
Verifique o tanque para confirmar se toda a água foi drenada. Incline suavemente a mangueira ou toque na lateral do tanque para liberar qualquer água retida. Inspecione a área ao redor da válvula de drenagem para verificar se há vazamentos ou gotejamentos. Feche bem a válvula de drenagem após terminar a drenagem. Remova a mangueira e mantenha toalhas por perto para capturar qualquer gota restante.
Nota: A drenagem completa garante um ambiente mais seguro e limpo para a substituição do elemento. Também reduz o risco de danos causados pela água durante as próximas etapas.
Ao seguir estas etapas, você prepara seu aquecedor de água para uma substituição suave do elemento. A drenagem adequada protege seu equipamento e área de trabalho, tornando todo o processo mais eficiente.
Como Remover e Substituir o Elemento em um Aquecedor de Água
Acessando o Elemento do Aquecedor de Água
Removendo os Painéis de Acesso
Comece localizando os painéis de acesso no aquecedor de água. A maioria dos aquecedores elétricos tem um ou dois painéis, geralmente fixados com parafusos. Use sua chave de fenda para remover esses parafusos e guarde-os em um local seguro. Levante suavemente o painel para expor o isolamento interno. Puxe o isolamento para revelar o elemento e sua fiação. Alguns modelos incluem uma tampa de proteção plástica sobre as conexões elétricas. Remova também essa tampa para obter acesso total.
Dica: Mantenha todos os parafusos e tampas organizados. Você precisará deles ao remontar o aquecedor.
Desconectando os Fios Elétricos
Antes de tocar em qualquer fio, verifique novamente se a energia está desligada usando seu multímetro. Coloque as pontas de prova nos terminais do elemento. Se você observar tensão zero, pode prosseguir com segurança. Afrouxe os parafusos que prendem os fios aos terminais do elemento. Desconecte cuidadosamente cada fio e afaste-os. Tire uma foto ou anote a configuração da fiação. Esta etapa ajuda a reconectar tudo corretamente após substituir o elemento.
Removendo o Elemento Antigo do Aquecedor de Água
Afrouxando e Extraindo o Elemento
Encaixe sua chave de elemento de aquecimento na base do elemento. Gire a chave no sentido anti-horário para soltar o elemento. Se o elemento resistir, aplique pressão constante em vez de força repentina. Uma vez solto, desparafuse completamente o elemento e puxe-o para fora do tanque. Pode haver algum gotejamento de água, então mantenha uma toalha ou balde por perto.
Lidando com Elementos Presos ou Corroídos
Os elementos podem ficar presos devido à corrosão ou acúmulo de minerais. Se encontrar resistência, evite usar força excessiva, que pode danificar o tanque. Em vez disso, toque suavemente na chave com um martelo de borracha para quebrar a vedação. Para corrosão severa, aplique um lubrificante penetrante e aguarde alguns minutos antes de tentar novamente. Se o elemento permanecer preso, consulte um profissional para evitar danos ao tanque.
Nota: Usar componentes de alta qualidade ao substituir o elemento do aquecedor de água ajuda a prevenir corrosão e problemas futuros.
Instalando o Novo Elemento do Aquecedor de Água
Posicionando e Selando o Novo Elemento
Antes de instalar o novo elemento de aquecimento, verifique se a junta ou vedação está no lugar. Deslize a junta na base do elemento. Insira o novo elemento de aquecimento na abertura e aperte manualmente. Use sua chave para fixar o elemento, mas não aperte demais. Conexões soltas ou excessivamente apertadas podem causar vazamentos ou danos. Busque um encaixe firme que pareça seguro.
Destaque: Conexões apertadas incorretamente são um erro comum. Fixe o elemento firmemente, mas evite usar força excessiva.
Reconectando os Fios e Fixando os Painéis
Reconecte os fios aos terminais do novo elemento de aquecimento. Consulte suas anotações ou foto para garantir o posicionamento correto. Aperte os parafusos dos terminais para que os fios permaneçam no lugar, mas não aperte demais. Recoloque a tampa de proteção plástica se seu aquecedor tiver uma. Empurre o isolamento de volta à posição e reinstale o painel de acesso usando os parafusos que você guardou.
Dica: Verifique todas as conexões antes de fechar o painel. Esta etapa ajuda a prevenir problemas elétricos ao restaurar a energia.
Erros Comuns a Evitar ao Substituir o Elemento
- Conexões apertadas incorretamente podem causar vazamentos ou danos. Sempre fixe as conexões firmemente, mas evite apertar demais.
- A instalação incorreta da válvula de alívio de temperatura e pressão pode criar riscos de segurança. Certifique-se de que a válvula e o tubo de descarga estejam instalados corretamente.
- Usar componentes de baixa qualidade pode economizar dinheiro no início, mas frequentemente causam corrosão, vazamentos ou falhas precoces. Escolha peças de alta qualidade para confiabilidade e longevidade.
Seguindo estes passos, você pode substituir elemento em seu aquecedor de água de forma eficiente e segura. A atenção cuidadosa aos detalhes e a técnica adequada ajudarão você a evitar os erros mais comuns e prolongar a vida útil do seu aquecedor.
Reabastecendo e Testando o Aquecedor de Água Após a Substituição do Elemento
Após substituir o elemento no aquecedor de água, você precisa reabastecer o tanque e testar o sistema para garantir uma operação segura e eficiente. Este processo ajuda a prevenir danos ao novo elemento e confirma que o aquecedor funciona conforme o esperado.
Reabastecendo o Tanque do Aquecedor de Água
Fechando a Válvula de Drenagem
Comece fechando a válvula de drenagem. Gire-a no sentido horário até que fique firme. Esta etapa evita vazamentos ao reabastecer o tanque. Verifique novamente a válvula para garantir que nenhuma água goteje da conexão.
Ligando o Fornecimento de Água
Em seguida, gire a válvula de fornecimento de água fria no sentido anti-horário para permitir que a água flua de volta para o tanque. Ouça o ar escapando por uma torneira de água quente. Esse som significa que o tanque está enchendo e pressurizando. Abra uma torneira de água quente em sua casa e deixe-a correr. Aguarde até que a água flua de forma constante, sem espirros. Essa ação remove o ar preso no sistema e garante que o tanque encha completamente.
Dica: Sempre verifique se há vazamentos ao redor da válvula de drenagem enquanto o tanque reabastece. A detecção precoce ajuda a evitar danos causados pela água.
Verificando Vazamentos Após Substituir o Elemento
Inspecionando Vedações e Conexões
Uma vez que o tanque esteja cheio e o ar eliminado, feche a torneira de água quente e recoloque o arejador se você o removeu. Inspecione visualmente a área ao redor do novo elemento e da junta para verificar se há sinais de vazamento. Se notar umidade ou gotejamentos, aperte cuidadosamente o elemento até que o vazamento pare. Se o aperto não resolver o problema, drene o tanque, remova o elemento e inspecione a junta quanto a danos. Substitua a junta se necessário, reinstale o elemento e verifique novamente se há vazamentos. Prossiga somente quando confirmar que a área está completamente seca e sem vazamentos.
Nota: Nunca restaure a energia do aquecedor de água até verificar se o tanque está cheio. Operar o elemento seco pode causar danos permanentes.
Restaurando a Energia e Testando o Aquecedor de Água
Ligando a Eletricidade
Após confirmar que não há vazamentos, restaure a energia do seu aquecedor. Religue o disjuntor para modelos elétricos. Para modelos a gás, ajuste o termostato para a temperatura desejada. Esta etapa ativa o ciclo de aquecimento.
Monitorando o Ciclo de Aquecimento
Aguarde até duas horas para que o aquecedor de água atinja a temperatura definida. Durante esse período, monitore o sistema quanto a ruídos incomuns ou vazamentos. Abra uma torneira de água quente para confirmar o aquecimento e o fluxo adequados. Se notar qualquer problema, como falta de água quente ou vazamentos persistentes, revise as etapas de instalação ou consulte um profissional.
Destaque: Testar o elemento com um multímetro após a instalação pode confirmar o funcionamento adequado. Uma leitura entre 10 e 30 ohms indica um elemento saudável.
Seguindo estes passos, você garante que seu o aquecedor de água opera com segurança e eficiência após você substituir o elemento. Atenção cuidadosa durante o reabastecimento e o teste protege seu investimento e prolonga a vida útil do aquecedor.
Solução de Problemas Após Substituir o Elemento do Aquecedor de Água
Após substituir o elemento, você pode encontrar problemas que impedem o funcionamento adequado do aquecedor de água. Resolver esses problemas rapidamente garante que o aquecedor opere com segurança e eficiência.
Sem Água Quente Após a Substituição
Se você notar ausência de água quente após instalar um novo elemento, vários fatores podem ser responsáveis.
Problemas de Conexão Elétrica
Comece verificando todas as conexões elétricas. Fios soltos ou conexões inadequadas podem impedir o aquecimento do elemento. Use um multímetro para verificar a tensão nos terminais do elemento. Certifique-se de ter uma conexão neutra sólida, não apenas tensão no lado quente. Às vezes, um fusível queimado ou o botão de reset de limite alto acionado pode interromper a energia. Pressione o botão vermelho de reset no termostato para restaurar o funcionamento. Teste os elementos superior e inferior com um ohmímetro, mesmo que sejam novos. Termostatos defeituosos também causam falhas de aquecimento, então considere substituí-los se os problemas persistirem.
- Causas comuns para ausência de água quente incluem:
- Elemento superior ou termostato defeituoso
- Interruptor de limite alto acionado
- Fusível queimado no quadro de energia
- Fiação neutra ruim
- Aquecedor antigo ou desgastado (10 anos ou mais)
Ar Preso no Tanque
O ar preso dentro do tanque pode impedir que o elemento aqueça a água adequadamente. Sempre purgue o ar do sistema abrindo uma torneira de água quente até que a água flua de forma constante. Se você pular esta etapa, o elemento pode superaquecer ou falhar. Um tubo de imersão quebrado também pode fazer com que água fria se misture com a quente, reduzindo a água quente disponível. O acúmulo de sedimentos dentro do tanque pode bloquear o fluxo de água e afetar o aquecimento. A descarga regular ajuda a prevenir esse problema.
Vazamentos ao Redor do Elemento do Aquecedor de Água
Vazamentos ao redor do novo elemento geralmente indicam problemas de instalação ou vedação.
Problemas com Junta ou Vedação
Verifique se a arruela de borracha ou junta está posicionada corretamente no elemento. Aperte o elemento com segurança, mas evite apertar demais. Se os vazamentos continuarem, remova o elemento e limpe a superfície do tanque onde a junta se assenta. Aplique pasta lubrificante para roscas com Teflon tanto na arruela quanto na superfície do tanque antes de reinstalar. Se ainda houver vazamentos, envolva as roscas do elemento com fita de Teflon e aplique pasta de vedação por cima. Vazamentos persistentes podem indicar uma junta defeituosa ou uma superfície do tanque danificada. Tente reinstalar o elemento antigo para ver se o vazamento para. Se parar, substitua o novo elemento ou sua arruela.
Instalação Incorreta
Instalação inadequada pode causar vazamentos ou problemas elétricos. Sempre siga as instruções do fabricante para o seu aquecedor de água. Garanta que todas as conexões estejam firmes e que a junta esteja assentada corretamente. Isolamento úmido perto dos terminais não é uma preocupação importante, mas mantenha as partes elétricas secas para evitar riscos.
Disjuntor Desarmado ou Fusível Queimado
A disjuntor desarmado ou fusível queimado após a substituição sinaliza problemas elétricos que exigem atenção imediata.
Curtos-Circuitos
Fiação que toca ou causa curto pode desarmar o disjuntor. Verifique novamente todas as conexões e certifique-se de que os fios não se toquem nem toquem o tanque. Nunca ligue o elemento antes que o tanque esteja cheio e o ar seja purgado. Fazer isso pode danificar o elemento e causar um curto-circuito.
Novo Elemento Defeituoso
Um novo elemento defeituoso também pode desarmar o disjuntor. Se o disjuntor continuar desarmando após confirmar a fiação e a instalação adequadas, teste o elemento quanto a defeitos. Às vezes, um disjuntor danificado por falhas anteriores pode precisar de substituição. Sempre encha o tanque completamente e purgue o ar antes de restaurar a energia para evitar danos.
Dica: Se a solução de problemas não resolver o problema, consulte um profissional licenciado para evitar danos adicionais ou riscos de segurança.
Custo para Substituir o Elemento do Aquecedor de Água e Quando Reparar ou Substituir o Aquecedor Inteiro
Custo de Substituição do Elemento: Faça Você Mesmo vs. Profissional
Preço dos Elementos de Aquecimento e Materiais
Você pode esperar pagar um valor diferente dependendo se escolhe o reparo faça você mesmo ou contrata um profissional. A tabela abaixo descreve a típica divisão de custos:
| Aspecto do Reparo | Faixa de Custo DIY | Faixa de Custo do Serviço Profissional |
|---|---|---|
| Peça do Elemento de Aquecimento | $15 a $80 | Incluído no custo de mão de obra |
| Testador de Continuidade | Cerca de $10 | N/D |
| Kit de Manutenção | Cerca de $30 | N/D |
| Mão de Obra (Profissional) | N/D | $200 to $300 |
| Reparo Total Típico | Under $20 (simple fixes) | $200 to $300 |
Quando você mesmo faz o reparo, paga principalmente pela peça e algumas ferramentas. Correções simples geralmente custam menos de $20. O serviço profissional inclui mão de obra, o que aumenta o custo total para substituir o elemento do aquecedor de água para $200–$300.
Encargos de Mão de Obra para Substituição Profissional
Encanadores profissionais cobram tanto pela mão de obra quanto pela experiência. Somente a mão de obra geralmente varia de $200 a $300, com o elemento incluído no preço. Você paga mais pela conveniência, segurança e cobertura de garantia. Algumas empresas oferecem uma garantia curta de mão de obra, geralmente cerca de 90 dias, enquanto as garantias do fabricante para o elemento em si normalmente duram um ano.
Fatores que Afetam o Custo para Substituir o Elemento do Aquecedor de Água
Número de Elementos Substituídos
A maioria dos aquecedores de água elétricos tem dois elementos. Se você substituir ambos, o custo dobra para as peças e aumenta para a mão de obra. Substituir um único elemento é menos caro, mas pode não resolver todos os problemas de aquecimento se ambos estiverem antigos ou desgastados.
Tipo e Marca do Elemento do Aquecedor de Água
O tipo e a marca do elemento que você selecionar também afetam o custo. Elementos de alta potência ou especiais custam mais do que os modelos padrão. Marcas premium podem oferecer garantias mais longas ou durabilidade aprimorada, mas você paga um preço mais alto antecipadamente.
Você deve substituir o elemento ou todo o aquecedor de água?
Idade e condição do aquecedor de água
Você deve considerar a idade e a condição do seu aquecedor antes de investir em reparos. Aquecedores de água com mais de 10 a 15 anos frequentemente desenvolvem problemas de eficiência e falhas recorrentes. Se a sua unidade estiver nessa faixa etária, a substituição pode ser mais econômica a longo prazo.
Reparar um elemento do aquecedor de água prolonga a vida útil da sua unidade atual e reduz o desperdício. No entanto, substituir um aquecedor antigo ou ineficiente pode reduzir suas contas de energia e diminuir seu impacto ambiental ao longo do tempo.
Sinais de que é hora de um novo aquecedor de água
Você pode precisar substituir todo o seu aquecedor de água se notar estes sinais:
- A unidade tem 10 a 15 anos ou mais.
- Você vê vazamentos ou umidade ao redor do tanque, o que geralmente indica corrosão.
- O fornecimento de água quente torna-se inconsistente ou insuficiente.
- A água parece enferrujada ou descolorida, indicando corrosão interna.
- Você ouve ruídos de estrondo ou estalos devido ao acúmulo de sedimentos.
- Corrosão visível aparece no tanque ou nos canos.
- Modelos a gás apresentam problemas frequentes na chama-piloto.
- Seu As contas de energia aumentam sem aumento no uso.
- Você enfrenta reparos repetidos que se tornam caros e inconvenientes.
- Você planeja melhorar ou permanecer em sua casa a longo prazo.
Reparar problemas menores, como um elemento de aquecimento ou termostato, geralmente custa $150 a $500. Reparos mais complexos podem chegar a $1.000. Substituir todo o aquecedor de água custa $1.200 a $3.000 para modelos com tanque e $2.500 a $5.000 para modelos sem tanque. Unidades mais novas oferecem melhor isolamento, tecnologia aprimorada e até 30% de economia de energia, tornando-as um investimento inteligente se o seu aquecedor atual estiver desatualizado.
Quando Chamar um Profissional para Reparos no Aquecedor de Água
Saber quando chamar um profissional pode economizar tempo, dinheiro e frustração. Alguns reparos vão além das habilidades básicas de "faça você mesmo" e exigem conhecimento especializado. Você deve reconhecer os sinais e as situações que demandam atenção de um especialista.
Instalações Complexas
Você pode encontrar situações em que o processo de instalação ou reparo se torna complicado demais para um proprietário comum. Por exemplo, se você tiver um aquecedor de água híbrido, com bomba de calor ou sem tanque, a tecnologia e a fiação podem ser complexas. Atualizar de um aquecedor a gás para um elétrico ou lidar com problemas importantes de fiação elétrica também exige um profissional licenciado. A tabela abaixo descreve qual especialista contatar para problemas específicos:
| Tipo de Profissional | Quando Chamar um Profissional | Vantagens/Experiência |
|---|---|---|
| Técnicos de HVAC | Problemas elétricos/mecânicos complexos, unidades híbridas ou com bomba de calor | Qualificado em elétrica/encanamento, certificado NATE, dimensionamento e instalação adequados |
| Encanadores | Sem fluxo de água, vazamentos em canos/conexões, bloqueios nas linhas de água | Experiência em fornecimento de água, resolução de vazamentos/pressão, aquecedores com e sem tanque |
| Eletricistas | Atualização de gás para elétrico, problemas de fiação, problemas de fornecimento de energia | Atualizações elétricas, conformidade com códigos de segurança, suporte a aquecedores modernos |
Se você notar Sem água quente, temperaturas inconsistentes ou disjuntores desarmando com frequência, você deve considerar ajuda profissional. Você pode começar com um encanador, que pode diagnosticar o problema e encaminhá-lo a um eletricista ou técnico de HVAC, se necessário.
Preocupações de Segurança
Sua segurança deve vir sempre em primeiro lugar. Se você não se sentir confortável trabalhando com eletricidade ou gás, não arrisque ferimentos. Reparos em aquecedores de água geralmente envolvem alta voltagem, água pressurizada e superfícies quentes. Você deve chamar um profissional se notar vazamentos, água enferrujada ou ouvir ruídos estranhos vindos do seu aquecedor. Esses sintomas podem sinalizar problemas mais profundos que exigem ferramentas especializadas e treinamento.
- Sinais comuns de que você precisa de um profissional:
- Sem água quente ou temperaturas inconsistentes
- Vazamentos ou umidade ao redor da unidade
- Ruídos incomuns ou estrondos
- Água enferrujada ou descolorida
- Baixa pressão da água
- Disjuntores que desarmam com frequência
Dica: Sempre tente a solução básica de problemas primeiro, como verificar o termostato, a chama-piloto ou o disjuntor. Se o problema persistir, não hesite em contatar um especialista qualificado.
Você protege sua casa e sua família conhecendo seus limites e buscando ajuda quando necessário. Profissionais trazem experiência, equipamentos adequados e conhecimento dos códigos de segurança para cada trabalho. Essa abordagem garante que seu aquecedor de água opere com segurança e eficiência.
Você pode substitua um elemento do aquecedor de água seguindo estes passos: desligue a energia, drene o tanque, remova a peça defeituosa e instale o novo elemento. Sempre use as ferramentas corretas e teste as conexões por segurança.
| Opção | Custo Típico | Melhor Para |
|---|---|---|
| Reparo do Elemento | $200–$300 | Unidades com menos de 7 anos |
| Substituição Completa | $800 a $2.500 | Unidades com mais de 10 anos ou problemas frequentes |
Se você se sentir inseguro ou desconfortável, entre em contato com um profissional para obter um serviço seguro e confiável.
FAQ
Com que frequência você deve substituir o elemento do aquecedor de água?
Você deve verificar o elemento do seu aquecedor de água a cada 3–5 anos. Substitua-o se notar redução de água quente, corrosão visível ou se o elemento falhar no teste de continuidade.
Você pode substituir o elemento do aquecedor de água sem drenar o tanque?
Você deve drenar o tanque abaixo do nível do elemento antes da remoção. Essa etapa evita que a água vaze e garante um espaço de trabalho seguro e seco.
Qual tamanho de elemento de aquecimento o seu aquecedor de água necessita?
Verifique a etiqueta ou o manual do seu aquecedor de água para obter a potência e o comprimento corretos. A maioria das unidades residenciais utiliza elementos de 3.500 a 5.500 watts. Sempre corresponda às especificações para segurança e eficiência.
Você precisa desligar o fornecimento de água antes de substituir o elemento?
Sim. Feche a válvula de fornecimento de água fria antes de começar. Essa ação impede que a água entre no tanque e ajuda a evitar vazamentos durante o processo de substituição.
Por que o seu novo elemento ainda não aquece a água?
Verifique novamente todas as conexões elétricas. Teste o termostato e rearme o interruptor de limite máximo. Se o problema continuar, o novo elemento pode estar com defeito ou outro componente pode ter falhado.
É seguro usar fita de Teflon nos elementos do aquecedor de água?
Você pode usar fita de Teflon em elementos rosqueados para ajudar a evitar vazamentos. Enrole a fita apenas ao redor das roscas. Não cubra os contatos elétricos.
Quais ferramentas você precisa para substituir o elemento do aquecedor de água?
- Chave para elemento de aquecimento
- Chave de fenda
- Multímetro
- Balde e toalhas
- Luvas de segurança e óculos de proteção
Essas ferramentas ajudam você a concluir o trabalho com segurança e eficiência.

