クラスターページ ? ~2007語 ? グローバル ? FAQ: 5 ? 安全第一の手順(モデル非依存)
本ガイドでは、GE製食器洗い機の 加熱エレメント交換における安全かつ実用的な作業手順を説明します。.食器洗い機の機種は多様であるため、指示は共通レベルで記載されています。電源と水を遮断し、ヒーター端子にアクセスし、正しいシールでエレメントを交換し、漏れを確認し、加熱性能を検証します。.
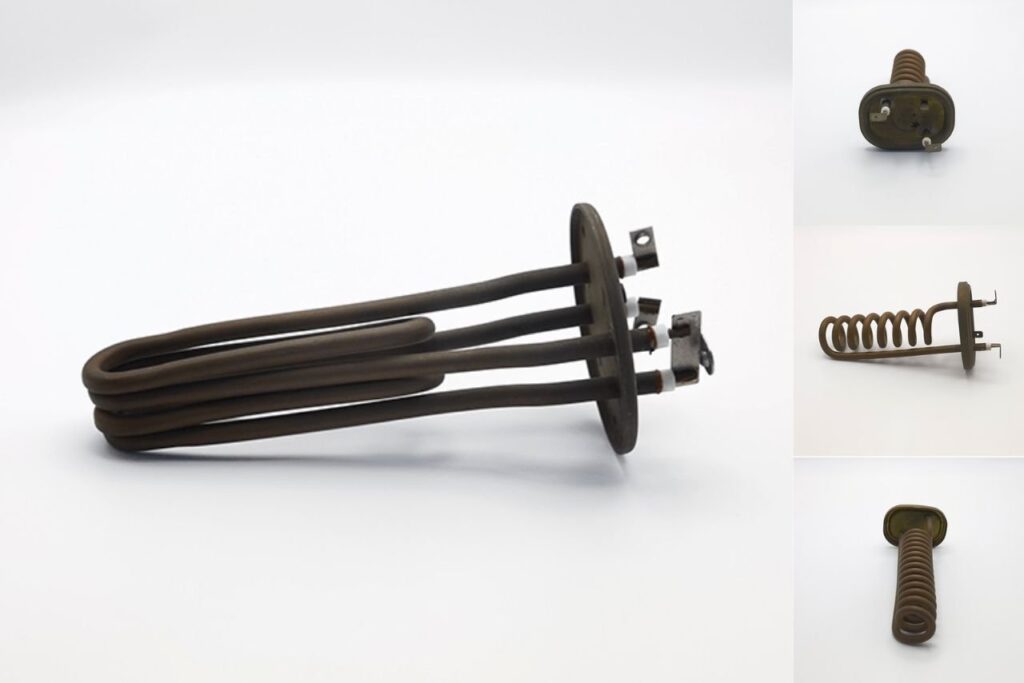
工学的背景:加熱エレメントは、導電材料、絶縁材料、コネクタからなるアセンブリであり、特定の目的に設計されています。つまり、適切な適合、端子、および動作条件が、コイル自体と同様に重要です。. TUTCO参照.
- メンテナンスおよび正しいサイクル設定後も、加熱関連の症状(乾燥不良、洗浄水が冷たい、サイクルの延長)が続く場合。.
- ヒーターまたはヒーター端子に目に見える損傷(焦げ、緩みや焼損したコネクタ)がある場合。.
- ヒーター回路が開放状態である場合(テスターでの測定資格がある場合)。.
注意:TUTCOは、ヒーターの性能と寿命は環境と統合状態に依存することを強調しています。「ヒーターの問題」は、エレメント、端子のホットスポット、または制御ロジックに起因する可能性があります。. ソース.
- ドライバーセット / ナットドライバー(キックプレート、接続箱、取り付け用)
- 調整可能レンチまたは適切なオープンエンドレンチ(ヒーターナットがある場合)
- ニードルノーズプライヤー
- タオル+浅いトレイ(残留水用)
- 懐中電灯
- オプション:サーモヒューズ、サーモスタット(テストで導通がない場合) GE製食器洗い機用加熱エレメント (型番で適合確認)
- 正しいガスケット/シール(多くの場合付属;変形している場合は交換)
- 高温対応端子(オプションだが、既存の端子が緩んでいるか変色している場合は推奨)
- 電源を切る ブレーカーにて(食器洗い機は直結配線されていることが多い)。.
- 電源が切れていることを確認 接続箱の配線に触れる前に行うこと。.
- 給水を止める 食器洗い機への給水を止める。.
- 食器洗い機が作動した直後の場合は、, 冷却するまで待つ 熱湯によるやけどリスクを低減するため。.
Whirlpoolの給湯器エレメント取扱説明書では、排水前に熱湯が冷めるまで流し続けることから始め、やけど防止を強調しています。. ソース.
多くの食器洗い機では、ヒーター端子は洗浄槽の底部を通り、配線は下部キックプレートの背面からアクセス可能です。.
ネジは脇に置き、パネルの向きを再組み立て用に記録しておく。.
配線経路と端子位置を写真に撮る。コネクタが緩んでいるか黒ずんでいる場合は、交換を計画する。.
コネクタ本体を引き抜く(線を引っ張らない)。コネクタが固い場合は、優しく揺する。.
機種により、エレメントは貫通スタッドのナットまたはクリップ/ブラケットで固定されている場合がある。エレメントを支え、洗浄槽の貫通部に負荷がかからないようにする。.
古いガスケットを取り外し、合わせ面を清掃する。異物があると微量の漏れの原因となる。.
新しいエレメントが型番に適合し、正しい形状と端子であることを確認する。. 参考.
エレメントに指定されたガスケットタイプのみを使用する。ねじれなく平らに装着されていることを確認する。.
均等に締め付ける。締めすぎるとシールが変形し、締め付け不足は漏れの原因となる。.
すべての配線接続が確実であることを確認する。Whirlpoolのエレメント取扱説明書では、配線接続の確実な締め付けを強調しており、端子のホットスポット防止に役立つ。. ソース.
- 給水を再開する。.
- ヒーター貫通部およびユニット下部に水滴がないか確認する。.
- 漏れが発生した場合は、作業を中止し、給水を止め、ガスケットの装着状態と締め付けを修正する。.
Whirlpoolの手順には、取り付け後に漏れを確認し、漏れが止まるまで締め付けること、漏れが続く場合はガスケットを点検/交換することが含まれています。. 参考.
- キックプレート/トーパネルを再取り付けします。.
- ブレーカーで電源を復旧させます。.
- 短いサイクルを実行し、漏水を監視します。.
- 次の1~2サイクルにわたり、乾燥状態/水温の改善を確認します。.
- 緩んでいる/変色している端子を交換する
- 接続部を確実に締め、腐食を防止する
- 配線が鋭利な縁から離れて通されていることを確認する
- フィルターを清潔に保ち、通常の洗浄性能を維持する
- 乾燥性能のためにリンスエイドを使用する
- 持続的な長サイクルに対処する(加熱目標値の問題を示している可能性あり)
TUTCOは、ヒーター寿命が酸化、変形、サイクル動作によって制限されることに留意。システムを意図された条件内で動作させることで負荷を低減できる。. ソース.
家電製造において、加熱要素はチューブ、プレート、フィルム、統合モジュールとして現れる。 加熱エレメント および関連カテゴリ、例えば 加熱管, ヒーティングプレート (リストには食洗機用加熱要素を含む)、 加熱フィルム,、 ダイカスト加熱ソリューション.
一部モデルは前面/下部パネルからアクセス可能。他のモデルは底面アクセスのためユニットの引き出しが必要。.
通電状態での作業、または漏水がなく配線が確実であることを確認する前に電源を復旧させること。. 参考.
注意して締め付けますが、漏水が止まらない場合は、ガスケットが正しく座っていないか損傷している可能性があります。. ソース.
推奨されません。圧縮または硬化したガスケットは、ヒーター交換後の緩慢な漏水の一般的な原因です。.
乾燥は、リンスエイド、サイクル選択、水温、および気流/換気設計にも依存します。.
- TUTCO - 加熱要素の定義とヒーター寿命に関する考慮事項: https://tutco.com/conductive/heating-elements
- Whirlpool - 「加熱要素の交換」手順(安全/検証原則に使用: 正しい交換、確実な配線、漏水チェック): https://www.whirlpoolwaterheaters.com/support/help/element-was-out-of-range/24
- Hudson Reed - 仕様重視のヒーター製品リストの例(非食洗機用): https://usa.hudsonreed.com/1000-plug-in-watt-electric-heating-element-76309
免責事項: これは一般的な情報です。GE食洗機の設計は多様です。常にモデル固有のサービス手順および地域の電気/配管安全要件に従ってください。.

