
Votre four de revêtement par poudre ne chauffe pas, et la production est arrêtée. Un élément chauffant défectueux Élément chauffant est le problème le plus probable. La réparation est souvent simple. Vous pouvez tester la continuité des éléments chauffants et remplacer ceux qui sont défectueux. De nombreux principes issus de éléments chauffants pour appareils ménagers s’appliquent également ici. Les principaux fabricants Fabricants d'éléments chauffants, comme Chauffage électrique Jinzhong, conçoivent ces composants pour garantir leur fiabilité. Ce guide vous fournit les étapes exactes pour diagnostiquer le problème et installer un remplacement, vous permettant de reprendre rapidement le durcissement des pièces.
Un élément chauffant défectueux est-il vraiment votre problème ?

Avant de commander une pièce de rechange, vous devez confirmer qu’un des éléments chauffants est bien la source de la panne de votre four. Quelques symptômes clés pointent directement vers un élément défectueux, mais d’autres problèmes électriques peuvent imiter les mêmes symptômes. Cette approche de diagnostic vous fait gagner du temps et de l’argent.
Signes révélateurs d’un élément défaillant
Recherchez ces quatre indicateurs courants. La présence d’un ou plusieurs d’entre eux suggère fortement qu’un élément a atteint la fin de sa durée de vie.
Le four n’atteint pas la température cible
Votre four peine à atteindre sa température de durcissement définie ou ne peut pas la maintenir. C’est le signe le plus courant d’un élément défaillant ou affaibli. Les éléments fonctionnels restants ne peuvent pas produire assez de chaleur pour compenser celui qui est hors service.
Les temps de durcissement s’allongent
Vous remarquez que les pièces nécessitent plus de temps dans le four pour durcir correctement. Un élément défaillant perd en efficacité avant de tomber complètement en panne. Cette baisse progressive de la production de chaleur vous oblige à prolonger les temps de cycle, entraînant des finitions irrégulières comme l’effet “ peau d’orange ” ou une mauvaise adhérence..
Dommages visibles : fissures, cloques ou cassures
Une inspection visuelle rapide peut révéler une panne évidente. Mettez le four hors tension et recherchez tout défaut physique à la surface de l’élément.
- Fissures ou cassures dans la gaine de l’élément sont un signe définitif de défaillance.
- Cloques ou zones bombées indiquent une surchauffe interne et une défaillance imminente.
L’élément ne rougeoie pas
Lors d’un cycle de chauffage normal, vous devriez voir vos éléments de type calrod rougeoyer d’un rouge terne à vif. Si vous pouvez observer les éléments en toute sécurité et remarquez que l’un d’eux reste sombre tandis que les autres rougeoient, vous avez trouvé le coupable.
Éliminer les autres causes courantes
Ne supposez pas que l’élément est défectueux sans vérifier d’abord ces autres composants. Un simple défaut électrique peut facilement être confondu avec une panne matérielle majeure.
Vérification de l’alimentation électrique et du disjoncteur
Commencez par la solution la plus simple. Confirmez que votre four est branché sur une prise sous tension. Ensuite, localisez le disjoncteur dédié au four dans votre tableau électrique. Assurez-vous qu’il est en position “ On ” et qu’il n’a pas sauté. Un disjoncteur qui a sauté indique une surcharge électrique ou un court-circuit que vous devez examiner.
Inspection des fusibles et des relais statiques (SSR)
Le boîtier de commande de votre four contient des fusibles et des relais qui gèrent le flux d’énergie. Un fusible grillé ou un relais statique (SSR) défectueux empêchera l’énergie d’atteindre l’élément.
Astuce professionnelle : vérification rapide du SSR Vous pouvez effectuer un test de base sur un SSR. D’abord, vérifiez que la LED d’entrée s’allume lorsque le contrôleur demande de la chaleur. Ensuite, utilisez un multimètre pour vérifier la tension du côté sortie afin de confirmer qu’il commute correctement l’énergie.
Vérification du thermostat et du contrôleur PID
Le thermostat ou le contrôleur PID est le cerveau du four. S’il fonctionne mal, il peut ne pas envoyer le signal pour allumer les éléments. Des problèmes tels que des capteurs de température défectueux ou des réglages incorrects du contrôleur peuvent provoquer un durcissement inégal ou empêcher le four de chauffer, même avec des éléments parfaitement fonctionnels.
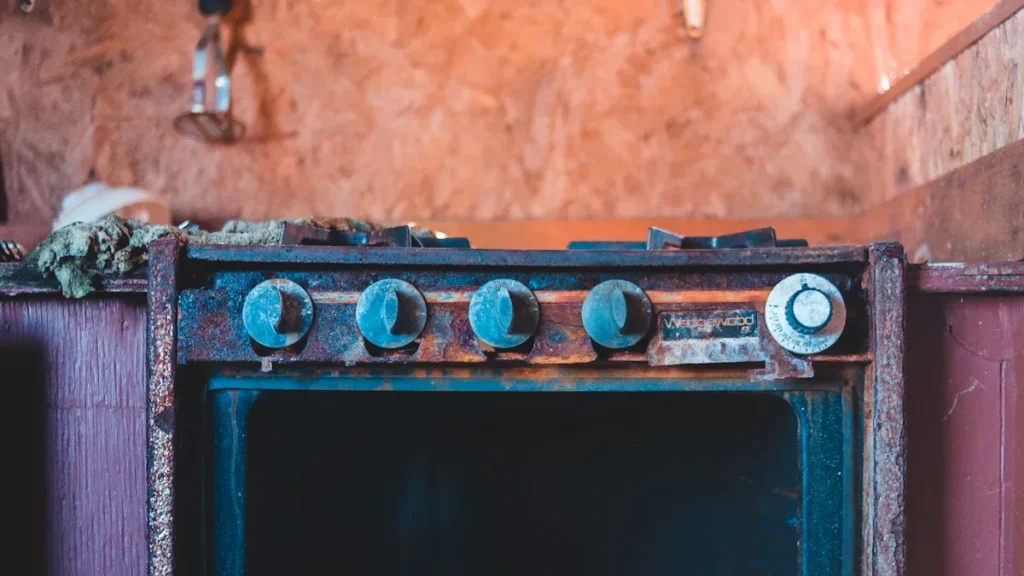
Comprendre les éléments chauffants de votre four de revêtement par poudre
Pour diagnostiquer et remplacer correctement un composant défectueux, vous devez d’abord comprendre le matériel avec lequel vous travaillez. Vos éléments chauffants du four sont plus que de simples fils ; leur type, leur puissance et leur configuration de câblage dictent tous les performances de votre four.
Types d’éléments chauffants utilisés dans les fours
Les fours utilisent différents types d’éléments, chacun avec des caractéristiques uniques. Identifier le vôtre est la première étape.
Éléments Calrod (gainés)
Ce sont les types les plus courants que vous rencontrerez. Un élément Calrod est constitué d’un fil résistif enfermé dans une gaine métallique de protection. Ils sont connus pour leur durabilité, polyvalence et temps de chauffe rapides. Les fabricants les apprécient car ils sont à la fois économiques et efficaces, offrant un transfert de chaleur précis pour un durcissement homogène.
Éléments infrarouges (IR) halogènes
Les radiateurs infrarouges fournissent un chauffage rapide et direct. Au lieu de chauffer l’air, ils émettent un rayonnement infrarouge qui chauffe directement la surface de la pièce. Cette technologie offre une excellente efficacité de conversion de l’énergie électrique en énergie rayonnante, ce qui en fait une option rapide et efficace pour certaines applications.
Éléments à bobine ouverte
Il est peu probable que vous en trouviez dans les équipements modernes. Les éléments chauffants à résistance ouverte sont une conception plus ancienne avec des bobines résistives exposées. L’industrie les a largement abandonnés en raison de leur inefficacité et de leurs risques de sécurité importants, notamment les risques de choc électrique et de court-circuit..
Comment la puissance et la taille influent sur les performances
La puissance de vos éléments doit correspondre à la taille de votre four pour un fonctionnement efficace.
La règle des 100 à 150 watts par pied cube
En règle générale, la plupart des fours de revêtement par poudre nécessitent entre 100 et 150 watts de puissance de chauffage pour chaque pied cube d’espace intérieur. Cette plage garantit que le four peut atteindre et maintenir efficacement les températures de durcissement.
Calcul des besoins de votre four
Vous pouvez facilement calculer le volume de votre four. Cela vous aide à vérifier si vos éléments sont correctement dimensionnés.
Calcul du volume du four
Longueur intérieure (pi) x Largeur intérieure (pi) x Hauteur intérieure (pi) = Pieds cubes (pi³)
Pieds cubes x 125 (watts) = Puissance totale cible
Pourquoi la tension (208 V vs. 240 V) est importante
Vous devez adapter votre élément de remplacement à l’alimentation électrique de votre bâtiment. Bien que de nombreux éléments soient conçus pour 240 V, de nombreux bâtiments commerciaux fournissent du 208 V. Un élément de 240 V fonctionnant sous 208 V ne produira qu’environ 75 % de sa puissance nominale, ce qui entraînera des temps de chauffe plus longs.
| Résistance attendue | Alimentation électrique | Production de chaleur réelle |
|---|---|---|
| 240V | 240V | 100% |
| 240V | 208 V | ~75% |
Configuration et câblage des éléments
La manière dont les éléments sont câblés ensemble impacte directement la production totale de chaleur.
Explication du câblage en série et en parallèle
- Câblage en série : Les éléments sont connectés bout à bout, comme de vieilles guirlandes lumineuses. Le courant électrique traverse un élément avant de passer au suivant.
- Câblage en parallèle : Chaque élément est connecté directement à la source d’alimentation. Le courant est réparti entre les éléments.
Comment la configuration affecte la production de chaleur
Câbler les éléments en série augmente la résistance totale, ce qui réduit la puissance globale et la production de chaleur. Inversement, les câbler en parallèle diminue la résistance totale, permettant à chaque élément de tirer plus de courant et de produire sa pleine chaleur nominale. La plupart des fours utilisent une configuration en parallèle pour des performances maximales.
Rassembler vos outils et la pièce de remplacement appropriée
Une réparation réussie commence par une préparation adéquate. Vous devez rassembler les bons outils et trouver la pièce de remplacement exacte avant de commencer à démonter votre four. Cette approche garantit un processus fluide et efficace et évite des temps d’arrêt inutiles.. La liste de contrôle essentielle des outils et de la sécurité.
Avoir ces articles à portée de main rendra le travail considérablement plus facile et plus sûr. Vous en possédez probablement la plupart dans votre atelier.
C’est votre outil de diagnostic le plus critique. Vous utiliserez un multimètre numérique pour tester la continuité et confirmer que l’alimentation est coupée du four.
Mesurer la résistance/continuité
Jeu de tournevis et de douilles.
Vous avez besoin d’un bon jeu de tournevis pour retirer les panneaux d’accès du four et la quincaillerie de montage qui maintient l’élément en place. Les embouts magnétiques sont un atout utile.
Pinces à bec effilé et clés.
Ces outils sont essentiels pour les travaux électriques. Vous utiliserez des pinces pour manipuler les fils et les petits connecteurs. Les clés sont nécessaires pour desserrer les écrous sur les bornes de l’élément.
Gants et lunettes de sécurité.
Donnez toujours la priorité à votre sécurité. 🛡️
Gants isolés :
- Vous protègent contre les chocs électriques potentiels. Lunettes de sécurité :.
- Protègent vos yeux des débris ou des arcs électriques accidentels. Comment trouver les éléments chauffants de remplacement corrects.
Vous devez installer un élément de remplacement qui correspond aux spécifications de l’original. Utiliser une pièce incorrecte peut entraîner de mauvaises performances, des dommages à votre four ou un risque pour la sécurité.
Trouver le numéro de pièce sur l’ancien élément.
Le moyen le plus simple de trouver une correspondance est d’utiliser le numéro de pièce. Inspectez la base métallique ou la bride de montage de l’ancien élément. Les fabricants estampent ou gravent souvent le numéro de pièce, la tension et la puissance directement sur cette surface.
Si les chiffres sont faibles, utilisez une brosse métallique et une lampe de poche pour les rendre plus lisibles. Prenez une photo claire de ces informations avec votre téléphone pour référence.
Conseil de pro : Mesurer les dimensions et les supports de montage.
Si vous ne trouvez pas de numéro de pièce, vous devez prendre des mesures précises. Notez la longueur, la largeur, l’espacement des bornes et la configuration des supports de montage de l’élément. Ces détails sont cruciaux pour trouver un remplacement compatible.
Où acheter : pièces OEM vs. pièces de rechange.
Vous pouvez acheter des pièces d’équipement d’origine (OEM) directement auprès du fabricant de votre four ou d’un revendeur agréé. Les éléments chauffants de rechange offrent une alternative économique. Pour des pièces spécifiques,
The Fab Shop propose des éléments de 5 000 watts conçus pour les fours de revêtement en poudre., Si vous recherchez une gamme plus large de fournisseurs, les répertoires en ligne peuvent être très utiles.. Heating-Elements.com.
- fournit des listes de divers fabricants et fournisseurs. PowderCoatingOnline.com.
- est un répertoire axé sur les équipements de revêtement et les pièces de rechange. Le guide définitif pour tester vos éléments chauffants.
Vous avez identifié le problème potentiel. Vous allez maintenant effectuer un test définitif pour confirmer un élément défectueux. Ce processus est méthodique et nécessite une attention particulière à la sécurité. Suivez ces étapes précisément pour obtenir un diagnostic précis.
Étape 1 : Sécurité d’abord—Coupez l’alimentation.
Vous ne devez jamais travailler sur un équipement électrique sous tension. Mettre votre four hors tension est l’étape la plus critique. Les professionnels utilisent une procédure formelle de
verrouillage/étiquetage (LOTO) pour garantir la sécurité. Vous pouvez suivre une version simplifiée de cette norme industrielle. Informez les autres :.
- Avertissez tout le personnel à proximité du four que vous l’arrêtez pour maintenance.Mettez hors tension :.
- Éteignez le four à l’aide de son interrupteur principal ou de ses commandes.Isolez l’énergie :.
- Débranchez le four et coupez le disjoncteur.Vérifiez l’isolation :.
- Utilisez votre multimètre pour confirmer que le four est complètement hors tension.Débranchez le four de la prise murale.
Votre première action est de déconnecter physiquement le four de sa source d’alimentation. Débranchez le cordon d’alimentation principal de la prise murale. Cette étape supprime immédiatement le flux électrique principal.
Your first action is to physically disconnect the oven from its power source. Unplug the main power cord from the wall receptacle. This step immediately removes the primary flow of electricity.
Coupez le disjoncteur dédié
Ensuite, localisez le tableau électrique principal de votre bâtiment. Trouvez le disjoncteur dédié au four de revêtement en poudre. Basculez le disjoncteur en position “ Arrêt ”. Cette action fournit une deuxième couche de protection, garantissant qu'aucune alimentation électrique ne peut atteindre la prise. Vous pouvez appliquer un cadenas ou une étiquette sur le disjoncteur pour empêcher quiconque de le rallumer accidentellement.
Utilisez votre multimètre pour confirmer une puissance nulle
Il s'agit de votre dernière vérification de sécurité. Réglez votre multimètre pour mesurer la tension alternative (V~). Touchez soigneusement les sondes du multimètre aux bornes à l'intérieur du boîtier de connexion électrique du four.
Une lecture correcte pour un circuit hors tension est 0 volts. Votre multimètre doit afficher ‘ 0 ’ ou une valeur très proche de celle-ci. Toute autre lecture indique la présence d'une tension dangereuse. Vous devez vous arrêter et revérifier les étapes précédentes avant de continuer.
Étape 2 : Accès aux bornes de l'élément
Une fois l'alimentation électrique déconnectée en toute sécurité, vous pouvez désormais accéder aux points de connexion de l'élément. Ceux-ci se trouvent généralement derrière un panneau amovible à l'arrière ou sur le dessus du four.
Retrait des panneaux d'accès du four
Utilisez votre tournevis ou votre douille pour retirer les vis maintenant le panneau d'accès principal en place. Mettez le panneau et ses vis de côté dans un endroit sûr. Cela exposera le câblage interne du four, les relais et les bornes des éléments chauffants.
Identification des points de connexion de l'élément
Recherchez les extrémités des éléments dépassant à travers la paroi intérieure du four. Chaque élément aura deux tiges filetées avec des fils attachés par des écrous ou des connecteurs. Ce sont les bornes auxquelles vous devez accéder pour les tests.
Astuce : Utilisez un plateau magnétique pour les vis
Un espace de travail organisé est un espace de travail sûr. Placez toutes les vis, écrous et petites quincailleries dans un plateau magnétique pour pièces. Cette astuce simple évite de perdre les fixations et rend le remontage beaucoup plus rapide. 🧲
Étape 3 : Réalisation du test de continuité
Le test de continuité détermine si le fil interne d'un élément est intact ou cassé. Un fil complet et non cassé permet à l'électricité de circuler et de générer de la chaleur. Un fil cassé crée un circuit ouvert, et l'élément ne fonctionnera pas.
Réglage de votre multimètre sur Ohms (Ω)
Tournez le cadran de votre multimètre numérique sur le réglage de résistance, marqué du symbole oméga (Ω). Si votre multimètre a plusieurs plages, sélectionnez le réglage 200 ohms. Avant de commencer, touchez les deux sondes ensemble. Le multimètre doit afficher 0,0 ou une valeur très proche, confirmant qu'il fonctionne correctement.
Comment placer correctement les sondes
Tout d'abord, vous devez déconnecter les fils de l'élément que vous testez. Utilisez une clé ou une douille pour retirer soigneusement les écrous et retirer les connecteurs de fil des deux bornes. Maintenant, appuyez fermement une sonde de multimètre contre chacune des deux bornes nues de l'élément. La polarité des sondes n'a pas d'importance pour ce test.
Ce que signifie la lecture : Continuité vs. Boucle ouverte
Le nombre sur l'écran de votre multimètre indique l'état de l'élément.
- Continuité: Une lecture numérique spécifique indique que la bobine interne est complète. L'électricité peut la traverser.
- Boucle ouverte: Une lecture “ OL ” ou infini (∞) signifie que la bobine interne est cassée. L'électricité ne peut pas passer.
Étape 4 : Interprétation des résultats
Les chiffres sur l'écran de votre multimètre fournissent le verdict final sur l'état de votre élément chauffant. Une interprétation correcte est cruciale. Elle vous indique s'il faut procéder à un remplacement ou poursuivre votre diagnostic ailleurs.
Une bonne lecture (10-50 Ohms)
Vous avez un bon élément si votre multimètre affiche une valeur de résistance spécifique. Pour la plupart des éléments de four de revêtement en poudre, cette lecture se situera entre 10 et 50 ohms (Ω).
Une lecture dans cette plage confirme que la bobine interne de l'élément est intacte. Elle fournit un chemin complet et non cassé pour que l'électricité circule et génère de la chaleur. L'élément est électriquement sain.
Astuce de pro : Pourquoi n'est-ce pas zéro ? La valeur de résistance est déterminée par la longueur et le calibre du fil à l'intérieur de l'élément. Un élément plus long ou plus puissant aura une résistance différente de celle d'un élément plus petit. Le point clé est qu'une lecture spécifique à faible ohm indique un circuit continu et sain.
Si vous obtenez une bonne lecture, votre problème de chauffage réside probablement ailleurs. Vous devez réexaminer d'autres composants comme le SSR, le contrôleur ou les connexions de câblage.
Une mauvaise lecture (OL ou Infini)
Vous avez trouvé le coupable si l'écran de votre multimètre affiche “ OL ” (Boucle ouverte), un symbole d'infini (∞), ou simplement ne change pas de sa lecture par défaut.
Ce résultat signifie que le fil interne est cassé. Considérez-le comme un pont rompu sur une autoroute ; le trafic (l'électricité) ne peut pas traverser. Aucun courant ne peut traverser l'élément, il ne peut donc produire aucune chaleur. Cet élément est défaillant et doit être remplacé.
| Lecture du multimètre | Interprétation | Action requise |
|---|---|---|
| 10-50 Ω | ✅ Bon élément (Continuité) | Enquêter sur d'autres composants. |
| OL ou ∞ | ❌ Mauvais élément (Boucle ouverte) | Remplacez l'élément chauffant. |
Comment tester un défaut à la terre
Un défaut à la terre est une condition dangereuse où le fil chaud interne de l'élément entre en contact avec sa gaine métallique externe. Cela peut provoquer un court-circuit, faire sauter les disjoncteurs ou créer un risque sérieux de choc électrique. Vous devez tester ce défaut avant d'installer un nouvel élément ou de réutiliser un ancien.
⚠️ Un défaut à la terre présente un risque de sécurité significatif. Vous devez identifier et remplacer immédiatement tout élément mis à la terre.
Suivez ce processus pour tester un défaut à la terre :
- Assurez-vous que les fils sont toujours déconnectés des deux bornes de l'élément.
- Réglez votre multimètre sur son réglage de résistance le plus élevé (Ohms Ω).
- Touchez fermement une sonde de multimètre à l'une des bornes de l'élément.
- Touchez l'autre sonde à un endroit propre et non peint sur la gaine métallique de l'élément ou son support de montage. Cette gaine est la terre.
- Observez la lecture. Un élément sain et non mis à la terre doit afficher “ OL ” ou infini (∞). Cela indique qu'il n'y a pas de connexion électrique entre le fil interne et la gaine externe.
- Répétez le test en utilisant l'autre borne du même élément.
Si vous obtenez une lecture de résistance numérique lors de ce test—surtout une faible—l'élément a un défaut à la terre. Il est compromis et dangereux. Vous devez le jeter et le remplacer, même s'il a réussi le test de continuité initial.
Procédure pas à pas : Remplacement de l'élément chauffant défectueux

Vous avez confirmé avec succès un mauvais élément. Vous allez maintenant effectuer le remplacement. Cette procédure est méthodique et nécessite une attention particulière aux détails. Travailler systématiquement garantit une réparation sûre et efficace, restaurant votre four à sa pleine capacité opérationnelle.
Étape 1 : Documenter et déconnecter l'ancien élément
Avant de retirer des pièces, vous devez créer un enregistrement clair des connexions existantes. Cette documentation est votre outil le plus précieux lors du remontage.
Prenez une photo claire du câblage
Votre smartphone est un outil essentiel ici. Prenez plusieurs photos claires et bien éclairées du câblage de l’élément sous différents angles. Capturez exactement comment les fils se connectent aux bornes. Cette référence visuelle élimine toute incertitude lors de l’installation de la nouvelle pièce.
Étiquetez les fils si les connexions sont complexes
Pour Fours avec plusieurs éléments chauffants ou câblage complexe, les photos seules peuvent ne pas suffire. Utilisez du ruban de masquage et un marqueur pour créer de petites étiquettes pour chaque fil. Un système de numérotation simple (par exemple, “ 1A ”, “ 1B ”) correspondant à chaque borne évitera toute confusion.
Desserrez et retirez soigneusement les fils
Utilisez une clé ou un tourne-écrou pour desserrer les écrous sur les bornes de l’élément. Les cosses annulaires connectant les fils sont probablement en acier nickelé. Ce matériau est conçu pour une utilisation continue à des températures élevées allant jusqu’à 482 °C (900 °F), ce qui empêche leur fusion ou leur corrosion. Une fois les écrous retirés, tirez doucement les cosses des fils loin des bornes.
Les fils eux-mêmes sont également spécialisés pour les environnements à haute température. Votre four utilise probablement l’un des types suivants :
| Type de fil | Isolation/Gaine | Température maximale |
|---|---|---|
| MG (Haute Température) | Ruban de mica renforcé de verre, Gaine en tresse de fibre de verre | 450 °C (842 °F) |
| TGGT (Standard) | Fil de verre enroulé sur du téflon, Gaine en tresse de fibre de verre | 250 °C (482 °F) |
Étape 2 : Retirez l’ancien élément du four
Une fois les connexions électriques déconnectées en toute sécurité, vous pouvez maintenant retirer l’élément défectueux de la chambre du four.
Dévissez les supports de montage intérieurs
Déplacez-vous à l’intérieur du four. Localisez les vis ou boulons qui fixent les supports de montage de l’élément à la paroi du four. Utilisez le tournevis ou le tourne-écrou approprié pour retirer cette quincaillerie. N’oubliez pas de placer toutes les fixations dans votre plateau magnétique.
Faites glisser doucement l’ancien élément vers l’extérieur
Saisissez fermement l’ancien élément et faites-le glisser hors du four. Soyez doux pendant ce processus. Un ancien élément peut être cassant, surtout près des joints soudés, et vous souhaitez le retirer en une seule pièce. Tirez-le tout droit pour éviter d’endommager les trous de montage.
Nettoyez la zone de montage et les bornes
Avant d’installer la nouvelle pièce, prenez un moment pour nettoyer la zone. Utilisez une brosse métallique pour enlever toute rouille, suie ou débris des surfaces de montage intérieures. Nettoyez également la zone autour des trous de passage des bornes à l’extérieur. Une surface propre garantit une connexion mécanique et électrique solide.
Étape 3 : Installez le nouvel élément chauffant
Vous êtes maintenant prêt à installer la pièce de remplacement. Manipulez le nouvel élément avec soin pour éviter tout dommage pouvant entraîner une défaillance prématurée.
Guidez soigneusement le nouvel élément en place
Faites glisser doucement le nouvel élément dans le four à travers les trous de montage. Alignez les bornes de manière à ce qu’elles traversent proprement la paroi extérieure. Assurez-vous que les supports de montage de l’élément s’alignent parfaitement avec les trous de vis sur la paroi intérieure.
Fixez fermement les supports de montage
Réinstallez les vis ou boulons pour fixer les supports de montage intérieurs. Serrez-les jusqu’à ce qu’ils soient bien ajustés et fermes. Cela garantit que l’élément est maintenu solidement et ne vibrera ni ne se déplacera pendant le fonctionnement. Évitez de trop serrer, ce qui pourrait abîmer les vis ou endommager le support.
Assurez-vous qu’il ne touche pas les parois du four
Inspectez visuellement le nouvel élément installé depuis l’intérieur du four. Confirmez qu’il y a un dégagement suffisant de tous les côtés. L’élément ne doit pas toucher les parois intérieures du four ni aucun autre composant. Un contact direct peut créer un point chaud, provoquer un court-circuit et entraîner un durcissement inégal.
Bonnes pratiques d’installation 💡
- Laissez du mou: Laissez un peu de mou dans les fils de sortie de l’élément. Cela permet la dilatation et la contraction lors des cycles de chaleur, évitant ainsi les contraintes sur les connexions.
- Évitez de solliciter les soudures : Manipulez les zones soudées avec un soin particulier. Ne tordez ni ne pliez les tiges de l’élément lors du serrage des connexions, car cela pourrait fissurer les joints fragiles.
- Pliez les fils avec précaution : Si vous devez plier un fil de sortie, utilisez des pinces à bec doux pour éviter d’endommager les connexions internes.
Étape 4 : Rebranchez les fils solidement
Vous avez maintenant atteint la phase finale et la plus critique de l’installation. Une connexion électrique correcte est primordiale pour la sécurité et les performances. Vous devez rattacher les fils correctement pour garantir un fonctionnement fiable de votre four.
Référez-vous à votre photo “ Avant ”
C’est le moment où votre documentation précédente devient inestimable. Ouvrez les photos que vous avez prises avant de déconnecter l’ancien élément. Votre photo sert de plan définitif pour le remontage.
Votre guide visuel 📸.
Fixez les fils aux nouvelles bornes
Vous allez maintenant rebrancher les fils haute température au nouvel élément. Travaillez méthodiquement pour reproduire la configuration d’origine.
- Récupérez le fil de la première borne, en vous référant à votre photo ou à votre étiquette.
- Placez la cosse annulaire du fil sur la tige filetée du nouvel élément.
- Vissez l’écrou correspondant sur la tige. Serrez-le d’abord à la main pour vous assurer qu’il n’est pas croisé.
- Répétez ce processus pour la deuxième borne.
Assurez-vous que les fils ne sont ni tendus ni tordus. Ils doivent reposer naturellement sans exercer de contrainte sur les points de connexion.
Assurez-vous que toutes les connexions sont serrées
Une connexion desserrée est une cause principale de défaillance électrique. Elle crée une résistance élevée, ce qui génère une chaleur intense à la borne au lieu de l’intérieur de l’élément. Cela peut faire fondre les fils, endommager le nouvel élément et créer un risque d’incendie.
Utilisez votre clé ou tourne-écrou pour serrer les écrous sur les deux bornes. La connexion doit être bien ajustée et ferme. Vous devez comprimer solidement la cosse annulaire contre la tige. Évitez une force excessive, car un serrage excessif peut abîmer les filetages ou casser la tige de la borne.
La règle du “ Serrage ferme ” 🔩.
| Qualité de la connexion | Résultat |
|---|---|
| ✅ Connexion serrée | Faible résistance, circulation efficace de l'énergie, fonctionnement sécurisé. |
| ❌ Connexion desserrée | Résistance élevée, accumulation de chaleur, risque d'arc électrique et de défaillance. |
Après serrage, effectuez une dernière vérification visuelle. Vérifiez que le métal nu des bornes du câble n'est pas en contact avec le châssis du four ou tout autre fil à proximité. Un espacement approprié est essentiel pour éviter un court-circuit.
Vérifications finales et mise sous tension
Vous avez installé avec succès le nouveau composant. Vous allez maintenant effectuer les vérifications finales pour garantir un démarrage sûr et réussi. Ce processus minutieux et étape par étape valide votre travail et prépare votre four à reprendre du service.
Réassemblage de votre four de poudrage
Un réassemblage correct est tout aussi important que la réparation elle-même. Vous devez restaurer le four dans son état d'origine pour assurer un fonctionnement sûr et une efficacité thermique.
Remise en place de tous les panneaux et couvercles
Commencez par réinstaller le panneau d'accès que vous avez retiré précédemment. Alignez correctement le panneau avec ses trous de vis. Insérez toutes les vis et serrez-les jusqu'à ce qu'elles soient bien ajustées. Un four correctement scellé maintient sa température interne plus efficacement et confine la chaleur.
Effectuer une vérification finale de toutes les vis
Prenez un moment pour procéder à une inspection finale du four. Vérifiez que vous avez bien serré tous les fixations du panneau d'accès et des supports de montage de l'élément. Un assemblage sécurisé prévient les vibrations et garantit que tous les composants restent en place en toute sécurité pendant le fonctionnement.
Le moment de vérité : tester votre travail
Le four étant entièrement remonté, vous êtes prêt à rétablir l'alimentation et à tester le nouvel élément. C'est ici que vous voyez le résultat de vos efforts.
Rétablir l'alimentation du four en toute sécurité
Suivez une séquence de mise sous tension réfléchie pour maintenir la sécurité.
- Premièrement, rebranchez le cordon d'alimentation principal du four dans la prise murale.
- Ensuite, rendez-vous au tableau électrique et remettez le disjoncteur dédié en position “Marche”.
La sécurité avant tout ⚠️.
Régler une température basse (par exemple, 200°F)
Mettez en marche les commandes principales du four. Réglez le régulateur PID ou le thermostat sur une température basse, telle que 200°F (93°C). Cela permet au nouvel élément de chauffer progressivement et vous donne l'occasion d'observer son fonctionnement initial.
Confirmer visuellement que le nouvel élément rougit
Si vous pouvez observer l'intérieur du four en toute sécurité, vérifiez que le nouvel élément commence à rougir (rouge sombre). Cette confirmation visuelle est le signe le plus clair que votre réparation a réussi. L'élément reçoit du courant et le convertit en chaleur comme prévu.
Exécuter un cycle de test complet
Un élément qui rougit est un excellent signe, mais un cycle de test complet est nécessaire pour confirmer que le four est prêt pour la production.
Porter le four à une température de cuisson standard
Augmentez le consigne de votre régulateur à une température de cuisson typique, comme 400°F (204°C). Laissez le four atteindre complètement cette température.
Surveiller un chauffage stable et uniforme
Observez l'affichage du régulateur pour vous assurer que le four atteint la température cible et la maintient de manière stable. Une lecture de température stable indique que le régulateur, les relais et le nouvel élément fonctionnent tous correctement ensemble. Votre four est maintenant réparé et prêt à reprendre la cuisson des pièces.
Félicitations. Vous avez diagnostiqué et remplacé avec succès l'élément chauffant de votre four. Vous avez maîtrisé une pièce essentielle de la maintenance de l'équipement. Cette réparation par vous-même vous fait économiser de l'argent et élimine les temps d'arrêt coûteux. Elle vous donne également une compréhension plus approfondie de votre installation de poudrage. Votre four fonctionne désormais comme neuf. Il est temps de vous remettre à créer ces finitions durables et impeccables.
FAQ
À quelle fréquence dois-je m'attendre à remplacer un élément chauffant ?
La durée de vie d'un élément varie selon l'utilisation et l'environnement. Avec une utilisation régulière, vous pouvez vous attendre à ce que les éléments durent plusieurs années. Un fonctionnement intensif et continu ou des cycles de mise sous tension fréquents peuvent réduire cette durée. Vous devez effectuer des inspections annuelles pour détecter les défaillances potentielles de manière précoce.
Puis-je passer à un élément de puissance supérieure pour un chauffage plus rapide ?
Vous devriez éviter cela. Le câblage, les relais et le régulateur de votre four sont conçus pour une charge électrique spécifique. Installer un élément de puissance supérieure peut surcharger ces composants. Cela crée un risque d'incendie sérieux et peut endommager votre équipement. Respectez toujours les spécifications de la pièce d'origine.
Pourquoi mon tout nouvel élément chauffant a-t-il si vite tombé en panne ?
Une défaillance prématurée indique souvent un problème d'installation ou une cause externe.
Causes courantes :
- Une connexion électrique desserrée a créé un point chaud.
- L'élément a été endommagé pendant l'installation.
- La tension de votre four est incorrecte pour la pièce.
Est-il jamais sûr de réparer un élément chauffant fissuré ?
Non. Vous ne devez jamais tenter de réparer un élément fissuré ou cassé. Un fourreau endommagé expose la résistance interne sous tension, créant un risque grave d'électrocution et de courts-circuits. Pour des raisons de sécurité, vous devez toujours remplacer immédiatement un élément physiquement endommagé.
Que faire si tous les éléments testent bons mais que le four ne chauffe toujours pas ?
Si vos éléments présentent une bonne continuité, vous devez examiner les autres composants du circuit de chauffage. Vérifiez à nouveau les relais statiques (SSR), les fusibles et les connexions du câblage. Le problème peut également provenir d'un régulateur PID ou d'un capteur de température défectueux.
Comment savoir si mon atelier a une alimentation 208V ou 240V ?
Vous pouvez utiliser votre multimètre pour déterminer votre tension. Réglez-le sur Tension Alternative (V~). Testez prudemment la prise murale utilisée par votre four. Une lecture autour de 208V indique une source d'alimentation triphasée, tandis qu'une lecture proche de 240V indique une alimentation monophasée.

