
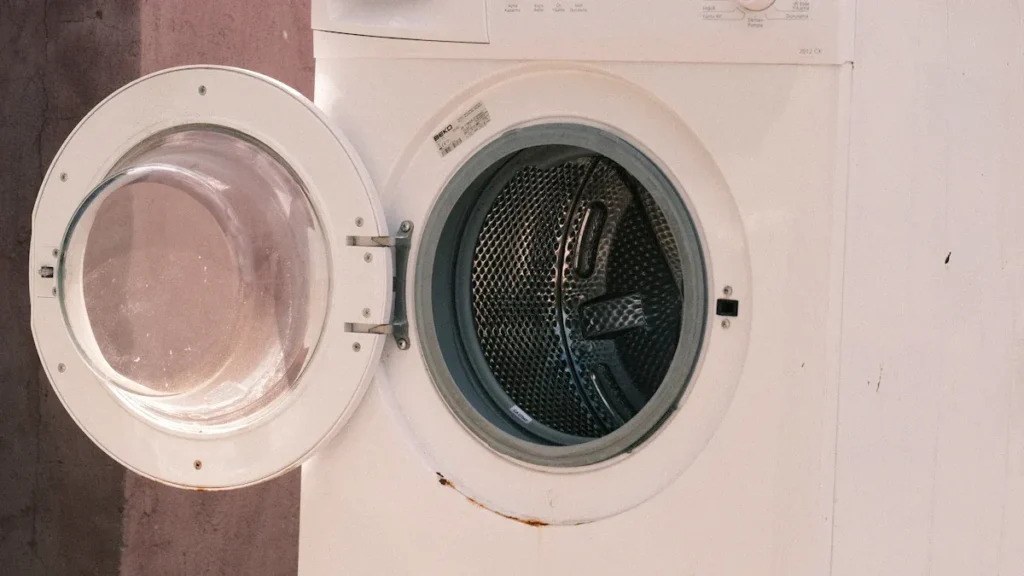
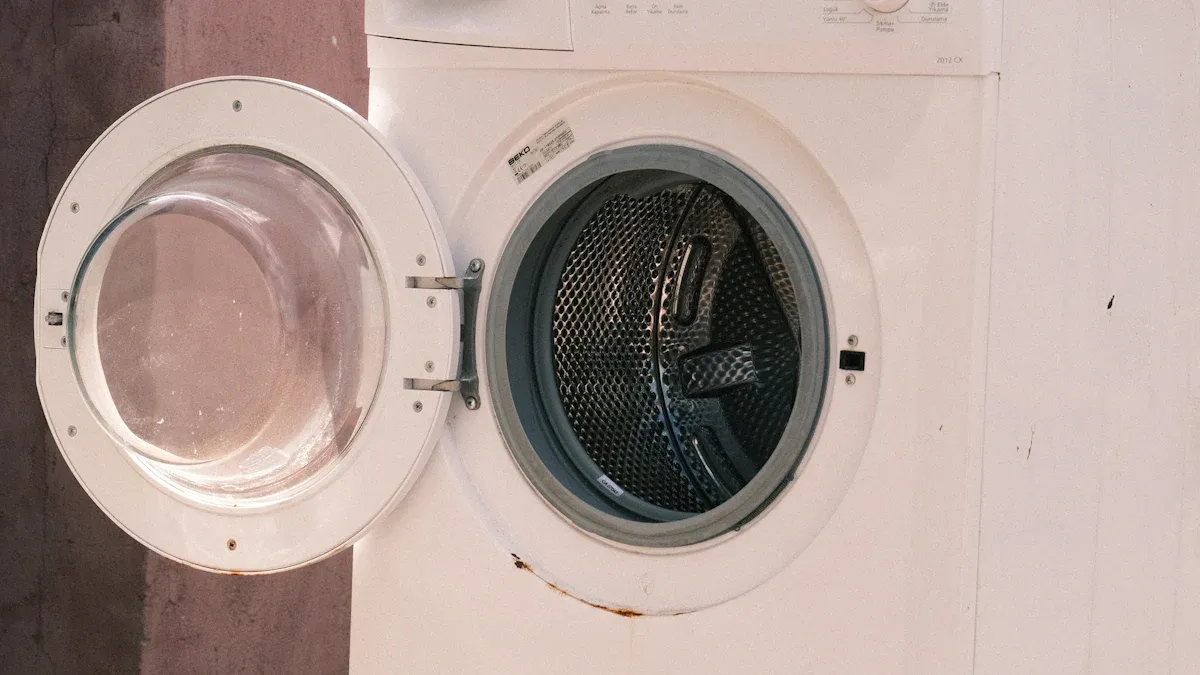
Si votre sèche-linge Samsung cesse soudainement de chauffer, restez calme et suivez immédiatement ces étapes. Tout d'abord, débranchez le sèche-linge pour éviter tout risque électrique. De nombreux modèles Samsung rencontrent des problèmes avec l'élément chauffant du sèche-linge Samsung, ce qui entraîne souvent une absence de chaleur. Inspectez votre sèche-linge pour détecter des signes évidents d'un élément chauffant défectueux, comme une odeur de brûlé ou des dommages visibles sur la bobine. Une action rapide vous aide à rétablir la chaleur et protège votre appareil Samsung contre d'autres problèmes.
Identification d'un élément chauffant de sèche-linge Samsung défectueux
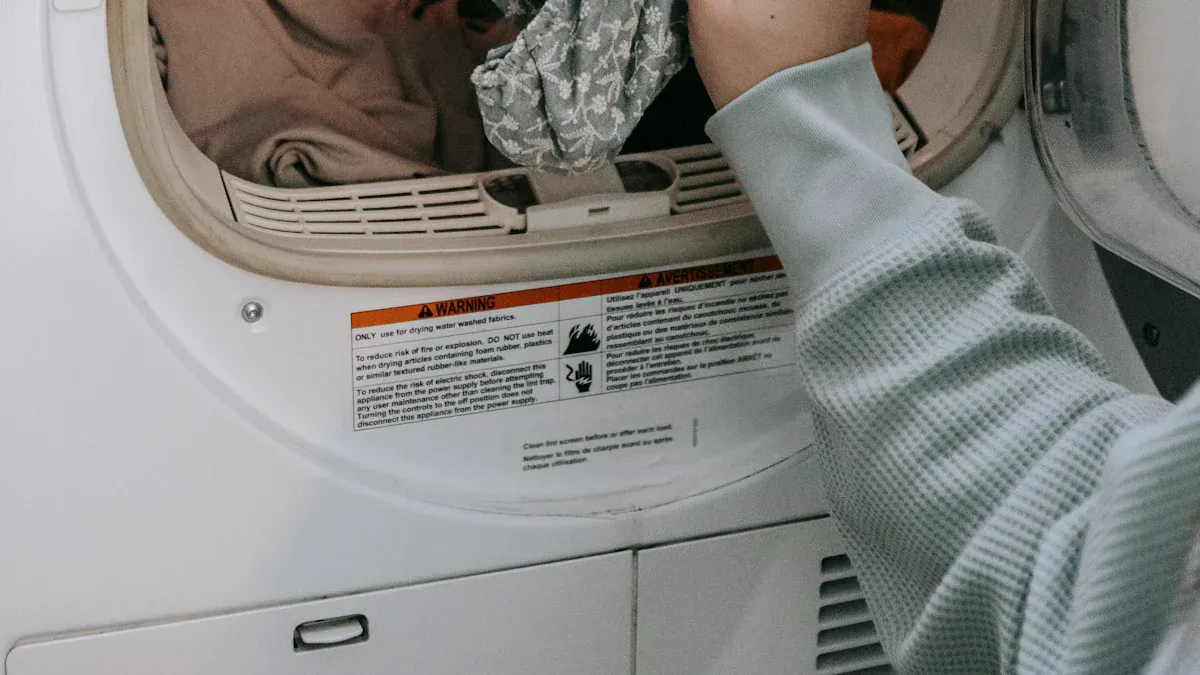
Causes courantes d'un sèche-linge Samsung qui ne chauffe pas
Signes d'un élément chauffant défectueux
Vous pouvez remarquer plusieurs signes d'avertissement lorsque votre élément chauffant de sèche-linge Samsung élément chauffant tombe en panne. L'indicateur le plus évident est que le sèche-linge fonctionne, mais que vos vêtements sortent froids ou humides. Si vous inspectez l'élément chauffant, vous pourriez voir des marques de brûlure, des fissures, voire des cloques sur la bobine. Parfois, l'élément ne brillera pas en orange vif ou en rouge pendant le fonctionnement, ce qui signifie qu'il ne produit pas de chaleur. Ces symptômes physiques indiquent directement un élément chauffant défectueux et nécessitent souvent un remplacement immédiat.
Autres raisons fréquentes d'absence de chaleur
Bien qu'un élément chauffant défectueux soit une cause principale d'un sèche-linge Samsung sèche-linge Samsung qui ne chauffe pas, d'autres problèmes peuvent également déclencher une absence de chaleur. Vous devez vérifier la continuité du fusible thermique à l'aide d'un multimètre. Un fusible grillé coupera l'alimentation de l'élément chauffant, arrêtant la production de chaleur. Des thermostats défectueux, comme le thermostat de limite haute ou le thermostat de cycle, peuvent perturber le cycle de chauffage. Des problèmes avec la carte de commande, un câblage endommagé ou des connexions desserrées peuvent également interrompre le flux d'alimentation. Enfin, vérifiez toujours que votre sèche-linge reçoit la tension correcte — les sèche-linge électriques Samsung nécessitent 240 volts pour faire fonctionner le système de chauffage.
Conseil : Le remplacement de l'ensemble de l'élément chauffant, qui comprend souvent le fusible thermique et le thermostat, est une réparation courante et économique. La plupart des utilisateurs peuvent effectuer cette opération pour environ $30.
Symptômes d'un élément chauffant défectueux
La sécheuse fonctionne mais ne produit pas de chaleur
Si votre sèche-linge Samsung fonctionne mais ne chauffe pas, vous avez probablement un problème d'élément chauffant. Le tambour tournera et la minuterie décomptera, mais l'air à l'intérieur reste froid. Ce symptôme est l'une des causes les plus courantes d'un sèche-linge Samsung qui ne chauffe pas.
Les vêtements restent humides après le cycle
Lorsque l'élément chauffant tombe en panne, vos vêtements resteront humides même après un cycle de séchage complet. Vous pouvez remarquer que les temps de séchage augmentent progressivement à mesure que l'élément approche de la panne, indiquant une perte de chaleur avant que l'élément ne cesse complètement de fonctionner.
Dommages visibles sur la bobine de l'élément chauffant
Une inspection physique peut révéler des signes clairs d'un élément chauffant défectueux. Recherchez des marques de brûlure, des fissures ou des traces de brûlure sur la bobine. Si l'élément ne brille pas uniformément ou pas du tout dans les dix minutes suivant le démarrage d'un cycle, vous devez envisager un remplacement.
| Signe ou symptôme de diagnostic | Description et données de réparation |
|---|---|
| L'élément ne brille pas en orange/rouge | Indique un élément chauffant défectueux ou cassé ; doit briller dans les 10 minutes suivant le chauffage. |
| Dommages physiques visibles | Les marques de brûlure, fissures, cloques ou traces de brûlure sur l'élément sont des signes évidents de dommages. |
| Performance de chauffage inégale | Résulte d'une distribution de chaleur incohérente due à des défauts de l'élément. |
| Codes d'erreur sur les affichages numériques | Les codes tels que F1, F2, F3 ou E2 indiquent des défauts de l'élément chauffant ou du capteur. |
Tests rapides à domicile pour un sèche-linge Samsung qui ne chauffe pas
Vérification des codes d'erreur
Les sèche-linge Samsung modernes affichent des codes d'erreur qui vous aident à diagnostiquer les problèmes de chauffage. Par exemple, les codes comme F1, F2 ou F3 indiquent souvent des défauts de l'élément chauffant, tandis que E2 indique un problème de capteur. Vous pouvez également voir des codes tels que “ HC ” pour une température anormale ou “ 9C1 ” pour des problèmes de tension. Consultez toujours votre manuel d'utilisation pour une liste complète des codes d'erreur et leur signification.
Réalisation d'un test de continuité avec un multimètre
Un test de continuité avec un multimètre est l'un des moyens les plus fiables de confirmer un élément chauffant défectueux. Tout d'abord, débranchez votre sèche-linge et accédez aux bornes de l'élément chauffant. Réglez votre multimètre sur le réglage de continuité et touchez les sondes aux bornes. Si le multimètre n'émet pas de bip ou n'affiche pas de lecture, l'élément est défectueux et doit être remplacé. Vous devez également tester la continuité du fusible thermique et des thermostats, car ces composants peuvent également provoquer un sèche-linge Samsung qui ne chauffe pas.
- Réglez votre sèche-linge sur Time Dry avec Eco Dry désactivé. Démarrez le cycle et vérifiez la chaleur à l'intérieur du tambour après 30 secondes.
- Examinez les facteurs d'installation, y compris la tension correcte (240 V pour les modèles électriques) et une ventilation adéquate.
- Actionnez le disjoncteur en position arrêt puis marche pour vous assurer que les deux circuits sont actifs.
- Effectuez le test de blocage de l'évent en appuyant sur la combinaison de boutons appropriée. Interprétez les codes affichés pour identifier les problèmes de ventilation ou de température.
- Nettoyez régulièrement l'évent d'évacuation pour éviter les obstructions qui réduisent la production de chaleur.
- Si tous les tests sont réussis mais que votre sèche-linge Samsung ne chauffe toujours pas, contactez un technicien professionnel.
Remarque : Débranchez toujours votre sèche-linge avant d'effectuer des tests de diagnostic ou des réparations pour éviter les risques électriques.
Étapes de sécurité avant de remplacer l'élément chauffant
Précautions de sécurité essentielles
Déconnexion de l'alimentation du sèche-linge
Avant de commencer toute réparation sur votre sèche-linge Samsung, débranchez toujours l'alimentation. Débranchez l'appareil de la prise murale. Si votre sèche-linge utilise une connexion câblée, désactivez le disjoncteur. Cette étape prévient les chocs électriques et vous protège des blessures. Éloignez le sèche-linge du mur et débranchez le tuyau d'évacuation si nécessaire. Vous ne devez jamais tenter d'entretenir le sèche-linge lorsqu'il est branché ou connecté à l'alimentation.
Conseil : Débranchez toujours votre sèche-linge avant de commencer toute réparation. La sécurité doit primer lors de toute tâche de dépannage ou de remplacement.
Port de gants de protection et de lunettes de sécurité
Vous devez porter des gants de protection et des lunettes de sécurité avant de manipuler des composants internes. Les bords métalliques à l'intérieur du sèche-linge peuvent être tranchants. Les gants protègent vos mains des coupures et des éraflures. Les lunettes de sécurité protègent vos yeux de la poussière et des débris. Ces précautions vous aident à éviter les blessures lorsque vous travaillez dans des espaces restreints. Ne faites jamais fonctionner le sèche-linge avec les mains mouillées et ne touchez pas les pièces internes sans avoir pris les mesures de sécurité appropriées.
Outils et matériaux nécessaires pour remplacer l'élément chauffant
Tournevis et tourne-écrous
Vous aurez besoin d'un ensemble de tournevis et de clés à douille pour retirer les panneaux et accéder à l'élément chauffant. La plupart des sèche-linge Samsung utilisent des vis cruciformes et des écrous hexagonaux. Gardez vos outils organisés et étiquetez toutes les vis que vous retirez. Cette pratique facilite le remontage et évite la perte de matériel.
Multimètre pour les tests
Un multimètre est essentiel pour tester la résistance chauffante et les autres composants électriques. Utilisez-le pour vérifier la continuité et déterminer si la résistance chauffante doit être remplacée. Testez toujours les bornes d’alimentation du sèche-linge et la résistance chauffante avant d’installer une nouvelle pièce. Cette étape garantit que vous traitez le bon problème et évitez des réparations inutiles.
Manipuler les fils et les connecteurs
Achetez un élément chauffant de remplacement compatible pour votre modèle de sèche-linge Samsung . Vérifiez le numéro de modèle et les spécifications avant d'acheter. L'utilisation de la pièce correcte assure un ajustement approprié et un fonctionnement sûr. Conservez le nouvel élément chauffant dans un endroit propre et sec jusqu'à ce que vous soyez prêt à l'installer.
Les recommandations de sécurité suggèrent de nettoyer le filtre à peluches après chaque charge et de vérifier l'évent annuellement. Évitez de pousser le sèche-linge contre le mur pour maintenir la circulation d'air. Remplacez les évents en plastique par des évents métalliques pour une sécurité accrue.
| Outil/Matériel | But |
|---|---|
| Tournevis/Clés à douille | Retirez les panneaux et accédez aux pièces internes |
| Multimètre | Testez la continuité et diagnostiquez les défauts |
| Alliage NiCr, classé 1200°F | Rétablissez la chaleur et assurez un fonctionnement sûr |
En suivant ces étapes de sécurité et en utilisant les bons outils, vous vous protégez et prolongez la durée de vie de votre sèche-linge. Donnez toujours la priorité à la sécurité et consultez votre manuel d'utilisation pour des instructions spécifiques à votre modèle.
Guide étape par étape pour diagnostiquer l'élément chauffant du sèche-linge Samsung
Accéder à l’ensemble de l’élément chauffant
Retrait du panneau arrière ou avant
Pour commencer le diagnostic de votre sèche-linge Samsung, vous devez accéder aux composants internes. Commencez par débrancher le sèche-linge et l'éloigner du mur. La plupart des modèles Samsung nécessitent le retrait du panneau arrière ou avant pour atteindre l'ensemble de l'élément chauffant. Utilisez un tournevis ou une douille pour retirer les vis fixant le panneau. Placez les vis dans un petit récipient pour ne pas les perdre. Soulevez ou faites glisser délicatement le panneau pour le retirer. Si votre modèle possède un panneau avant, vous devrez peut-être ouvrir la porte du sèche-linge et retirer des vis supplémentaires autour de l'ouverture.
Conseil : Prenez une photo du panneau et de l'emplacement des vis avant le retrait. Cette étape vous aide à remonter correctement le sèche-linge.
Localisation de l'élément chauffant à l'intérieur du sèche-linge
Une fois le panneau retiré, localisez l'élément chauffant. Dans la plupart des sèche-linge Samsung, vous trouverez l'ensemble de l'élément chauffant près du bas de l'appareil, à proximité du boîtier du ventilateur. L'ensemble ressemble souvent à un boîtier métallique ou à une boîte rectangulaire avec des fils attachés. Vous pouvez voir la bobine à l'intérieur du boîtier. Identifiez les fils connectés à l'élément chauffant et notez leurs positions pour le remontage.
Test de continuité de l'élément chauffant
Utilisation d'un multimètre pour vérifier l'élément
Vous avez besoin d'un multimètre pour tester Élément chauffant pour sèche-linge Samsung la continuité. Réglez votre multimètre sur le réglage de résistance le plus bas (ohms, Ω). Déconnectez les fils des bornes de l'élément chauffant. Touchez une sonde sur chaque borne. Un élément chauffant fonctionnel doit afficher une lecture comprise entre 10 et 50 ohms. Si l'affichage indique une résistance infinie ou aucun changement, l'élément est défectueux.
Étapes pour le test de continuité :
- Débranchez le sèche-linge et accédez à l'élément chauffant.
- Débranchez les fils des bornes de l’élément.
- Réglez votre multimètre sur le réglage ohms.
- Placez les sondes sur chaque borne.
- Lisez l'affichage pour la résistance.
Remarque : Manipulez toujours l'élément chauffant et les fils avec précaution pour éviter d'endommager d'autres composants.
Interprétation des résultats du test de continuité
Vous devez interpréter la lecture du multimètre pour déterminer si l'élément chauffant fonctionne. Une lecture dans la plage de 10 à 50 ohms signifie que l'élément a une continuité et doit chauffer correctement. Une lecture de zéro ou de résistance infinie signifie que l'élément est cassé et doit être remplacé. Si vous obtenez une lecture anormale, revérifiez vos connexions et testez à nouveau.
| Lecture du multimètre | Diagnostic | Action nécessaire |
|---|---|---|
| 10–50 ohms | Continuité normale | No replacement needed |
| 0 ou infini | Pas de continuité (élément défectueux) | Remplacer l'élément |
| Instable/erratique | Connexion possiblement desserrée ou défaut | Retester ou inspecter |
En suivant ces étapes, vous pouvez diagnostiquer avec précision l'état de votre élément chauffant. Ce processus garantit que vous ne remplacez la pièce que lorsque cela est nécessaire, économisant ainsi du temps et de l'argent.
Remplacement de l'élément chauffant dans un sèche-linge Samsung
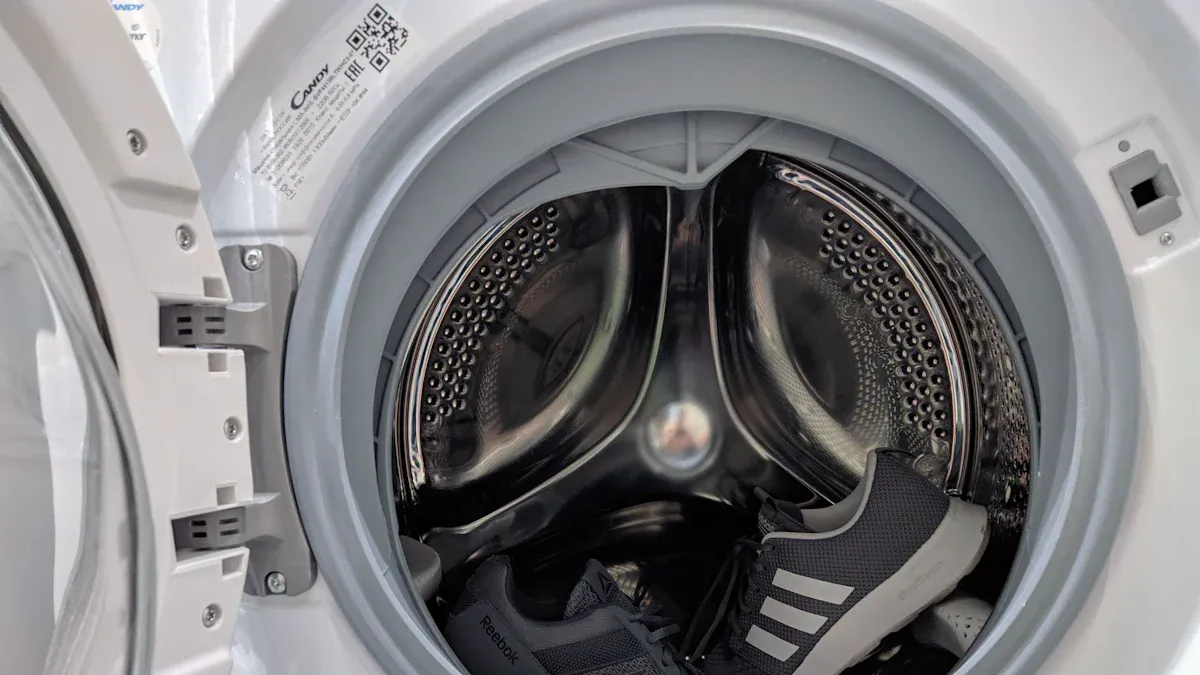
Retrait de l'élément chauffant défectueux
Débranchement des fils et des vis de montage
Vous devez commencer par vous assurer que le sèche-linge est débranché. La sécurité est primordiale dans toute réparation. Éloignez le sèche-linge du mur pour un accès plus facile. Retirez le panneau supérieur soit en le soulevant avec un couteau à mastic, soit en dévissant les vis à l'arrière. Faites glisser et soulevez le panneau pour le retirer. Ensuite, ouvrez la porte du sèche-linge et retirez les vis derrière la porte et sur le bord supérieur. Déconnectez le câblage de l'interrupteur de porte. Tirez le panneau avant vers l'avant et mettez-le de côté.
Localisez l'élément chauffant dans le coin avant inférieur droit à l'intérieur de son boîtier métallique. Retirez les vis fixant le support qui maintient l'élément chauffant. Sortez la vis fixant l'élément chauffant au support. Écartez le support. Tirez l'élément chauffant aussi loin que les fils le permettent. Déconnectez tous les fils connectés à l'élément chauffant, au fusible thermique ou au thermostat. Utilisez des pinces à bec effilé pour redresser les languettes de verrouillage qui maintiennent ensemble les moitiés du boîtier de l'élément chauffant.
Conseil : Étiquetez chaque fil au fur et à mesure que vous le déconnectez. Cette étape vous aidera à tout reconnecter correctement lors du remontage.
Extraction sécurisée de l'ancien élément
Après avoir déconnecté les fils et retiré les vis de montage, vous pouvez retirer l'élément chauffant de son boîtier. Redressez les languettes de verrouillage des bornes des fils avec une pince. Séparez soigneusement les deux moitiés du boîtier de l'élément chauffant en pliant les languettes et en retirant les vis restantes. Faites glisser délicatement l'ancien élément chauffant vers l'extérieur. Évitez d'endommager le boîtier métallique ou les composants à proximité. Mettez l'élément défectueux de côté pour une élimination appropriée.
Installation du nouvel élément chauffant
Fixation du nouvel élément en place
Prenez votre nouvel élément chauffant et faites-le glisser dans le boîtier métallique. Assurez-vous qu'il s'ajuste parfaitement et s'aligne avec les trous de montage. Repliez les languettes de verrouillage en place pour sécuriser le boîtier. Remettez en place le support de montage et serrez toutes les vis fermement. Vérifiez que l'élément est bien en place et ne bouge pas à l'intérieur du boîtier.
Reconnexion des fils et des panneaux
Reconnectez tous les fils à l'élément chauffant, au fusible thermique et au thermostat. Référez-vous à vos étiquettes ou photos pour garantir un placement correct. Assurez chaque connexion par une légère traction pour confirmer qu'elle est serrée. Réinstallez le panneau avant en l'alignant et en fixant les vis. Reconnectez le câblage de l'interrupteur de porte. Replacez le panneau supérieur en position et fixez les vis. Remettez le sèche-linge à son emplacement d'origine et reconnectez le conduit d'évacuation.
Remarque : Vérifiez toujours qu'aucun fil n'est pincé ou exposé avant de rebrancher le sèche-linge.
Test du sèche-linge après le remplacement de l'élément chauffant
Exécution d'un cycle de test pour la chaleur
Rebranchez le sèche-linge à la prise de courant. Sélectionnez un cycle de séchage standard et démarrez la machine. Laissez-la fonctionner pendant plusieurs minutes. Ouvrez la porte et vérifiez la présence d'air chaud à l'intérieur du tambour. Si vous sentez de la chaleur, le nouvel élément fonctionne comme prévu.
Vérification du bon fonctionnement
Pour garantir que le sèche-linge fonctionne selon les normes de l'industrie, vous pouvez vous référer aux procédures de test établies. Le Département de l'Énergie (DOE) et les organisations industrielles recommandent d'utiliser une charge de test standardisée pour valider les performances après le remplacement de l'élément chauffant. Le tableau ci-dessous résume les aspects clés :
| Aspect | Description | Détails justificatifs |
|---|---|---|
| Procédures de test | Procédures de test des sèche-linge du DOE incluant la composition, la taille et les sélections de cycle de la charge de test | Référencées dans les annexes D1 et D2 du DOE ; inclut des types et poids de tissus spécifiques pour les tissus de test |
| Composition de la charge de test | Charge de test standardisée de 50% coton / 50% polyester tissu blanchi, avec des dimensions et un poids précis | Le DOE spécifie les tailles et poids du tissu de test énergétique et du tissu de remplissage énergétique |
| Normes industrielles | Les normes ANSI/AHAM HLD-1-2010 et IEC 61121 spécifient les charges et tailles de test pour la mesure des performances | L'ANSI utilise des draps, serviettes et taies d'oreiller en coton 100% ; l'IEC inclut des charges de test en coton et en mélange synthétique/coton |
| Répétabilité et reproductibilité | Samsung et d'autres fabricants soutiennent les charges de test du DOE pour des résultats cohérents et reproductibles ; les charges réelles manquent de reproductibilité | Samsung déclare que les charges réelles ne produisent pas de résultats reproductibles ; soutient l'utilisation de la charge de test du DOE pour minimiser l'incertitude |
| Taille de la charge de test | Le DOE spécifie 8,45 lb ± 0,085 lb pour les sèche-linge standard, 3 lb ± 0,03 lb pour les sèche-linge compacts | Les groupes industriels et de services publics suggèrent des tailles de charge supplémentaires pour mieux représenter le comportement des consommateurs |
| Application aux réparations | Les procédures de test générales du DOE et les normes industrielles servent de cadre de validation pour les performances du sèche-linge après le remplacement d'un composant | Aucune procédure de test explicite uniquement pour le remplacement de l'élément chauffant, mais les procédures générales s'appliquent |
Si votre sèche-linge chauffe et sèche une charge standard efficacement, vous avez terminé la réparation avec succès. Si vous remarquez des problèmes, tels qu'une absence de chaleur ou des codes d'erreur, revérifiez vos connexions et les étapes d'installation.
🛠️ Conseil de pro : Surveillez toujours le premier cycle de séchage complet après le remplacement de l'élément chauffant. Cette pratique garantit que le sèche-linge fonctionne de manière sûre et efficace.
Dépannage d'autres causes courantes d'un sèche-linge Samsung qui ne chauffe pas
Vérification du fusible thermique et du thermostat
Symptômes d'un fusible thermique grillé
Vous pouvez rencontrer plusieurs problèmes de chaleur courants sur un sèche-linge Samsung si le fusible thermique est défaillant. Lorsque le fusible thermique grille, votre sèche-linge cesse de produire de la chaleur, même si le tambour continue de tourner. Vous remarquerez peut-être que vos vêtements restent humides après un cycle complet. Dans certains cas, le panneau de commande affiche des codes d'erreur ou le sèche-linge s'éteint en cours de cycle. Ces symptômes indiquent souvent qu'il est nécessaire de vérifier le fusible thermique. Si vous constatez que le fusible est grillé, vous devez remplacer le fusible thermique pour rétablir un fonctionnement normal.
Test et remplacement du thermostat
Un thermostat défectueux peut également provoquer des problèmes de chaleur. Si votre sèche-linge surchauffe ou n'atteint pas la température correcte, le thermostat peut ne pas réguler correctement la chaleur. Vous devez utiliser un multimètre pour tester la continuité du thermostat. Débranchez l'alimentation, retirez le thermostat et vérifiez la présence d'un chemin électrique continu. Si la lecture n'est pas dans la plage attendue, remplacez le thermostat. Dans certains cas, même si le thermostat réussit les tests initiaux, il peut encore mal fonctionner dans des conditions de fonctionnement réelles.. Un remontage correct et une circulation d'air adéquate sont essentiels pour un diagnostic et une réparation précis.
Conseil de dépannage : Débranchez toujours l'alimentation avant de tester ou de remplacer des composants internes. Cette étape prévient les risques électriques et garantit votre sécurité.
Inspection de l'alimentation électrique et du disjoncteur
Assurer une tension appropriée au sèche-linge
De nombreux problèmes de chaleur courants sur un sèche-linge Samsung proviennent de problèmes d'alimentation électrique. Les sèche-linge électriques Samsung nécessitent une prise de 240 volts avec un disjoncteur bipolaire de 30 ampères. Les modèles à gaz nécessitent un circuit de 15 ampères et une prise standard à 3 broches. Inspectez le cordon d'alimentation, la fiche et la prise pour détecter des marques de brûlure ou des dommages avant de rebrancher l'alimentation. Si vous constatez des signes de dommages ou d'installation incorrecte, contactez un électricien agréé.
Réinitialisation du disjoncteur si nécessaire
Les disjoncteurs peuvent parfois être “ à moitié déclenchés ”, en particulier sur les sèche-linge électriques. Pour réinitialiser, basculez les deux parties du disjoncteur complètement en position arrêt pendant au moins 30 secondes, puis remettez-les en position marche. Cette action rétablit l'alimentation complète du sèche-linge. Si vous continuez à rencontrer des problèmes de chaleur, répétez le processus de réinitialisation. Si le disjoncteur se déclenche à nouveau, faites appel à un professionnel. Pour les défauts mineurs, vous pouvez également réinitialiser le sèche-linge en le débranchant pendant une à deux minutes, puis en le rebranchant. Cette étape simple résout souvent les problèmes temporaires.
Conseil de dépannage : Éteignez toujours le disjoncteur avant de travailler sur la connexion électrique du sèche-linge pour éviter tout choc électrique.
Nettoyage des évents du sèche-linge et du filtre à peluches
Prévention de la surchauffe et des pannes futures
L'accumulation de peluches dans l'évent ou le filtre est une cause majeure des problèmes de chaleur courants sur un sèche-linge Samsung. Un nettoyage régulier prévient la surchauffe et réduit les risques d'incendie. Nettoyez le filtre à charpie avant et après chaque charge. Inspectez et nettoyez le système d'évacuation pour maintenir une circulation d'air adéquate. Utilisez uniquement des matériaux d'évacuation métalliques approuvés pour minimiser l'accumulation de peluches et garantir un fonctionnement sûr.
Instructions de nettoyage étape par étape
Suivez ces étapes de dépannage pour maintenir votre sèche-linge en fonctionnement efficace :
- Retirez le filtre à peluches et nettoyez-le avec vos mains ou une brosse douce.
- Utilisez un aspirateur ou une brosse de nettoyage d'évent pour éliminer les peluches du logement du filtre.
- Déconnectez le tuyau d'évacuation à l'arrière du sèche-linge.
- Nettoyez le tuyau d'évacuation et le conduit mural avec une longue brosse ou un aspirateur.
- Rebranchez solidement le tuyau d'évacuation et assurez-vous qu'il n'y a pas de plis.
- Essuyez le capteur d'humidité avec un chiffon doux et de l'alcool à friction pour éliminer les résidus.
- Gardez la zone autour du sèche-linge exempte d'objets inflammables.
Conseil de dépannage : Si vous remarquez des temps de séchage plus longs, une chaleur excessive ou une odeur de brûlé, nettoyez immédiatement les évents et effectuez une réinitialisation. Ces signes indiquent souvent une circulation d'air restreinte.
Vous pouvez également réinitialiser votre sèche-linge Samsung après un nettoyage ou des réparations en le débranchant pendant une minute, puis en rétablissant l'alimentation. Ce processus efface les défauts mineurs et aide le sèche-linge à reprendre un chauffage normal.
| Tâche de maintenance | Fréquence | Avantage |
|---|---|---|
| Nettoyez le filtre à peluches | Avant/après chaque charge | Empêche l'accumulation de peluches, améliore l'efficacité |
| Inspectez et nettoyez le système d'évacuation | Tous les 6 à 12 mois | Réduit la surchauffe, prévient les pannes |
| Essuyez le capteur d'humidité | Mensuel | Garantit des cycles de séchage précis |
En suivant ces conseils de dépannage et ces routines d'entretien régulières, vous traitez les problèmes de chaleur les plus courants sur un sèche-linge Samsung et prolongez la durée de vie de votre appareil.
Quand faire appel à un professionnel pour un élément chauffant défectueux
Signes indiquant que vous avez besoin de l'aide d'un expert
Problèmes de chaleur persistants après le remplacement
Vous remarquerez peut-être que votre sèche-linge ne chauffe toujours pas même après avoir remplacé l'élément chauffant. Cette situation indique souvent des problèmes plus profonds nécessitant l'intervention d'un professionnel. Les problèmes persistants peuvent résulter d'un fusible thermique grillé, de thermostats défectueux ou d'une carte de commande défaillante. Si vous avez déjà vérifié et remplacé les composants de base mais que le sèche-linge continue de sous-performer, vous ne devez pas tenter d'autres réparations par vous-même.
Si votre sèche-linge affiche des codes d'erreur, ne produit pas de chaleur ou ne démarre pas après une réinitialisation, ce sont des signes clairs que vous avez besoin d'une assistance experte. Les techniciens formés utilisent des outils de diagnostic spécialisés pour identifier les défauts dans les cartes de commande, les capteurs et les modules de connectivité. Ils interprètent également les codes d'erreur spécifiques à Samsung, tels que LE, DE ou 3E, pour identifier la source exacte du problème.
Problèmes électriques ou de câblage
Les problèmes électriques présentent des risques de sécurité graves. Si vous détectez des odeurs de brûlé, des marques de brûlure ou des bruits inhabituels comme des grincements ou des couinements, cessez immédiatement d'utiliser le sèche-linge. Ces symptômes indiquent souvent un câblage défectueux ou des dysfonctionnements de la carte de commande. Tenter de réparer des défauts électriques sans formation appropriée peut entraîner des blessures ou des risques d'incendie.
- Vous devez contacter un professionnel si vous observez :
- Des panneaux de commande ne répondant pas ou des codes d'erreur persistants
- Une surchauffe ou des odeurs de brûlé pendant le fonctionnement
- Le sèche-linge ne démarre pas, même après une réinitialisation
- Tout dommage visible sur les câbles ou les connexions
Les problèmes complexes, tels que les défauts de la carte de commande ou les câbles endommagés, nécessitent l'expertise de services de réparation de sèche-linge certifiés. Les professionnels garantissent des réparations sûres et précises et fournissent une documentation officielle pour vos dossiers.
Choisir un technicien d'appareils électroménagers qualifié
Ce qu'il faut rechercher dans un service de réparation
Choisir le bon technicien protège votre investissement et garantit que votre sèche-linge Samsung reçoit des soins appropriés. Recherchez un service de réparation qui emploie des professionnels certifiés et expérimentés. Les entreprises réputées utilisent des pièces de rechange Samsung d'origine et fournissent une documentation écrite de garantie pour toutes les réparations.
| Critères | Pourquoi c'est important |
|---|---|
| Certification | Garantit que les techniciens respectent les normes de l'industrie |
| Expérience | Augmente la probabilité d'un diagnostic précis |
| Couverture de la garantie | Vous protège contre les pannes futures |
| Utilisation de pièces OEM | Maintient les performances et la sécurité du sèche-linge |
| Tarification transparente | Évite les coûts imprévus |
Vous devriez également vérifier la présence d'antécédents de service positifs et de notes techniques officielles dans leurs rapports. Les services fiables émettent des rapports techniques détaillés après les diagnostics, décrivant la source de la panne, les composants affectés et les recommandations de réparation.
Questions à poser avant d'embaucher
Avant d'engager un technicien, posez les questions suivantes pour vous assurer de recevoir un service de qualité :
- Vos techniciens sont-ils certifiés pour réparer les sèche-linge Samsung ?
- Fournissez-vous une garantie écrite sur les pièces et la main-d'œuvre ?
- Utiliserez-vous des pièces de rechange Samsung d'origine ?
- Pouvez-vous fournir un rapport de service détaillé après la réparation ?
- Quelle est votre politique si le sèche-linge nécessite des réparations supplémentaires après la première visite ?
Poser ces questions vous aide à choisir un service de réparation digne de confiance et garantit que votre sèche-linge reçoit les meilleurs soins possibles.
Si vous rencontrez des problèmes de chauffage persistants, des défauts électriques ou si vous soupçonnez un câblage défectueux, n'hésitez pas à contacter un professionnel. Les services de réparation de sèche-linge certifiés disposent des outils et de l'expertise nécessaires pour restaurer votre appareil en toute sécurité et efficacement.
Prévention des futures pannes de l'élément chauffant du sèche-linge Samsung
Conseils d'entretien régulier
Nettoyer le filtre à peluches après chaque utilisation
Vous pouvez considérablement prolonger la durée de vie de votre sèche-linge Samsung en nettoyant le filtre à peluches après chaque cycle. L'accumulation de peluches restreint le flux d'air, obligeant l'élément chauffant à travailler plus dur et augmentant le risque de surchauffe. En retirant régulièrement les peluches, vous aidez votre sèche-linge à fonctionner efficacement et réduisez les risques d'incendie. De nombreuses études de maintenance à long terme montrent que les utilisateurs qui nettoient systématiquement le filtre à peluches subissent moins de pannes et bénéficient de meilleures performances de leur sèche-linge. Cette simple habitude étaye l'affirmation du fabricant selon laquelle les sèche-linge Samsung peuvent durer plus de dix ans avec un entretien approprié.
Conseil : Faites-en une routine de vérifier et de nettoyer le filtre à peluches avant et après chaque chargement. Cette petite étape peut éviter des réparations coûteuses et maintenir le bon fonctionnement de votre sèche-linge.
Planifier des nettoyages annuels des conduits d'évacuation
Le nettoyage annuel des conduits d'évacuation est une autre tâche de maintenance essentielle. Au fil du temps, les peluches et les débris s'accumulent dans le système d'évacuation, entraînant des blocages qui provoquent des temps de séchage plus longs et une sollicitation supplémentaire de l'élément chauffant. Vous devriez planifier un nettoyage professionnel des conduits au moins une fois par an pour garantir un flux d'air optimal et prévenir la surchauffe. Les registres de maintenance et les listes de contrôle d'experts recommandent cette étape pour réduire le risque d'incendie et maintenir l'efficacité de votre sèche-linge. Un nettoyage approprié des conduits vous aide également à éviter les défaillances prématurées de l'élément chauffant.
- Nettoyez le filtre à peluches après chaque utilisation.
- Planifiez un nettoyage professionnel des conduits annuellement.
- Inspectez régulièrement le tambour, les joints et les conduits d'évacuation.
- Tenir un journal de maintenance pour suivre les services et réparations.
Bonnes pratiques d'utilisation du sèche-linge
Éviter de surcharger le sèche-linge
Vous protégez votre L'élément chauffant du sèche-linge Samsung en évitant les cycles surchargés. Lorsque vous remplissez le tambour au-delà de sa capacité recommandée, vous forcez l'appareil à travailler plus dur, ce qui peut entraîner un séchage inégal et une usure excessive des composants internes. Des pratiques d'utilisation appropriées, comme charger le sèche-linge avec la bonne quantité de linge, aident à maintenir des performances optimales et à prolonger la durée de vie de votre machine.
Utiliser les réglages corrects pour différents tissus
Sélectionner les réglages corrects pour chaque type de tissu assure un séchage doux et efficace. Les sèche-linge Samsung offrent une gamme de cycles et d'options de température conçus pour divers matériaux. Par exemple, utilisez une chaleur élevée pour les cotons résistants et des températures plus basses pour les synthétiques ou les tissus délicats. Suivez toujours les étiquettes d'entretien des vêtements et utilisez des sacs de lavage en filet pour les articles comme la laine ou le cachemire. Évitez l'eau de Javel et les adoucissants liquides, en particulier avec les tissus spéciaux. Ces bonnes pratiques économisent l'énergie, réduisent l'usure de votre sèche-linge et aident à prévenir les pannes de l'élément chauffant.
| Type de tissu | Réglage recommandé | Conseils supplémentaires |
|---|---|---|
| Coton | Chaleur élevée | Utilisez le séchage à capteur pour de meilleurs résultats |
| Synthétiques | Chaleur moyenne ou basse | Évitez le surséchage pour prévenir l'électricité statique |
| Délicats | Très basse température ou séchage à l'air | Utilisez des sacs en filet, évitez les feuilles assouplissantes |
| Laine/Cachemire | Cycle délicat, température fraîche | Sécher à plat, utiliser un détergent spécifique pour la laine |
| Polaire/Fausse fourrure | Température fraîche/sans chaleur, séchage à l'air | Lavez séparément, évitez l'eau de Javel |
Suivre ces directives vous aide à tirer le meilleur parti de votre Sécheuse Samsung tout en minimisant le risque de futurs problèmes d'élément chauffant. .
Vous pouvez restaurer les performances de votre sécheuse Samsung en suivant des étapes de diagnostic et de réparation claires. Priorisez toujours la sécurité et utilisez des méthodes de dépannage appropriées. Si vous rencontrez des problèmes persistants, faites appel à un technicien certifié. Un nettoyage régulier et la vérification du filtre à peluches prolongent la durée de vie de votre sécheuse, qui est en moyenne de 8 à 14 ans avec une utilisation normale. Le tableau ci-dessous met en évidence comment l'entretien et l'utilisation influencent la longévité et les besoins de réparation.
| Aspect | Élément chauffant de sécheuse Samsung |
|---|---|
| Durée de vie moyenne | de 8 à 14 ans |
| Fréquence de remplacement | 1 à 2 fois en 15 ans |
| Impact de la maintenance | Un nettoyage régulier prolonge la durée de vie. |
FAQ
À quelle fréquence devez-vous remplacer l'élément chauffant de votre sèche-linge Samsung ?
La plupart des éléments chauffants des sèche-linge Samsung durent de 8 à 14 ans avec un entretien régulier. Vous ne devez remplacer l'élément que si vous constatez des problèmes de chauffage ou des dommages visibles. Un nettoyage régulier prolonge la durée de vie et réduit la nécessité de remplacements fréquents.
Pouvez-vous utiliser votre sèche-linge si l'élément chauffant est cassé ?
Vous ne devez pas utiliser votre sèche-linge avec un élément chauffant défectueux. Le sèche-linge ne séchera pas correctement les vêtements et pourrait causer des dommages supplémentaires. Réparez ou remplacez toujours la pièce défectueuse avant de reprendre l'utilisation.
Quels codes d'erreur indiquent un problème d'élément chauffant ?
Les sèche-linge Samsung affichent des codes tels que HC, HE, F1, ou E2 pour les défauts de l'élément chauffant ou du capteur de température. Vous pouvez consulter votre manuel d'utilisation pour une liste complète des codes d'erreur et leurs significations.
Avez-vous besoin d'outils spéciaux pour remplacer l'élément chauffant ?
Vous avez besoin d'outils de base tels que des tournevis, des clés à douille et un multimètre. Utilisez toujours des gants de protection et des lunettes de sécurité. Vous n'avez pas besoin d'équipement avancé pour la plupart des réparations domestiques.
Que devez-vous faire si votre sèche-linge ne chauffe toujours pas après le remplacement de l'élément ?
Vérifiez le fusible thermique, le thermostat et l'alimentation électrique. Assurez-vous que tous les fils sont correctement connectés. Si le problème persiste, vous devez contacter un technicien d'appareils électroménagers certifié pour un diagnostic approfondi.
Comment pouvez-vous empêcher votre sèche-linge Samsung de surchauffer ?
Nettoyez le filtre à peluches après chaque chargement. Programmez un nettoyage annuel de la ventilation. Évitez de surcharger le sèche-linge. Utilisez les réglages appropriés pour chaque type de tissu. Ces étapes aident à maintenir des températures sûres et à prévenir la surchauffe.
Est-il prudent de remplacer soi-même l'élément chauffant ?
Vous pouvez remplacer l'élément chauffant en toute sécurité si vous suivez toutes les précautions de sécurité. Débranchez toujours l'alimentation, portez un équipement de protection et suivez les instructions du fabricant. Si vous avez des doutes, engagez un technicien professionnel.
Quelles tâches d'entretien aident à prolonger la durée de vie de votre sèche-linge ?
| Tâche | Fréquence |
|---|---|
| Nettoyez le filtre à peluches | Après chaque chargement |
| Inspectez et nettoyez la ventilation | Tous les 6 à 12 mois |
| Essuyez le capteur d'humidité | Mensuel |
Un entretien régulier maintient le bon fonctionnement de votre sèche-linge et prévient les pannes.

