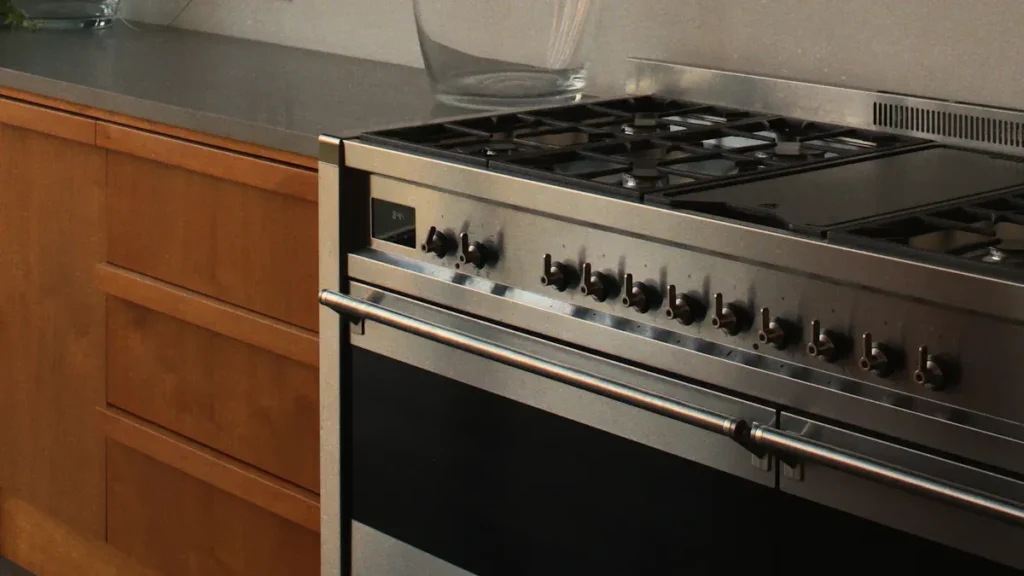
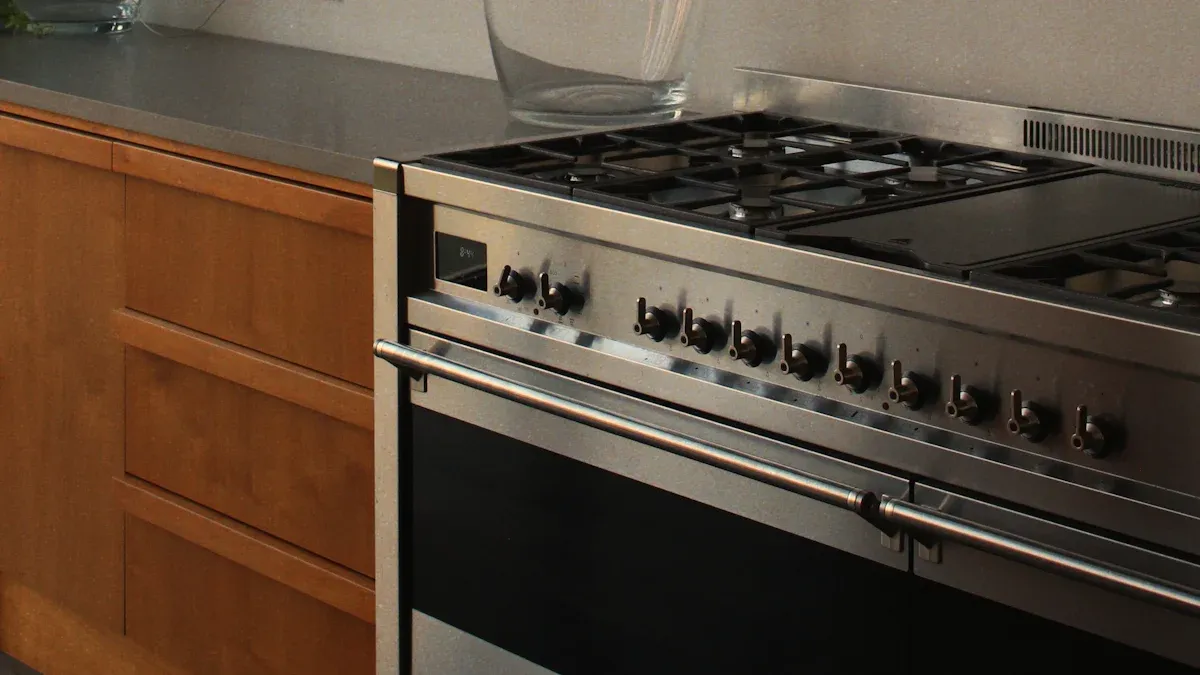
您只需使用几件基本工具并注意安全事项,即可自行更换厨房烤箱的加热元件。亲自动手处理这项任务,能让您掌握维修过程和费用控制权。.
- Bạn 避免上门服务费和专业人工成本.
- 您可自主选择替换零件,其价格通常低于专业维修商的报价。.
- 专业维修往往包含额外费用和加价零件,这些都会增加总成本。.
通过完成此项维修,您既能节省开支,又能建立处理简单烤箱故障的信心。.
更换烤箱加热元件:必备知识指南
什么是烤箱加热元件?
每次使用烤箱时都离不开加热元件。该部件 将电能转化为热能, ,使您能够烘烤、炙烤或烧烤食物。加热元件由金属线圈或金属棒构成,通电时会发出炽热的红光。在大多数电烤箱中可见到 不同类型的加热元件, ,每种都针对特定烹饪功能设计。烘烤加热元件位于底部,而炙烤元件通常置于顶部。两者对于实现食谱所需温度都起着至关重要的作用。.
Mẹo: 开始更换前务必确认正确的加热元件型号。此步骤可确保您购买到正确零件,避免不必要的延误。.
电烤箱中加热元件的工作原理
电烤箱通过加热元件产生并分布热量。当您启动烤箱时,电流通过加热元件使其升温。底部的烘烤加热元件为大多数烹饪任务提供稳定均匀的热量。顶部的炙烤元件则提供强烈直射热用于食物上色或烧烤。部分烤箱还在后部风扇附近设有对流加热元件,可协助循环热空气以实现更均匀的烹饪效果。.
| 烘烤加热元件 | Vị trí | 主要功能 |
|---|---|---|
| 烘焙加热元件 | 烤箱底部 | 为烘焙提供稳定持续的热量,确保烤架上的食物受热均匀。. |
| 炙烤加热元件 | 烤箱顶部 | 提供强烈直射热用于上色和烧烤,工作温度更高。. |
| 对流加热元件 | 后部风扇附近 | 配合风扇循环热空气,促进均匀烹饪并提升能效。. |
| 烧烤加热元件 | 烤箱顶部(商用型) | 提供强烈的自上而下热量用于快速烧烤和烘烤,比炙烤元件尺寸更大、功率更高。. |
操作任何加热元件时都应始终遵循安全步骤。开始前,, 请在配电箱处关闭烤箱电源或拔掉插头. 。取出烤架及所有盖板以安全接触元件。佩戴安全眼镜和手套,防止被锋利边缘划伤并规避电气危险。. 标记或拍摄电线连接方式 以确保正确重装。安装新加热元件后,恢复供电并测试烤箱运行是否正常。.
烤箱加热元件类型(烘烤、炙烤、隐藏式等)
现代烤箱中常见以下几种加热元件:
- 烘烤加热元件: 位于底部,为烘焙和烘烤提供主要热源。.
- 炙烤元件: 置于顶部,提供高强度直射热用于炙烤和上色。.
- 对流元件: 位于风扇附近,配合风扇循环热空气实现均匀烹饪。.
- 隐藏式元件: 部分烤箱在底板下方设有隐蔽式烘烤加热元件,便于清洁并减少直接暴露。.
- 烧烤元件: 常见于商用烤箱,这种顶部大功率元件专用于快速烧烤和烘烤。.
每种加热元件都有其独特用途。了解它们的作用有助于您诊断问题,并在烤箱 停止正常工作时选择合适的 替换方案。.
何时应考虑更换烤箱加热元件
加热元件故障的迹象
烤箱的稳定表现至关重要,因此及早识别加热元件故障迹象有助于避免更严重问题。请注意以下常见征兆:
- 加热元件 开启烤箱后约10分钟内 未呈现亮橙色炽热状态。.
- 元件出现可见损伤,如灼痕、焦斑、起泡、裂纹或断裂。.
- 即使严格按食谱操作,食物仍受热不均或未熟透。.
- 烤箱内部积垢过多可能影响元件性能。.
- 电费异常上涨,可能表明元件需消耗更多电力以维持温度。.
Mẹo: 若发现任何上述问题,请立即处理以防止进一步损坏或安全隐患。.
视觉与性能线索
通过简单检查和基础测试常可发现问题。首先确认烤箱底部和顶部的金属线圈位置。启动烤箱后 检查元件是否发出红/橙色光. 。若无发光现象,则元件可能已失效。.
其他线索包括:
- 烤箱断电状态下加热元件存在裂纹、断裂或变色。.
- Nấu không đều, 食物受热不均,例如餐点一侧熟化更快或存在冷区。.
- 烹饪时间长于往常,表明加热效率下降。.
若需精确检测,请断开电源并卸下元件。使用万用表测试导通性,正常元件应显示导通。 电阻值应在20至120欧姆之间. 。若检测到断路读数,请更换加热元件以恢复均匀加热。.
维修与更换:如何选择最佳方案?
决定维修还是更换烤箱需考虑多个因素。请评估 烤箱的使用年限. 。若使用超过10年且频繁故障,更换可能更具成本效益。对于加热元件损坏等小问题,通常进行简单维修即可。.
评估问题严重程度及替换零件的可获得性。若零件难以获取或价格昂贵,则更换更为合理。遵循“50%原则”半价原则”:若维修费用超过新烤箱价格的一半,通常更换是更优选择。新型烤箱能效更高且功能先进,长期来看可节省开支。.
Ghi chú: 维修烤箱能减少电子废弃物,对环境更友好,尤其适用于小故障。.
Công cụ và vật liệu để thay thế bộ phận gia nhiệt lò nướng

Danh sách các công cụ cần thiết
安全高效地更换烤箱加热元件需要合适工具。开始前请备齐以下物品:
- 十字头螺丝刀螺丝刀:拆卸固定加热元件和烤箱面板的螺丝。.
- Kìm mũi nhọn尖嘴钳:夹持并断开旧元件上的电线连接。.
- 螺母旋具套筒扳手:拧松或紧固固定元件的螺母/螺栓。.
- 万用表(可选):测试旧元件的通断性并确认是否故障。.
Mẹo: 操作前务必拔掉烤箱插头并关闭断路器以切断电源。此步骤可防止触电。.
提前备好工具可确保维修过程无需中断。.
选择正确的替换元件
选择正确的烤箱加热元件对安全和性能至关重要。首先找到烤箱型号(通常位于烤箱抽屉附近标签或框架上),据此确定所需具体零件。. 需匹配物理尺寸(如安装支架间距、安装点到连接器的长度). 。核对电气规格(包括电压和功率)以确保兼容性。.
按以下步骤寻找合适替换件:
- 查找设备型号.
- 确定烤箱加热元件的零件编号。.
- 直观对比新旧元件的形状与尺寸。.
- 通过信誉良好的零件经销商搜索零件编号。.
- 优先选择原厂配件以获得最佳效果。.
查阅设备手册有助于确认正确规格. 。即使两个元件外观相似,电压或功率差异也可能导致安装问题或安全隐患。使用错误元件可能引发火花、设备损坏甚至火灾。购买前务必仔细核对。.
安全装备与预防措施
操作电器时务必安全第一。应始终从断路器切断电源,而非仅关闭烤箱控制面板。通过观察指示灯或尝试启动来双重确认烤箱已断电。.
请佩戴以下安全装备:
操作前确保烤箱及元件完全冷却。使用绝缘工具并保持工作区域整洁。手电筒可帮助更清晰地观察烤箱内部。小心处理所有部件,某些边缘可能锋利或易碎。.
Ghi chú: 切勿跳过安全步骤。适当的装备和预防措施能降低受伤风险,确保维修过程顺利。.
烤箱加热元件更换分步指南
安全第一:断电与拔插头
开始操作前必须将安全放在首位。若不遵循正确流程,电器可能造成严重危险。始终首先 让烤箱完全冷却. 。高温表面可能导致严重烫伤。检查烤箱内部并移除可能妨碍操作的物品。备齐所有必要工具及安全装备(如手套、护目镜),以防被锋利边缘或电气部件伤害。清理烤箱周围区域以防绊倒或碰落工具。确保工作区域照明充足以便观察细节。.
遵循以下关键安全步骤:
- 拔掉烤箱插头或关闭断路器以切断电源.
- 等待烤箱和加热元件完全冷却。.
- 取出烤箱内所有烤架和烤盘。.
- 待加热元件完全冷却后再接触。.
- 尝试启动烤箱或检查指示灯以双重确认已断电。.
Mẹo: 切勿跳过断电步骤。即使微量残余电流也可能导致触电。.
接触烤箱元件
拆卸前需确保能清晰接触加热元件。多数电烤箱结构相似,但具体操作请参考设备手册。.
必要时移除内部组件
首先取出所有烤箱烤架。这能提供更大操作空间,避免烤架或烤箱内部意外损坏。若加热元件上有底板或盖板,请通过拧螺丝或解卡扣将其移除。将所有螺丝和小零件妥善放置于安全处。.
定位安装螺丝或卡扣
找到固定加热元件的安装板或支架(通常位于烤箱后壁)。如需照明可使用手电筒。用十字螺丝刀或套筒扳手小心拧下螺丝。将螺丝有序存放以便重新安装。.
Ghi chú: 部分烤箱使用卡扣而非螺丝。必要时可用平头螺丝刀轻轻撬开。.
拆卸旧烤箱元件
接触元件后即可开始拆卸旧加热元件。请耐心操作以免损坏电线或其他部件。.
拆卸螺丝与断开电线连接
将加热元件及其安装支架轻轻拉离烤箱壁. 。此时可看到连接元件的电线。使用非接触式电压测试仪确认无电流。小心断开元件上的叉形电线连接器。务必握住连接器而非电线以防损坏。可拍照或标记电线以确保后续正确重连。.
处理损坏或卡住的元件
有时安装螺丝或螺母可能因受热或腐蚀而卡住。必要时可涂抹少量渗透油辅助松动。使用尖嘴钳或套筒扳手等合适工具,避免螺丝滑丝。若元件卡滞,可轻轻晃动使其松脱,切勿强行拆卸。若拆卸过程中元件断裂或碎裂,请戴手套并用钳子处理锋利或易碎碎片。继续操作前请清理所有碎屑。.
Báo động: Never force screws or wires. Forcing can damage the oven’s internal wiring or mounting hardware, leading to more costly repairs.
By following these steps, you ensure a safe and efficient process for replacing oven element. Careful preparation and attention to detail help you avoid common mistakes and protect your appliance.
Installing the New Oven Element
牢固连接电线
You need to connect the wires to the new heating element with care. Begin by matching each wire to its correct terminal, using the photo or labels you made earlier. Push the spade connectors onto the terminals until they fit snugly. Loose connections can cause arcing or poor performance, so double-check that each connector sits firmly in place. If you notice any corrosion or damage on the wires or terminals, clean them gently or replace them before proceeding. Secure connections help your oven operate safely and efficiently.
Mẹo: Tug each wire lightly after connecting. If it moves or slips off, reposition it until it holds tight.
Đảm bảo vị trí cố định của thành phần
Once you connect the wires, slide the heating element back into its mounting position. Align the screw holes or clips with the oven wall. Use your screwdriver or nut driver to fasten the screws or secure the clips. Do not overtighten, as this can strip the threads or crack the mounting plate. Make sure the element sits level and does not touch any other oven parts. Replace any covers or panels you removed earlier. Return the oven racks to their original positions if you removed them.
Ghi chú: A properly secured element prevents rattling and ensures even heating during use.
Testing After Replacing Oven Element
Powering On and Checking for Proper Heating
After you finish replacing oven element, you must test the oven to confirm safe and correct operation. Follow these steps:
- Restore power to the oven by plugging it in or switching on the circuit breaker.
- Set the oven to a high temperature, such as 400°F.
- Observe the new heating element. It should glow bright orange within about ten minutes.
- Expect a small amount of smoke or odor during the first use. This comes from the protective coating on the new element and is normal.
- Once you confirm the element heats properly, replace any covers and return the oven racks if you have not already done so.
If the element does not glow or the oven fails to heat, turn off the power and double-check your connections.
Khắc phục các sự cố thường gặp
Sometimes, issues can arise after you install a new heating element. You may notice uneven heating, a lack of heat, or unusual smells. Use the table below to identify and resolve the most common problems:
| 常见问题 | Sự miêu tả | Resolution / Troubleshooting Tips |
|---|---|---|
| Sưởi ấm không đều hoặc điểm nóng | Cracks or damage in element; thermostat miscalibration causing uneven heat distribution. | Visually inspect element for cracks; check thermostat accuracy; call professional if unresolved or electrical issues suspected. |
| Oven Not Reaching Desired Temperature | Faulty thermostat, bad element, or wiring issues preventing proper heating. | Test element continuity with multimeter; inspect thermostat and wiring; call professional if problem persists. |
| 加热元件无法启动 | Broken connection, blown fuse, or tripped circuit breaker cutting power to element. | Check power source connection; test element continuity; call professional for internal wiring or circuit board issues. |
| Thiệt hại vật lý cho phần tử | Wear, cracks, or breaks impair heating efficiency. | Inspect wiring; remove panels to access element; call professional if unable to repair or replace safely. |
| 电气问题 | Loose connections or damaged wiring causing erratic heating or failure; fire hazard risk. | Disconnect power; inspect power cord and terminal block; replace faulty relays or switches; call professional if unsure. |
| Mùi quá nóng hoặc cháy | Element melting, insulation issues, or food debris buildup causing smells and safety concerns. | Turn off and disconnect power; clean oven interior; check and clear ventilation; call professional if problem persists. |
| Frequent Tripping of Circuit Breakers | Overcurrent due to short circuits, faulty components, or wiring problems. | Check oven power rating; inspect circuit breaker and wiring for damage; ensure dedicated circuit; call professional if needed. |
You may encounter a situation where the oven does not reach the correct temperature, even though the broil function works. This can indicate a failed relay on the oven’s control board, which powers the bake element. If you have checked the wiring and the new element but still face issues, you may need to replace the control board. In these cases, contacting a professional ensures a safe and lasting repair.
Always disconnect power before inspecting or troubleshooting electrical components. If you feel unsure or encounter persistent problems, seek help from a qualified technician.
Pros of Replacing Oven Element Yourself
Cost Savings Compared to Professional Service
You can save a significant amount of money by replacing your oven element yourself. Hiring a professional to handle this repair often costs between $150 and $400, depending on your oven’s make and model. Most of this expense comes from labor fees and service call charges. When you choose the DIY route, you usually spend only $10 to $50 for the replacement part. This approach allows you to avoid paying an extra $50 to $200 in labor costs. You control the budget and select the part that fits your needs. While professionals recommend caution due to electrical risks, especially with gas ovens, many homeowners find the savings compelling for standard electric models.
Mẹo: Always prioritize safety. If you feel unsure about working with electrical components, consult a qualified technician.
Convenience and Quick Turnaround
You gain control over your schedule when you handle the repair yourself. You do not need to wait for an appointment or adjust your plans to fit a technician’s availability. Most homeowners can complete the replacement process in 30分钟内完成. The steps include disconnecting power, removing the oven racks, unscrewing the old element, installing the new one, and testing the oven. If you have basic tools and follow safety instructions, you can restore your oven’s function quickly. This efficiency means you spend less time without a working appliance and return to your regular cooking routine sooner.
- Disconnect power and remove racks.
- 拧下并断开旧加热元件的连接.
- Install the new element and test the oven.
You can finish the entire process in about half an hour, making it one of the fastest DIY appliance repairs.
Personal Satisfaction and DIY Confidence
Completing a repair on your own builds confidence and a sense of accomplishment. You learn valuable skills that help you tackle future home maintenance tasks. Each successful project increases your comfort level with tools and basic repairs. You also gain a better understanding of how your oven works, which can help you diagnose issues more quickly in the future. Many homeowners find that DIY repairs foster independence and reduce reliance on outside help. This experience can motivate you to take on other manageable projects around your home.
Taking charge of simple repairs empowers you and can lead to long-term savings and self-reliance.
Cons of Replacing Oven Element Yourself
Safety Risks and Electrical Hazards
When you attempt to replace an oven element on your own, you face several safety risks. Ovens contain complex electrical systems that can cause serious harm if you do not handle them properly. You risk overheating and electrical fires if you connect wires incorrectly or use damaged components. Even a small mistake can lead to a dangerous situation.
- Faulty wiring may result in electrical fires.
- Mishandling the oven’s internal parts can expose you to electric shock.
- Gas ovens present an additional hazard—gas leaks require immediate professional attention.
- 在缺乏专业知识的情况下尝试维修,可能使小问题演变成重大安全隐患。.
⚠️ 请务必谨记:专业技术人员遵循严格的安全标准并使用原厂配件。他们的专业技能可降低火灾、燃气泄漏和设备故障的风险。.
操作失误或造成损坏的可能性
自行维修看似简单,但极易造成代价高昂的失误。许多业主在尝试更换烤箱加热元件时,会损坏温度传感器等相邻部件。这可能导致 原本简单的维修演变为高昂的综合性维修 ,特别是当需要额外配件或人工时。.
在电路通电时测量电阻
- 拆卸或安装过程中损坏邻近部件。.
- 使用了错误的替换零件。.
- 采用了不正确的安装技术。.
- 缺乏合适的维修工具。.
- 错误诊断问题并更换了不相关的部件。.
这些错误可能导致更高的维修成本、电气安全隐患甚至火灾。您还可能面临人身伤害风险,例如被锋利边缘割伤或被高温元件烫伤。在许多情况下,自行维修产生的问题比原始故障更严重。专业人员使用专用工具并接受过专业培训,可避免这些后果。.
对保修或保险范围的影响
您应始终考虑自行维修对烤箱保修和家庭保险的影响。制造商通常要求仅由授权技术人员进行维修以保持保修有效。使用非原厂配件或未经授权的服务可能导致保修失效。.
| Diện mạo | Giải thích |
|---|---|
| 未经授权的维修 | 非授权技术人员进行的维修可能导致设备保修失效。. |
| 使用非原厂配件 | 使用未经制造商批准或非原厂的配件可能使保修无效。. |
| 保修要求 | 必须由授权服务中心或技术人员执行维修以维持保修 coverage。. |
| 家庭保险注意事项 | 自行维修造成的安装不当或损坏可能影响理赔,即使保险未被直接作废。. |
| 建议方案 | 请仔细查阅保修文件,并咨询制造商以获取明确说明。. |
若在自行维修过程中损坏烤箱,您的保险索赔可能被拒绝。开始任何维修前,请务必查阅保修条款和保险政策。如有疑问,请联系制造商或保险公司寻求指导。.
不应自行更换烤箱加热元件的情形
危险信号与警示迹象
You should recognize certain warning signs that indicate a 需重点关注 is not safe or practical. These issues often point to problems beyond a simple element swap and require professional attention.
- 加热元件 加热时无法呈现亮橙色 ,这标志着元件已烧毁。.
- 食物持续未煮熟或仅半熟,表明加热元件未按预期工作。.
- 您注意到电费突然激增,表明烤箱因元件故障而过载工作。.
- Các 烤箱无法启动, ,即使检查电源后亦然。.
- 您遇到电源波动,发现腐蚀迹象,或发现烤箱内部线路短路。.
- 烤箱预热时间异常漫长,这可能指向温度传感器故障。.
- 炉头加热异常或升温时间过长,暗示存在更深层的电气或点火问题。.
- 因铰链弯曲导致烤箱门无法正确密封。.
- 您闻到异常气味,特别是燃气烤箱中的臭鸡蛋味,这可能表明燃气泄漏。.
- 食物出现欠熟或过熟现象,表明温控器或内部组件存在故障。.
⚠️ Báo động: 若发现任何上述症状,请立即停止操作并联系专业人员。在此类情况下尝试维修可能增加受伤、火灾或设备进一步损坏的风险。.
结构复杂或特殊型号的烤箱
某些烤箱需要专业知识和工具才能安全维修。如果您的烤箱属于以下任一类别,应避免自行更换:
- 燃气烤箱(存在火灾和燃气泄漏风险).
- 壁挂式烤箱和嵌入式设备(通常涉及复杂的安装和布线)。.
- 配备高级控制面板或数字界面的烤箱。.
- 更换新加热元件后仍持续故障的 electric 烤箱。.
- 存在可见线路问题或维修尝试后元件仍失效的设备。.
专业服务能确保您的安全、保护您的保修权益,并保证符合行业标准。您还可获得维修符合所有安全法规的安心保障。.
Mẹo: 若您的烤箱型号看似复杂或难以触及加热元件,请预约持证技术人员上门服务。.
缺乏工具、经验或信心
更换烤箱加热元件需要合适的工具和对电气安全的基本理解。在准备不足的情况下尝试此维修可能导致严重后果。.
- 缺乏绝缘工具或万用表会增加触电风险。.
- 对高压组件缺乏经验可能导致火灾隐患或致命伤害。.
- 自行维修可能使制造商保修失效, ,导致您需承担后续所有费用。.
- 操作不当可能造成进一步损坏或导致问题误判。.
- 不安全的布线条件,例如 未配备专用断路器, ,会使自行更换变得极其危险。.
若对任何步骤不确定,或遇到复杂线路,请致电专业电工。持证技术人员能提供正确诊断、保修保护及责任保障。许多专业维修服务包含配件和人工的双重保修,为您提供额外保障。.
认清自身局限有助于避免 costly 失误并保障家居安全。如有疑虑,请委托合格专家处理。.
顺利更换烤箱加热元件的建议
仔细核对型号与零件编号
购买替换元件前,您应始终核实烤箱的型号和零件编号。. 制造商经常更新烤箱设计和内部部件。, even within the same product line. These changes can affect how the heating element attaches or operates. For example, some elements use spade connectors, while others require screw terminals. Even if two elements look similar, they may not fit or function correctly in your oven.
- Model and serial numbers identify the exact version of your appliance.
- Hardware and firmware updates can change part compatibility.
- Retailers may list parts by model number, but this does not guarantee a perfect fit.
- Electronics and heating elements are often version-specific for safety and reliability.
- Confirming with the seller using both model and serial numbers helps you avoid returns and extra shipping costs.
Mẹo: Always check the appliance’s data plate, usually found inside the oven door or on the frame, for the correct model and serial numbers. This step ensures you order the right part the first time.
Take Photos Before and During Disassembly
Capturing clear photos as you work makes the reassembly process much easier. Before you disconnect any wires from the heating element, take a picture of the connections. This visual record acts as a reliable guide when you put everything back together. You reduce the risk of connecting wires incorrectly, which can cause the oven to malfunction or create safety hazards.
Follow these steps for effective documentation:
1. Remove the screws holding the heating element in place. 2. Gently pull the element forward to expose the wires. 3. Take detailed photos of each wire’s position and connection. 4. Disconnect the wires only after you have a clear visual reference.
These images serve as a step-by-step map during reassembly. You can compare your progress to the photos, ensuring each wire and screw returns to its proper place. This method reduces stress and helps prevent costly mistakes.
📸 专业建议: Use your smartphone to take close-up shots. If you have multiple wires, label them with tape for extra clarity.
Keep Track of Screws and Small Parts
Losing screws or small components can delay your repair and cause frustration. You should organize all hardware as you remove it. Place screws, clips, and brackets in a small container or magnetic tray. This habit prevents parts from rolling away or getting lost in the kitchen.
Consider these organization strategies:
- Use a labeled cup or dish for each type of screw or part.
- Arrange parts in the order you remove them to simplify reassembly.
- Place small items on a white towel or tray for better visibility.
Ghi chú: Keeping hardware organized ensures a smooth, efficient repair and helps you avoid searching for missing pieces when you reassemble your oven.
By following these tips, you set yourself up for a successful oven element replacement. Careful preparation and attention to detail make the process faster, safer, and less stressful.
Preventing Future Oven Element Problems
定期清洁与维护
You can extend the lifespan of your oven element by following a consistent cleaning and maintenance routine. After each use, wipe down the oven interior to prevent food residue and grease from building up. Clean spills promptly so they do not harden and become difficult to remove. Use oven liners to catch drips, but make sure they do not block vents or touch the heating element. Clean oven racks by soaking them in warm, soapy water and scrubbing gently. Maintain the door seal by inspecting it regularly and replacing it if you notice any wear. This helps preserve heat retention and improves efficiency.
Tip: Use a baking soda paste or natural degreasers like vinegar and water for stubborn stains. Avoid harsh chemicals that can damage oven components.
You should also clean the oven door and control panel with a damp cloth. Keep vents and exhaust filters clear to maintain proper airflow and prevent overheating. Use the self-cleaning mode sparingly, and always remove racks before starting the cycle. Regularly check the oven temperature with an oven thermometer to ensure accurate cooking.
Avoiding Common Causes of Element Failure
Oven elements can fail due to several preventable reasons. The most common cause is wear or internal damage, such as when the inner heating wire bursts and welds to the outer sheath. This can create a short circuit and trip your breaker. You can avoid many issues by keeping the heating element clean and free from residue. Regularly inspect the element for signs of damage or discoloration. If the element does not glow red when the oven is on, it may need replacement.
To reduce the risk of failure, follow these best practices:
- Avoid using aluminum foil on the oven floor or near the element.
- Do not let oven liners touch the heating element or block vents.
- Calibrate the thermostat to prevent overheating.
- Inspect and maintain the door seal to keep heat inside.
- Schedule regular maintenance to catch problems early.
Note: Preventive care helps you avoid costly repairs and keeps your oven running efficiently.
何时安排专业检查
You should schedule professional inspections if you notice persistent issues, such as uneven heating or frequent tripping of the circuit breaker. A technician can detect electrical or mechanical problems that may not be visible during routine cleaning. Plan for a professional check-up at least once a year, especially if your oven sees heavy use. During an inspection, a technician will examine the heating element, wiring, thermostat, and seals. Early detection of wear or damage can prevent unexpected breakdowns and extend the life of your appliance.
Regular professional maintenance ensures your oven operates safely and reliably, giving you peace of mind in your kitchen.
You can replace an oven element with basic skills and the right tools. This repair offers a safe and cost-effective solution when you follow each safety step. Review the pros and cons before you begin. If you feel uncertain or run into problems, contact a professional for help.
Trust your comfort level. A working oven brings convenience and confidence to your kitchen.
Câu hỏi thường gặp
How often should you replace your oven element?
You should replace your oven element when you notice visible damage, uneven heating, or if it stops working. Most elements last several years with normal use. Regular inspection helps you catch problems early.
Can you use your oven if the element is partially working?
You should avoid using your oven if the element is only partially working. A damaged element can cause uneven cooking and may pose a safety risk. Replace it as soon as possible.
What happens if you install the wrong oven element?
Installing the wrong element can cause electrical issues, poor performance, or even damage your oven. Always match the model and part number before installation. If unsure, consult your appliance manual or a professional.
Do you need special tools to replace an oven element?
Most replacements require only basic tools like a screwdriver and pliers. A multimeter helps test the element. You do not need specialized equipment for standard electric ovens.
自行更换烤箱加热元件是否安全?
You can safely replace an oven element if you follow all safety steps. Always disconnect power before starting. Wear gloves and safety glasses. If you feel unsure, contact a professional.
如何判断新更换的烤箱加热元件是否正常工作?
将烤箱设置为高温模式。新加热元件应在十分钟内呈现橙红色。若其未发热或出现异常气味,请关闭烤箱并检查安装情况。.
更换烤箱加热元件是否会使您的保修失效?
开始前请仔细核对保修条款。许多制造商要求由授权服务商进行维修。若使用非原厂配件或不当方法自行更换,可能导致保修失效。.

