
When you need to replace oven element quickly, you want a solution that saves time and hassle. Most home users finish this task in under 30 minutes with only basic tools. If you can handle a screwdriver and locate your power source, you can replace your oven’s element without stress.
- The process involves a few straightforward steps and requires minimal technical skill.
Safety matters most—always disconnect power before you begin.
Replace Oven Element: What You’ll Need
Before you begin your oven element replacement, gather all the necessary tools and materials. Preparation ensures you work efficiently and safely. Appliance repair professionals recommend a few essential items for this task.
Основные инструменты
You do not need a full toolbox, but having the right tools on hand makes the process smoother. Here are the basics:
Screwdriver (Phillips or flathead, depending on your oven)
A screwdriver is the primary tool for removing and installing the screws that hold the element in place. Most ovens use Phillips-head screws, but some models require a flathead. Check your oven’s hardware before you start.
Рабочие перчатки для безопасности
Work gloves protect your hands from sharp edges and electrical components. They also help you grip tools and parts securely. Always wear gloves when handling the old or new element.
Фонарик для лучшей видимости
Oven interiors can be dim, especially near the back wall where the element sits. A flashlight helps you see screws, wires, and connectors clearly. Good lighting reduces the risk of mistakes.
Tip: Professionals often keep a small flashlight or headlamp in their toolkit for appliance repairs.
You may also find these tools helpful:
- Needle-nose pliers: Use these to handle and disconnect metal connectors from the element terminals.
- Nut driver or socket set: Some ovens use nuts instead of screws to secure the element.
- Multimeter (optional): This device tests the resistance of the element. It helps confirm if the part is faulty before you replace it.
- Wire cutters and wire nuts (optional): These come in handy if you need to trim or secure wires during installation.
A typical professional toolkit for this job includes:
- Needle-nose pliers for disconnecting connectors safely.
- Phillips-head screwdriver for removing and reinstalling screws.
- Nut driver (1/4-inch) as an alternative for certain screws.
- Multimeter to test the element’s condition.
Replacement Parts and Materials
Having the correct replacement part is crucial for a successful repair. Always check your oven’s model number and order the exact replacement oven element specified by the manufacturer. Using the wrong part can cause improper heating or even damage your appliance.
Correct replacement oven element for your model
Match the new element to your oven’s make and model. If you are unsure, consult your owner’s manual or the manufacturer’s website. Bringing the old element to an appliance parts store can also help you find the right match.
Небольшая ёмкость для винтов
A small container keeps screws and small parts organized during the repair. Losing a screw inside the oven can delay your project and create safety hazards.
Note: Keeping your workspace tidy prevents accidents and makes reassembly easier.
With these tools and materials ready, you can complete the replacement quickly and confidently. Proper preparation sets the stage for a smooth and safe repair.
Replace Oven Element: Safety First
When you replace an oven element, safety must always come first. You protect yourself and your appliance by following a few essential precautions. Before you touch any part of your oven, make sure you eliminate all electrical risks and avoid burns. These steps help you work confidently and prevent accidents.
Отключите питание
Electric ovens run on high voltage. Even when the oven is off, the element can still carry a dangerous charge. You must disconnect the power supply before you begin any repair. This step prevents electrical shock and keeps you safe throughout the process.
Unplug the oven from the wall outlet
If your oven plugs into a standard wall outlet, unplug it completely. Do not rely on simply turning the oven off at the control panel. The control panel only stops the heating cycle, but electricity still flows to the element. Reach behind the oven and pull the plug out of the socket. If the oven is heavy, ask someone to help you move it safely.
⚡ Совет: Always double-check that the oven is unplugged before you touch any wires or components.
Switch off the circuit breaker if hardwired
Some ovens connect directly to your home’s electrical system without a plug. In this case, you must switch off the circuit breaker that controls the oven. Locate your electrical panel and find the breaker labeled for the kitchen or oven. Flip the switch to the “off” position. If you are unsure which breaker controls the oven, turn off the main breaker for the entire house to guarantee safety.
- Checklist for disconnecting power:
- [ ] Unplug oven or switch off breaker
- [ ] Confirm no lights or displays are on
- [ ] Test the oven controls to ensure no power
🔒 Примечание: Never skip this step. Working on a live appliance can cause serious injury.
Let the Oven Cool
Oven elements reach extremely high temperatures during use. Even after you turn off the oven, the element and interior surfaces can stay hot for a long time. Touching a hot element can cause severe burns.
Wait until the oven is completely cool before starting
Patience is key. Wait until the oven feels cool to the touch before you begin any work. Open the oven door and let it air out if needed. If you recently used the oven, give it at least 30 minutes to an hour to cool down. Use your work gloves to check the temperature, but do not rush this step.
🧤 Напоминание о безопасности: Always prioritize your safety. A cool oven and disconnected power make your repair process much safer and more comfortable.
By following these safety steps, you set yourself up for a smooth and risk-free oven element replacement. Take your time, double-check your power source, and never handle a hot or live appliance.
Replace Oven Element: Accessing the Element
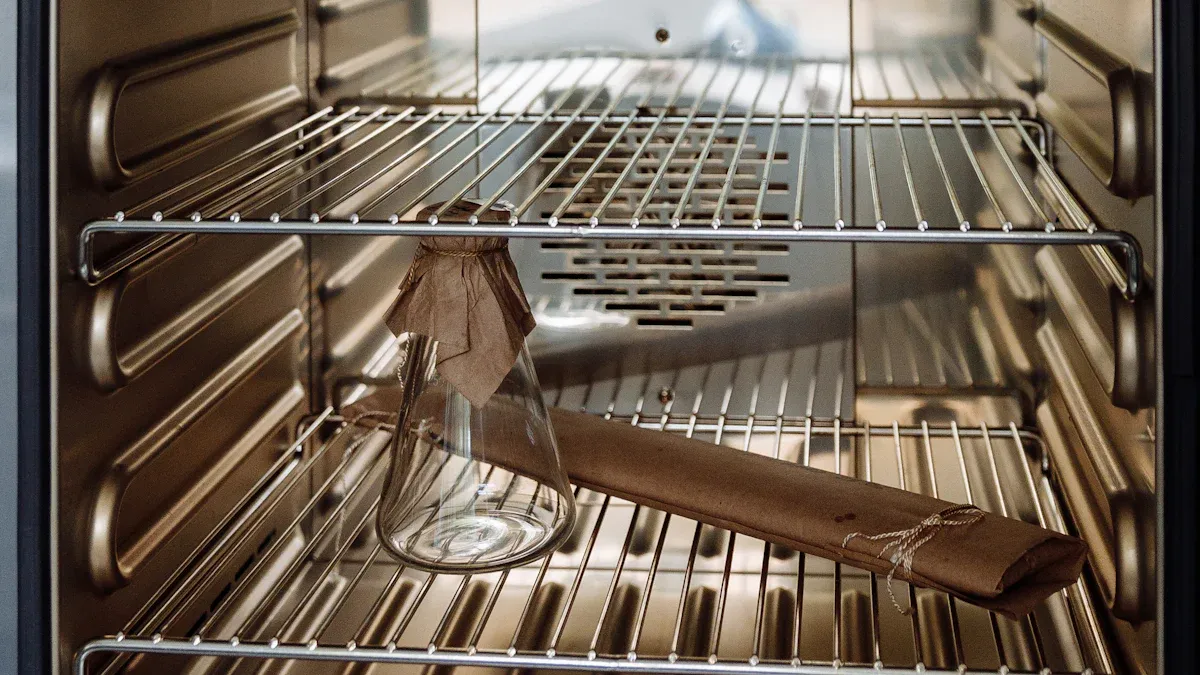
When you prepare to replace oven element, you need clear access to the faulty part. This step ensures you can work efficiently and avoid damaging your appliance. Begin by removing any obstacles inside the oven.
Remove Oven Racks
Slide out all racks for clear access
Start by sliding out all oven racks and any other removable parts. This action gives you an unobstructed workspace and prevents accidental scratches or dents inside the oven. Follow these steps to remove the racks safely:
- Grasp each rack firmly at the front.
- Pull the rack straight out, keeping it level to avoid scraping the oven walls.
- Set the racks aside in a well-ventilated area or outside.
- If you plan to clean the racks, spray them with an oven cleaning product and place them in a bag for 30 minutes to an hour.
- After soaking, scrub gently with a non-abrasive sponge or brush.
- Rinse and dry the racks thoroughly before reinstalling.
Совет: Avoid using metallic scouring pads or harsh scrubbers on the oven interior. Use a soft sponge or microfiber cloth to protect the finish.
Removing the racks before you work on the oven heating element also makes it easier to spot any debris or residue. This step helps you maintain a clean and safe environment for the repair.
Locate the Faulty Element
Identify the bake or broil element that needs replacing
Next, identify which oven heating element requires replacement. Most electric ovens have two main elements: the oven bake element at the bottom and the broil element at the top. Look for visible signs of damage, such as blistering, burning, or breaks in the baking coil. If you notice uneven heating or the oven fails to reach the set temperature, the heating element may be faulty.
For a more precise diagnosis, use a multimeter to test the element’s electrical resistance. Disconnect power to the oven first. Remove the racks and unscrew the element to access its terminals. Detach the wires and label them for easy reinstallation. Visually inspect the entire heating element for signs of burning or damage. Set your multimeter to the appropriate scale and test for continuity between the terminals. A functional element shows continuity, while a broken one does not. Compare your resistance reading to the manufacturer’s specifications, usually between 19 and 115 ohms. If you find no continuity or see visible damage, you need to replace the element.
Note: Always match the replacement part’s wattage and part number to your oven model. Using the wrong oven heating elements can cause improper heating or even damage your appliance.
By following these steps, you ensure you remove obstacles and accurately identify the faulty heating element. This preparation sets the stage for a smooth and successful repair.
Replace Oven Element: Removing the Old Element
When you reach the core of the repair process, you need to remove the old heating element with care and precision. This step ensures you avoid damaging your oven’s internal wiring or mounting hardware. Follow these instructions to complete the removal safely and efficiently.
Unscrew the Element
Find and remove mounting screws or nuts
Begin by locating the mounting screws or nuts that secure the heating element to the oven’s back wall or ceiling. Most ovens use standard machine screws for this purpose. You will often find sizes such as 10-16 x 3/4, 7-18 x 0.750, or 10-24 x 1/2, which are common across many brands. Some models, like Electrolux or Smeg, may use metric screws such as M4x44. These screws do not require special high-temperature ratings, as original equipment manufacturer (OEM) parts are designed for this environment.
| OEM Part Number | Screw Description | Size/Type | Brand/Use Case |
|---|---|---|---|
| WPW10200660 | Screw | 10-16 x 3/4 | Machine screw |
| WP3368921 | Screw | 7-18 x 0.750 | Machine screw |
| WP308685 | Screw | 10-24 x 1/2 | Machine screw |
| Electrolux | Oven Door Screw | M4x44 | Metric size screw |
Use the correct screwdriver or nut driver to loosen each fastener. Turn each screw counterclockwise until it comes free. Place all screws or nuts in your small container to prevent loss. If you encounter a stuck or rusted screw, apply a small amount of penetrating oil and wait a few minutes before trying again. This approach helps you avoid breaking the screw or damaging the mounting bracket.
🛠️ Совет: Never force a screw that feels stuck. Gentle, steady pressure works best and protects the oven’s internal structure.
Disconnect Wires
Gently pull the element forward to expose wires
Once you remove the mounting screws, carefully pull the heating element a few inches away from the oven wall. This movement exposes the electrical wires connected to the element’s terminals. Avoid pulling too hard, as the wires may be short or tightly connected.
Carefully detach wires, noting their positions
You must disconnect the wires from the old heating element before you can complete the heating element replacement. Use needle-nose pliers or your fingers to grip the wire connectors at the base of the terminals. Do not tug on the wires themselves, as this can damage the connectors or internal wiring.
Follow these steps to protect your oven’s wiring:
- Take a clear photo or draw a diagram of the wire layout before disconnecting anything. This record helps you reconnect the wires correctly during installation.
- Use pliers or a screwdriver to gently loosen the terminal screws or wire connectors.
- Avoid pulling directly on the wires. Always handle the connectors or terminals.
- Label each wire if your oven has a complex wiring configuration.
- If you see any exposed wire after disconnection, insulate it with electrical tape or shrink tubing.
⚡ Предупреждение о безопасности: Always confirm the oven is unplugged or the breaker is off before touching any wires. Electrical shock can occur even if the oven appears off.
If you notice signs such as scorching, persistent uneven heating, or visible damage to the element, you should proceed with replacement. These symptoms indicate the heating element is beyond repair and cleaning or adjustment will not restore proper function. In some cases, you may also see warped or bowed oven interiors, which signal deeper heat-related issues.
Removing the old heating element with care sets the stage for a successful installation of the new part. By following these steps, you protect your oven’s wiring and ensure a smooth heating element replacement process.
Replace Oven Element: Installing the New Element
Attach Wires to New Element
Connect wires securely in the correct positions
You have removed the old heating element and prepared the workspace. Now, you need to connect the wires to the new heating element. Secure connections ensure safe operation and prevent electrical hazards. Follow these best practices to guarantee a reliable installation:
- Inspect each wire and connector for damage. Replace any worn or burnt female electrical connectors before proceeding.
- If you find damaged wiring, splice in a new section using high-temperature rated wire, preferably 12 AWG. Solder new female connectors onto the replacement wire for a solid connection.
- Use quality electrical butt connectors to join new wire lengths to existing wiring. This step maintains durability and safety.
- Всегда match wire colors correctly. Connect neutral to neutral, live to live, and ground to ground. Secure the grounding wire with the ground link screw.
- Tighten all screws and connectors firmly. Loose connections can cause arcing, which leads to repeated failures or even fire hazards.
- Avoid using any damaged terminals. If you notice a damaged spade terminal on the heating element, replace the entire part to prevent arcing.
- After connecting the wires, gently tug each one to confirm it is secure. Double-check your work against your earlier photo or diagram.
⚡ Совет: Never rush this step. A secure connection is critical for the safe operation of your oven.
Secure the New Element
Align and screw the new element into place
Once you have attached the wires, you need to mount the new heating element. Align the element’s mounting holes with the screw holes in the oven wall or ceiling. Insert the screws or nuts by hand to avoid cross-threading. Use your screwdriver or nut driver to tighten each fastener until snug.
Manufacturers do not provide specific torque specifications for oven element screws. You should tighten the screws enough to hold the new heating element firmly in place, but avoid over-tightening, which can strip the threads or damage the mounting bracket. For extra security in high-temperature environments, you may use a high-temperature threadlocker, such as Loctite 272, on the screws. This product retains strength up to 150°C and helps prevent loosening over time.
🛠️ Примечание: Do not rely solely on threadlocker. Properly tightened screws provide the main holding force for the baking coil.
After securing the new heating element, check that it sits evenly and does not touch the oven walls. A misaligned element can cause uneven heating or damage the oven interior. Reposition the access cover and fasten it with screws if your oven design requires it.
You have now completed the core step to replace oven element. With the new heating element installed and secured, you are ready to restore power and test your oven.
Replace Oven Element: Restore Power and Test
Reinstall Oven Racks
Slide racks back into position
After you secure the new element, you need to reinstall the oven racks. Proper rack placement ensures your oven performs at its best. Choose the shelf levels based on your typical cooking needs. The distance between the racks and the heating elements affects how your food cooks. For example, placing a rack closer to the broil element gives you faster browning, while a lower rack near the bake element provides even baking.
Follow these steps to reinstall the racks correctly:
- Make sure the angular side of each oven rack faces upward.
- Insert the rack into the oven at a slight angle.
- Slide the rack fully into place until it rests securely.
- Repeat this process for any additional racks.
Tip: Double-check that each rack sits level and does not wobble. A stable rack prevents spills and ensures even cooking.
Restore Power
Plug in the oven or switch on the breaker
Before you restore power, confirm that all wires and screws are secure. Restoring power with loose connections can cause electrical shock, damage your oven, or even create a fire hazard. If you notice a tripped breaker, do not ignore it. A tripped breaker signals a possible short circuit or overload that you must address before proceeding.
- Restoring power before confirming secure connections can result in:
- Electrical shock or serious injury.
- Damage to the oven’s wiring.
- Overheating and potential fire hazards.
- Tripped breakers that indicate unresolved electrical faults.
Once you confirm everything is secure, restore power by plugging the oven back into the outlet or switching the circuit breaker to the “on” position. Always follow your oven’s user manual for model-specific safety instructions.
⚡ Напоминание о безопасности: Only restore power when you are certain all connections are tight and the oven is properly assembled.
Test the Oven
Set oven to bake and check if the new element heats up
Now you need to test new oven heating element to ensure your repair succeeded. Set your oven to the bake function and select a moderate temperature, such as 350°F. Watch the new element as the oven powers up.
Use this procedure to verify correct operation:
- Plug the oven back in or turn the breaker on.
- Run the oven empty and observe the new element.
- Элемент должен glow red or orange, indicating it produces heat.
- You may notice a small amount of smoke at first. This is normal and results from the factory coating burning off.
- Check for any unusual sounds, sparks, or odors. If you see any, turn off the oven immediately and inspect your installation.
- Use an oven thermometer to confirm the oven reaches the set temperature.
- Inspect the element for any visible damage, such as cracks or blistering.
Note: If the oven does not heat up or the breaker trips, disconnect power and review your connections. Seek professional help if you cannot resolve the issue safely.
A properly installed element will heat up quickly and evenly. This test confirms your oven is ready for regular use.
Replace Oven Element: Quick Checklist and Troubleshooting
Final Checklist
Before you finish your oven repair, review this checklist to confirm safety and performance. Completing these steps helps you avoid common issues and ensures your oven operates efficiently.
Tighten all screws
Secure every screw or nut holding the element and access panels. Loose hardware can cause rattling or poor electrical contact.Надежно подключите провода
Дважды проверьте каждое соединение проводов. Аккуратно потяните каждый провод, чтобы убедиться, что он надежно закреплен. Правильные соединения предотвращают возникновение дуги и обеспечивают безопасную работу.Осмотрите новый нагревательный элемент
Проверьте установленный элемент на наличие трещин, сколов или других видимых повреждений. Поврежденные элементы могут вызывать неравномерный нагрев или быстро выходить из строя.Очистите внутреннюю часть духовки
Удалите остатки пищи, жир или чистящие средства из духовки и с варочной панели. Оставшиеся загрязнения могут гореть и выделять дым при первом использовании.Проверьте уплотнители дверцы духовки
Осмотрите дверной уплотнитель на предмет разрывов или трещин. Герметичное уплотнение удерживает тепло внутри и повышает эффективность приготовления.Откалибруйте температуру духовки
Используйте термометр для духовки, чтобы убедиться, что она достигает правильной температуры. При необходимости отрегулируйте термостат для точного приготовления.Проверьте функции безопасности
Убедитесь, что автоматическое отключение и регуляторы температуры работают должным образом. Эти функции защищают вас и вашу технику.
📝 Совет: Для газовых духовок проверьте соединения горелок на утечки или засоры. Если вы чувствуете запах газа, перекройте подачу и немедленно вызовите специалиста.
Советы по устранению неисправностей
Даже после тщательной установки могут возникнуть проблемы. Используйте эти шаги для диагностики и решения распространенных неисправностей.
Духовка не нагревается? Дважды проверьте соединения проводов
- Отключите питание духовки перед осмотром.
- Убедитесь, что все провода надежно подключены к клеммам элемента.
- Проверьте элемент на видимые повреждения. Если элемент не раскаляется докрасна в режиме выпекания, проверьте его целостность с помощью мультиметра.
- Проверьте напряжение в розетке. Неправильное напряжение может препятствовать нагреву духовки.
- Проверьте целостность теплового предохранителя и датчика температуры. Замените неисправные компоненты.
- Если не работают и верхний, и нижний нагревательные элементы, проверьте тепловой ограничитель или плату управления.
Искры или дым? Отключите питание и проверьте установку
- Искры или дым могут быть вызваны:
- Поврежденными или неисправными нагревательными элементами.
- Сгоранием остатков пищи, жира или чистящих средств.
- Выгоранием заводского покрытия при первом использовании нового элемента.
- Неправильным расположением пищи или решеток слишком близко к элементу.
- Немедленно выключите духовку и отключите питание.
- Проверьте проводку на наличие следов горения или ненадежных соединений.
- Удалите все пролитые жидкости или остатки из внутренней части духовки.
- Если искрение продолжается, проверьте проводку и соединения платы управления с помощью мультиметра.
⚠️ Тревога: Продолжающийся дым или искрение после очистки и проверки могут указывать на более серьезную электрическую проблему. Не используйте духовку, пока ее не осмотрит специалист.
Все еще не работает? Рассмотрите возможность обращения к профессионалу
- Вызовите специалиста, если вы не можете безопасно получить доступ к элементу духовки или отремонтировать его.
- Обратитесь за помощью к эксперту, если вы не уверены в проверке или замене проводки, реле или плат управления.
- Обратитесь к технику, если автоматический выключатель срабатывает повторно, элемент плавится или запах гари не исчезает.
- Назначьте регулярные проверки при сложных неисправностях или если калибровка и ремонт не решают проблему.
👨🔧 Примечание: Профессиональные техники обладают инструментами и опытом для диагностики электрических неисправностей, проблем с термостатом и поломок платы управления. Их помощь гарантирует безопасную и эффективную работу вашей духовки.
Следуя этому контрольному списку и руководству по устранению неисправностей, вы сможете уверенно решить большинство проблем, связанных с заменой нагревательного элемента духовки. Если проблемы сохраняются, профессиональное обслуживание защитит вашу технику и вашу безопасность.
Замена нагревательного элемента духовки может быть простым проектом «сделай сам», если тщательно выполнять каждый шаг. Всегда отключайте питание и дайте духовке остыть перед началом работы. Проверьте электрические соединения на повреждения и используйте только совместимые, качественные детали. Обращайтесь с проводами осторожно, чтобы они не соскользнули за духовку. Если вы заметите частые срабатывания автоматического выключателя или новый элемент не нагревается, обратитесь за помощью к квалифицированному технику. Следуя этим рекомендациям, вы восстановите работоспособность духовки и обеспечите безопасность на кухне.
ЧАСТО ЗАДАВАЕМЫЕ ВОПРОСЫ
Как узнать, что нагревательный элемент духовки неисправен?
Вы заметили неравномерное приготовление пищи, видимые разрывы или элемент не раскаляется при нагреве духовки. Используйте мультиметр для проверки целостности цепи. Отсутствие целостности означает необходимость замены.
Можно ли самостоятельно заменить нагревательный элемент духовки?
Да, вы можете заменить его самостоятельно. Соблюдайте меры безопасности, отключайте питание и используйте правильную запасную часть. Большинство домашних пользователей справляются с этой задачей с помощью базовых инструментов и внимательности.
Сколько времени занимает замена нагревательного элемента духовки?
Обычно работа занимает от 20 до 30 минут. Подготовка и наличие правильных инструментов помогают работать эффективно. Всегда выделяйте дополнительное время для проверок безопасности.
Нужно ли отключать питание перед заменой элемента?
Да, всегда отключайте питание перед началом работы. Отсоедините духовку от сети или отключите автоматический выключатель. Этот шаг защищает вас от поражения электрическим током.
Что делать, если новый элемент не нагревается?
Проверьте все соединения проводов и убедитесь, что питание восстановлено. Осмотрите элемент на наличие видимых повреждений. Если духовка по-прежнему не нагревается, проверьте элемент мультиметром или вызовите специалиста.
Можно ли использовать любой нагревательный элемент духовки в качестве замены?
Нет, необходимо использовать совместимый нагревательный элемент для вашей модели духовки. Проверьте руководство пользователя или сайт производителя. Использование неподходящей детали может повредить устройство.
Нормально ли, что новый нагревательный элемент дымит при первом использовании?
Да, возможно появление лёгкого дыма из-за выгорания заводского покрытия. Это должно прекратиться через несколько минут. Если дым продолжается, выключите духовку и проверьте установку.
Какие инструменты нужны для замены нагревательного элемента духовки?
Вам понадобятся отвёртка, рабочие перчатки и фонарик. Полезны также узкогубцы и небольшая ёмкость для винтов. Мультиметр пригодится для проверки, но не является обязательным.

