Ready to fix your Samsung dryer yourself? You can replace elemento calefactor parts at home with just a few basic tools. Many people feel nervous about repairs, but you can do this if you follow each step carefully. Safety matters most, so unplug the dryer before you start. Take your time and handle each part with care. You might even find that you enjoy the process!
Principales conclusiones
Always unplug your Samsung dryer before you start. Wear safety gear to stay safe and avoid accidents.
Gather all the tools you need. Use real Samsung parts for a safe and good heating element replacement.
Follow each step to take off the panels. Test the heating element with a multimeter. Carefully disconnect the wires.
Put in the new heating element and make sure it is tight. Reconnect the wires the right way. Clean the vent so your dryer works well.
Put the dryer back together with care. Check all the connections again. Run a test cycle to make sure the repair worked.
Tools and Parts
Needed Tools
Get all your tools together before you start. This makes the job easier and less stressful. Here are the tools you should have:
Phillips screwdriver
Flathead screwdriver
Nut driver (usually 1/4-inch or 5/16-inch)
Needle-nose pliers
Multimeter (for testing the heating element)
Work gloves
Safety glasses
Small container for screws
Most people already own these tools at home. The multimeter lets you test if the heating element works. Gloves and safety glasses keep your hands and eyes safe. Use a small container so you do not lose any screws. It is annoying to search for missing screws on the floor!
Consejo: Put all your tools out before you begin. You will not have to stop and look for something while fixing the dryer.
Replacement Parts
You need the right parts to repair your Samsung dryer. The most important part is the heating element. Sometimes, other parts can break too. It is a good idea to check and change old parts while the dryer is open. These are the parts people replace most often:
Heating element (specific to your Samsung model)
Thermal fuse
Thermostat
High-limit thermostat
Wiring harness (if damaged)
Most of the time, changing the heating element fixes the dryer. But sometimes, a broken thermal fuse or thermostat is the problem. You should check these parts and the wiring when you troubleshoot. Using real Samsung parts gives you the best results. Samsung says to use genuine parts for safety and good performance. Many people say their dryer works better after using the right parts. They are happy when the dryer heats up and dries clothes well again.
Nota: If you do not know which parts to buy, look for your dryer’s model number. You can find it on a sticker inside the door or on the back. Always make sure the parts fit your dryer before you order them.
Safety Steps
Disconnect Power
Before you do anything else, unplug your dryer from the wall. This step keeps you safe from electric shock. If your Samsung dryer uses gas, turn off the gas supply too. Never skip this part. Even if you feel sure the dryer is off, double-check.
Unplug the dryer from the outlet.
If you have a gas dryer, turn off the gas valve.
Check for blown fuses or tripped circuit breakers before you start.
Use a voltmeter to make sure there is no power at the outlet.
Inspect the power cord for any damage.
Do not use extension cords for your dryer.
Use a multimeter to test for continuity and make sure all parts are safe to touch.
Nota: Electrical failures or malfunctions cause about 8% of home dryer and washer fires. Taking time to disconnect power the right way can prevent accidents and keep you safe.
Protective Gear
You want to protect yourself while working on your dryer. Always wear work gloves to keep your hands safe from sharp edges and hot parts. Safety glasses protect your eyes from dust and small pieces that might fly up.
Put on gloves before you touch any parts inside the dryer.
Wear safety glasses to shield your eyes.
Keep loose clothing and jewelry away from moving parts.
Consejo: If you ever feel unsure, stop and ask for help. Safety comes first. You can always call a professional if you need extra support.
Taking these steps helps you avoid injuries and makes the repair process much smoother. Stay safe, and you will feel more confident as you move on to the next steps!
Access Heating Element
Remove Panels
You need to open up your Samsung dryer to reach the heating element. Start by unplugging the dryer. Safety always comes first! Now, grab your screwdriver and get ready to remove some panels. Here’s a simple step-by-step guide:
Take out the two screws at the back that hold the top panel in place.
Slide the top panel toward the back, then lift it off.
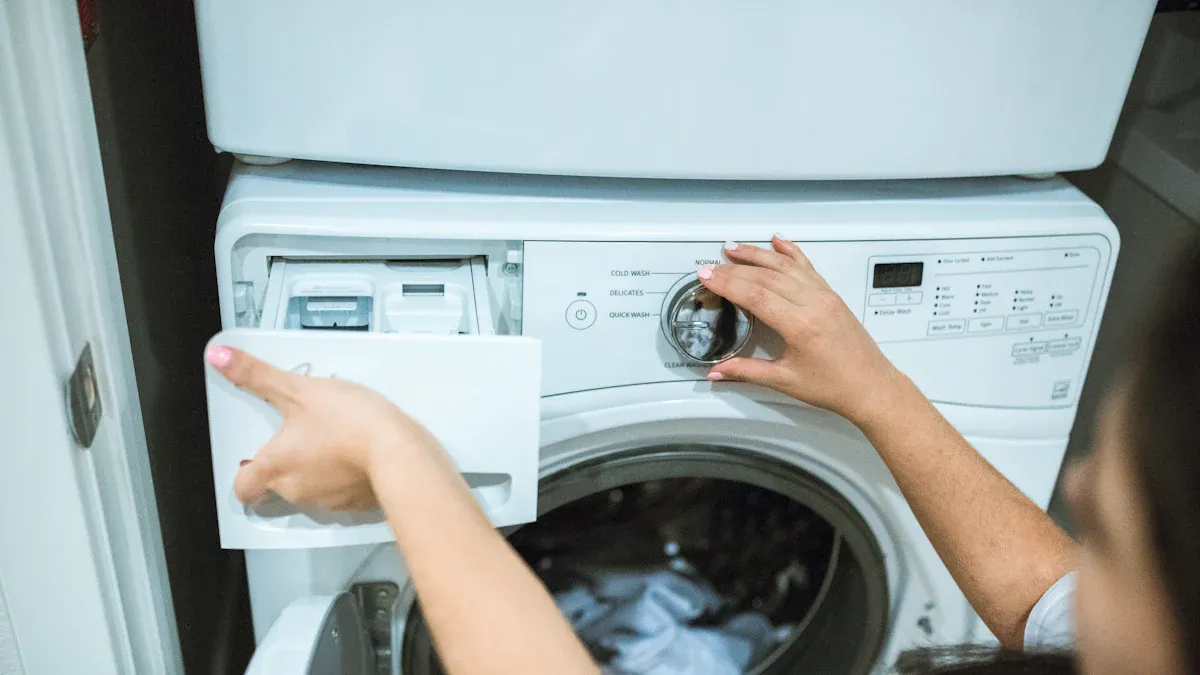
If your dryer has a control panel on top, remove the screws holding it. Gently pull up the control panel. You might need to disconnect some wires, so take your time.
Look behind the control panel. You’ll find a folded technical wiring sheet. This diagram shows you how the wires connect to the heating element, thermal fuse, and thermostats. Keep it handy if you want extra help.
Remove the screws behind the control panel that secure the front panel.
Open the dryer door and take out the two screws at the bottom of the door frame.
Tilt the front panel forward. Disconnect the door switch connector, then lift the front panel away.
Consejo: Place all screws in a small container. You don’t want to lose any!
Locate Element
Now that you’ve removed the panels, you can see inside the dryer. The heating element sits on the bottom right side in most Samsung dryers. It looks like a metal canister or a long coil inside a metal housing. You’ll also see wires connected to it, along with the thermal fuse and thermostats.
If you want to replace heating element parts, look for the wires and screws holding the heating element in place. You may need to disconnect a few more wires and remove a mounting screw at the front. Once you do this, you can pull out the heating element assembly.
Nota: The wiring diagram you found earlier can help you double-check connections when you put everything back together.
Taking your time with these steps makes the job much easier. You’re almost ready to test and remove the old heating element!
Test and Remove
Test with Multimeter
You want to make sure the heating element is really the problem before you swap it out. Grab your multimeter and follow these steps:
Unplug your dryer and let it cool down. Safety comes first!
Open the access panel so you can see the heating element.
Set your multimeter to the continuity setting. Touch the probes to the terminals on the heating element.
If the multimeter shows no continuity, the heating element is bad and you need to replace it.
While you have the multimeter out, check the thermal fuse and thermostat for continuity too. If they fail the test, you should replace those parts as well.
Look at the heating coils for any breaks or burns. If you see damage, you know it’s time to replace heating element parts.
Consejo: If you’re not sure what the reading means, check your dryer’s wiring diagram or manual. Most manuals show what a good reading looks like.
Disconnect Wires
Once you know the heating element needs to go, you need to disconnect the wires. Take a picture of the wiring before you start. This helps you remember where everything goes later. Use needle-nose pliers to gently pull the wires off the terminals. Don’t yank them—just wiggle them loose. Keep the wires out of the way so you don’t damage them.
Nota: Some wires might have clips or tabs. Press these down to release the wires safely.
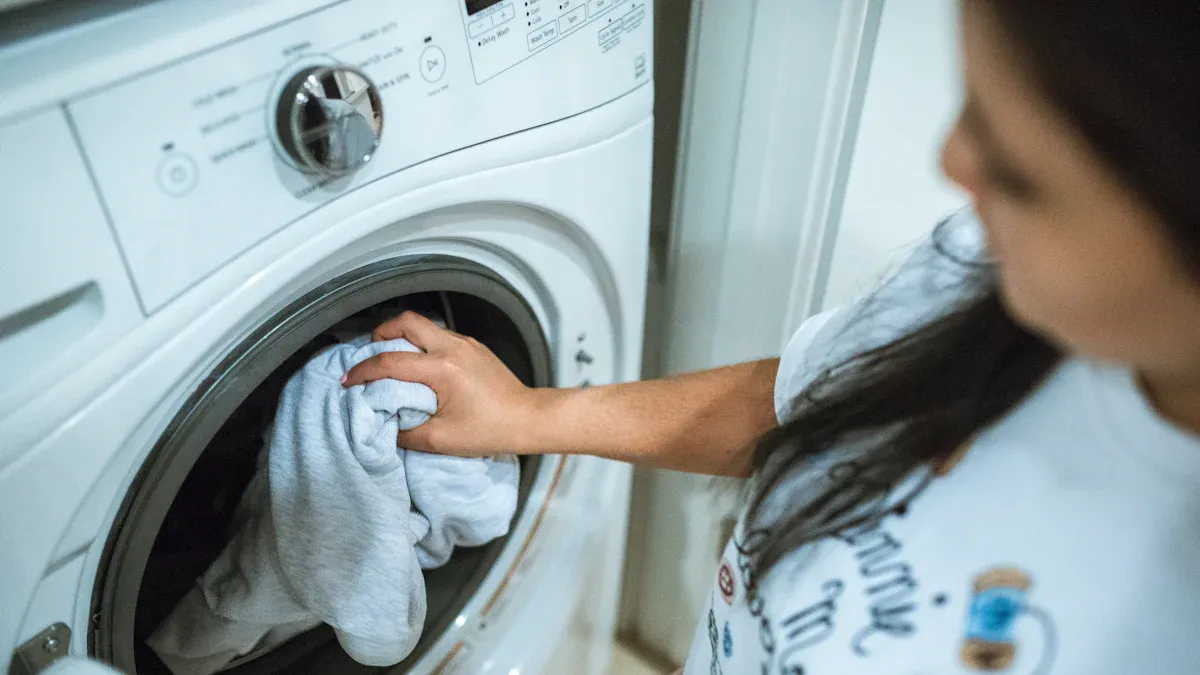
Remove Heating Element
Now you’re ready to take out the old heating element. Find the screws or bolts holding the element in place. Use your nut driver or screwdriver to remove them. Slide the heating element out of its housing. Be careful—sometimes it can catch on other parts inside the dryer. If it feels stuck, check for hidden screws or clips.
Once you remove the heating element, set it aside. You’re now ready to install the new part and get your dryer working again!
Replace Heating Element
Install New Element
You have the old heating element out. Now, grab your new part and get ready to put it in. Slide the new heating element into the same spot where you took the old one out. Make sure it fits snugly in the housing. Line up the screw holes and use your screwdriver or nut driver to secure the element. Tighten the screws, but do not overdo it. You want the element to stay in place, but you do not want to strip the threads.
Consejo: Double-check that the new heating element matches your dryer model. If it looks different, stop and compare the part numbers.
Before you move on, look around the inside of your dryer. Check the vent system for lint or blockages. A clogged vent can make your dryer overheat and cause the new heating element to fail. Clean out any dust or lint you see. This step helps your dryer work better and last longer.
Reattach Wires
Now it is time to reconnect the wires. Look at the photo you took earlier or use the wiring diagram you found inside the dryer. Attach each wire to the correct terminal on the new heating element. Push the connectors on until they click or feel tight. If you see any damaged wires, fix them before you finish. The Appliance Repair Victoria blog explains that sometimes just repairing or reattaching a single wire can bring your dryer back to life. Wires can get loose or break over time, so this step is important.
If you need to reconnect a broken wire, pinch the ends together and sandwich them between two metal washers. Secure them with a nut and bolt. This method, recommended by experts, gives you a strong and safe connection. Take your time and make sure every wire is in the right place.
Nota: Good wire connections keep your dryer safe and help it heat up like it should.
Reassemble Dryer
You are almost done! Now you need to put your dryer back together. Work in the reverse order of how you took it apart. Start by putting the front panel back on. Reconnect the door switch wire harness. Secure the panel with screws. Next, set the control panel in place and attach any wires you disconnected. Slide the top panel back on and tighten the screws at the back.
Here is a quick checklist to help you:
Attach the front panel and reconnect the door switch.
Secure the control panel and plug in any wires.
Slide the top panel on and screw it down.
Make sure all screws are tight and panels fit well.
Many users share that following these steps closely helps avoid problems like blown fuses or error codes. Some people have had issues with burned wires or short circuits when they missed a connection. Always check your wiring before you close up the dryer. If you need to replace a wire connector or harness, do it now.
Consejo: Before you plug in your dryer, check the vent hose at the back. Make sure it is not kinked or blocked. A clear vent helps your dryer run safely and dry clothes faster.
When you finish, plug your dryer back in and run a short test cycle. Listen for any strange noises. Feel for heat inside the drum. If everything works, you did a great job! Most people find that when they replace heating element parts themselves, they save money and get their dryer working again quickly. Reviews show that Samsung dryers are reliable, and most users are happy with their performance after a repair.
Here is a table showing why DIY repair is a smart choice:
Repair Type | Cost Range | What You Save |
|---|---|---|
Professional Repair | Time, but costs more | |
DIY (parts only) | $70 – $150 | Labor fees |
You can see that when you replace heating element parts yourself, you save on labor costs. Most people can do this repair with basic tools and a little patience.
You can feel proud when you replace heating element parts in your Samsung dryer. This repair is practical for most people. Always double-check every connection before you close up the dryer. Here’s a quick checklist to help you finish strong:
Test the new heating element with a multimeter. A reading near 10 Ohms means it works.
Secure all parts and wires during reassembly.
Power on the dryer and run a short cycle to make sure it heats up.
If you ever feel unsure, reach out to a professional. You can also find more support and parts online. You’ve got this!
PREGUNTAS FRECUENTES
How do I know if my Samsung dryer heating element is bad?
You might notice your dryer runs but does not heat up. Clothes stay damp after a full cycle. You can test the heating element with a multimeter. No continuity means you need a new one.
Can I use any heating element for my Samsung dryer?
No, you need a heating element that matches your dryer’s model number. Using the wrong part can cause damage or not fit at all. Always check your model before you buy.
How long does it take to replace the heating element?
Most people finish this repair in about 1 to 2 hours. If you have all your tools and parts ready, you might finish even faster. Take your time and follow each step.
What should I do if my dryer still does not heat after replacing the element?
Check the thermal fuse, thermostat, and wiring. Sometimes, these parts fail too. Make sure all wires are connected tightly. If you still have trouble, you might want to call a professional.

