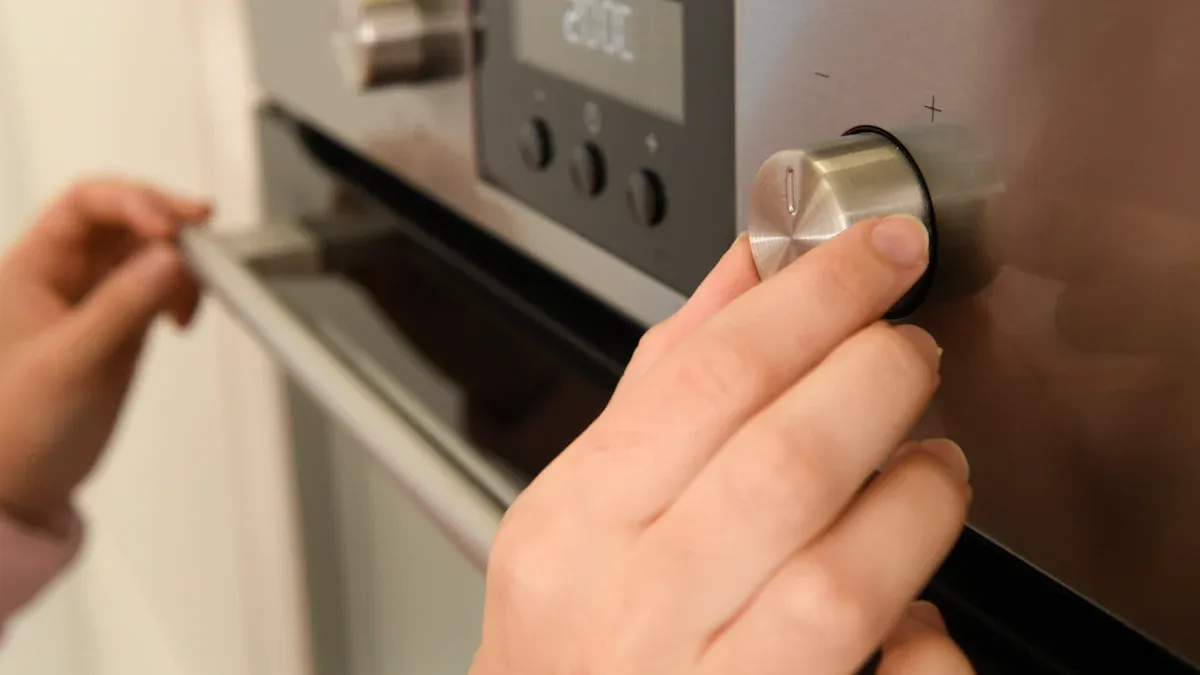
You depend on your oven for daily meals, so a malfunctioning heating element can quickly disrupt your cooking routine. Many households experience frustration when this essential component fails, as it leads to uneven temperatures and longer cooking times. Zuverlässig Heizelemente für Haushaltsgeräte, such as those from Jinzhong Elektroheizung und andere führende Hersteller von Heizelementen, play a crucial role in maintaining oven performance. Addressing these issues promptly ensures your GE oven model JBP64WOK1WW delivers consistent results every time you bake or broil.
Heating Element Issues: Identification and Testing
Anzeichen für ein defektes Heizelement
Uneven Cooking Results
You may notice that your food cooks unevenly. Some dishes might burn on one side while remaining undercooked on the other. This symptom often points to a malfunctioning Heizelement. When the bottom element fails to heat, your oven cannot distribute temperature properly. You might see inconsistent browning or raw spots in baked goods. These issues disrupt your cooking routine and reduce the quality of your meals.
Visible Damage or Burn Marks
Inspect the heating element inside your GE oven. Look for visible signs of damage, such as burn marks, blisters, or cracks. A damaged element often shows discoloration or melted spots. These physical changes indicate that the element has overheated or suffered electrical failure. If you see any of these signs, you should consider replacing the heating element to restore safe and efficient operation.
Oven Not Heating Up
If your oven does not heat up at all, the heating element may have failed completely. You might turn on the oven and find that the temperature remains cold, even after several minutes. Users frequently report that their GE oven does not heat, which can result from incorrect resistance readings, a faulty switch, or loose wiring connections. Problems with the terminal block or oven safety thermostat can also prevent the heating element from functioning.
Tipp: Always check both the bake and broil elements if your oven fails to heat. Sometimes, only one element stops working, affecting specific cooking modes.
Testing the Heating Element
Visual Inspection Guide
Begin by unplugging your oven or switching off the circuit breaker. Remove the racks to access the heating element. Examine the element closely for any signs of damage. Look for burn marks, cracks, or areas where the metal appears melted. If you see loose or damaged wiring connections near the terminals, this can also cause heating problems. Use a flashlight to inspect hard-to-see areas.
Using a Multimeter for Continuity
A multimeter helps you test the heating element for electrical continuity. Set your multimeter to the resistance (ohms) setting. Disconnect the wires from the element terminals. Touch the probes to each terminal. A healthy heating element should show a resistance reading within the manufacturer’s specified range. If the reading is zero or infinite, the element is faulty and needs replacement.
| Multimeter-Messwert | Zustand des Heizelements |
|---|---|
| 10-40 ohms | Normal |
| 0 Ohm | Kurzschluss |
| Infinite ohms | Open circuit (broken) |
Safety Precautions for Testing
Safety must come first when testing your oven’s heating element. Always disconnect power before starting any inspection or testing. Wear insulated gloves to protect yourself from electrical shock. Avoid touching exposed wires or terminals with bare hands. If you feel unsure about handling electrical components, contact a qualified appliance technician for assistance.
Anmerkung: Never test the heating element while the oven is plugged in. This precaution prevents accidental injury and protects your appliance from further damage.
Heating Element Replacement: Finding the Right Part
Correct Part Numbers for GE JBP64WOK1WW
Bake Element Part Number WB44T10010
You need the right part number to ensure a successful replacement. For the GE JBP64WOK1WW oven, the bake element part number is WB44T10010. This part fits your oven and restores proper heating performance.
- Bake element part number: WB44T10010
Broil Element Part Number Reference
The broil element also requires a specific part number. You should check your oven’s manual or the manufacturer’s website for the exact broil element part number. This step helps you avoid ordering the wrong part and ensures compatibility.
Where to Buy Heating Element Replacements
Authorized GE Parts Dealers
You can purchase genuine parts from authorized GE dealers. These sources guarantee that you receive authentic components designed for your oven model. Buying from authorized dealers reduces the risk of receiving counterfeit or incompatible parts.
Online Retailers and Marketplaces
Many online retailers offer heating element replacements for the GE JBP64WOK1WW. The following table highlights a recommended source:
| Retailer | Beschreibung |
|---|---|
| GE Appliance Parts | Recommended source for genuine GE parts, including heating elements for the JBP64WOK1WW model. |
You should compare prices and shipping options before making a purchase. Always verify the seller’s reputation to ensure you receive a quality product.
Ensuring Compatibility
Checking Model and Serial Numbers
You must confirm that the replacement part matches your oven’s model and serial numbers. This step prevents installation issues and ensures optimal performance. Use the following table to guide your compatibility check:
| Schritt | Beschreibung |
|---|---|
| 1 | Verify that the replacement heating element part number HE-WB44T10011 matches your oven model. |
| 2 | Cross-reference your oven model with the compatible models listed, such as GE JBP66WB4WW, GE JBP66BB1WH, etc. |
| 3 | Visually compare the new heating element with the original to ensure they are similar in size and shape before installation. |
Avoiding Ordering Mistakes
You can avoid mistakes by double-checking the part number and model information before placing your order. Take a moment to review the product description and images. If you feel uncertain, contact the seller or manufacturer for clarification.
Tip: Keep your oven’s model and serial numbers handy when shopping for replacement parts. This practice saves time and helps you select the correct heating element.
Heating Element Replacement: Step-by-Step Guide

Tools and Materials Needed
Essential Tools List
You need the right tools to complete this repair efficiently. Gather the following items before you begin:
- Kreuzschlitzschraubendreher
- Schlitzschraubendreher
- Nut driver (1/4-inch or 5/16-inch, depending on your oven)
- Spitzzange
- Multimeter (for continuity testing)
- Arbeitshandschuhe
These tools help you remove screws, disconnect wires, and handle the heating element safely.
Optional Helpful Items
Some additional items can make the process smoother:
- Flashlight or headlamp for better visibility inside the oven
- Small container or magnetic tray to hold screws
- Digital camera or smartphone to take reference photos
- Vacuum or brush to clean debris from the oven cavity
Tipp: Taking photos of the wiring before removal helps you reconnect everything correctly during installation.
Safety Preparation
Disconnecting Power
Safety comes first when working with electrical appliances. Always disconnect power to your oven before starting any work. You can do this by unplugging the oven from the wall outlet or switching off the circuit breaker that supplies power to the appliance. Manufacturers recommend verifying that the oven is de-energized by performing an initial voltage check with a multimeter. If possible, apply lockout/tagout procedures to ensure no one accidentally restores power while you work.
Protecting Yourself and Your Kitchen
Prepare your workspace to prevent accidents. Clear the area around the oven of clutter and flammable materials. Inspect your tools for damage before use. Wear insulated gloves and safety glasses to protect yourself from electrical hazards and sharp edges. Ensure proper ventilation if you work in a confined space. Never leave tools or parts unattended near the oven, and avoid using flammable chemicals during the repair.
| Sicherheitsvorkehrungen | Beschreibung |
|---|---|
| Stromzufuhr trennen | Always disconnect power before starting any work on the heating element. |
| Inspect Wiring | Check for loose connections or damaged wiring before installing the new part. |
| Safe Workspace | Clear clutter, remove flammable materials, and ensure good ventilation. |
Entfernen des alten Heizelements
Zugriff auf das Heizelement
Start by opening the oven door and removing the oven racks. This gives you clear access to the back wall where the element is mounted. Locate the screws or mounting brackets that secure the element to the oven cavity. Use your screwdriver or nut driver to remove these fasteners. Gently pull the element toward you until you see the wires connected at the back.
Abschrauben und Trennen von Kabeln
Carefully note the position of each wire attached to the element terminals. Take a photo if needed. Use needle-nose pliers to disconnect the wires by pulling on the connectors, not the wires themselves. Avoid letting the wires slip back into the oven wall. If necessary, use tape to secure them in place. Once the wires are free, remove the old element completely from the oven.
Anmerkung: If you notice any damaged or burnt wiring, address these issues before installing the new element. Damaged wires can cause erratic heating or pose a fire risk.
Einbau des neuen Heizelements
Kabel sicher verbinden
You must connect the wires to the new element with care. Each wire should attach to the correct terminal. Use your reference photo to match the positions. Slide the wire connectors onto the terminals until they fit snugly. Loose connections can cause arcing or poor performance. If you notice corrosion or damage on the connectors, clean them with a wire brush or replace them. Needle-nose pliers help you grip the connectors without damaging the wires.
Tipp: Double-check each connection before moving forward. A secure connection ensures safe operation and reliable heating.
Sichern des Elements an seinem Platz
Once you connect the wires, push the element gently back into the oven cavity. Align the mounting holes on the element with the holes in the oven wall. Insert the screws or bolts you removed earlier. Tighten them with a screwdriver or nut driver. Do not overtighten, as this can strip the threads or crack the mounting bracket. The element should sit flush against the oven wall without wobbling.
A stable installation prevents movement during use and reduces the risk of electrical shorts. Replace the oven racks after you finish securing the element.
Testen des neuen Heizelements
Powering On and Initial Test
Restore power to your oven by plugging it in or switching on the circuit breaker. Set the oven to bake at a moderate temperature, such as 350°F. Watch the new element as the oven heats up. The element should begin to glow red within a few minutes. You may notice a slight odor as the new part heats for the first time. This is normal and should fade quickly.
Check for even heating across the entire element. Uneven glow or cold spots may indicate a connection issue. Use an oven thermometer to verify that the oven reaches the set temperature.
| Schritt | Was zu beachten ist |
|---|---|
| Element Glows Red | Confirms proper electrical connection |
| No Sparks or Smoke | Indicates safe installation |
| Oven Heats Evenly | Shows successful replacement |
Troubleshooting If It Doesn’t Work
If the oven does not heat or the element fails to glow, take these steps:
- Turn off the oven and disconnect power.
- Inspect the wire connections. Make sure each connector sits firmly on the terminal.
- Check the mounting screws. Loose screws can affect the electrical path.
- Use a multimeter to test for continuity across the element terminals.
- Examine the circuit breaker or fuse box for tripped breakers or blown fuses.
Anmerkung: If you cannot identify the problem or the oven still does not heat, consult a qualified appliance technician. Electrical issues can pose safety risks if not handled properly.
You have now completed the installation and testing process. Your oven should operate efficiently with the new heating element.
Heating Element Hacks: Maintenance and Optimization
Extending Heating Element Lifespan
Regular Cleaning Practices
You can extend the life of your oven’s components by adopting a regular cleaning routine. Wipe down the oven interior after each use to prevent food residue from hardening. Inspect the heating coil and elements regularly for signs of wear, such as cracks or discoloration. Look for any visible build-up that could affect heating. For best results, check your oven at least twice a year, especially before heavy-use seasons like holidays.
Tip: Perform a deep clean monthly and clean stove burners and drip pans weekly. This habit keeps your oven running efficiently.
Avoiding Overheating and Overuse
Proper usage habits help you avoid unnecessary stress on your oven. Preheat only as long as needed and avoid running the oven empty. Use cookware that matches the size of the heating area to ensure even heat distribution. Timely repairs prevent minor issues from becoming major problems. Schedule professional maintenance checks to ensure long-term reliability.
| Maintenance Practice | Benefits |
|---|---|
| Regular cleaning | Ensures efficient operation and reduces utility costs. |
| Proper usage | Retains heat and speeds up cooking times. |
| Timely repairs | Prevents minor issues from escalating into expensive repairs. |
| Professional maintenance | Ensures long-term efficiency and reliability. |
Cleaning and Maintenance Tips
Safe Cleaning Methods
Use a damp cloth or non-abrasive sponge to clean the oven interior. Mild dish soap works well for most stains. For stubborn spots, apply a baking soda paste and let it sit before wiping. Always allow the oven to cool before cleaning. Remove racks and soak them separately for easier cleaning.
What to Avoid When Cleaning
Never use harsh chemicals or metal scouring pads on the heating element. These can damage the surface and reduce efficiency. Avoid spraying water or cleaner directly onto electrical connections. Do not attempt to clean the element while it is hot or plugged in.
Note: Safe cleaning methods protect both you and your appliance from accidental damage.
Troubleshooting Common Heating Element Problems
Element Not Heating Evenly
If you notice uneven cooking, check for visible build-up or residue on the element. Inspect for cracks or discoloration. Uneven heating often results from poor contact or a failing element. Tighten any loose connections and remove any debris that may block heat flow.
Tripping Circuit Breakers
Frequent tripping of circuit breakers signals a possible electrical issue. Inspect the wiring for damage or loose connections. Avoid overloading the oven with multiple high-power appliances on the same circuit. If the problem persists, schedule a professional inspection to prevent further complications.
Optimizing Oven Performance
Proper Preheating Techniques
You can achieve better cooking results by mastering preheating. Preheating ensures your oven reaches the desired temperature before you place food inside. This step helps you avoid undercooked centers and uneven browning. Many users skip preheating or guess when the oven is ready, which leads to inconsistent results.
To preheat your GE JBP64WOK1WW oven effectively, follow these steps:
- Set the Desired Temperature: Turn the oven dial or use the digital controls to select your recipe’s recommended temperature.
- Wait for the Preheat Indicator: Most GE ovens have a preheat light or beep. Wait for this signal before placing food inside.
- Use an Oven Thermometer: For precise results, place an oven thermometer on the center rack. This tool helps you verify the actual temperature.
- Allow Extra Time for Full Loads: If you plan to bake multiple dishes, give the oven a few extra minutes to recover heat after opening the door.
Tipp: Always preheat your oven for at least 10-15 minutes. For baking bread or pastries, wait until the oven is fully preheated to ensure proper rise and texture.
Proper preheating prevents temperature fluctuations. You get more predictable cooking times and better texture in your dishes. Skipping this step can cause food to cook unevenly or take longer than expected.
Using the Right Cookware
The cookware you choose directly affects oven performance. Materials and shapes influence how heat transfers to your food. Using the right pans helps you achieve even cooking and prevents hot spots.
Consider these cookware guidelines for your GE oven:
- Material Matters:
- Metal pans (aluminum or stainless steel) heat quickly and work well for roasting and baking.
- Glass and ceramic retain heat longer but may require you to lower the oven temperature by 25°F to prevent overbaking.
- Size and Shape:
- Use pans that fit comfortably on the oven rack. Overcrowding restricts airflow and leads to uneven results.
- Shallow pans promote better air circulation, which helps with browning and crisping.
- Color Considerations:
- Dark-colored pans absorb more heat and can brown food faster. Light-colored or shiny pans reflect heat and may require longer baking times.
| Cookware Type | Am besten für | Adjustments Needed |
|---|---|---|
| Aluminum/Steel | Roasting, Baking | Keiner |
| Glass/Ceramic | Casseroles, Baking | Lower temp by 25°F |
| Dark Nonstick | Quick Browning | Check early for doneness |
Anmerkung: Avoid using warped or damaged pans. These can cause uneven heating and may damage the oven racks or element.
Choosing the right cookware and preheating properly ensures your GE JBP64WOK1WW oven delivers consistent, high-quality results every time you cook.
Heating Element FAQs for GE JBP64WOK1WW
How long should a heating element last?
You can expect a typical oven heating element to last between 5 and 10 years. The actual lifespan depends on how often you use your oven and how well you maintain it. Frequent high-temperature cooking or neglecting regular cleaning can shorten the element’s life. If you notice signs like uneven heating, visible damage, or slow preheating, you should inspect the element.
Tipp: Schedule a quick inspection every six months. Early detection of wear or damage helps you avoid sudden failures.
A heating element’s longevity also depends on the quality of the replacement part. Genuine GE parts or reputable aftermarket brands usually offer better durability. If you use your oven daily, you may need to replace the element sooner than someone who cooks less frequently.
Can I use a generic heating element?
You can use a generic heating element if it matches your oven’s specifications. However, you should always check compatibility before purchasing. The replacement must fit the mounting holes, match the wattage, and connect securely to your oven’s wiring.
- Pros of using a generic element:
- Lower cost
- Wider availability
- Nachteile:
- Possible fitment issues
- Shorter lifespan if quality is poor
- May void your oven’s warranty
| Merkmal | Genuine GE Element | Generic Element |
|---|---|---|
| Guaranteed Fit | ✅ | ❓ |
| Garantieumfang | ✅ | ❌ |
| Preis | 💲💲 | 💲 |
Anmerkung: Always compare the part number and physical dimensions. If you feel unsure, contact the manufacturer or a qualified technician for guidance.
What if my oven still doesn’t heat after replacement?
If your oven still does not heat after you install a new heating element, you should troubleshoot further. Several other components can cause heating problems.
- Check these areas:
- Wiring connections: Loose or damaged wires can interrupt power flow.
- Oven thermostat: A faulty thermostat may prevent the element from receiving power.
- Control board: Electronic control failures can stop the oven from heating.
- Thermal fuse or safety switch: These safety devices can cut power if they detect overheating.
If you have checked all connections and the oven still fails to heat, you should consider calling a professional appliance technician. Electrical troubleshooting requires expertise and proper safety precautions.
You can use a multimeter to test for continuity in the wiring and other components. Always disconnect power before performing any electrical tests.
Sicherheitshinweis: Never attempt repairs beyond your comfort level. Professional help ensures your safety and protects your appliance from further damage.
Is it safe to replace the heating element myself?
You can safely replace the heating element in your GE oven if you follow proper procedures and take necessary precautions. Many homeowners choose to handle this repair themselves because it requires only basic tools and minimal technical knowledge. You must understand the risks before you begin.
Tipp: Always read your oven’s manual and review safety instructions before starting any repair.
You face several safety hazards during a DIY heating element replacement. You must address each risk to protect yourself and your home:
- Electrical shock if you do not properly disconnect power.
- Burns from touching a hot element or oven interior.
- Fire hazards from grease buildup or damaged wiring.
- Injuries from sharp edges or debris inside the oven.
- Accidents if you do not allow the oven to cool completely before starting.
You should always disconnect your oven from the power source. Unplug the appliance or switch off the circuit breaker. Wait until the oven cools down before you touch any internal parts. Wear insulated gloves and safety glasses to reduce the risk of injury. Remove any food residue or grease from the oven cavity to prevent fire hazards. Use a flashlight to inspect for sharp edges or loose debris.
If you feel uncertain about any step, you should contact a qualified appliance technician. Professional help ensures your safety and protects your oven from further damage. You must never rush the process or skip safety checks.
| Sicherheitsstufe | Warum es wichtig ist |
|---|---|
| Disconnect power | Prevents electrical shock |
| Allow oven to cool | Avoids burns |
| Clean oven interior | Reduces fire risk |
| Wear protective gear | Shields against cuts and debris |
Anmerkung: You increase your safety by following each step carefully. You also improve the chances of a successful repair.
How do I know if I need a bake or broil heating element?
You must identify which heating element needs replacement to restore your oven’s performance. Your GE oven uses two main elements: the bake element and the broil element. Each serves a different purpose.
The bake element sits at the bottom of the oven. It provides steady heat for baking, roasting, and most cooking tasks. The broil element mounts at the top. It delivers intense heat for broiling, browning, and finishing dishes.
You can determine which element needs attention by observing your oven’s behavior:
- If your oven fails to heat during baking or roasting, you likely need a new bake element.
- If broiling does not work or food does not brown on top, the broil element may be faulty.
- Visible damage, such as cracks or burn marks, on either element signals the need for replacement.
- Uneven cooking or cold spots often point to a failing bake element.
Tipp: Set your oven to bake and observe if the bottom element glows red. Switch to broil and check the top element. If one does not heat, you have found the problem.
You should also consult your oven’s manual for troubleshooting guidance. Use a multimeter to test each element for continuity. Replace only the element that shows signs of failure or damage.
| Problem Observed | Likely Solution |
|---|---|
| Oven not baking evenly | Replace bake element |
| Broil function fails | Replace broil element |
| Visible damage | Replace affected element |
You ensure efficient repairs and restore your oven’s full functionality by identifying the correct heating element.
Heating Element: When to Call a Professional
Anzeichen dafür, dass Sie fachkundige Hilfe benötigen
You can handle many heating element issues on your own, but some situations require a professional’s expertise. Recognizing these signs helps you avoid further damage and ensures your safety.
-
Anhaltende elektrische Probleme
If your oven repeatedly trips the circuit breaker or blows fuses, you face a serious electrical issue. This problem often points to faulty wiring or a malfunctioning control board. You should not attempt to repair these components without proper training. -
Burnt or Damaged Wiring
When you see melted insulation, exposed wires, or burn marks near the heating element terminals, you need expert help. Damaged wiring increases the risk of electrical shock and fire. -
No Power to the Oven
If your oven remains completely unresponsive after you replace the heating element, the problem may involve the main power supply, control board, or internal fuses. These repairs require specialized tools and knowledge. -
Ungewöhnliche Geräusche oder Gerüche
Loud buzzing, popping sounds, or persistent burning odors signal deeper electrical faults. You should stop using the oven immediately and call a technician. -
Repeated Heating Element Failures
If you replace the heating element and it fails again soon after, you may have an underlying issue with the oven’s electrical system or thermostat.
Alarm:
Never ignore signs of electrical damage. Attempting complex repairs without proper training can put you and your home at risk.
Finding a Qualified Appliance Repair Technician
You want a skilled technician who understands GE ovens and can guarantee a safe, lasting repair. Use these steps to find the right professional:
-
Verify Credentials
Look for technicians certified by organizations such as the National Appliance Service Technician Certification (NASTeC) or the Professional Service Association (PSA). Certification shows that the technician has received proper training. -
Check Experience with GE Appliances
Ask if the technician has experience repairing GE ovens, especially your model. Familiarity with the JBP64WOK1WW ensures faster diagnosis and repair. -
Read Service Policies
Review the company’s warranty and service guarantees. Reliable technicians offer clear policies and stand behind their work. -
Request an Estimate
Get a written estimate before work begins. This step helps you avoid unexpected costs. -
Ask About Parts
Confirm that the technician uses genuine or high-quality replacement parts. Using the correct parts protects your oven’s performance and warranty.
| Schritt | Warum es wichtig ist |
|---|---|
| Verify credentials | Ensures technician meets industry standards |
| Check experience | Confirms knowledge of your specific oven model |
| Review policies | Protects you with service guarantees |
| Request estimate | Prevents surprise charges |
| Confirm parts | Maintains oven reliability and safety |
Tipp:
You can find qualified technicians through GE’s official service website, local appliance repair companies, or trusted online directories. Always check reviews and ask for references if you feel unsure.
By recognizing when to call a professional and choosing a qualified technician, you protect your oven and your home. You also ensure that your GE JBP64WOK1WW continues to deliver safe and reliable performance.
Heating Element Preventative Care for GE Oven
Regelmäßiger Inspektionsplan
You can protect your GE JBP64WOK1WW oven from unexpected breakdowns by following a consistent inspection schedule. Regular maintenance improves efficiency and extends the lifespan of your heating element. You should inspect the oven’s interior and heating elements at least every three months. During each inspection, check for signs of wear, such as discoloration, cracks, or burn marks on the element. Remove oven racks and use a flashlight to examine hard-to-see areas. Clean away any food residue or grease that may have accumulated on or near the heating element. Consistent cleaning and maintenance help you avoid costly repairs and ensure your oven operates efficiently.
You should also schedule a professional inspection once a year. A technician can identify hidden issues and verify that all electrical connections remain secure. Combining regular DIY care with professional inspections protects your investment and ensures safe operation for years to come.
Tipp: Set a reminder on your calendar for quarterly inspections. This habit keeps your oven in top condition and reduces the risk of sudden failures.
Tips for Avoiding Future Heating Element Issues
You can minimize the risk of heating element problems by adopting smart preventative measures. Simple habits make a significant difference in your oven’s reliability and performance.
- Regular cleaning prevents grease and food spills from building up on the heating element. Wipe down the oven interior after each use.
- Avoid using the self-cleaning feature. Extreme heat during self-cleaning cycles can damage the heating element and shorten its lifespan.
- Clean or replace drip pans regularly. Dirty or damaged drip pans can cause short circuits and affect heating performance.
- Inspect and maintain door seals. A tight seal keeps heat inside the oven, reducing strain on the heating element.
- Use a surge protector. Power surges can damage electrical components, including the heating element.
- Consider a home warranty. Coverage for unexpected breakdowns provides peace of mind and financial protection.
| Preventative Measure | Nutzen Sie |
|---|---|
| Regular cleaning | Prevents residue buildup |
| Avoid self-cleaning cycles | Reduces risk of element damage |
| Maintain drip pans | Prevents electrical issues |
| Check door seals | Improves heating efficiency |
| Use surge protector | Shields against power surges |
| Home warranty | Covers unexpected repairs |
You should always address minor issues promptly. Replace worn or damaged parts before they affect oven performance. By following these tips, you ensure that your GE oven remains reliable and efficient for years to come.
Anmerkung: Preventative care not only saves you money but also helps you enjoy consistent cooking results every time you use your oven.
You can restore your GE JBP64WOK1WW oven’s performance by following these essential steps:
- Disconnect power and remove oven racks.
- Locate and unscrew the bake element.
- Disconnect wires and remove the old element.
- Attach wires to the new heating element and secure it.
- Replace racks, restore power, and test the oven.
Routine inspections, regular cleaning, and proper temperature management all help extend the lifespan of your appliance.
| Maintenance Practice | Impact on Performance and Reliability |
|---|---|
| Routine inspections | Detects wear and potential failures early |
| Regular cleaning | Enhances heat transfer |
| Proper temperature management | Prolongs lifespan of elements |
Sie gewinnen self-reliance, save money, and enjoy the satisfaction of a successful repair. Consistent maintenance ensures reliable oven performance for years.
FAQ
How often should you inspect your GE oven’s heating element?
You should inspect the heating element every three months. Regular checks help you spot early signs of wear, such as cracks or discoloration. Early detection prevents unexpected failures and keeps your oven running efficiently.
Can you clean the heating element with oven cleaner?
Never spray oven cleaner directly on the heating element.
Use a damp cloth or non-abrasive sponge for cleaning. Harsh chemicals can damage the element and reduce its lifespan.
What should you do if the new heating element does not heat?
Check all wire connections for tightness. Confirm that you installed the correct part. Test the element with a multimeter for continuity. If the problem continues, contact a qualified appliance technician.
Is it safe to use the oven if the heating element has minor discoloration?
Minor discoloration often results from normal use. You can continue using the oven if you see no cracks, blisters, or burn marks. Replace the element if you notice physical damage or uneven heating.
Do you need to preheat your oven every time?
Preheating ensures even cooking and accurate temperatures.
For best results, always preheat your oven before baking or roasting.
Skipping this step can cause uneven results or longer cooking times.
Can you replace the heating element without professional help?
You can replace the heating element yourself if you follow safety steps and use the correct tools. Always disconnect power before starting. If you feel unsure, seek help from a certified technician.

