You can replace a Heizelement in your appliance with a few simple steps. First, always turn off power at the breaker or unplug the unit to prevent electrical shock. Many Heizelemente für Haushaltsgeräte, such as those from Jinzhong Elektroheizung oder andere Hersteller von Heizelementen, come in different types, including open coil, ceramic, and quartz. Loose or damaged wiring during a do-it-yourself job can cause injury, so check connections carefully. Replacing heating element parts yourself saves money and builds confidence.
Signs You Need to Replace Heating Element
Common Symptoms of a Failing Heating Element
No heat or inconsistent heating
You may notice your appliance stops producing heat or delivers it unevenly. Inconsistent heating often signals a problem with the heating element. If you experience cold spots in your home or reduced heat output from your appliance, the heating element could be the culprit. Sometimes, poor airflow or weak heat can also point to a failing blower motor, but these issues frequently relate to the heating element itself. Temperature fluctuations might result from a faulty thermostat, which can eventually lead to heating element failure. If you see these symptoms, consider when to replace heating element parts to restore proper function.
Visible damage or corrosion
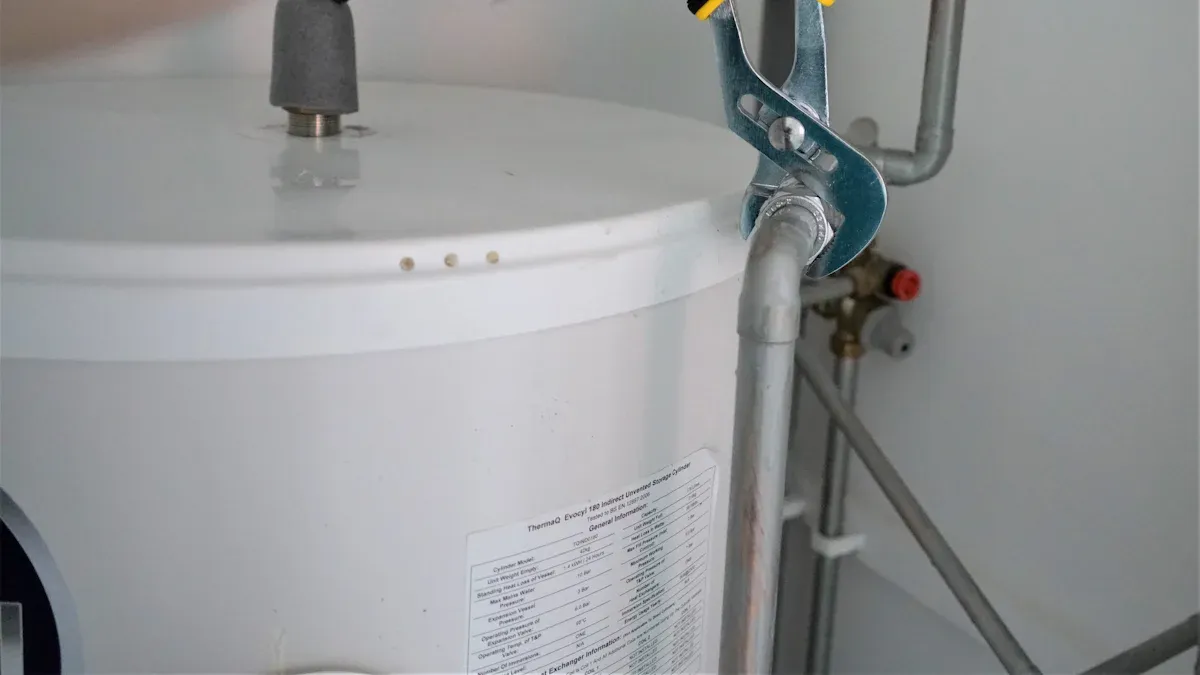
Physical inspection can reveal clear signs of trouble. Look for burn marks, cracks, or blisters on the heating element. Warped or discolored surfaces also indicate damage. Corrosion often appears as rust or pitting, especially in water heaters. These visual cues suggest the element has reached the end of its lifespan. In hard water areas, heating elements in water heaters may last only about five years, while in other locations, you can expect eight to twelve years of service.
Unusual noises or smells
Strange sounds or odors during operation often signal a failing heating element. Listen for buzzing, popping, or humming noises. These sounds may indicate electrical issues or internal damage. Burning odors or chemical-like smells can point to overheating or electrical faults. If you detect any of these warning signs, act quickly to prevent further damage or safety hazards.
Tipp: Regularly check your appliance for these symptoms to catch problems early and avoid unexpected breakdowns.
| Sign of Failure | Beschreibung |
|---|---|
| Sichtbare Schäden oder Korrosion | Look for burn marks, cracks, or blisters on the heating element. |
| Seltsame Geräusche | Listen for buzzing, popping, or humming sounds during operation. |
| Unusual Smells | Detect burning odors or chemical-like smells indicating potential hazards. |
| Warped or Discolored Surfaces | Check for warped, melted, or discolored areas on the heating element. |
| Elektrische Probleme | Be aware of tripped breakers or other electrical faults related to the element. |
How to Test a Heating Element
Using a multimeter for continuity
You can use a multimeter to test the heating element for continuity. Set the multimeter to the continuity or resistance setting. Disconnect the appliance from power. Touch the probes to the terminals of the heating element. If the multimeter shows a reading within the recommended range, the element works properly. A reading of zero or infinite resistance means the element has failed and needs replacement. This simple test helps you confirm the need for replacing heating element parts.
Visual inspection tips
Before testing, always disconnect power to the appliance. Remove any covers or panels to access the heating element. Inspect the element for visible signs of damage, such as cracks, blisters, or corrosion. Check for melted or discolored areas. If you see any of these issues, the element likely needs replacement. Regular inspections help you maintain your appliance and extend its lifespan.
Anmerkung: The typical lifespan of a water heater is about ten years, but heating elements may fail sooner, especially in areas with hard water.
Safety Steps Before Replacing Heating Element
Before you begin replacing a heating element, you must prioritize safety. Electrical appliances can pose serious risks if you do not follow proper procedures. Taking the right precautions protects you from injury and ensures a smooth repair process.
Elektrische Sicherheitsvorkehrungen
Turning off power at the breaker or unplugging
You should always disconnect your appliance from its power source before starting any work. Locate the circuit breaker that controls the appliance and switch it off. If your appliance plugs into an outlet, unplug it completely. Never rely on just turning off the appliance’s control panel. This step eliminates the risk of electrical shock while you handle internal components.
Checking for residual electricity
After disconnecting the power, you need to confirm that no electricity remains in the appliance. Use a multimeter to test for voltage at the terminals where you will work. Even after unplugging, some appliances can retain a small charge. Always verify the unit is de-energized before touching any wires or terminals. This extra check can prevent accidental shocks.
Tipp: Clear your workspace of clutter and flammable materials before you begin. Inspect your tools for any damage to avoid unexpected hazards.
| Sicherheitsvorkehrungen | Beschreibung |
|---|---|
| Creating a Safe Workspace | Clear clutter and flammable materials; inspect tools for damage. |
| Disconnecting from Power Source | Always disconnect power and verify the unit is de-energized before starting work. |
| Using Personal Protective Equipment (PPE) | Wear insulated gloves and safety glasses to protect against electrical shock and burns. |
Personal Safety Tips
Wearing gloves and safety glasses
You should always wear insulated gloves and safety glasses when working with heating elements. Gloves protect your hands from electrical shock and accidental burns. Safety glasses shield your eyes from sparks, debris, or sudden electrical discharges. Personal protective equipment (PPE) forms a critical barrier between you and potential hazards.
Working in a dry, well-lit area
Choose a workspace that is dry and well-lit. Moisture increases the risk of electrical shock. Good lighting helps you see small parts and connections clearly, reducing the chance of mistakes. Never work in damp conditions or near water sources.
Common personal safety hazards during heating element replacement include:
- Burns from accidental contact with hot surfaces.
- Fire risks due to improper handling of heating elements.
- Electrical shocks from live wires or faulty connections.
- Explosions if flammable chemicals are present near the work area.
- Equipment issues, especially with devices like hotplates or Bunsen burners.
Anmerkung: Never use or store flammable chemicals around heating elements. Always elevate heating devices to allow for immediate heat removal. Do not leave heating elements unattended. Inspect any glassware for cracks and ensure it is heat resistant. Avoid using space heaters in laboratory environments.
By following these safety steps, you protect yourself and your home. Careful preparation and attention to detail make the replacement process safer and more efficient.
Tools and Materials for Replacing Heating Element
Wichtige Werkzeuge für die Arbeit
When you prepare for replacing heating element parts, you need the right tools to ensure a safe and efficient process. Professional technicians rely on specific equipment to handle heating elements in appliances. You can achieve similar results by gathering these essential items before you start.
Screwdrivers (Phillips and flathead)
You should keep both Phillips and flathead screwdrivers in your toolkit. These tools help you remove panels, access the heating element, and loosen terminal screws. Choose screwdrivers with insulated handles to reduce the risk of electrical shock.
Wrenches or socket set
A wrench or socket set allows you to loosen and tighten nuts or bolts that secure the heating element. Select a set with multiple sizes to match different fasteners. Many professionals use brands like Fusion Tools and ProToolsNow for durability and precision.
Multimeter
A multimeter helps you test the heating element for continuity and voltage. You can quickly identify faulty components and confirm that the appliance is safe to work on. Models from EDTM Meters and Yellotools offer reliable readings and easy operation.
Garden hose (for water heaters)
If you replace a heating element in a water heater, you need a garden hose to drain the tank. Attach the hose to the drain valve and direct water to a safe location. This step prevents spills and protects your workspace.
Tipp: Organize your tools before you begin. Place them within easy reach to avoid interruptions during the repair.
Here is a table summarizing the most frequently used professional tools and brands for heating element replacement:
| Werkzeug-Typ | Gängige Marken | Typical Use |
|---|---|---|
| Schraubendreher | Olfa, Tri-Edge | Removing panels and screws |
| Wrenches/Socket | Fusion Tools, ProToolsNow | Loosening nuts and bolts |
| Multimeter | EDTM Meters, Yellotools | Testing continuity and voltage |
| Heat Gun Element | Fusion Max Flux, Leister | Specialized heating element replacement |
Ersatzteile und Verbrauchsmaterial
You need the correct replacement parts and supplies to complete the job successfully. Choosing compatible components ensures your appliance works efficiently after the repair.
Finding the right heating element
Identify the exact model and specifications of your appliance before purchasing a new heating element. You can check the manufacturer’s label or user manual for details. Many professionals recommend using OEM (original equipment manufacturer) parts for best results. If you wonder where to buy heating element parts, local hardware stores and online retailers offer a wide selection. Search by appliance model number to guarantee compatibility.
Gaskets, seals, and Teflon tape
You should replace gaskets and seals whenever you install a new heating element. These components prevent leaks and maintain a tight fit. Use Teflon tape on threaded connections to improve the seal and reduce the risk of water or air escaping. Always inspect old gaskets for wear and choose replacements that match your appliance’s specifications.
Anmerkung: Keep extra gaskets and Teflon tape on hand. These supplies help you address unexpected issues during installation.
Where to Buy the Right Heating Element
Finding the right heating element for your appliance requires careful consideration. You want to ensure compatibility, quality, and value. You have several options for sourcing replacement parts, each with unique advantages.
Local Hardware and Appliance Stores
What to ask for at the counter
When you visit a local hardware or appliance store, you should ask for heating elements by specifying your appliance brand and model. Staff can guide you to the correct part and answer technical questions. You can request genuine OEM parts for brands like Whirlpool, Kenmore, or Frigidaire. Reliable Parts stands out as a trustworthy source for these major brands, offering a wide selection of heating elements that help maintain your appliance’s performance.
Checking compatibility with your model
You need to check the compatibility of the heating element with your appliance model. Bring your old part or note the model number. Store associates can match the specifications and confirm fit. Inspecting the product in person allows you to verify quality and avoid mistakes. You also benefit from expert guidance, which can simplify the process of replacing heating element components.
Tip: Always double-check the part number and compare it with your appliance’s manual before making a purchase.
Online Retailers for Heating Elements
Searching by appliance model number
Online retailers offer a convenient way to shop for heating elements. You can search by your appliance’s model number to find compatible parts. Most websites provide detailed product descriptions and technical specifications. You often see lower prices and frequent discounts compared to local stores.
Reading reviews and ratings
Before you buy, read product reviews and ratings. These insights help you assess quality and reliability. Online shopping gives you access to a wider selection, but you should pay attention to return policies. Approximately 30% of online purchases are returned, while only 9% of in-store purchases face returns. You want to minimize the risk of buying the wrong part.
- Prices for heating elements range from $9 to $95.
- Most homeowners spend between $13 and $60 for replacements.
- Online shopping offers lower prices and discounts.
- Local stores allow product inspection and provide expert guidance.
- Higher quality products at local stores may offer better long-term value.
Note: In 2017, 85% of retail purchases in the U.S. occurred in physical stores. More than 70% of consumers prefer shopping at brick-and-mortar locations.
Ordering Direct from Manufacturer
Benefits of OEM parts
Ordering directly from the manufacturer ensures you receive genuine OEM parts. Manufacturers guarantee product quality and offer customization options for specific needs. You gain access to skilled labor and regional certifications, such as ISO 9001 and CE, which enhance trust.
| Advantage | Beschreibung |
|---|---|
| Qualitätssicherung | Manufacturer guarantees product quality. |
| Anpassungsoptionen | Tailored solutions for specific requirements. |
| Better Pricing | Lower costs for bulk orders. |
| Integrated Supply Chains | Reduced lead times and logistics costs. |
| Specialized Labor Pools | Skilled labor for custom designs. |
| Regional Certifications | Compliance with standards like ISO 9001 and CE. |
Warranty and return policies
Manufacturers often provide robust warranty and return policies. You can resolve issues quickly and ensure long-term satisfaction. Always review these policies before placing an order.
Tip: If you need specialized heating elements or large quantities, ordering direct from the manufacturer may offer the best value and support.
Step-by-Step Guide: How to Replace Heating Element
Replacing a heating element requires careful preparation and attention to detail. You can follow these steps to ensure a safe and successful installation.
Preparation and Setup
Disconnecting power and water supply
Start by disconnecting the power supply. Locate the circuit breaker for your appliance and switch it off. If your unit uses a plug, remove it from the outlet. For water heaters or similar appliances, turn off the water supply valve. This step prevents electrical hazards and water leaks.
Draining the appliance (if needed)
If you work with a water heater or any appliance that holds water, drain it before you proceed. Attach a garden hose to the drain valve and direct the water to a safe location. Open a hot water tap to allow air into the system and speed up draining. This process protects your workspace from spills and makes the job easier.
Clearing your workspace
A clean and organized workspace reduces the risk of accidents. Remove any racks, trays, or obstacles from the area. Lay out your tools and parts so you can reach them easily. Use the table below to review the most critical preparatory steps:
| Preparation Step | Importance |
|---|---|
| Clear workspace | Reduces clutter and risk of accidents |
| Organize tools | Saves time and minimizes mistakes |
| Disconnect power | Prevents electrical hazards |
| Remove racks/trays | Protects appliance and provides space |
| Drain or disconnect | Avoids leaks and safety risks |
Tip: Take a photo of the appliance before you begin. This reference helps you reassemble everything correctly.
Entfernen des alten Heizelements
Accessing the element safely
Remove the access panel or cover to reach the heating element. Use a screwdriver or wrench as needed. Always check for any remaining voltage with a multimeter before touching wires or terminals. If you see insulation or wiring in the way, move it aside carefully.
Loosening and removing fasteners
Locate the screws, bolts, or nuts that secure the heating element. Loosen them with the appropriate tool. Keep all fasteners in a small container so you do not lose them. Gently pull the old heating element out of its housing. If you notice any corrosion or debris, clean the area before installing the new part.
Environmental Note:
These units contain refrigerants and other materials that can be harmful if released into the atmosphere or improperly handled, posing significant environmental and health risks. Always dispose of old heating elements at a certified recycling center.
Einbau des neuen Heizelements
Positioning and securing the new element
Insert the new heating element into the opening. Make sure it sits flush and aligns with the mounting holes. Secure it with the original fasteners. Do not overtighten, as this can damage the threads or the element itself.
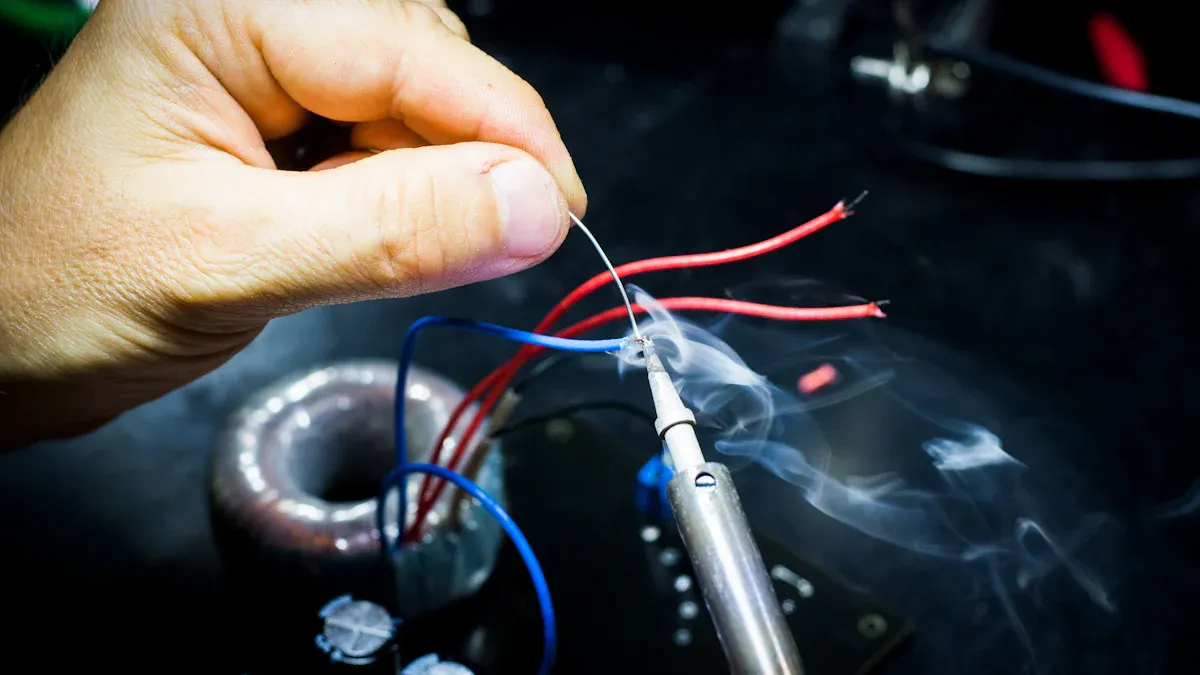
Reconnecting wires or terminals
Attach the wires or terminals to the new heating element. Match each wire to its correct terminal, following your photo or the manufacturer’s diagram. Tighten the connections firmly to ensure good contact. Loose wires can cause poor performance or electrical hazards.
Using Teflon tape and checking gaskets
Wrap Teflon tape around any threaded connections to prevent leaks. Inspect the gasket or seal and replace it if worn or damaged. A proper seal keeps water or air from escaping and protects your appliance.
⚠️ Common mistakes during installation can lead to system failure or safety hazards. Here are some errors you should avoid:
- Not properly sizing the heater.
- Ignoring safety guidelines.
- Failing to properly connect ductwork.
- Not installing a well-planned drainage system.
- Misplacement of the thermostat or air vents.
- Skipping resistance and continuity checks.
- Using the wrong circuit type.
- Sensor wire errors.
- Power connected too early.
- Inconsistent wire spacing for cable systems.
Take your time and double-check each step. If you wonder how to replace heating element parts safely, following these guidelines will help you achieve reliable results.
Testing After Replacing Heating Element
After you replace heating element parts in your appliance, you need to verify that everything works correctly. Proper testing ensures safety and confirms that your repair was successful. You should follow a systematic approach to restore power and water, then check for leaks or electrical issues.
Restoring power and water
You must restore power and water to your appliance before you begin testing. Follow these steps to ensure a safe and effective process:
-
Reconnect the Power Source
Switch the circuit breaker back on or plug the appliance into the outlet. Confirm that the power indicator lights up or the control panel activates. -
Turn On the Water Supply
Open the water valve slowly. Watch for any immediate leaks around the heating element or connections. -
Monitor the Appliance
Allow the appliance to run for several minutes. Listen for normal operating sounds. Observe the heating cycle to confirm that the element activates. -
Check for Proper Heating
Use the appliance as intended. For ovens, set a moderate temperature and wait for preheating. For water heaters, run a hot water tap and measure the temperature after a few minutes.
Tip: Always stand clear of the appliance during the initial power-up. If you notice sparks, smoke, or unusual noises, turn off the power immediately and inspect your work.
Checking for leaks or electrical issues
Once you restore power and water, you need to check for leaks and electrical problems. These checks help you catch issues early and prevent damage.
-
Inspect for Water Leaks
Look closely at the area around the heating element. Check gaskets, seals, and threaded connections. If you see drips or moisture, tighten connections or replace faulty seals. -
Test for Electrical Safety
Use a multimeter to measure voltage at the terminals. Confirm that the readings match the manufacturer’s specifications. If you detect abnormal voltage or resistance, disconnect power and review your wiring. -
Observe for Unusual Signs
Watch for flickering lights, tripped breakers, or burning smells. These symptoms may indicate electrical faults or improper installation. -
Verify Heating Performance
Measure the temperature output. For ovens, use an oven thermometer. For water heaters, check the water temperature at the tap. Consistent heating shows that the new element works as intended.
Here is a table summarizing the recommended procedures for testing appliances after you replace heating element parts:
| Schritt | Action Description |
|---|---|
| Reconnect Power | Restore electricity and check for normal operation |
| Turn On Water Supply | Open valve and inspect for leaks |
| Visuelle Inspektion | Look for damage, blisters, or cracks |
| Multimeter Testing | Measure voltage and resistance at terminals |
| Performance Check | Confirm heating function and temperature output |
Note: If you find persistent leaks or electrical issues, you should consult a licensed technician. Safety must remain your top priority during every step of the process.
Troubleshooting After You Replace Heating Element
New Element Won’t Fit or Work
Verifying part numbers and compatibility
You may find that the new heating element does not fit or function as expected. Start by checking the part number on the replacement element. Compare it with your appliance’s manual or the old part. Manufacturers often use specific models for each appliance, so even a small difference can cause issues. If you notice a mismatch, return the part and request one that matches your appliance’s requirements. Always confirm compatibility before installing to avoid unnecessary frustration.
Adjusting installation steps
If the part number matches but the element still will not fit, review your installation steps. Sometimes, a minor adjustment can solve the problem. Follow this troubleshooting checklist to ensure proper installation:
- Disconnect the appliance from the power source.
- Remove any panels or covers that block access to the heating element.
- Inspect the mounting area for debris or corrosion.
- Align the new element carefully with the mounting holes.
- Secure all fasteners without overtightening.
- Reconnect wires, ensuring each terminal matches the original setup.
- Double-check the power cord and terminal block for loose connections.
- Test the element with a multimeter for continuity.
- Clean the interior to prevent airflow obstruction.
- Check ventilation for blockages.
Tip: If you still experience issues after these steps, consult your appliance’s manual or contact customer support for guidance.
Appliance Still Not Heating
Double-checking connections
If your appliance does not heat after replacing heating element parts, inspect all electrical connections. Loose or improperly attached wires can prevent the element from working. Use a multimeter to verify that electricity flows to the element. Examine the power cord and terminal block for signs of wear or damage. Replace any faulty components to restore proper function.
Testing other components
Sometimes, the heating element is not the only issue. Other components, such as relays, switches, or the blower motor, may cause heating problems. Use a multimeter to test relays and switches for continuity. If you have a forced-air system, check the blower motor and air returns. The table below highlights common causes of continued heating issues:
| Ursache | Erläuterung |
|---|---|
| Duct Leaks | Duct leaks can account for 20% to 30% of lost heated air, reducing system efficiency. |
| Blower Motor Issues | A malfunctioning blower motor may not circulate air properly, leading to inadequate heating. |
| Blocked Air Returns | Insufficient or blocked air returns decrease air pressure and affect heating performance. |
Note: Persistent heating issues may indicate a larger problem, such as duct leaks or blower motor failure, rather than a faulty heating element.
Leaks or Electrical Problems
Inspecting seals and wiring
After installing a new heating element, you might notice leaks or electrical issues. Inspect all seals and gaskets for proper placement. Tighten any loose connections and replace worn gaskets. Examine wiring for frays, burns, or loose terminals. Addressing these issues early helps prevent water heater problems and protects your appliance from further damage.
When to call a professional
If you continue to experience leaks, electrical faults, or if the appliance still does not heat, consider calling a licensed technician. Some problems require specialized tools or expertise. A professional can diagnose complex issues and ensure your appliance operates safely.
Tips for a Smooth DIY Replacing Heating Element Experience
Staying Organized During the Project
Keeping track of screws and small parts
You can prevent frustration and mistakes by keeping track of every screw, nut, and small part during your project. Place removed fasteners in a labeled container or magnetic tray. Label wires and connectors as you disconnect them. This habit helps you avoid confusion when you reassemble the appliance. Many professionals recommend organizing your workspace before you begin. You should create a printed checklist to confirm that all tools and materials are ready. Organizing tools before starting the job saves time and reduces stress.
Here is a simple table to help you visualize an organized setup:
| Werkzeug/Material | Standort | Ready to Use? |
|---|---|---|
| Elementschlüssel | Tool tray | ✅ |
| Multimeter | Tool tray | ✅ |
| Gartenschlauch | Floor, coiled | ✅ |
| Towels & Rags | Nearby surface | ✅ |
Tipp: Label wires and small parts as you remove them. This step makes reassembly much easier and prevents costly errors.
Taking photos before disassembly
You should take clear photos of your appliance before you start disassembly. Use your phone or a digital camera to capture the wiring layout, screw locations, and overall setup. These images serve as a valuable reference when you put everything back together. If you encounter unexpected issues, you can compare your photos to the manufacturer’s diagrams. This strategy reduces the risk of incorrect wiring or misplaced components.
Avoiding Common Mistakes When You Replace Heating Element
Not forcing parts into place
You must avoid forcing any part into position. Heating elements and connectors should fit smoothly. If you encounter resistance, double-check the alignment and part number. Forcing parts can damage threads, seals, or the element itself. You should always match the replacement part to your appliance’s specifications. Using off-brand or generic parts often leads to poor fit and repeat failures. OEM parts provide the best performance and reliability.
Double-checking compatibility before installation
You need to verify compatibility before installing a new heating element. Always check the model number of your appliance and compare it to the replacement part. Guessing or assuming can result in wasted time and money. Skipping the diagnosis is another common mistake. You should confirm that the heating element is the actual problem before replacing it. Sometimes, a faulty thermostat, fuse, or power supply causes heating issues.
Here are the most frequent mistakes DIY homeowners make:
- Not checking the model number.
- Skipping the diagnosis.
- Forgetting to disconnect power or water.
- Using off-brand or generic parts.
- Not installing the part correctly.
⚠️ Always disconnect power and water before you begin. This step protects you from electric shock and water damage.
By staying organized and avoiding these mistakes, you increase your chances of a successful DIY heating element replacement. Careful planning and attention to detail help you achieve professional results at home.
You can replace a heating element by following these essential steps:
- Schalten Sie den Leistungsschalter aus und ziehen Sie den Stecker des Geräts.
- Remove racks or panels to access the element.
- Schrauben Sie das alte Element ab und trennen Sie es.
- Attach and secure the new element.
- Reconnect power and test the appliance.
| Sicherheitsvorkehrungen | Beschreibung |
|---|---|
| Wear insulated gloves | Protects your hands from electrical shock. |
| Avoid touching exposed metal | Prevents accidental electrocution. |
| Replace screws in exact positions | Ensures safe and proper assembly. |
If you feel unsure at any point, consult a professional. With patience and preparation, you can build confidence and enjoy the satisfaction of a successful DIY repair.
FAQ
How often should you replace a heating element?
You should replace a heating element when you notice signs of failure, such as no heat or visible damage. Most elements last between five and twelve years, depending on usage and water quality.
Can you replace a heating element without professional help?
You can replace a heating element yourself if you follow safety steps and use the correct tools. Always disconnect power and water before starting. If you feel unsure, contact a licensed technician.
Welches Werkzeug wird für den Heizelementwechsel benötigt?
You need screwdrivers, a wrench or socket set, a multimeter, and possibly a garden hose for water heaters. Organize your tools before you begin for a smoother process.
How do you know if the new heating element is working?
You should restore power and water, then test the appliance. Check for proper heating, listen for normal sounds, and inspect for leaks. Use a multimeter to confirm electrical connections.
What should you do if the appliance still does not heat?
You should double-check all connections and test other components, such as relays or thermostats. If the problem continues, consult your appliance manual or call a professional.
Are there risks if you install the wrong heating element?
You risk damaging your appliance or causing electrical hazards if you install an incompatible heating element. Always verify the part number and model before installation.
Where can you buy a reliable replacement heating element?
You can buy heating elements at local hardware stores, online retailers, or directly from the manufacturer. Always check compatibility and read reviews before purchasing.
What safety gear should you wear during replacement?
You should wear insulated gloves and safety glasses. Work in a dry, well-lit area to reduce the risk of electrical shock and injury.

