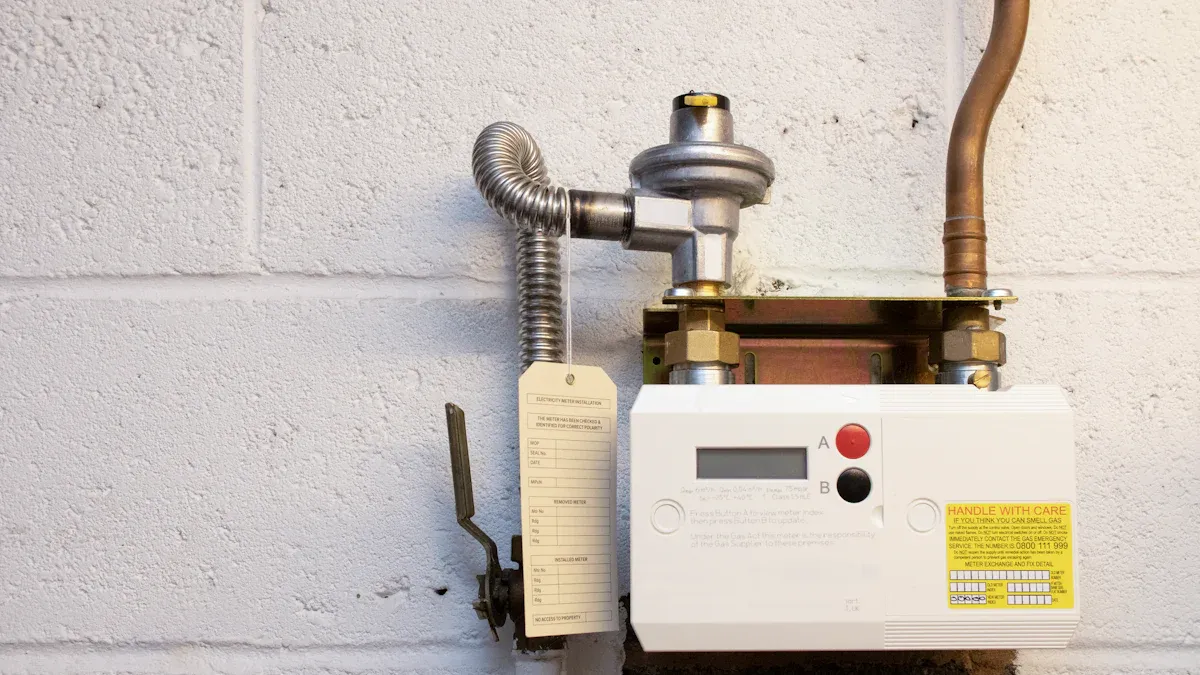
If your whirlpool water heater fails to deliver hot water, you likely feel frustrated. Many homeowners experience issues with their whirlpool water heater, such as no hot water, leaks, faulty elements, or thermostat malfunctions. These common electric water heater problems can disrupt your daily routine. You can start troubleshooting your whirlpool hot water heater by identifying the symptoms. Some whirlpool water heater issues require a simple fix, while others may need professional attention. Addressing whirlpool hot water heater problems early prevents further damage and restores reliable hot water.
- No hot water
- Leaks from the heater or connections
- Faulty heating elements
- Thermostat issues
Whirlpool Hot Water Heater: No Hot Water
When your whirlpool water heater stops producing hot water, you need to act quickly. Several issues can cause your whirlpool hot water heater to fail, from electrical problems to faulty parts. Understanding the most common causes helps you troubleshoot and restore your hot water supply.
Checking Power Supply to Your Whirlpool Water Heater
A lack of power is a frequent reason your whirlpool hot water heater does not work. You should always start by checking the power supply before moving on to other parts.
Resetting the Circuit Breaker for the Hot Water Heater
Locate your home’s electrical panel and find the breaker labeled for your electric water heater. If the breaker has tripped, switch it off and then back on. This simple step often restores power to your whirlpool water heater. If the breaker trips again, you may have a deeper electrical issue or a problem with internal water heater parts.
⚡ Tip: Always press the reset button on your whirlpool hot water heater after restoring power. This can resolve minor electrical glitches.
Inspecting Power Cord and Electrical Connections
Inspect the power cord and all visible electrical connections on your whirlpool water heater. Look for signs of wear, loose wires, or burned areas. Damaged cords or connections can prevent your heater from working and may require replacement. If you see any damage, turn off the power at the breaker before touching any parts.
Testing Whirlpool Hot Water Heater Elements
The heating element is a critical part of your whirlpool hot water heater. If the element fails, you will not get hot water. Testing the element helps you determine if you need a replacement.
Using a Multimeter to Test the Element
You need a multimeter to check the element in your electric water heater. Follow these steps:
- Turn off the circuit breaker for your whirlpool water heater.
- Remove the access panel and insulation to expose the element terminals.
- Disconnect the wires from the element.
- Set your multimeter to the lowest ohms setting.
- Place the probes on the two screws of the element.
- A reading between 10 and 30 ohms means the element works. A reading of “OL” or zero means you have a bad heating element and need a replacement.
- Repeat the process for both upper and lower elements if your heater has two.
🛠️ Note: Always press the reset button after replacing or testing any parts to ensure the system resets properly.
Identifying Signs of a Faulty Element
You can often spot a failing whirlpool hot water heater element by watching for these symptoms:
- No hot water or inconsistent hot water from your heater.
- Higher energy bills as your whirlpool water heater works harder.
- Unusual noises, such as popping or hissing, from the tank.
- Sediment buildup around the element, causing overheating.
- Visible mineral deposits on the element during inspection.
Loose wiring or thermostat issues can mimic element problems, so check these parts before replacing the element. Dry firing, which happens when you power the heater before the tank is full, can also cause immediate element failure.
Replacing a Whirlpool Water Heater Element
If you confirm a faulty element, you need to replace it. Gather the right parts and tools before starting the replacement process.
Tools and Parts Needed for Element Replacement
You will need the following parts and tools:
- Replacement element that matches your whirlpool water heater’s voltage and wattage.
- Gasket for sealing the element.
- Screwdriver and pliers.
- Multimeter for testing.
- Garden hose for draining the tank.
- Teflon tape or plumber’s tape for sealing threads.
- Access to the correct water heater parts for your specific model.
Step-by-Step Guide to Replacing the Element
Follow these steps for a safe and effective replacement:
- Open a hot water faucet and let the water run until cool.
- Turn off the cold water supply to your whirlpool water heater.
- Attach a garden hose to the drain valve and place the other end in a safe drainage area.
- Open the drain valve and a hot water faucet to drain the tank completely.
- Remove the access panel and insulation to reach the element.
- Disconnect the wires from the element.
- Use the correct tool to unscrew and remove the old element.
- Clean the tank opening threads and lubricate the new gasket.
- Install the new element and tighten it securely.
- Reconnect the wires, making sure all connections are tight.
- Close the drain valve and refill the tank by opening the cold water supply.
- Remove the aerator from the nearest hot water faucet and let water run for three minutes to purge air.
- Check for leaks around the new element and gasket.
- Replace the insulation and access panel.
- Restore power at the circuit breaker only after the tank is full.
- Press the reset button to complete the process.
🔧 Important: Never turn on the power until the tank is full of water. Dry firing can destroy the new element and void your warranty.
Many whirlpool water heater problems stem from neglected maintenance or worn-out parts. Mineral buildup inside the tank can insulate water from heat, reducing efficiency and causing element failure. Annual flushing and regular inspection of water heater parts help prevent these issues. If your whirlpool hot water heater continues to fail after replacing the element, you may need to check other parts or consider a full replacement.
Whirlpool Hot Water Heater Thermostat Problems
A malfunctioning thermostat in your Whirlpool water heater can disrupt your daily routine and leave you without reliable hot water. The thermostat controls the temperature of the water inside your heater. If it fails, you may notice water that is too cold, too hot, or fluctuates unpredictably. Addressing thermostat issues quickly helps you maintain consistent performance from your Whirlpool hot water heater.
Testing the Thermostat
You can test the thermostat in your Whirlpool water heater with a few basic tools and safety precautions. Diagnosing thermostat problems early prevents further damage to your heater and ensures you get hot water when you need it. Follow these steps to test the thermostat:
- Turn off the power supply to your Whirlpool water heater at the circuit breaker. This step protects you from electrical shock.
- Use a voltage tester to confirm that no electricity flows to the heater.
- Remove the access panels on your Whirlpool water heater to locate both the upper and lower thermostats.
- Set your multimeter to measure resistance (ohms).
- Place the probes on the thermostat terminals. A working thermostat should show zero ohms, indicating continuity.
- If the thermostat shows no continuity, you have a bad thermostat and need to replace it.
- After testing, press the reset button on the upper thermostat to clear any temporary glitches.
- Schedule regular inspections and flush the tank periodically to prevent future electrical issues.
⚠️ Safety Tip: Always verify the power is off before you touch any electrical components inside your Whirlpool water heater.
If you find that the voltage at the thermostat terminals is correct but your heater still does not produce hot water, suspect a burned-out upper element. In this case, check the element and replace it if necessary. Always ensure the tank is full before restoring power to avoid damaging the new element.
Adjusting or Replacing the Thermostat
If your Whirlpool water heater produces inconsistent hot water or fails to reach the desired temperature, you may need to adjust or replace the thermostat. Begin by adjusting the temperature setting. Most Whirlpool models allow you to set the thermostat between 120°F and 140°F. Use a flathead screwdriver to turn the dial to your preferred temperature.
If adjusting the thermostat does not resolve the issue, replacement may be necessary. Here is how you can replace the thermostat in your Whirlpool water heater:
- Turn off the power at the circuit breaker.
- Remove the access panel, insulation, and plastic cover to expose the thermostat.
- Disconnect the wires from the thermostat, noting their positions for reassembly.
- Remove the old thermostat and install the new one, ensuring it fits snugly against the tank.
- Reconnect the wires and replace the insulation and access panel.
- Restore power and test the heater for proper operation.
🔧 Note: Always check that the water heater tank is full before turning the power back on. Running the heater with an empty tank can damage the element and thermostat.
Regular maintenance, such as flushing the tank and inspecting electrical components, extends the life of your Whirlpool water heater. If you continue to experience problems after replacing the thermostat, consider consulting a professional. Persistent issues may indicate deeper electrical faults or aging components in your heater.
Whirlpool Water Heater Leaking
A water heater leak in your home can cause significant damage if you do not act quickly. When you notice water pooling around your whirlpool water heater, you need to identify the source and determine the best solution. Leaks can come from several parts of the heater, and some issues require immediate replacement of the unit.
Identifying the Source of the Leak in Your Hot Water Heater
Checking the Tank for Leaks
Start by turning off the power supply to your whirlpool water heater. For electric models, switch off the breaker. For gas models, turn off the gas supply. Dry the area around the heater with paper towels. This step helps you spot new moisture and pinpoint the leak location. Inspect the tank walls for rust, corrosion, or pinhole leaks. Corroded tank walls often cause persistent leaks and signal the need for replacement. If you see water dripping from the bottom or rust stains, the tank itself may have failed.
Inspecting Valves, Fittings, and Connections
Next, check all threaded connection points, including the temperature and pressure (T&P) relief valve, drain valve, and water supply lines. Press a dry towel against each fitting to detect moisture. Tighten any loose connections with a wrench. Examine the T&P valve for drips, which may indicate high water pressure or thermal expansion. Inspect flexible supply pipes, as leaks here can mimic tank leaks. If you find corrosion or water around these parts, you may need to replace the affected water heater parts.
💡 Tip: Regular maintenance, such as flushing sediment from the tank, helps prevent leaks and extends the life of your whirlpool water heater.
Fixing Common Whirlpool Hot Water Heater Leaks
Tightening Connections and Fittings
Loose fittings and connections are frequent sources of leaks in whirlpool water heaters. Use a wrench to tighten the hot and cold water inlet and outlet connections. If the leak persists, turn off the water supply and remove the threaded connections. Clean the threads and gaskets, then apply plumber’s tape before re-tightening. This process often resolves minor leaks without replacing major parts.
Replacing Faulty Valves or Gaskets
If tightening does not stop the leak, inspect the T&P valve, drain valve, and gaskets. Replace any faulty valves or worn gaskets with new water heater parts. Always shut off power and water before starting repairs. Drain the tank to reduce water loss during the process. If you feel unsure about replacing these parts, contact a professional plumber for assistance.
⚠️ Safety Alert: Wear protective gloves and safety goggles when working on your whirlpool water heater to avoid injury.
When a Leak Means Replacing Your Whirlpool Water Heater
Some leaks signal that you need a full replacement. Cracks or corrosion in the tank cannot be repaired reliably. If you notice unexplained water pooling under the heater or if leaks continue after replacing valves and gaskets, you should replace the water heater. Frequent repairs or a unit older than ten years also suggest that replacement is more cost-effective. Newer whirlpool models offer improved energy efficiency and enhanced safety features. Always consult a professional if you cannot identify the source of the leak or if you suspect tank failure.
Inconsistent Water Temperature in Whirlpool Hot Water Heater
Inconsistent water temperature in your whirlpool water heater can disrupt your daily routine and signal underlying issues. You may notice sudden bursts of cold water or fluctuating temperatures during showers. Understanding the root causes helps you restore reliable hot water and extend the life of your heater.
Diagnosing Temperature Fluctuations in Your Water Heater
Several factors can cause your whirlpool water heater to deliver inconsistent temperatures. You need to identify the source before you can apply the right solution.
Thermostat Calibration and Settings
A misaligned or malfunctioning thermostat often leads to temperature swings in your whirlpool water heater. If the thermostat does not accurately sense the water temperature, it may shut off the element too soon or allow the water to overheat. You should check the thermostat settings and ensure they match your household’s needs. Most experts recommend setting the thermostat to 120°F for safety and efficiency. If you notice that the temperature fluctuates even after adjusting the settings, the thermostat may require calibration or replacement.
🔎 Tip: Regular thermostat calibration ensures your whirlpool water heater maintains a stable temperature and prevents scalding or lukewarm water.
Sediment Buildup Affecting the Element
Sediment buildup inside your whirlpool water heater tank can create a barrier between the heating element and the water. Minerals like calcium and magnesium settle at the bottom, forming an insulating layer. This insulation forces the heater to work harder, causing uneven heating and temperature fluctuations at your faucets. Sediment also reduces the effective capacity of your tank, so you may run out of hot water faster than expected. You might hear rumbling or popping noises as trapped air escapes through the sediment layer.
- Common causes of inconsistent water temperature in whirlpool water heaters:
- Malfunctioning or misaligned thermostat
- Sediment buildup inside the tank
- Undersized heater for your household demand
- Faulty temperature control valve
- Damaged dip tube allowing cold water to mix with hot water
- Simultaneous use of multiple appliances
Solutions for Whirlpool Water Heater Temperature Issues
Once you identify the cause, you can take steps to restore consistent hot water from your whirlpool water heater.
Flushing the Tank to Remove Sediment
You should flush your whirlpool water heater tank at least once a year to remove sediment and maintain efficiency. Flushing helps restore proper heat transfer between the element and the water, reducing temperature fluctuations and energy consumption.
Steps to flush your tank:
- Turn off the power to your heater at the circuit breaker.
- Attach a garden hose to the drain valve at the bottom of the tank.
- Open a hot water faucet in your home to allow air into the system.
- Open the drain valve and let the water flow until it runs clear.
- Close the valve, remove the hose, and refill the tank before restoring power.
💧 Note: Regular flushing prevents sediment buildup and extends the life of your whirlpool water heater.
Adjusting or Replacing the Thermostat
If flushing does not resolve the issue, you may need to adjust or replace the thermostat. Locate the thermostat access panel on your whirlpool water heater. Use a flathead screwdriver to set the dial to your desired temperature, but do not exceed 120°F. Replace the panel and allow the heater to stabilize. If temperature swings continue, inspect the element and thermostat for faults. Replace any damaged components to maintain stable hot water delivery.
A combination of regular maintenance, proper thermostat settings, and timely replacement of worn parts ensures your whirlpool hot water heater operates efficiently. Addressing these issues promptly helps you avoid unexpected cold showers and keeps your heater running smoothly.
Strange Noises or Odors from Whirlpool Hot Water Heater
Strange noises or unpleasant odors from your Whirlpool water heater often signal underlying issues that require prompt attention. Addressing these problems early helps you maintain the efficiency and safety of your electric water heater.
Common Causes of Noises in Whirlpool Water Heaters
Unusual sounds from your Whirlpool water heater can indicate several mechanical or maintenance-related problems. You should listen for specific noises to help identify the source.
Sediment Buildup in the Tank
Sediment buildup remains the most common cause of popping, crackling, rumbling, or gurgling noises in a Whirlpool water heater. Minerals from your water supply settle at the bottom of the tank. When the electric element heats the water, steam bubbles form beneath these mineral deposits and escape suddenly, creating loud popping or gunshot-like sounds. This issue becomes more pronounced if you use well water, which often contains higher mineral content. Regular flushing of your heater tank helps prevent sediment accumulation and reduces these noises.
💡 Tip: Schedule annual maintenance to flush your Whirlpool water heater and minimize sediment-related problems.
Heating Element Issues and Fixes
A loose or faulty element in your electric water heater can create humming, vibrating, or hissing sounds. If the element becomes covered by sediment, it may overheat and produce a hissing noise as water boils off the mineral layer. Loose mounting brackets or components can also cause vibrations. You should inspect the element and its connections for tightness and signs of wear. If you hear banging or knocking, you may be experiencing a water hammer effect, which results from sudden changes in water flow. Screeching or whistling often points to partially closed or malfunctioning valves restricting water movement.
- Common Whirlpool water heater noises:
- Popping or rumbling: Sediment buildup
- Humming or vibrating: Loose element or brackets
- Banging: Water hammer effect
- Screeching: Valve issues
- Hissing: Element covered by sediment
Professional inspection and regular maintenance help you address these issues before they lead to costly repairs.
Dealing with Odors in Your Whirlpool Hot Water Heater
Odors from your Whirlpool water heater can range from unpleasant to alarming. Identifying the cause ensures you take the right corrective action.
Bacterial Growth and Smelly Water
A rotten egg or sulfur smell from your electric water heater usually indicates hydrogen sulfide gas. Sulfate-reducing bacteria thrive in low-oxygen water, especially in well systems. These bacteria react with the anode rod inside your Whirlpool water heater, releasing hydrogen sulfide and causing the characteristic odor. The anode rod, designed to prevent corrosion, can deteriorate over time and contribute to the smell. Burning or sulfur-like odors may also signal a failing element or corroded rod. If you notice a gas-like or sewer odor, you should check for plumbing issues or possible gas leaks.
| Odor Type | Underlying Cause(s) | Diagnostic Details |
|---|---|---|
| Rotten egg/sulfur | Hydrogen sulfide from bacteria, anode rod reaction | Smell persists after running hot water |
| Gas-like | Possible natural gas leak | Stronger odor near heater; turn off gas supply immediately |
| Sewer gas | Plumbing or bacterial growth | Odor stronger near heater after running hot water |
| Burning | Overheating, failing element, corroded anode rod | Indicates component failure; requires inspection |
Flushing and Cleaning Steps
You can often resolve odors by flushing and cleaning your Whirlpool water heater. Start by turning off the power to your electric water heater. Attach a hose to the drain valve and empty the tank. Refill and repeat until the water runs clear. For persistent odors, consider replacing the anode rod or treating your water supply with chlorination. If you suspect a gas leak or electrical failure, contact a professional immediately.
⚠️ Alert: Never ignore strong gas or burning smells from your Whirlpool water heater. These can indicate serious safety hazards.
Regular maintenance, including flushing and inspection of the element and anode rod, keeps your Whirlpool water heater running safely and odor-free.
Repair or Replace Your Whirlpool Hot Water Heater?
Deciding whether to repair or replace your Whirlpool hot water heater requires careful evaluation of the unit’s age, condition, and the frequency of issues. You want to ensure your investment delivers reliable hot water and minimizes unexpected costs.
Signs Your Whirlpool Water Heater Needs Replacement
Age and Condition of the Hot Water Heater
Whirlpool hot water heaters typically last about 10 to 12 years, based on manufacturer data and industry standards. If your unit approaches or exceeds this range, you may notice a decline in performance or efficiency. Factors such as water quality, regular maintenance, and installation location can affect how long your heater and its parts last. When you see rust, corrosion, or visible deterioration on the tank or electrical parts, you should consider a replacement.
Frequent Repairs and Persistent Problems
If you find yourself replacing parts or scheduling repairs more often, your Whirlpool water heater may be nearing the end of its useful life. Persistent issues like leaks, faulty elements, or thermostat failures indicate that internal parts are wearing out. When repairs become routine, the cost and inconvenience add up quickly. You should weigh the benefits of a new unit against the ongoing expense of fixing old parts.
Cost Comparison: Repairing vs. Replacing a Whirlpool Hot Water Heater
Evaluating Repair Costs for Elements and Parts
You need to compare the costs of repairing your Whirlpool water heater with the price of a full replacement. The table below outlines typical expenses:
| Action | Cost Range (USD) |
|---|---|
| Repair Water Heater | $230 to $1,000 |
| Gas Valve Replacement (example repair) | $150 to $500 |
| Replace Whirlpool Water Heater | $350 to $1,500 |
Repairing your Whirlpool unit often costs less upfront, especially if you only need to replace specific parts like heating elements or valves. However, if you must replace multiple parts or face repeated breakdowns, the total cost can approach or exceed the price to replace the water heater.
Benefits of Upgrading to a New Whirlpool Hot Water Heater
Upgrading to a new Whirlpool hot water heater offers several long-term advantages:
- Older units often produce less hot water and use more energy.
- New, energy-efficient models reduce energy consumption and lower utility bills.
- Improved heat retention in modern tanks prevents energy waste.
- You gain consistent hot water and fewer interruptions from failing parts.
- Newer models increase reliability and minimize the risk of sudden breakdowns.
💡 Tip: Investing in a new Whirlpool hot water heater can save you money on energy and repairs over time, while also improving your home’s comfort.
When you face frequent repairs or your unit is near the end of its lifespan, it makes sense to replace the water heater. You will benefit from improved efficiency, fewer service calls, and peace of mind knowing your hot water supply is dependable.
Preventive Maintenance for Whirlpool Hot Water Heater
Regular maintenance keeps your whirlpool hot water heater running efficiently and extends its lifespan. By following a consistent inspection and cleaning routine, you can prevent costly breakdowns and ensure safe operation.
Regular Inspection Checklist for Your Water Heater
Checking for Leaks and Corrosion
You should inspect your whirlpool water heater for leaks and corrosion every few months. Look for water pooling around the base, rust on the tank, or moisture near fittings and valves. Early detection of leaks helps you avoid water damage and tank failure. Examine the anode rod annually and replace it every three to five years to prevent internal corrosion. Upgrading to a powered anode rod offers even better protection, especially in hard water areas.
Testing Elements and Thermostats
To maintain consistent hot water, you need to test the thermostat and heating elements regularly. Use a multimeter to check for continuity in the elements. If you notice inconsistent temperatures or no hot water, faulty elements or thermostats may be the cause. Schedule a professional inspection each year for a comprehensive check of all electrical components and safety features.
🛠️ Tip: Document your maintenance activities. Keeping records helps maintain your warranty and provides a history for future service.
Flushing Your Whirlpool Water Heater Tank
How Often to Flush the Hot Water Heater
You should flush your whirlpool water heater at least once a year. In areas with hard water, consider flushing every six months to remove mineral buildup. Regular flushing prevents sediment from reducing efficiency and causing premature failure. If you hear popping noises or see rust-colored water, flush the tank sooner.
Step-by-Step Flushing Guide
Follow these steps to flush your whirlpool water heater:
- Turn off the power at the circuit breaker.
- Shut off the cold water supply to the heater.
- Attach a garden hose to the drain valve at the bottom of the tank.
- Place the hose end in a safe drainage area.
- Open a hot water faucet in your home to allow air into the system.
- Open the drain valve and let the water flow until it runs clear.
- Close the drain valve, remove the hose, and turn the cold water supply back on.
- Once the tank is full, restore power at the breaker.
This process removes sediment and helps your heater operate efficiently. If you want to know how to drain a whirlpool water heater, always follow the manufacturer’s safety guidelines.
💧 Note: Annual flushing can extend your whirlpool water heater’s life from 10–12 years up to 20 years.
Setting the Right Temperature on Your Whirlpool Water Heater
Set your whirlpool water heater to 120°F for optimal performance and safety. This temperature reduces the risk of scalding and saves energy. For homes with children or elderly residents, 120°F or lower is safest. If your household has high hot water demand, you may set it slightly higher, but avoid exceeding 130°F. Settings above 140°F increase the risk of burns and are not recommended.
🔥 Safety Reminder: Adjust the thermostat carefully and always test the water temperature at the tap after making changes.
Routine preventive maintenance, including inspections, flushing, and temperature adjustments, ensures your whirlpool hot water heater delivers reliable service for years.
Whirlpool Hot Water Heater Safety and When to Call a Pro
When you work on your whirlpool hot water heater, safety must come first. Electrical repairs and troubleshooting can expose you to serious hazards if you do not follow proper procedures. You can handle many maintenance tasks yourself, but you should know when to call a professional to avoid injury or further damage.
Electrical Safety Tips for Hot Water Heater Repairs
You must take extra precautions when working with electricity and water. Follow these essential safety tips to protect yourself and your whirlpool water heater:
Turning Off Power Before Working on the Heater
- Always turn off the power supply at the circuit breaker or fuse box before you begin any repair on your whirlpool electric hot water heater.
- Allow the water heater to cool completely before you reset the high-limit switch or perform maintenance. This step prevents burns and electrical hazards.
- Use a multimeter to check electrical components, such as heating elements and thermostats, for continuity and proper function.
- Remember that water and electricity create a dangerous combination. Take every precaution to avoid electric shock.
- Regularly flush the tank to remove sediment buildup. Sediment can cause overheating and damage electrical parts.
- Inspect and test safety features, including the pressure relief valve, to ensure they work correctly.
- If you feel unsure about any electrical testing or repairs, contact a qualified plumber or electrician. Professional help prevents accidents and further damage.
⚡ Safety Reminder: Never skip the step of turning off the power. Even a small mistake can result in serious injury.
Using Proper Tools and Safety Gear
You should always use insulated tools when working on your whirlpool water heater. Wear safety goggles and gloves to protect against accidental shocks or burns. Keep your work area dry and free from water puddles. A clean workspace reduces the risk of slipping or electrical accidents. If you need to test or replace electrical parts, follow the manufacturer’s instructions and use the correct tools for each task.
When to Call a Professional for Whirlpool Water Heater Issues
Some problems with your whirlpool hot water heater require expert attention. Attempting complex repairs without the right training can make the situation worse or void your warranty.
Major Leaks or Tank Damage
- If you notice a major leak or visible damage to the tank, you should call a professional immediately. Tank corrosion or cracks often mean you need a replacement.
- Tinted or foul-smelling water may signal bacterial contamination or internal tank issues that require specialized treatment.
- Any sign of a persistent leak after tightening connections or replacing valves suggests a deeper problem.
Persistent Electrical or Element Problems
- Inadequate hot water, repeated tripped reset buttons, or failed heating elements point to complex electrical faults.
- Thermostat malfunctions or overheating issues often need diagnosis by a licensed technician.
- If your whirlpool water heater is older or has internal damage, professional assessment ensures safe and effective repairs.
🛠️ Tip: When in doubt, always choose safety. A professional can resolve difficult problems and help you avoid costly mistakes.
You can solve many Whirlpool hot water heater problems by following a step-by-step approach. Start with basic checks, such as power supply and thermostat settings. Try simple fixes first, like tightening connections or flushing the tank. Regular maintenance keeps your heater running efficiently and helps prevent costly breakdowns.
⚠️ Tip: If you notice major leaks, electrical issues, or persistent failures, contact a licensed professional for safe repairs.
FAQ
How often should you flush your Whirlpool hot water heater?
You should flush your Whirlpool hot water heater at least once a year. If you have hard water, flush it every six months. Regular flushing removes sediment and helps your heater run efficiently.
What temperature should you set your Whirlpool water heater?
Set your Whirlpool water heater to 120°F. This temperature provides enough hot water for most homes and reduces the risk of scalding. Lower settings also save energy and extend the life of your heater.
Why does your Whirlpool water heater make popping noises?
Popping noises usually mean sediment has built up in the tank. The heating element heats water trapped under the sediment, causing the noise. Flushing the tank removes sediment and stops the sound.
Can you replace a Whirlpool water heater element yourself?
Yes, you can replace the element if you follow safety steps. Turn off the power, drain the tank, and use the correct tools. If you feel unsure, contact a licensed professional for help.
What should you do if your Whirlpool water heater leaks?
First, turn off the power and water supply. Check all connections and valves for leaks. Tighten or replace faulty parts. If the tank itself leaks, you need to replace the water heater.
How do you reset your Whirlpool hot water heater?
Locate the reset button on the upper thermostat behind the access panel. Press it firmly. If the heater does not reset or trips again, check for faulty elements or thermostats. Call a professional if problems continue.

