You may notice water heater leaks from the bottom element, which often signal a problem with your Thanh gia nhiệt or gasket. Quick action protects your home since even a small leak can weaken floors, cause mold, and lead to costly repairs. A leaking hot water heater increases energy bills and damages property, with claims for water damage sometimes exceeding $10,000. Reliable bộ phận làm nóng thiết bị gia dụng from Hệ thống sưởi điện Jinzhong and trusted nhà sản xuất bộ phận làm nóng help extend your water heater’s life and reduce risk.
Main Causes of Water Heater Leaking from Bottom Element
Understanding why your water heater develops a leak from the bottom element helps you prevent costly repairs and maintain a safe home. Several factors can cause this issue, and each one requires a different approach for diagnosis and repair.
Faulty or Worn-Out Heating Element
MỘT faulty or worn-out heating element stands as the most common reason for a bottom element leak in residential water heaters. Over time, the element faces constant exposure to water and minerals, which leads to deterioration.
Corrosion and Rust
You often find corrosion and rust as the main culprits behind a leaking element. When you neglect regular maintenance, minerals and moisture attack the metal, causing it to break down. Internal rust or corrosion weakens the element, making it more likely to develop holes or cracks. This process allows water to escape, resulting in a leak around the bottom of your water heater.
Cracks or Damage to the Element
Cracks or physical damage to the element can also trigger leaks. Heating and cooling cycles put stress on the metal, and over time, this stress may cause the element to crack. Once a crack forms, water seeps through, leading to a bottom element leak. You might notice water pooling around the base of your water heater or even hear strange noises from the tank, such as popping or crackling, which often signal element damage.
Mẹo: Watch for these signs that your heating element is worn out and causing leaks:
- Inconsistent water temperatures during use.
- Lukewarm or cold water only.
- Reduced hot water volume.
- Strange noises from the tank.
- Cloudy or rusty hot water.
- Error codes on newer models.
- Repeatedly tripped circuit breaker.
Failed Element Gasket
The gasket forms a watertight seal between the heating element and the tank. If this seal fails, water escapes and causes leaking from the bottom element.
Gasket Deterioration Over Time
Gaskets naturally deteriorate due to regular wear and exposure to high temperatures. As the gasket ages, it loses flexibility and may crack or shrink. A compromised gasket cannot maintain a proper seal, which leads to leaks. Faulty gaskets often result in significant leakage issues, especially if you do not address them quickly.
Improper Installation or Tightening
Improper installation or insufficient tightening of the element or gasket can also cause leaks. If you or a technician do not seat the gasket correctly, water will find its way through the gap. Loose or worn-out fittings at the inlet and outlet connections may also contribute to the problem. Always ensure that the gasket and element are installed according to manufacturer specifications.
Sediment Buildup in Hot Water Tank
Sediment buildup in your hot water tank poses a serious risk to both the heating element and the tank itself. Minerals, salt, and debris settle at the bottom, creating a barrier that affects performance and safety.
How Sediment Affects the Element Seal
A thick layer of sediment insulates the element from the water, forcing it to work harder and overheat. This excessive heating can damage the element and its gasket, leading to leaks. Overheating also increases pressure inside the tank, which may cause small fractures or even a tank burst. Accumulated minerals can corrode the element, further increasing the risk of a bottom element leak.
Signs of Excess Sediment
You can spot sediment buildup by looking for these warning signs:
- Reduced heating efficiency and longer wait times for hot water.
- Popping or crackling noises from the tank.
- Cloudy or rusty water coming from your taps.
- Water pooling around the base of the heater.
Ghi chú: Plumbing industry reports list the following as common causes of water heater leaks:
- Old and cracked tanks
- Sediment collection
- Pressure imbalance
- Loose inlet and outlet connections
- Old anode rod
If you notice any of these issues, address them promptly to prevent further damage to your water heater.
Leaking Inner Tank
A leaking inner tank often signals a serious problem with your water heater. You may notice water pooling at the base, which can quickly escalate into extensive damage if left unchecked. The inner tank serves as the main reservoir for hot water, and any compromise in its integrity can result in a leak from the bottom element.
Tank Corrosion and Age
Corrosion stands as the leading cause of inner tank failure. Over time, minerals and moisture attack the metal lining, weakening the structure. As your water heater ages, the risk of corrosion increases. You may observe rusty or discolored water from your hot taps, which often points to internal corrosion. If your hot water appears reddish-brown or tastes metallic, the tank liner may have failed due to sediment buildup. These signs indicate that the tank is deteriorating and may soon develop a leak.
| Warning Sign | Điều đó có nghĩa là gì |
|---|---|
| Visible leak from bottom | Severe issue; requires immediate attention |
| Rusty or discolored water | Corrosion inside tank; possible leak risk |
| Reddish-brown water/taste | Internal corrosion or failing tank liner |
| Foul-smelling hot water | Bacterial growth from leaks |
You should act quickly if you notice any of these warning signs. Ignoring them can lead to costly repairs and potential health hazards.
Pressure-Related Cracks
Pressure fluctuations inside the tank can cause cracks to form. When the temperature and pressure relief valve malfunctions or sediment builds up, pressure increases beyond safe levels. The tank expands and contracts, which stresses the metal and may result in pressure-related cracks. These cracks often appear near the bottom, allowing water to escape and cause a leak. In one reported case, a user discovered wet insulation around the bottom element after noticing abnormal cycling of the heating element. This investigation revealed a small leak from the tank, confirming that inner tank issues can lead to bottom element leaks.
You should check the drain valve regularly. Expansion and contraction can loosen this connection, creating a pathway for water to leak from the bottom of the tank.
Other Possible Causes of Water Heater Leaking
You may encounter other factors that contribute to leaks from the bottom element. These issues often arise from installation errors or component failures.
Loose Connections
Loose or faulty fittings and pipe connections can allow water to escape. Over time, vibrations and thermal expansion may loosen these connections. You should inspect all inlet and outlet fittings, as well as the drain valve, to ensure they remain secure. Even a small gap can result in a persistent leak.
Mẹo: Regularly check all connections for moisture or corrosion. Tighten any loose fittings to prevent future leaks.
Manufacturing Defects
Manufacturing defects sometimes cause leaks in new water heaters. Poor welding, substandard materials, or improper assembly can compromise the tank’s integrity. You may notice leaks soon after installation if the unit has a defect. In addition, an improperly installed temperature and pressure relief valve or a worn-out anode rod can accelerate corrosion and increase the risk of leaking.
- Common causes of leaks from the bottom element include:
- Cracked or corroded tank
- Loose or faulty fittings and pipe connections
- Improperly installed temperature and pressure relief valve
- Worn out anode rod
You should contact a professional if you suspect a manufacturing defect. Prompt action ensures your water heater operates safely and efficiently.
How to Confirm the Source of the Leak in Your Water Heater
Safety First: Turn Off Power and Water
Shutting Off Electricity or Gas
You must prioritize safety before inspecting your water heater. Shut off the power at the circuit breaker if you have an electric unit. For gas models, turn the gas control knob to the “off” position. Use a non-contact voltage tester to confirm that no electricity flows to the unit. This step protects you from electrical hazards during inspection.
Closing the Water Supply Valve
Locate the cold water supply valve above your hot water tank. Turn the valve clockwise to stop water flow into the tank. This action prevents additional water from entering and worsening the leak. You should always ensure the water supply is off before starting any inspection or repair.
Visual Inspection Steps for Leaking from Bottom Element
Checking Around the Bottom Element
Begin your inspection by drying off the tank and its connections. This allows you to spot new signs of leaking from the bottom element. Examine the area around the element for moisture, puddles, or mineral deposits. Use insulated gloves and safety goggles for protection. A Philips head screwdriver helps you access panels if needed.
Looking for Water Trails or Rust
Scan the tank from top to bottom. Look for water trails, rust stains, or discoloration near the bottom element. These signs often indicate the source of the leak. Document the characteristics of the leak, noting severity and exact location. Capture images or videos from multiple angles for reference. This documentation assists you or a professional in diagnosing the issue.
Mẹo: Inspect common leak sources such as inlet and outlet connections, the pressure relief valve, the tank itself, and the drain valve. Dry surfaces make it easier to identify active leaks.
Testing the Element and Gasket for Leaks
Removing the Access Panel
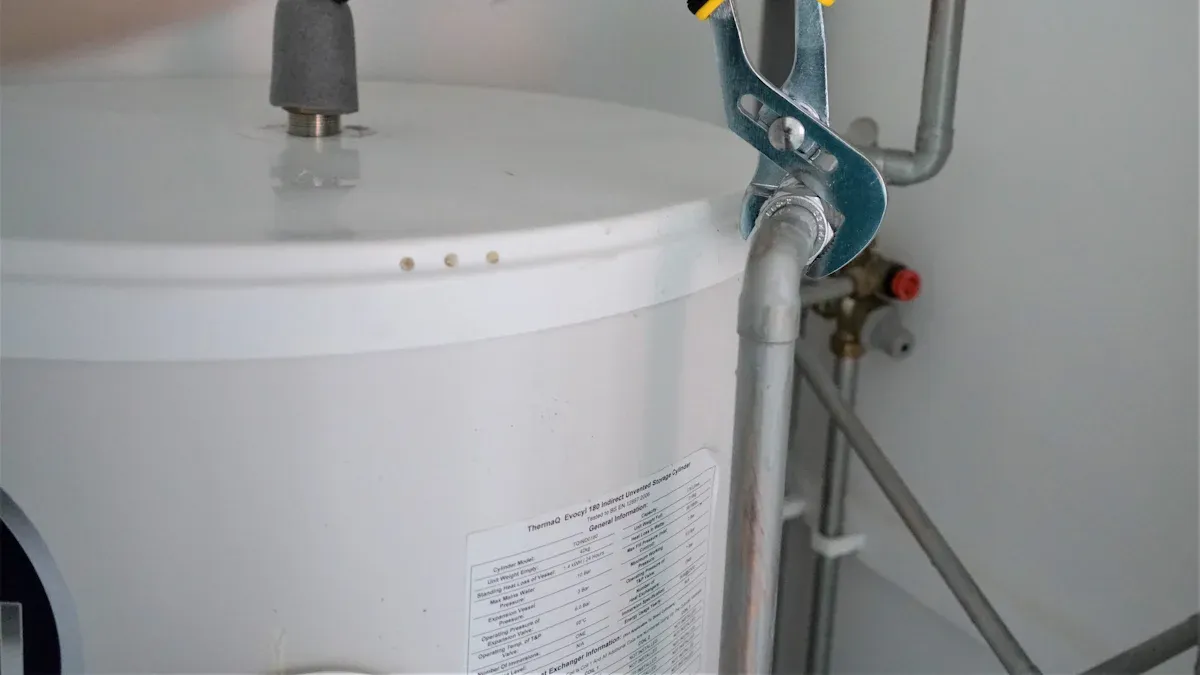
Use a Philips head screwdriver to remove the access panel covering the bottom element. Ensure the power remains off before proceeding. This step gives you direct access to the element and its gasket.
Inspecting for Moisture or Corrosion
Check for moisture, corrosion, or mineral buildup around the element and gasket. A digital multimeter or continuity tester helps you assess the condition of the element. If you find water or rust inside the compartment, the element or gasket may have failed. Record your findings and avoid DIY repairs unless you have proper qualifications. Prepare to contact a professional if the leak persists or if you notice extensive damage.
| Dụng cụ | Mục đích |
|---|---|
| Non-contact tester | Confirms power is off |
| Tua vít | Removes access panel |
| Găng tay cách nhiệt | Protects hands during inspection |
| Kính bảo hộ | Shields eyes from debris |
| Đồng hồ vạn năng | Tests element condition |
Following these steps allows you to confirm the source of a leak in your water heater. Careful inspection and documentation help you address issues quickly and maintain the integrity of your hot water tank.
Ruling Out Other Leak Sources in Hot Water Tank
When you notice water pooling near your hot water tank, you need to confirm the true source of the leak. Many homeowners assume the bottom element is always responsible, but other components can also cause water to escape. You should systematically check each possible leak point to avoid unnecessary repairs and ensure your water heater operates safely.
Checking the Drain Valve
The drain valve sits at the bottom of your hot water tank and allows you to flush out sediment during maintenance. Over time, this valve can loosen, corrode, or develop cracks. If you see water dripping from the valve or pooling directly beneath it, you may have a faulty drain valve rather than a problem with the heating element.
To inspect the drain valve, follow these steps:
- Dry the area around the valve with a towel.
- Look for active drips or moisture forming at the valve connection.
- Tighten the valve gently with a wrench if you notice any looseness.
- Examine the valve for signs of rust or mineral buildup.
- Place a small container under the valve to catch any water and monitor for leaks over several hours.
If tightening does not stop the leak, you may need to replace the valve. Persistent leaking from the tank base often signals a more serious internal issue, so do not ignore this warning.
Inspecting the T&P Relief Valve
The temperature and pressure (T&P) relief valve protects your hot water tank from dangerous pressure buildup. This valve usually sits on the side or top of the tank and features a discharge pipe that runs down the side. If the T&P valve malfunctions or fails to close properly, water may leak from the pipe and pool near the base.
You should inspect the T&P relief valve by:
- Checking the discharge pipe for moisture or water stains.
- Looking for water trails running down the side of the tank.
- Listening for hissing or gurgling sounds near the valve.
- Testing the valve by lifting the lever briefly to ensure it opens and closes smoothly.
Leaks from the T&P valve often indicate excess pressure or temperature inside the tank. You should address these issues quickly to prevent further damage. If you find water leaking from the tank near the discharge pipe, you may need to replace the valve or consult a professional.
Mẹo: Always check for condensation on the tank surface before assuming a leak. Condensation can mimic a leak, especially in humid environments. Inspect all pipe fittings and connections at the top and sides of the tank. Leaks at the side often come from the T&P relief valve, while leaks at the base may point to internal tank problems.
| Leak Source | What to Check | Common Signs |
|---|---|---|
| Drain Valve | Tightness, corrosion | Drips, puddles at base |
| T&P Relief Valve | Discharge pipe, valve lever | Water trails, hissing sound |
| Condensation | Tank surface | Moisture, no active drip |
By ruling out these other sources, you can accurately diagnose the cause of water escaping from your hot water tank and take the right steps to fix it.
Step-by-Step Solutions for Stopping Water Heater Leaks
Turning Off and Draining the Hot Water Tank
How to Safely Drain the Tank
You must follow strict safety precautions before you begin repairs on your hot water tank. Start by turning off the power supply or gas line. Wait several hours for the water to cool. Wear thick gloves and safety goggles to protect yourself from burns and splashes. Next, turn off the water supply using the valve on the supply pipe. Find a safe place to direct the water, such as a large bucket or a nearby drain, to prevent flooding. Attach a garden hose to the drain valve at the bottom of the tank. Open a hot water tap in your home to prevent pressure buildup. Finally, open the drain valve and release the water into your chosen container or drain. Manage overflow carefully to avoid water damage.
Tools You’ll Need for Repair
| Dụng cụ | Mục đích |
|---|---|
| Garden hose | Drains water from the tank |
| Tua vít | Removes access panels |
| Đồng hồ vạn năng | Tests the element |
| Wrench | Loosens and tightens fittings |
| Gloves & goggles | Protects hands and eyes |
| Bucket | Collects drained water |
Replacing the Bottom Heating Element in Water Heater
Removing the Old Element
You need to replace the element if you confirm a leak or damage. Begin by switching off the power at the main panel and waiting for the water to cool. Remove the access cover and insulation to expose the element. Use a multimeter to test for continuity and confirm the element’s failure. Shut off the cold water supply to the heater. Drain the hot water tank using a garden hose. Unscrew the old element with a wrench and remove it from the tank.
Installing a New Element
Insert the new element into the opening and secure it tightly. Make sure the heating element gasket sits properly to prevent future leaking. Close the drain valve and refill the tank with water. Reconnect the circuit wires to the new element. Replace the access cover and insulation. Turn the power back on and test the water heater for proper operation. Watch for any signs of a leak around the new element.
⚡ Mẹo: Always double-check the heating element gasket position before you finish installation. A misaligned gasket can cause persistent leaking.
Replacing the Element Gasket to Stop Leaking
Removing and Inspecting the Gasket
If you notice water escaping from the area around the element, you may need to replace the gasket. Turn off the power and water supply. Remove the access panel and insulation. Unscrew the element and carefully pull it out. Inspect the heating element gasket for cracks, wear, or mineral buildup. If you see any damage, you must replace the gasket.
Installing a New Gasket Properly
Clean the opening where the gasket sits. Place the new gasket onto the element, ensuring it fits snugly. Insert the element back into the tank and tighten it according to manufacturer instructions. Reconnect the wires and replace the access panel. Restore power and water supply. Check for leaks after you finish the repair. If you still see water, you may need to replace the element or repeat the process to replace the gasket again.
🛠️ Ghi chú: Always use a high-quality gasket when you replace the gasket. This reduces the risk of future leaks and extends the life of your water heater.
Addressing Sediment Buildup in Hot Water Tank
Flushing the Tank
Sediment buildup in your hot water tank can lead to leaks, reduced efficiency, and damage to the heating element. You can address this issue by flushing the tank regularly. This process removes minerals and debris that settle at the bottom, helping you maintain optimal performance.
To flush your water heater safely, follow these steps:
- Turn off the power to the water heater to prevent electrical hazards.
- Shut off the cold water supply to stop new water from entering the tank.
- Attach a hose to the drain valve at the bottom of the tank.
- Direct the hose to a safe drainage area, such as a floor drain or outside.
- Open the drain valve and allow the tank to empty completely.
- Once drained, open the cold water supply briefly to flush out remaining sediment until the water runs clear.
- Close the drain valve, remove the hose, and restore power and water supply.
Mẹo: Flushing your tank at least once a year helps extend its lifespan and improves heating efficiency. If you feel unsure about the process, you can hire a professional to perform the service.
Preventing Future Sediment Issues
You can take several steps to prevent sediment from accumulating in your hot water tank. These actions reduce the risk of leaks and keep your system running smoothly.
- Schedule annual tank flushes to remove sediment before it causes problems.
- Maintain your water heater temperature between 120 and 140 degrees Fahrenheit. This range slows mineral buildup and protects the tank lining.
- Consider installing a whole-home water softener. This device removes hard minerals from your water supply before they reach the tank.
- Inspect the heating element and gaskets during maintenance. Early detection of wear or corrosion allows you to replace faulty parts before leaks develop.
By following these preventive measures, you protect your investment and avoid the need to replace the tank prematurely.
When to Replace the Water Heater Due to Leaks
Signs the Tank is Beyond Repair
Sometimes, repairs cannot resolve persistent leaks. You need to recognize when your water heater has reached the end of its service life. Common signs include:
- Water pooling around the base even after you replace the gasket or element.
- Visible rust, corrosion, or cracks on the tank exterior.
- Repeated leaks from the same area despite multiple repairs.
- Hot water that appears discolored or smells foul.
- Unusual noises, such as banging or popping, that persist after flushing.
If you notice these issues, continuing to repair the unit may waste time and money. In these cases, you should consider replacing the tank.
Choosing a New Water Heater
When you decide to replace your water heater, you have several options. Evaluate your household’s hot water needs, energy efficiency goals, and budget. Look for models with high energy ratings and durable construction. You may choose between traditional tank-style heaters and modern tankless systems.
🛠️ Ghi chú: Professional installation ensures your new water heater operates safely and efficiently. Always select quality replacement parts and follow manufacturer guidelines for best results.
A new water heater provides peace of mind and reliable hot water for years. By acting promptly, you avoid further property damage and enjoy improved performance.
Preventing Future Leaks from the Bottom Element in Water Heater
Regular Maintenance Tips for Hot Water Tank
Flushing the Tank Annually
You can prevent many problems by flushing your hot water tank at least once a year. This simple step removes sediment that settles at the bottom and helps your element work efficiently. Sediment buildup can cause overheating and increase the risk of leaking. Attach a hose to the drain valve, direct it to a safe area, and let the water flow until it runs clear. Annual flushing keeps your system running smoothly and extends its lifespan.
Inspecting Elements and Gaskets
Regular inspections help you catch issues before they become serious. Check the element and gasket for signs of rust, corrosion, or moisture. Tighten any loose fittings and replace worn gaskets as needed. You should also inspect the anode rod every two to three years. The anode rod protects your tank from rust and corrosion. Replace it if you see heavy wear or if it looks thin. Scheduling professional maintenance once a year ensures all parts work correctly.
Mẹo: Install a drain pan under your water heater. This pan catches small leaks and prevents water from spreading across your floor.
Monitoring for Early Warning Signs of Leaking
Noticing Unusual Noises or Smells
Stay alert for strange sounds or odors coming from your water heater. Popping, crackling, or banging noises often signal sediment buildup or a failing element. A metallic or rotten egg smell may indicate corrosion or bacteria inside the tank. These early warning signs give you a chance to act before a small problem turns into a major leak.
Watching for Small Drips or Rust
Look for moisture, rust spots, or small drips around the base of your hot water tank. Even a tiny puddle can mean trouble. Place a sensor puck or water alarm near the base. These devices alert you to leaks right away, even if you are not nearby. The table below shows some helpful technology for early detection:
| Technology/Feature | Sự miêu tả |
|---|---|
| Sensor Puck | Detects water on the floor and triggers an alert |
| Automatic Shut-off Valve | Stops water flow when a leak is detected |
| Audible Alarm | Sounds an alert to notify you of a leak |
| Tích hợp nhà thông minh | Sends notifications to your smartphone |
| Sensor Placement | Place at the base or near connections for quick detection |
| Các mô hình nâng cao | Detect dripping water and humidity changes |
🛡️ Ghi chú: Water leak detectors act as your first line of defense against water damage, especially in basements or utility rooms.
Using Quality Replacement Parts for Water Heater
Choosing the Right Elements and Gaskets
Always select high-quality elements and gaskets when you need replacements. Cheap or incompatible parts can fail quickly and cause leaks. Check the manufacturer’s recommendations for your specific model. Quality parts last longer and provide better protection for your water heater.
Professional Installation vs. DIY
You may feel confident handling minor repairs, but professional installation offers peace of mind. Licensed plumbers know how to install elements and gaskets correctly. They also spot hidden problems that you might miss. If you choose to do it yourself, follow all safety steps and use the right tools. For complex repairs or if you notice repeated leaking, call a professional.
Checklist for Prevention:
- Schedule regular maintenance checks
- Flush the tank annually
- Inspect and replace the anode rod every 2-3 years
- Install a drain pan and water leak detector
- Use only quality replacement parts
- Consult a professional for annual inspections
When to Call a Professional Plumber for Water Heater Leaks
Signs You Need Expert Help with Leaking
Persistent Leaks After Repairs
You may feel confident handling minor repairs, but some situations require a professional plumber. If you notice a visible leak from the bottom element of your water heater, do not ignore it. Water pooling around the heater or dampness on nearby surfaces often signals a deeper issue. When you attempt repairs and the leaking continues, you risk further water damage and higher utility bills. A skilled plumber can accurately identify the source of the leak and ensure a lasting solution.
- Water pooling or dampness near the heater
- Dripping or rushing sounds from the unit
- Leaks that return after DIY repairs
Electrical or Gas Safety Concerns
Safety should always come first. If you suspect electrical or gas issues, call a professional immediately. Exposed wires, tripped breakers, or the smell of gas indicate serious hazards. Attempting to fix these problems yourself can lead to injury or property damage. You should also seek expert help if you notice inconsistent water temperature, as this may point to a malfunctioning heater or a hidden leak.
- Exposed wiring or frequent breaker trips
- Smell of gas near the heater
- Inconsistent hot water supply
⚠️ Báo động: Discolored or foul-smelling water suggests contamination. Older water heaters are more prone to leaks and failures. Do not delay professional assessment if you see these warning signs.
What to Expect from a Professional Service for Hot Water Tank
Inspection and Diagnosis
When you call a plumber, you can expect a thorough inspection of your hot water tank. The technician will check for visible leaks, listen for unusual sounds, and examine all connections. They may use specialized tools to detect hidden moisture or corrosion. The plumber will also assess the age and condition of your unit to determine if repairs are possible or if you need to replace the tank.
| Service Step | What the Plumber Does |
|---|---|
| Kiểm tra trực quan | Looks for leaks, rust, and corrosion |
| Sound Assessment | Listens for dripping or rushing water |
| Connection Check | Examines fittings and valves |
| Age Evaluation | Considers if the unit is near end-of-life |
Repair or Replacement Options
After diagnosis, the plumber will explain your options. If the leak is minor, they may repair or replace the faulty element or gasket. For severe leaks or extensive corrosion, replacement of the entire water heater may be necessary. The plumber will guide you through the process, helping you choose the best solution for your home and budget. Prompt professional service protects your property from further water damage and restores reliable hot water.
💡 Mẹo: Addressing leaks early with expert help saves money and prevents costly repairs down the road.
Common Myths and Mistakes About Water Heater Leaking
Misunderstandings About Leak Sources in Hot Water Tank
Confusing Condensation with Leaks
You may see moisture on your water heater and assume a leak has started. In reality, condensation often forms on the tank surface, especially in humid environments or when cold water enters a warm tank. Condensation appears as a thin layer of water and usually dries quickly. A true leak will leave persistent puddles or water trails near the bottom element. If you notice moisture, dry the area and check again after a few hours. Persistent wet spots signal a leaking component, while condensation disappears on its own.
Overlooking the Role of Sediment
Many homeowners believe draining the tank once a year is enough to prevent problems. You need to understand that sediment buildup can cause serious damage. Minerals in your water settle at the bottom of the tank, leading to corrosion and overheating. Sediment can damage the heating element and its gasket, increasing the risk of a leak. Regular flushing helps, but you should also inspect the tank and components for signs of wear. Ignoring sediment allows small issues to grow into major repairs.
Common Myths About Water Heater Leaks:
- Water heaters explode without warning. Modern units have safety features to prevent this.
- You must replace your water heater after 10 years. With proper care, many last much longer.
- Annual draining is all the maintenance you need. Inspections and additional tasks are necessary to prevent leaking.
DIY Mistakes to Avoid When Fixing Leaks
Bỏ qua các bước an toàn
You might feel tempted to fix a leaking water heater quickly, but skipping safety steps puts you at risk. Always turn off the power supply and close the water valve before you begin any repair. Use insulated gloves and safety goggles to protect yourself. Failing to follow these precautions can result in electrical shock or burns. Safety should always come first when you work with hot water tanks.
Using the Wrong Parts
Choosing the wrong replacement parts is a common mistake. You may think any gasket or heating element will fit your model, but using incompatible parts can cause further damage. Always check the manufacturer’s specifications before you replace any component. Quality parts ensure a proper seal and reduce the chance of future leaks. If you feel unsure, consult a professional for advice or installation.
| Mistake | Why It Happens | How to Avoid |
|---|---|---|
| Skipping safety steps | Rushing repairs | Always turn off power/water |
| Wrong replacement part | Not checking specifications | Use manufacturer guidelines |
🛠️ Mẹo: Regular inspections and proper maintenance help you catch issues early. Addressing problems promptly prevents costly repairs and keeps your water heater running efficiently.
You now know the main reasons a water heater may develop a leak from the bottom element. Regular maintenance and fast action help you avoid costly repairs and protect your home. Try simple fixes when you spot minor issues. For persistent leaks, contact a professional plumber. Preventing problems early saves you money and reduces stress over time.
Câu hỏi thường gặp
What should you do first if your water heater leaks from the bottom element?
Turn off the power supply and close the water inlet valve. This step prevents electrical hazards and stops more water from entering the tank. Always ensure safety before you inspect or repair your water heater.
How often should you flush your hot water tank to prevent leaks?
You should flush your hot water tank at least once a year. This process removes sediment buildup, which helps prevent leaks and extends the life of your water heater.
Can you use any gasket or heating element for your water heater?
No, you should always use parts recommended by your water heater’s manufacturer. Using the wrong gasket or element can cause leaks or damage. Check your model’s specifications before purchasing replacement parts.
What are signs that your water heater’s inner tank is failing?
Watch for rusty water, foul smells, or persistent leaks at the base. Unusual noises and visible corrosion also signal a failing inner tank. These signs often mean you need to replace your water heater.
Is it safe to repair a leaking water heater yourself?
You can handle minor repairs if you follow all safety steps and use the correct parts. For electrical, gas, or persistent leak issues, you should call a licensed plumber to avoid injury or further damage.
Why does sediment buildup cause leaks in water heaters?
Sediment traps heat near the bottom element, causing it to overheat. This stress can damage the element, gasket, or tank lining, leading to leaks. Regular flushing helps prevent this problem.
What maintenance tasks help prevent leaks from the bottom element?
- Flush the tank annually
- Inspect and replace worn gaskets
- Check the anode rod every two to three years
- Use a drain pan and leak detector
Mẹo: Schedule professional inspections yearly for best results.

