Selecting the right element to buy for your electric water heater ensures safe and efficient operation. When you match the correct heating element to your heater, you avoid common issues that can impact both performance and energy costs. Using the wrong element can lead to:
- Increased energy consumption in your heater, which raises your utility bills.
- Burnout of the lower heating element from scale buildup.
- Reduced hot water availability in your electric water heater.
- Masked inefficiency that may cause safety concerns in your heater.
You can confidently choose the right heating element by following simple steps, even if you have never replaced an element before.
Key Specifications for the Right Water Heater Element to Buy
Understanding Wattage and Voltage
Importance of Correct Wattage and Voltage
Selecting the correct wattage and voltage for your heating element is essential for the safe and efficient operation of your electric water heater. Most residential water heater elements in the United States operate at 240 volts, which is the standard for the majority of home heaters. Wattage ratings for these 240-volt elements typically range from 1000 watts up to 6000 watts, depending on the size and heating needs of your heater. Smaller or point-of-use heaters that use 120 volts usually have wattage ratings between 1000 and 2500 watts. You must match the replacement element’s voltage and wattage exactly to the original specifications. This ensures your heater functions properly and avoids electrical hazards.
If you select the wrong wattage or voltage, you risk damaging your heater and reducing its lifespan. The table below outlines the effects of incorrect selection:
| Diện mạo | Effect of Incorrect Selection | Impact on Performance and Lifespan |
|---|---|---|
| Điện áp | Using wrong voltage (e.g., 120V instead of 240V) | Causes overheating, tripped breakers, or permanent tank damage |
| Wattage (Higher) | Exceeding original wattage specification | Overheats tank, reduces element lifespan |
| Wattage (Lower) | Using lower wattage than specified | Slower heating, insufficient hot water |
| Sizing | Incorrect size or thread type | Leaks, poor performance, potential physical damage |
Mẹo: Always consult your owner’s manual or the manufacturer’s guidelines before purchasing a new heating element to avoid costly mistakes.
How to Locate Wattage and Voltage Information
You can usually find the wattage and voltage information stamped directly on the base of your old heating element. Look for numbers such as “240V 4500W” or “120V 1500W.” If the markings are faded or missing, check the label on your electric water heater or refer to the owner’s manual. Manufacturers list the required specifications for replacement elements in these resources. Never guess the ratings, as using the wrong element can lead to safety risks and poor heater performance.
Measuring Water Heater Element Length and Size
How to Measure the Old Heating Element
To ensure a proper fit, you need to measure the length and diameter of your old heating element. First, turn off the power and water supply to your heater. Remove the access panel and disconnect the wires from the element. Use a tape measure to determine the length from the base to the tip of the element. Most major brands, including Rheem, AO Smith, Bradford White, EcoSmart, GE, Whirlpool, and Bosch, use a 1-1/2 inch socket size for their heating elements. This size is standard for installation and removal.
- Common element lengths range from 8 to 15 inches.
- Wattages typically fall between 1,440 and 5,500 watts.
- Most residential water heater elements use 240 volts.
The table below shows typical lengths and ratings:
| Length (inches) | Wattage (Watts) | Voltage (Volts) |
|---|---|---|
| 8 | 1,440 | 120 |
| 9 | 1,500 – 2,000 | 120 – 240 |
| 11 | 5,500 | 240 |
| 12 | 2,500 | 240 |
| 14 | 3,000 – 5,500 | 240 |
| 15 | 3,500 – 4,500 | 240 |
Ensuring Proper Fit with Correct Length
You must select a heating element with the same length and thread size as your original. The standard screw-in flange style for new residential heaters has a 1 inch diameter with 11-1/2 NPSM thread, fitting most brands such as GE, Rheem, AO Smith, and Bradford White. Some older models may use a 1-3/8 inch thread or a bolt-in style. If you choose the wrong size or thread type, you risk leaks, poor performance, or even physical damage to your heater. Always double-check the measurements before purchasing a replacement element to buy.
Identifying the Type of Water Heater Element
Screw-In, Bolt-In, and Clamp-In Types
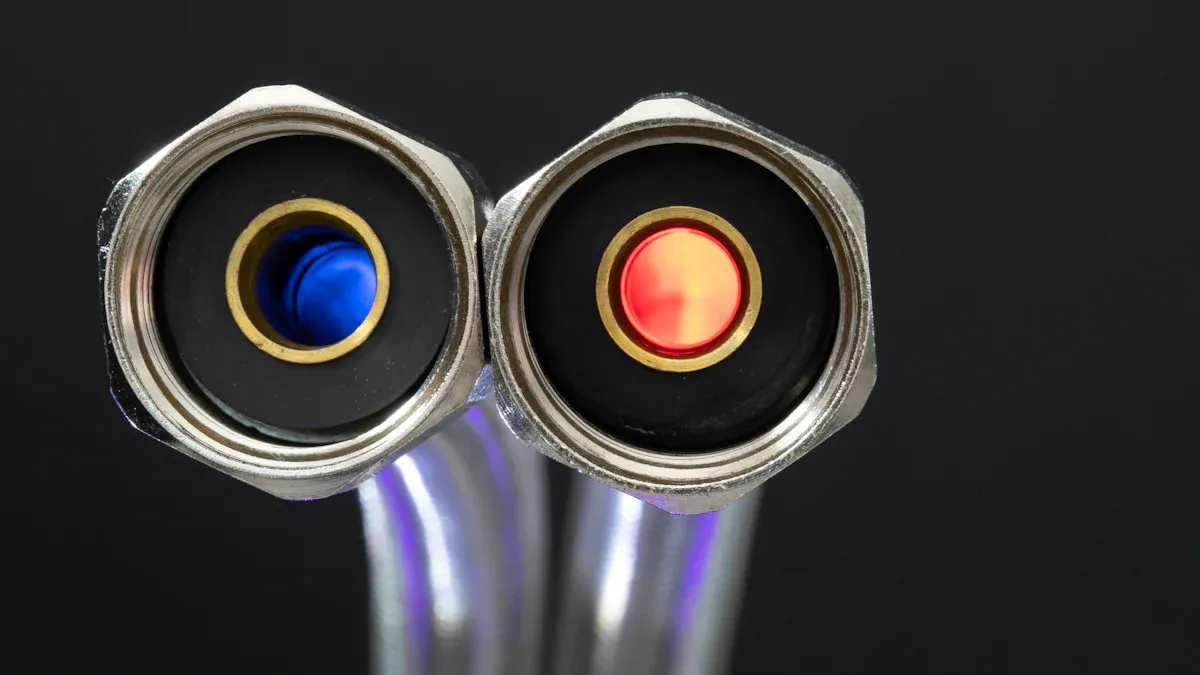
Water heater elements come in several mounting styles. The most common type for modern electric water heaters is the screw-in element. This style uses a threaded base that screws directly into the tank. Bolt-in elements use a flange with bolts to secure the element to the heater. Clamp-in elements, found in some older or specialty models, use a clamp mechanism for attachment.
- Screw-In: Standard for most residential heaters; easy to install and replace.
- Bolt-In: Found in older models; requires a matching flange and bolt pattern.
- Clamp-In: Less common; used in select specialty or older heaters.
Why Element Type Affects Compatibility
The type of heating element you choose must match your heater’s mounting style. Using the wrong type can prevent a proper seal, leading to leaks or inefficient heating. For example, a screw-in element will not fit a bolt-in flange without an adapter. Always verify the mounting style of your old element before purchasing a replacement. Matching the correct type ensures a secure fit and optimal performance for your electric water heater.
Ghi chú: If you are unsure about the type or size of your heating element, bring the old element to the store for comparison. This simple step helps you avoid compatibility issues and ensures you select the right water heater element for your needs.
Where to Find Water Heater Element Information
Checking the Old Heating Element
Reading Stamped Details on the Element
When you need to replace a heating element, your first step should be to inspect the old element itself. Manufacturers often stamp important details directly onto the base or sides of the heating element. You will usually find the voltage, wattage, and sometimes the part number printed clearly. These numbers might look like “240V 4500W” or “120V 1500W.” This information tells you exactly what type of heating element your heater requires. If you see a part number, you can use it to find an exact match for your water heater element at the store or online. Always check both sides of the element head, as some markings may be on the less visible side.
What to Do if Markings Are Faded or Missing
Sometimes, the stamped details on your heating element may be faded or completely worn away. If you cannot read the numbers, do not guess. Instead, measure the length of the element from the base to the tip. Take note of the thread size and mounting style. Bring the old element with you when you shop for a replacement. Store associates can help you compare the physical features and find a compatible heating element for your heater. If you still cannot identify the correct element, move on to checking the water heater label or the owner’s manual for more information.
Using the Water Heater Label and Manual
Locating and Decoding the Water Heater Label
Your heater’s rating plate or label provides a wealth of information about the heating element you need. You will usually find this label on the side of the heater tank. Look for details such as:
- Element voltage and wattage
- Element part number and length
- Model and serial numbers for your heater
- Tank capacity and manufacturing date
The label helps you match the replacement heating element to the original specifications. Manufacturers recommend using an OEM element to ensure your heater operates safely and efficiently. The label also lists other operational details, but you should focus on the element voltage, wattage, and length when shopping for a new heating element.
Finding Specifications in the Owner’s Manual
If you cannot find the information you need on the heater label, check the owner’s manual. The manual lists the recommended heating element specifications for your specific heater model. You will find tables or diagrams that show the correct voltage, wattage, and sometimes the part number for each element. The manual may also include installation instructions and safety tips for replacing a heating element. Always follow the manufacturer’s guidelines to avoid damaging your heater or voiding the warranty.
Mẹo: Keep your owner’s manual in a safe place. It serves as a valuable reference whenever you need to replace a heating element or perform maintenance on your heater.
Step-by-Step Guide to Choosing and Replacing a Replacement Element
Safety Precautions Before Replacing a Water Heater Element
Turning Off Power and Water Supply
You must always prioritize safety before you begin any work on your heater. Start by turning off the power at both the heater’s control knob and the circuit breaker. Use a multimeter or voltage tester to confirm that no electricity flows to the heating element. Circuit breakers can sometimes be mislabeled, so never skip this verification step.
Next, shut off the cold water supply valve to the heater. Open a hot water faucet and let the water run until it feels cool. This step reduces the risk of scalding and helps the tank drain faster. Attach a garden hose to the drain valve at the bottom of the tank and drain the water completely. Opening a hot water tap during this process allows air into the system, speeding up drainage.
Mẹo: Always wear insulated gloves, goggles, and protective clothing when working with any heater parts. This practice protects you from electrical shock and hot water burns.
Preventing Electrical Hazards
Electrical hazards pose serious risks during heating element replacement. You can avoid these dangers by following a few essential steps:
- Always turn off the power at the breaker before touching any wires or heater parts.
- Use a non-contact voltage tester or multimeter to double-check that the element receives no power.
- Look for signs of electrical damage, such as burnt wiring, melted insulation, or a burnt smell near the element.
- If you notice frequent breaker trips, burnt wires, or corrosion, the heating element or internal wiring may have failed. In these cases, consider calling a professional for repairs.
Never attempt to replace a water heater element if you feel unsure about electrical safety. Professional intervention ensures your safety and the proper function of your heater.
Removing and Inspecting the Old Element to Buy the Right Replacement
Truy cập vào bộ phận làm nóng nước
After you confirm the power and water supply are off, remove the access panel on your heater. Fold back the insulation to expose the heating element. Use a non-contact circuit tester again to verify the absence of voltage. Disconnect the wires from the element, labeling them if necessary for easy reassembly.
Use a socket wrench for screw-in elements or a screwdriver for bolt-in types to loosen and remove the old element. Remove the gasket as well. If you see mineral buildup, corrosion, or burn marks on the element, these signs indicate it needs replacement.
Ghi chú: Always drain the tank below the level of the element before removal. Failing to do so can cause water leaks and damage to heater parts.
Recording Key Specifications for Shopping
Before you leave for the store, record all key specifications from the old element. Write down the voltage, wattage, length, and mounting style. If the markings are faded, measure the element’s length and note the thread size or flange type. Take the old element with you if possible. This step helps you compare parts directly and ensures you select the correct element to buy.
You should also test the old heating element with a multimeter. Set the device to continuity mode and check for a beep, which indicates the element is intact. Measure resistance as well; a typical reading falls between 10 and 30 ohms. If the element fails these tests, you need a replacement.
Shopping for the Correct Replacement Element
What to Bring When Buying a Water Heater Element
When you shop for a replacement element, bring the following items:
- The old heating element (for direct comparison)
- A list of recorded specifications: voltage, wattage, length, thread or flange type
- Photos of the heater label or owner’s manual page with element details
- The gasket, if you plan to replace it as well
Having these parts and details on hand helps you avoid common mistakes, such as buying an element with the wrong voltage or an incompatible mounting style.
Matching Specifications at the Store
At the store, compare your old element to available replacement parts. Match the voltage and wattage exactly to your heater’s requirements. Check the length and mounting style to ensure a proper fit. Do not substitute a higher wattage element, as this can damage your heater and create electrical hazards. Always choose a replacement element that matches the original specifications.
⚠️ Báo động: Never operate your heater with a dry tank. Always refill the tank completely before restoring power to avoid destroying the new heating element.
Store associates can help you find the right element to buy if you bring the old part and your notes. Double-check every detail before making your purchase. This careful approach ensures your replacement will work safely and efficiently in your heater.
Material Options for Water Heater Elements
Comparing Copper, Stainless Steel, and Incoloy Elements
Pros and Cons of Each Material
When you select a heating element for your heater, you must consider the material. Each type—copper, stainless steel, and Incoloy—offers unique benefits and drawbacks. The table below summarizes the main differences:
| Vật liệu | Durability & Corrosion Resistance | Performance & Heat Transfer | Maintenance & Lifespan | Cost & Typical Use |
|---|---|---|---|---|
| Đồng | Moderate corrosion resistance; prone to corrosion in hard or acidic water; shorter lifespan in harsh conditions | High thermal conductivity; rapid heat transfer; energy efficient | Requires frequent maintenance to prevent scale and corrosion; shorter lifespan in hard water | Lower initial cost; widely used in residential heaters with moderate water quality |
| Thép không gỉ | High corrosion resistance; resists rust and scale even in hard water; longer service life | Moderate thermal conductivity; slower heat transfer than copper | Low maintenance; fewer replacements needed; stable performance over time | Moderate cost; preferred in hard water areas and commercial settings |
| Incoloy | Excellent corrosion resistance; withstands acidic and sulfur-rich environments; very long lifespan | Lower thermal conductivity than copper but stable at high temperatures; effective heating | Minimal maintenance; exceptional durability; ideal for harsh water conditions | Higher upfront cost; used in premium and commercial water heaters |
Copper elements transfer heat quickly and cost less, but you may need to replace them more often if your water is hard or acidic. Stainless steel elements resist corrosion and require less maintenance, making them a strong choice for areas with hard water. Incoloy elements provide the best durability and handle harsh water conditions, but you will pay more upfront.
Choosing the Best Material for Your Water Quality
Your water quality should guide your choice of heating element. Hard water contains minerals like calcium and magnesium. These minerals form limescale on the element, which insulates it and reduces heating efficiency. If you have hard water, you should choose stainless steel or Incoloy elements. These materials resist scale buildup and corrosion, so your heater will last longer and require less maintenance.
Soft water, on the other hand, can corrode tanks and piping. Copper elements may fail quickly in these conditions. Balanced water hardness is ideal because it prevents both scale buildup and corrosion. You should test your water hardness before installing a new element. Regular flushing and maintenance help remove sediment and extend the life of your water heater elements. Water softeners and filtration systems also protect your heater and plumbing from mineral-related damage.
Mẹo: Always match the element material to your local water conditions. This step ensures your heater operates efficiently and lasts as long as possible.
Specialty Heating Elements for Water Heaters
High-Watt Density vs. Low-Watt Density Elements
You will find both high-watt density and low-watt density heating element options. High-watt density elements heat water quickly and deliver higher efficiency in power delivery. However, they can overheat and fail sooner if not managed properly. Low-watt density elements spread heat over a larger area, which prevents overheating and extends the element’s lifespan. These elements operate at lower temperatures, making them safer and more reliable, especially in hard water conditions.
- High-watt density: Rapid heating, higher efficiency, but shorter lifespan if not controlled.
- Low-watt density: Slower, gentler heating, longer lifespan, and safer operation.
Selecting the right watt density balances performance, efficiency, and durability for your heater.
Elements Designed for Hard Water or High Sediment
If your home has hard water or high sediment, you should consider specialty heating element designs. Some elements use advanced materials like Incoloy or stainless steel to resist corrosion and scale. Others feature self-cleaning or anti-scale coatings that reduce mineral buildup. Specialty elements, such as those with DynaClean™ automatic cleaning systems or patented tank linings, help maintain efficiency and prolong the life of your heater.
You may also find commercial-grade elements and compact designs for tight spaces. These options provide durability and adaptability for unique installation needs. Regular maintenance, such as flushing the tank and checking the element, remains essential for all heaters, especially in challenging water conditions.
⚠️ Báo động: Always choose a heating element that matches your water quality and heater requirements. Specialty elements can save you money and prevent frequent replacements.
Ensuring Compatibility and Safe Installation of Your Water Heater Element
Double-Checking All Replacement Element Specifications
Why Every Detail Matters for Safety
You must verify every specification before installing a new heating element in your water heater. Even a small mismatch can lead to safety hazards or poor performance. Manufacturers design each element to operate at specific voltage and wattage levels. If you install an element with the wrong rating, you risk damaging your heater or creating unsafe conditions.
Follow these steps to double-check all replacement element specifications:
- Locate your water heater’s data plate.
- Check the voltage and wattage information listed on the plate.
- Confirm that your new heating element matches these voltage and wattage specifications exactly.
- Only proceed with installation if all details match. This ensures proper and safe operation.
⚠️ Mẹo: Never guess or assume compatibility. Always compare the numbers on your new element with the original specifications.
Risks of Using the Wrong Water Heater Element
Using an incompatible heating element can cause several problems. You may notice poor efficiency or even a complete malfunction of your water heater. The wrong element can create uneven temperature distribution, which leads to inconsistent hot water supply. Incorrect parts may damage the tank or other components.
- Poor efficiency and malfunction of the unit
- Uneven temperature distribution
- Damage to the water heater
- Voided warranty due to improper parts
- Safety risks, including electrical hazards or leaks
Faulty elements can also result in inadequate hot water, mineral buildup, or electrical issues. These problems often lead to further malfunctions and may create dangerous situations. Always follow manufacturer guidelines to avoid these risks.
Final Steps Before Installing the New Element
Compatibility Checklist
Before you install the new heating element, review this compatibility checklist:
- Confirm voltage and wattage match the data plate.
- Check that the length and thread type are identical to the original element.
- Inspect the gasket for a proper seal.
- Ensure the mounting style (screw-in, bolt-in, or clamp-in) matches your heater.
- Verify that the element material suits your water quality.
✅ Ghi chú: Bringing your old element to the store helps you compare and confirm compatibility.
When to Consult a Professional
If you feel uncertain about any step, consult a licensed plumber or electrician. You should seek professional help if you cannot identify the correct element, notice wiring damage, or experience repeated electrical issues. Professionals have the tools and expertise to ensure safe installation and long-term reliability for your water heater.
Khắc phục sự cố của bộ phận làm nóng nước

If You Can’t Find the Old Element’s Specs
Alternative Ways to Identify the Right Element to Buy
You may face a situation where the old heating element’s markings are unreadable or missing. In this case, you still have several reliable methods to identify the correct replacement for your water heater repairs:
- Turn off the electrical power to your water heater at the main panel.
- Run hot water until it feels lukewarm or cold, ensuring the tank is safe to work on.
- Disconnect the electrical wires from the heating element terminals.
- Use a multimeter or ohmmeter set to measure resistance (ohms).
- Place the meter probes on each terminal of the element.
- If the meter shows continuity (a reading other than infinity), the element is functional. If not, you have a faulty heating element that needs replacement.
This process helps you confirm element failure even without original specs. You can also measure the length and thread size of the removed element and compare it with available replacements at the store. Bringing the old part with you ensures you find a compatible match.
Mẹo: If you feel unsure about electrical testing, always prioritize safety and consider professional assistance.
When to Seek Professional Help
You should seek professional help if you cannot confidently identify the correct replacement or if you encounter complex wiring. Licensed plumbers or electricians have the expertise and tools to handle water heater repairs safely. If you notice signs of a faulty heating element, such as persistent tripped breakers or visible wiring damage, do not attempt further repairs yourself. Professionals can diagnose the common cause of element replacement and ensure your system operates safely.
Problems After Installing a Replacement Element
No Hot Water or Tripped Breaker
After installing a new element, you might discover that your water heater produces no hot water or trips the breaker. These issues often result from a few common mistakes:
- You may have powered the heater before filling the tank completely, causing immediate element failure.
- The thermostat or ECO (reset) button may have tripped. Check and reset these controls.
- Voltage supply issues or a faulty heating element can also prevent proper operation.
- Inspect all wiring connections for loose or damaged wires.
- Test the new element and switches for continuity using a multimeter.
⚠️ Báo động: Never turn on the power until the tank is full. Dry firing is a common cause of element replacement and can destroy a new element instantly.
Leaks or Unusual Noises from the Water Heater
Leaks or strange noises after installation often indicate improper sealing or sediment buildup. If you notice water around the base, check the gasket and thread connections for a tight fit. Unusual noises, such as popping or hissing, may signal limescale buildup or air trapped in the tank. Hard water accelerates element failure and noisy operation. Regular maintenance, such as flushing the tank and inspecting the element, helps prevent these issues and extends the life of your water heater repairs.
Ghi chú: Persistent leaks or noises after replacement may require professional inspection to prevent further damage.
Tips for a Smooth Water Heater Element Replacement
Essential Tools for Replacing a Water Heater Element
Basic Tools Needed for the Job
You can make your water heater element replacement much easier by gathering the right tools before you start. Professionals recommend several basic tools to ensure safety and efficiency:
- Heating element wrench: This specialized wrench fits most water heater elements and allows you to remove or install them without damaging the threads.
- Tua vít 4 trong 1: You will need this to remove access panels and disconnect wires from the element terminals.
- Kìm mũi nhọn: These help you handle wires safely and reach into tight spaces.
- Multimeter or continuity tester: Use this tool to check the heating element’s functionality before and after replacement.
- Non-contact voltage tester: Always confirm that the power is off before you touch any electrical parts.
- Bucket and towels: Keep these nearby to catch and clean up any water spills during the process.
- Găng tay bảo hộ và kính bảo hộ: Protect your hands and eyes from electrical hazards and hot water.
Mẹo: Lay out all your tools before you begin. This step saves time and helps you avoid unnecessary interruptions.
Optional Tools for Easier Installation
You can make the job even smoother with a few optional tools and supplies:
- Teflon tape: Wrap this around threaded connections to ensure a watertight seal and prevent leaks.
- Cleaning supplies: Use rags and a mild cleaner to wipe down the installation area and remove any debris or mineral buildup.
These extras are not always required, but they can help you achieve a professional-quality result and reduce the risk of future problems.
Avoiding Common Mistakes When Replacing a Heating Element
Over-Tightening or Cross-Threading
You should always pay close attention when installing the new heating element. Over-tightening the element can strip the threads or damage the tank, leading to leaks or costly repairs. Cross-threading is another common mistake. If you force the element into the opening at an angle, you can ruin the threads and create a poor seal.
- Start threading the element by hand to ensure it seats properly.
- Tighten the element firmly, but do not use excessive force.
- If you feel resistance, stop and realign the threads.
⚠️ Báo động: Never use power tools to tighten the element. Manual tightening gives you better control and helps prevent damage.
Refilling the Tank Before Powering On
You must refill the water heater tank completely before restoring power. If you turn on the power while the tank is empty, the new heating element will heat up rapidly and burn out almost instantly—a mistake known as “dry firing.”
- After installing the element, close the drain valve and open the cold water supply.
- Open a hot water faucet and let water run until you see a steady stream with no air bubbles.
- Only then should you turn the power back on.
Ghi chú: Taking these precautions protects your new element and ensures your water heater operates safely and efficiently.
Choosing the right water heater element requires careful attention to specifications and safety. Always turn off the power, wear safety gear, and drain the tank before starting. Test the element with a multimeter if you have no hot water. Replace faulty parts and flush the tank regularly to prevent sediment buildup. Double-check compatibility before installation. If you feel unsure, consult a professional. Take these steps, and you can approach your water heater repair with confidence and peace of mind.
Câu hỏi thường gặp
How do you know if your water heater element needs replacement?
You may notice lukewarm water, slow heating, or no hot water. Use a multimeter to test for continuity. If the element fails the test, you should replace it.
Can you use a higher wattage element in your water heater?
⚠️ Báo động:
Never use a higher wattage element than specified. You risk damaging your heater and creating safety hazards. Always match the original wattage.
What tools do you need to replace a water heater element?
You need a heating element wrench, screwdriver, multimeter, and safety gear. Optional tools include Teflon tape and cleaning supplies. Gather all tools before starting the job.
How long does it take to replace a water heater element?
Most replacements take 30 to 60 minutes. This includes draining the tank, removing the old element, installing the new one, and refilling the tank.
Should you replace both elements at the same time?
You do not need to replace both elements unless both fail. If one element fails, test the other. Replace only the faulty element to save time and money.
What happens if you power on the heater before refilling the tank?
⚠️ Cảnh báo:
You will burn out the new element instantly. Always refill the tank completely before restoring power to prevent dry firing.
How often should you check or replace your water heater element?
Check your element every 1 to 2 years. Replace it if you notice corrosion, scale buildup, or poor heating performance. Regular maintenance extends your heater’s lifespan.

