
You can replace нагревательный элемент in your oven with confidence using a step-by-step guide. The process uses basic tools and clear safety steps. Электрическое отопление Цзиньчжун и другие Производители нагревательных элементов supply нагревательные элементы бытовых приборов for most oven models. You will find oven heating element replacement straightforward, even if you have limited experience.
Always make sure your oven is unplugged before you start working on the heating element.
Heating Element Replacement: Tools and Materials
Essential Tools for Oven Element Repair
When you prepare for oven heating element replacement, you need the right tools to ensure a smooth process. Appliance manufacturers recommend basic hand tools for most oven element repair tasks. You should gather the following:
- Phillips-head screwdriver or flathead screwdriver for removing mounting screws
- Nut driver or socket set for loosening and tightening nuts
- Иглогубцы for handling connectors and wires
- Work gloves to protect your hands from sharp edges and heat
- Flashlight to improve visibility inside the oven
Tip: Always use insulated tools when working near electrical components to reduce the risk of shock.
A мультиметр can help you test for electrical continuity if you suspect a faulty heating element. Gloves and a flashlight make the process safer and easier, especially when you work in tight spaces.
Screwdrivers for heating element removal
You will need a Phillips or flathead screwdriver to remove the screws that secure the heating element. Most ovens use Phillips-head screws, but some models require a flathead.
Nut driver or socket set for oven heating element
A nut driver or socket set helps you remove nuts that hold the heating element in place. This tool provides better grip and control, especially if the nuts are tight or corroded.
Work gloves for safety during heating element replacement
Wear dry, heat-resistant gloves to protect your hands from sharp metal and residual heat. Gloves also help you grip the heating element securely during removal and installation.
Flashlight for oven element repair visibility
A flashlight allows you to see inside the oven cavity, making it easier to locate screws and connectors.
Choosing the Right Oven Heating Element
Selecting the correct oven heating element is crucial for a successful replacement. You must identify the right part for your oven model to ensure proper fit and performance.
Identifying the correct heating element for your oven
Check your oven’s data plate or user manual for the model number. Use this information to find a compatible heating element. Consider the type of oven (electric or gas), the power rating, and the coil design. Manufacturer compatibility charts can help you match the right part.
Where to purchase a replacement oven heating element
Purchase your replacement oven element from authorized retailers or the manufacturer’s website. This ensures you receive a genuine part with warranty coverage. Avoid third-party sellers that may offer counterfeit or low-quality components.
Safety Equipment for Heating Element Replacement
Safety should always come first when you perform oven heating element replacement. Electrical safety organizations recommend several precautions and equipment.
Safety glasses for oven element repair
Wear safety glasses to protect your eyes from debris or accidental sparks during the repair.
Voltage tester for confirming power off
Before you touch any wires, use a бесконтактный тестер напряжения to confirm the oven has no live current. This step prevents electrical shock and ensures a safe repair environment.
Примечание: всегда disconnect the oven from the power source before starting any replacement or repair work.
Optional Supplies for Oven Element Repair
When you prepare to replace your oven heating element, you can make the process easier and cleaner by gathering a few optional supplies. These items help you maintain a tidy workspace and ensure your oven stays in top condition after the repair. Although not strictly necessary, they can save you time and effort.
Cleaning cloth for oven heating element area
A clean work area improves both safety and performance. Before you install the new heating element, you should wipe down the inside of your oven. Grease, crumbs, and burnt residue often collect around the old element. If you leave this debris, it can cause smoke or unpleasant odors when you use your oven again.
- Use a soft, lint-free cloth for best results.
- Dampen the cloth slightly with water or a mild cleaner. Avoid harsh chemicals that might damage oven surfaces.
- Wipe around the mounting area, paying close attention to corners and crevices.
- Remove any loose particles or sticky spots.
Совет: Always let the oven cool completely before cleaning. Hot surfaces can cause burns or damage your cleaning cloth.
A clean surface ensures the new heating element sits flush against the oven wall. This helps maintain even heating and reduces the risk of future issues. You also prevent dirt from interfering with electrical connections.
Small vacuum for debris removal
You may find crumbs, dust, or small bits of insulation inside your oven cavity. A small handheld vacuum can help you remove this debris quickly and efficiently. Using a vacuum keeps the area free of particles that could catch fire or affect the performance of your new heating element.
- Choose a vacuum with a narrow nozzle to reach tight spaces.
- Gently vacuum around the mounting holes and wire connectors.
- Avoid touching any exposed wires or terminals with the vacuum nozzle.
Примечание: If you see any large debris or metal fragments, pick them up with gloved hands before using the vacuum. This prevents damage to your vacuum and keeps your hands safe.
A clean oven interior not only looks better but also works more efficiently. Removing debris helps you avoid unpleasant smells and ensures your new heating element operates at peak performance.
By taking a few extra minutes to clean the area with a cloth and vacuum, you set yourself up for a successful oven heating element replacement. These optional supplies help you achieve professional results and extend the life of your appliance.
Safety First: Preparing for Oven Heating Element Replacement
Before you begin any oven heating element replacement, you must prioritize safety. Following the correct safety measure protects you from electrical shock, burns, and other hazards. Professional appliance repair experts and electrical safety standards recommend a series of steps to ensure a safe workspace.
Disconnecting Power Before Heating Element Replacement
Unplugging the oven for safety
Вы всегда должны disconnect your oven from its power source before starting any repair. For most electric ovens, unplug the unit from the wall outlet. If your oven is hardwired, you need to locate the circuit breaker that controls the oven and switch it off. This step prevents accidental electrical shock and keeps you safe during the process.
Shutting off circuit breaker before oven element repair
Turning off the breaker is essential, especially if you cannot access the plug. Locate the dedicated breaker for your oven in your home’s electrical panel. Flip the switch to the “off” position. This action ensures no electric current flows to the oven heating element or any internal components.
⚡ Совет: Always double-check that you have turned off the power supply before proceeding. Never rely on the oven’s control panel alone.
Confirming No Power Before Oven Element Repair
Using a voltage tester for heating element replacement
After you disconnect the oven, you must confirm that no electrical power remains. Use a non-contact voltage tester or a multimeter to check the terminals and wires inside the oven. Touch the tester to the connectors where the heating element attaches. If the tester shows no voltage, you can safely continue. If you see any sign of power, stop and review your steps.
Follow these steps to confirm the oven is de-energized:
- Turn off the oven using the control panel.
- Wait for the oven and heating element to cool completely.
- Pull the oven away from the wall if needed to access the power source.
- Unplug the oven or switch off the circuit breaker.
- Attempt to turn on the oven light or control panel. No response means the oven is safely disconnected.
Safety Reminders for Oven Heating Element Replacement
Avoiding electrical shock during oven element repair
You face several risks if you skip safety steps. Live current can cause electrical shock, even if the oven appears off. Faulty wiring or damaged cords increase the danger. Always inspect cords and wiring before you begin. Never attempt oven element repair while the oven remains plugged in or the breaker is on.
Protecting hands and eyes during heating element replacement
Wear изолированные перчатки и защитные очки throughout the process. Gloves protect your hands from sharp edges and residual heat. Safety glasses shield your eyes from debris or accidental sparks. Remove any flammable materials or clutter from the area to reduce fire hazards. Prepare your workspace by clearing combustibles and ensuring proper ventilation.
🛡️ Примечание: If you notice flickering lights, buzzing sounds, or any unusual signs during the repair, stop immediately and contact a professional.
By following these safety steps, you create a secure environment for oven heating element replacement. You reduce the risk of injury and ensure a successful repair.
Accessing the Oven Heating Element
Locating the Heating Element in Your Oven
Identifying bake vs. broil heating element
You need to identify which heating element requires replacement before you begin. Most ovens contain two main elements: the baking element and the broil element. The baking element, also called the bottom oven element, sits at the base of the oven cavity. It provides the primary heat source for most cooking and baking tasks. The broil element is usually mounted at the top of the oven and delivers intense, direct heat for broiling.
- In electric ovens, you will find the heating element integrated within the oven cavity walls.
- Some ovens feature visible coils, while others hide the element beneath a ceramic or metal cover.
- Specialized ovens may have multiple heating elements, but the bake and broil elements remain the most common.
Tip: Always check your oven’s user manual or data plate to confirm the exact location and type of heating element installed.
Accessing inside the oven for heating element replacement
To access the oven heating element, open the oven door fully. Look for the exposed coil at the bottom for the baking element or at the top for the broil element. In some modern ovens, the element may be hidden under a protective panel. If you need to replace the baking coil, you must remove any covers or shields first. Use a flashlight to improve visibility inside the oven cavity.
Removing Oven Racks for Heating Element Replacement
Clearing workspace for oven element repair
You must remove the oven racks to create a clear workspace for the replacement process. This step prevents obstructions and allows you to reach the heating element easily.
Follow these steps to remove the oven racks safely:
- Confirm the oven is unplugged or the circuit breaker is off.
- Open the oven door completely.
- Grasp the front of each rack and pull it straight toward you.
- If the rack sticks, tilt it slightly upward to release it from the side grooves.
- Set the racks aside in a safe location.
Note: Removing the oven racks gives you more room to maneuver tools and reduces the risk of damaging the racks during the repair.
Unscrewing the Oven Heating Element
Finding mounting screws for heating element replacement
After you remove the oven racks, locate the mounting screws that secure the heating element. Most ovens use two screws at the back wall of the oven cavity. These screws hold the element’s mounting plate or brackets in place. In some models, you may find additional screws or clips along the sides.
- Use a flashlight to spot the screws clearly.
- Check for any covers or shields that may hide the screws.
Using the right tool for oven element repair
Select the correct tool for the job. Most ovens require a Phillips-head screwdriver or a nut driver to remove the screws. Some models may use hex-head screws, so a socket set can be helpful. Always use the tool that fits snugly to avoid stripping the screw heads.
Here is a standard procedure to remove the screws and access the heating element:
- Ensure the oven is cool and disconnected from power.
- Use your screwdriver or nut driver to remove the screws holding the heating element in place.
- Keep the screws in a safe spot for reinstallation.
- Gently pull the heating element toward you. If it resists, wiggle it slightly to loosen it from its brackets.
⚠️ Caution: Do not force the heating element out. If it feels stuck, double-check for hidden screws or clips before applying more pressure.
By following these steps, you can safely access and prepare to replace the oven heating element. This process ensures you have a clear workspace and the right tools to complete the replacement efficiently.
Извлечение старого нагревательного элемента
Disconnecting Wires from the Heating Element
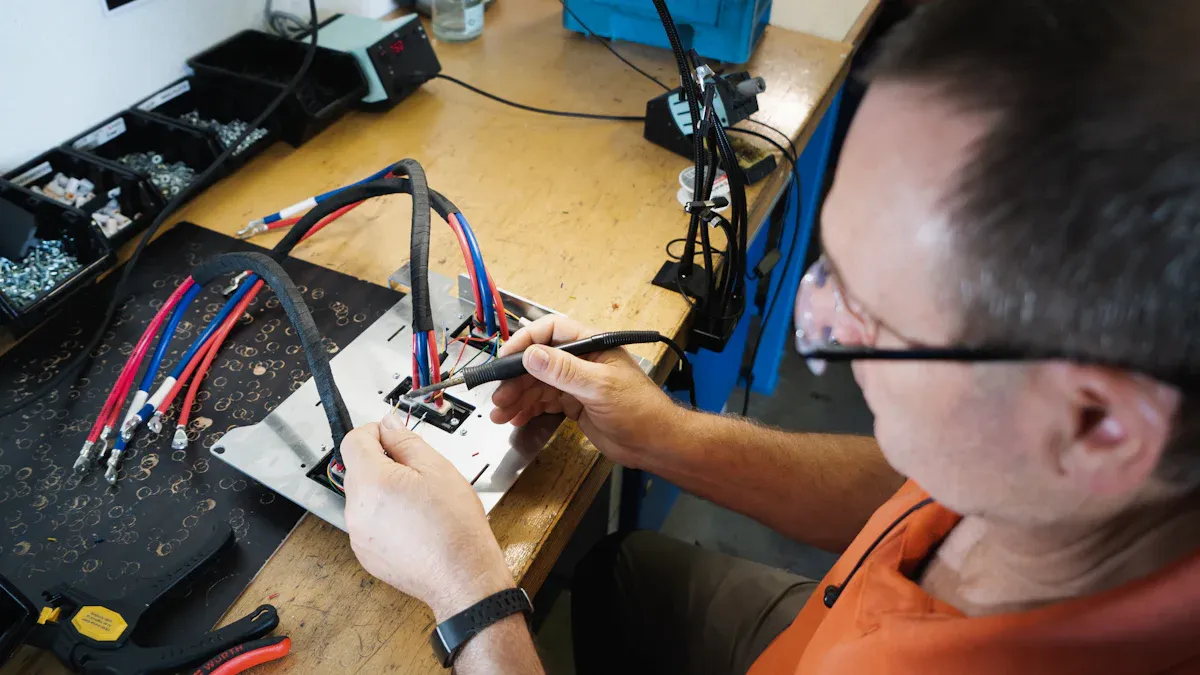
Noting wire placement for oven element repair
Before you detach the heating element, take a moment to observe how the wires connect to the terminals. You can use your phone to snap a quick photo or make a simple sketch. This step ensures you reconnect the wires correctly during installation. Each wire must return to its original position for the oven to function safely and efficiently.
Tip: Label the wires with masking tape if you feel unsure about their placement. This small effort can prevent confusion later.
Safely detaching connectors during heating element replacement
You must always prioritize safety when disconnecting wires from the oven heating element. First, confirm that the oven is unplugged and the circuit breaker is off. When you remove the wires, grip only the metal spade connectors at the element terminals. Use your fingers or a pair of needle-nose pliers for better control. Avoid pulling on the wires themselves, as this can cause internal damage or breakage. Hold the connectors firmly and pull straight out to release them. Take care not to let the wires slip back into the oven cavity, since you will need them for the new heating element.
⚡ Always double-check that no power remains before touching any wires. This habit protects you from electrical shock and keeps your repair process safe.
Inspecting for Damage During Oven Element Repair
Checking wires and terminals for heating element replacement
After removing the element, inspect the wires and terminals closely. Look for any signs of wear, discoloration, or fraying. Damaged wires can lead to poor connections or even electrical hazards. If you notice any issues, address them before proceeding with the replacement. Clean the terminals gently with a dry cloth if you see dirt or residue. Secure, clean connections help your new oven heating element perform at its best.
The table below highlights common signs of damage and what they indicate:
| Sign of Damage During Oven Heating Element Removal | What It Indicates |
|---|---|
| Element does not glow bright orange when heated | Element is malfunctioning or burned out; not producing heat properly |
| Visible physical damage (burns, scorch marks, blistering, cracks, breaks) | Overheating or wear; element likely needs replacement |
| Uneven cooking or undercooked food | Heat distribution issues; element failing to reach correct temperature |
| Excessive dirt buildup on element | Can damage the element and reduce performance; cleaning needed before replacement |
| Unexpected increase in electricity bills | Element may be drawing more power due to malfunction |
What to do if you see corrosion during oven element repair
Corrosion on the wires or terminals can interfere with the electrical connection and reduce the efficiency of your oven. If you spot any corrosion, use a small wire brush or fine sandpaper to clean the affected area. Remove all visible rust or buildup. If the corrosion appears severe or the metal feels weak, consider replacing the wire or terminal before you install the new heating element. Addressing corrosion now helps prevent future problems and ensures a reliable repair.
Note: If you feel uncertain about the condition of the wiring or see extensive damage, consult a professional before continuing.
By following these steps, you can safely and effectively remove the old heating element. Careful attention during this stage sets the foundation for a successful replacement and long-lasting oven performance.
Install the New Heating Element
Connecting Wires to the New Oven Heating Element
Matching wire placement for heating element replacement
Вы должны подключите провода к новому нагревательному элементу exactly as they were attached to the old one. This step ensures your oven operates safely and efficiently. Refer to your notes, sketches, or photos from earlier. Each wire should return to its original terminal. If you labeled the wires, match each label to the correct connector on the new heating element.
Follow these steps to connect the wires properly:
- Slide each wire connector fully onto the corresponding terminal of the new heating element.
- Use needle-nose pliers if needed to ensure a snug fit.
- Double-check that each connection feels tight and secure.
- Avoid touching the bare wire with your fingers to prevent oil transfer or accidental bending.
Tip: Secure connections prevent arcing and overheating, which can damage the oven or cause the replacement to fail prematurely.
Securing connectors for oven element repair
After you attach the wires, gently tug each connector to confirm it will not slip off. Loose connections can lead to poor performance or even electrical hazards. If a connector feels loose, use pliers to crimp it slightly for a tighter fit. Make sure no exposed wire touches any metal part of the oven except the designated terminal. This attention to detail ensures the oven heating element receives power safely and consistently.
Mounting the New Heating Element
Aligning screw holes for heating element replacement
Once you finish connecting the wires, position the new heating element so the mounting bracket lines up with the screw holes in the oven wall. You may need to adjust the element slightly to achieve perfect alignment. Proper alignment prevents stress on the wires and ensures the element sits flush against the oven cavity.
- Hold the heating element steady as you guide the mounting plate into place.
- Check that the element does not touch any other oven parts except at the mounting points.
Tightening screws for oven element repair
With the heating element aligned, insert the screws you removed earlier. Use a screwdriver or nut driver to tighten each screw firmly. Do not overtighten, as this can strip the threads or crack the mounting plate. Tight screws keep the heating element stable during operation and prevent vibrations.
Here is a quick checklist for installing the element securely:
- Insert all screws into their original holes.
- Tighten each screw until the heating element feels solid and does not move.
- Inspect the area for any leftover debris or tools before proceeding.
Note: A secure installation reduces the risk of future repairs and helps your oven maintain even heating.
Reinstalling Oven Racks After Heating Element Replacement
Placing racks back after oven element repair
After you install the new heating element and secure it, you need to return the oven racks to their original positions. Clean the racks and oven floor with a damp cloth before reinstalling to remove any dust or debris left from the replacement process. This step helps maintain a clean cooking environment and prevents unwanted odors during the first use.
Follow these steps to reinstall the racks:
- If you removed any panels or drip shields, replace them first by aligning with the screw holes and fastening securely.
- Slide each oven rack into its designated slot, ensuring it sits level and moves smoothly.
- Check that no tools or loose parts remain inside the oven before restoring power.
🛠️ Always confirm the racks are properly seated. Misaligned racks can interfere with airflow and affect cooking results.
You have now completed the core steps to install the new heating element. Your oven is almost ready for testing and use. By following these detailed instructions, you ensure a safe and effective replacement that restores your oven’s performance.
Reassembling and Testing the Oven Heating Element
Restoring Power After Heating Element Replacement
Plugging in or switching on breaker for oven element repair
After you finish installing the new heating element, you need to restore power to your oven safely. Follow these steps to ensure a secure and effective process:
- Double-check that all screws are tight and the heating element sits securely in place.
- Inspect every wire connection. Make sure each connector is firmly attached to the correct terminal.
- Use a multimeter to test for electrical continuity at the heating element terminals. This step confirms that the circuit is complete and ready for operation.
- Confirm that no tools or debris remain inside the oven cavity.
- Plug the oven back into the wall outlet or switch the circuit breaker to the “on” position.
⚡ Only restore power after you confirm that all components are properly installed and tested. This step prevents electrical hazards and ensures your safety.
Тестирование нового нагревательного элемента
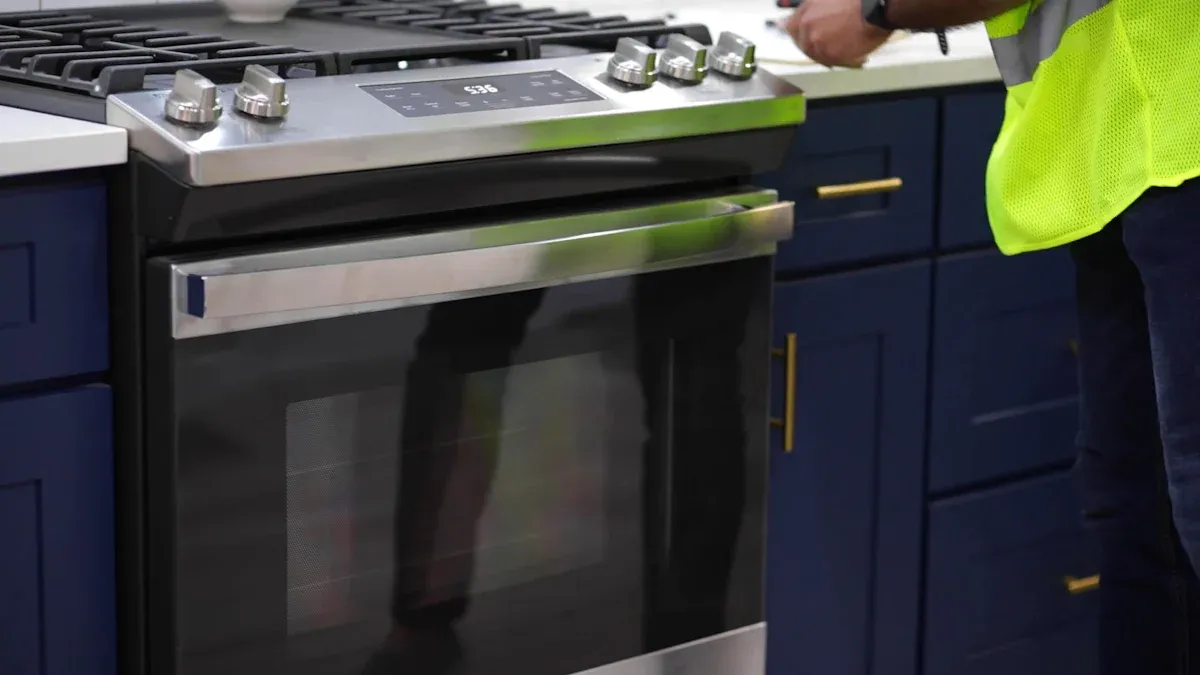
Setting oven to bake/broil for heating element replacement
You must begin testing by setting your oven to the bake or broil function, depending on which heating element you replaced. Select a standard temperature, such as 350°F, for the bake setting. Allow the oven to preheat. This process helps you check the new element for proper operation.
Observing heating and glow of oven heating element
Watch the oven heating element as the oven heats up. A functioning element will begin to glow bright orange within a few minutes. You should also listen for any unusual sounds or observe any smoke, which could indicate leftover debris or improper installation.
- Place an oven thermometer inside to monitor the internal temperature.
- Check the temperature every 20 minutes for up to two hours. This step helps you verify that the oven maintains a consistent temperature.
- If the oven does not reach or hold the set temperature, recalibrate the temperature dial as needed.
📝 A properly installed heating element will heat evenly and maintain the correct temperature throughout the testing period.
Troubleshooting Oven Element Repair Issues
What to do if heating element doesn’t heat
If the new heating element does not heat, take these troubleshooting steps:
- Unplug the oven or switch off the breaker before inspecting.
- Use a multimeter to test the new heating element for electrical continuity. A reading under 50 ohms means the element works. A reading of 1 or no reading means the element is faulty.
- Inspect the oven control board and thermal fuse for faults. Replace any defective parts you find.
Checking connections after heating element replacement
Loose or incorrect wiring can prevent the heating element from working. Check each connector to ensure it is secure and attached to the correct terminal. Make sure the temperature sensor is not touching the oven walls, as this can cause false readings. If you find any issues, correct them and repeat the testing process.
🔍 Always test the new heating element and check the new element for proper operation before using the oven for cooking. Careful testing ensures your replacement is successful and your oven is safe to use.
Common Mistakes in Oven Heating Element Replacement and How to Avoid Them
Skipping Safety Steps During Heating Element Replacement
Risks of working with live power during oven element repair
You must never overlook safety when replacing a heating element in your oven. Skipping essential steps can put you at serious risk. Many homeowners underestimate the dangers of working with electric appliances. If you fail to disconnect the oven from its power source, you expose yourself to electric shock. Always wear protective gear, such as safety gloves and glasses, to shield yourself from sharp edges and electrical components. Handle the heating element carefully, especially if it appears brittle, to prevent accidental breakage.
Here are the main risks you face if you skip safety steps:
- Electric shock can occur if you do not disconnect the oven before starting the replacement.
- Sharp edges and electrical parts can cause injury if you do not wear gloves and safety glasses.
- Mishandling a brittle or faulty heating element may result in further damage.
- Continuing to use an oven with a faulty heating element increases the risk of fire, electrical hazards, and appliance failure.
- If you feel unsure or encounter persistent electrical issues, you should seek professional help to avoid dangerous DIY mistakes.
⚠️ Always prioritize safety. Never attempt repairs if you are unsure about any step.
Using Wrong Oven Heating Element Replacement Part
Importance of model number for heating element replacement
Selecting the correct replacement part is crucial for a successful repair. Many homeowners attempt to fix their oven without proper training, which often leads to using the wrong heating element. This mistake can cause electrical shock, burns, or even fire hazards. Using an incorrect part may also damage your oven, void the warranty, and result in expensive repairs.
- Always check your oven’s model number before purchasing a replacement heating element.
- Refer to the manufacturer’s compatibility chart to ensure you select the right part.
- Avoid using generic or unverified parts, as they may not meet safety standards.
If you notice severe damage, such as melted wires or signs of arcing, stop the repair and contact a certified technician. Proper safety protocols and the correct tools protect both you and your appliance.
📝 Tip: Keep your oven’s model number handy when shopping for replacement parts to avoid costly errors.
Damaging Wires or Connectors During Oven Element Repair
Gentle handling tips for heating element replacement
You need to handle wires and connectors with care during oven heating element replacement. Improper handling can cause sparking, oxidation, and heat damage to copper wires. Corroded or thinned wires increase resistance, which can lead to burnout or even fire. Attempting to crimp damaged wires results in unreliable connections that fail quickly.
- Always cut back to shiny, undamaged copper wire before attaching connectors.
- Use high-temperature rated connectors and tools for all repairs.
- Avoid pulling or twisting wires forcefully, as this can cause internal damage.
- Inspect wires for signs of melting, burning smells, or corrosion before completing the replacement.
Loose or poor wiring disrupts the electrical flow, causing erratic heating or total failure of the oven heating element. Frequent circuit breaker trips may signal faulty wiring or short circuits. If you notice any of these issues, consult a professional technician to ensure safe and effective repairs.
🔍 Regular inspection and gentle handling of wires and connectors help maintain your oven’s performance and safety.
Forgetting to Test the Oven Heating Element
Why testing matters after heating element replacement
You might feel eager to use your oven right after installing a new heating element. However, skipping the testing step can lead to bigger problems. Testing ensures that your repair works as intended and that your oven operates safely. If you do not test the new element, you risk facing issues like uneven heating, electrical faults, or even damage to your appliance.
Testing the oven heating element serves several important purposes:
- Confirms Proper Installation: You verify that you connected all wires correctly and secured the element in place.
- Detects Immediate Issues: You can spot problems such as loose connections, faulty parts, or tripped breakers before they cause further damage.
- Prevents Safety Hazards: You reduce the risk of electrical shock, fire, or malfunction by ensuring the element heats up as expected.
Совет: Always test the oven in a controlled setting before cooking food. This approach helps you catch any issues early.
You should follow a simple process to test the new heating element:
- Restore power to the oven by plugging it in or switching on the breaker.
- Set the oven to a standard temperature, such as 350°F, and observe the heating element.
- Watch for a steady, even glow from the element. Listen for unusual sounds or look for smoke.
- Use an oven thermometer to check if the appliance reaches and maintains the set temperature.
If you notice that the oven does not heat up or the element fails to glow, turn off the power immediately. Recheck all connections and ensure you installed the correct part. Sometimes, a missed step or a loose wire can prevent the oven from working properly.
🛑 Neglecting to test the oven heating element can result in wasted time, additional repairs, or safety risks. Always make testing your final step.
By making testing a routine part of your repair process, you protect your investment and ensure reliable oven performance. You also gain peace of mind knowing your appliance is ready for safe use.
When to Call a Professional for Oven Element Repair
Signs You Need Help with Heating Element Replacement
Electrical issues during oven element repair
You may encounter situations where replacing an oven heating element becomes more complex than expected. Electrical issues often signal the need for a professional. If you notice any of the following, stop your repair and seek expert help:
- The oven fails to heat or does not reach the set temperature, even after a new heating element installation.
- You hear buzzing, grinding, or clicking noises from inside the oven.
- The oven takes much longer than usual to preheat or shows erratic temperature changes.
- You detect burning smells, smoke, or even a gas odor during or after the replacement.
- The oven does not turn on, despite having power and a new heating element.
These problems often point to deeper electrical faults, faulty wiring, or control board issues. Attempting to fix these without proper training can lead to further damage or safety hazards.
Unusual oven behavior after heating element replacement
After you replace a ge oven heating element or any other model, you should monitor the oven for unusual behavior. Watch for these signs of a faulty heating element or related issues:
- Inconsistent cooking results, such as overcooked or undercooked dishes.
- Неравномерный нагрев, where one side of the food burns while the other remains raw.
- Loud noises, including banging or rattling, that were not present before.
- Persistent strange odors, especially burning or chemical smells.
- The presence of smoke or visible sparks during operation.
These signs of a faulty heating element or other internal problems indicate that a simple replacement may not resolve the issue. You should not ignore these warning signals, as they can compromise both safety and performance.
⚠️ If you notice any of these signs of a faulty heating element, stop using the oven immediately and contact a qualified technician.
Finding a Qualified Technician for Oven Element Repair
What to look for in oven heating element replacement experts
Choosing the right professional ensures your oven receives a safe and effective repair. Look for these qualifications when selecting a technician:
- Certification and licensing that demonstrate proper training and adherence to industry standards.
- Technical expertise with your specific oven brand and model, especially for heating element repairs.
- Access to genuine manufacturer-approved parts and specialized tools.
- Strong diagnostic skills to identify hidden issues beyond the obvious signs of a faulty heating element.
- Experience with electrical components and compliance with safety regulations.
- Ability to offer service warranties, providing peace of mind for your replacement.
- Professionalism, clear communication, and transparency about costs and repair options.
- Positive reputation and insurance coverage to protect your property.
A certified, factory-trained technician can diagnose and repair complex problems quickly. You benefit from reliable service, genuine parts, and long-term performance. Regular maintenance and expert inspections also help prevent future breakdowns.
🛠️ Attempting to repair electrical problems or swap parts without proper training can be dangerous. Always trust a qualified expert for complex oven heating element replacement tasks.
You can replace an oven heating element efficiently by following a clear process and using basic tools. Always disconnect power, wear safety gear, and match the new heating element to your oven model.
1. Unplug the oven or switch off the breaker before starting.
2. Remove oven racks and any covers to access the oven heating element.
3. Wear gloves and safety glasses to protect yourself.
4. Double-check all connections before restoring power.
If you feel uncertain at any step, contact a professional for safe oven repairs.
ЧАСТО ЗАДАВАЕМЫЕ ВОПРОСЫ
How often should you replace an oven heating element?
Most oven heating elements last 5–10 years. Replace the element if you notice uneven heating, visible damage, or the oven fails to reach temperature. Regular inspection helps you catch issues early.
Can you replace an oven heating element without professional help?
Yes, you can replace most oven heating elements yourself. Use basic tools and follow safety steps. Always disconnect power before starting. If you feel unsure, contact a qualified technician.
What signs indicate a faulty oven heating element?
Ищите эти признаки:
- Пища готовится неравномерно
- The element does not glow
- Visible cracks or burns
- The oven takes longer to preheat
If you see these issues, consider replacing the element.
Do all ovens use the same heating element?
No, ovens use different heating elements based on brand and model. Always check your oven’s model number before buying a replacement. Refer to the manufacturer’s compatibility chart for guidance.
Is it safe to use the oven if the heating element is damaged?
You should not use an oven with a damaged heating element. Damaged elements can cause electrical hazards, uneven cooking, or even fire. Replace the faulty part before using the appliance again.
What tools do you need for oven heating element replacement?
You need:
- Отвертка
- Nut driver or socket set
- Иглогубцы
- Рабочие перчатки
- Фонарик
Optional: Use a voltage tester and safety glasses for extra protection.
How do you test a new oven heating element after installation?
Set the oven to bake or broil. Watch for the element to glow orange. Use an oven thermometer to check temperature accuracy. If the element does not heat, recheck your connections and power supply.
Can you clean a heating element instead of replacing it?
You can clean minor residue from a heating element with a damp cloth. Do not use harsh chemicals or scrub aggressively. If you see cracks, corrosion, or the element fails to heat, replacement is necessary.

