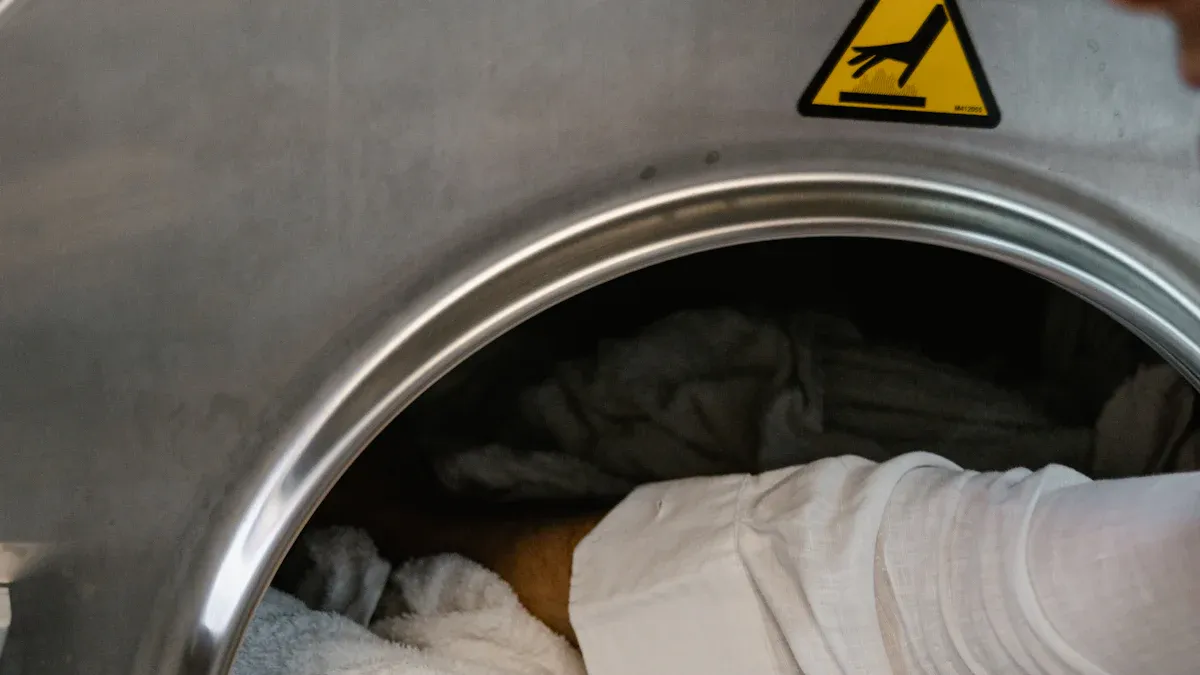
If your GTD33EASK0WW dryer stops heating, you likely face a problem with the heating element or a related part. This model often shows heating issues when the gtd33eask0ww heating element fails. You may notice the dryer door closes securely, but clothes remain cold. Always check the door switch and review the manual for your specific model. A worn heating element in the gtd33eask0ww can cause the dryer to run without proper heating.
Tip: Always unplug your dryer before opening the door or starting repairs.
Quick Diagnosis for a GTD33EASK0WW Not Heating
When your GTD33EASK0WW dryer is not heating, you need to identify the root cause quickly. This section guides you through the most common symptoms, initial checks, and when to suspect the heating element as the source of the problem.
Signs Your Dryer Heating Element May Be Bad
Одежда остается мокрой или холодной
You may notice that after a full cycle, your clothes stay damp or cold. This symptom often points to a heating issue in your dryer. The drum spins, but the lack of heat prevents proper drying. Many users report this as the first sign of a faulty heating element in the GTD33EASK0WW model.
Dryer Runs Without Producing Heat
If your dryer starts and the drum rotates, but you feel no warmth inside, the heating element could be at fault. This symptom is common in GE dryer models, including the GTD33EASK0WW. The machine appears to function, but the absence of heat means your clothes will not dry.
Unusual Smells or Error Codes
Sometimes, you may detect a burnt odor or see error codes on the control panel. A burnt smell can indicate a damaged heating element or charred connectors. Error codes may also signal a heating issue, especially in newer GE dryer models.
Примечание: If you notice a persistent burnt smell, unplug the dryer immediately and inspect the heating element before further use.
Initial Checks Before Testing the Heating Element
Before you start testing or replacing the gtd33eask0ww heating element, perform these essential checks to rule out simple causes.
Confirm Power Supply to the Dryer
Check that your dryer receives the correct voltage. The GTD33EASK0WW model requires 240VAC to heat properly. Use a multimeter to measure the voltage at the outlet. If you find less than 220V, the dryer will not heat, even if the drum spins.
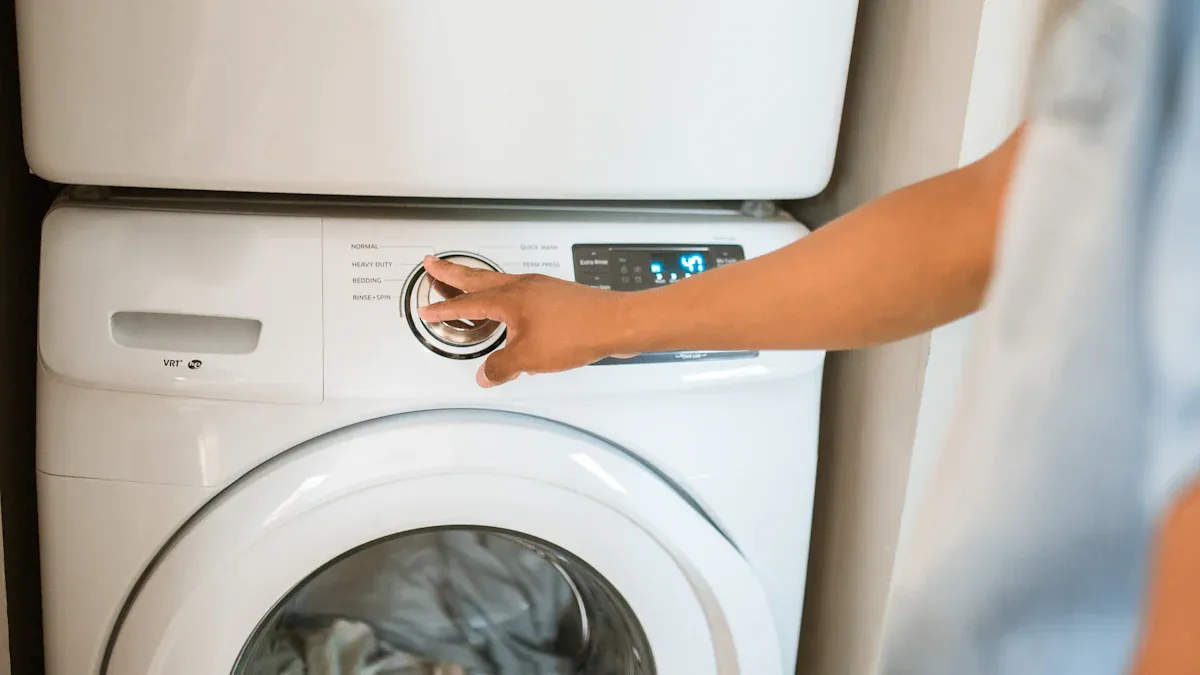
Inspect Dryer Settings and Controls
Review the control panel and settings. Make sure you select a heat cycle and not an air fluff or no-heat option. Sometimes, incorrect settings can mimic a heating issue. Double-check the timer and temperature controls before moving forward.
Check Lint Filter and Vent for Blockages
A clogged lint filter or vent can cause your dryer to stop heating. Remove the filter and clean off any lint buildup. Inspect the vent hose and the outside vent cover for obstructions. Lint accumulation restricts airflow, leading to overheating or poor drying performance.
Common maintenance oversights include:
Blocked outside vent covers.
Lack of regular vent cleaning.
Совет: Clean the lint filter before every load to maintain optimal airflow and prevent heating issues.
When to Suspect the GTD33EASK0WW Heating Element
Visual Inspection for Burnt or Damaged Element
Remove the back panel and inspect the heating element assembly. Look for visible signs of damage, such as broken coils, burnt spots, or discoloration. If you see any of these, the heating element likely needs replacement.
Smell of Burnt Metal or Charred Connectors
A strong burnt metal odor or blackened connectors near the heating element signals a serious problem. This symptom often means the element has failed or wiring has overheated. Do not start the dryer again until you address this issue.
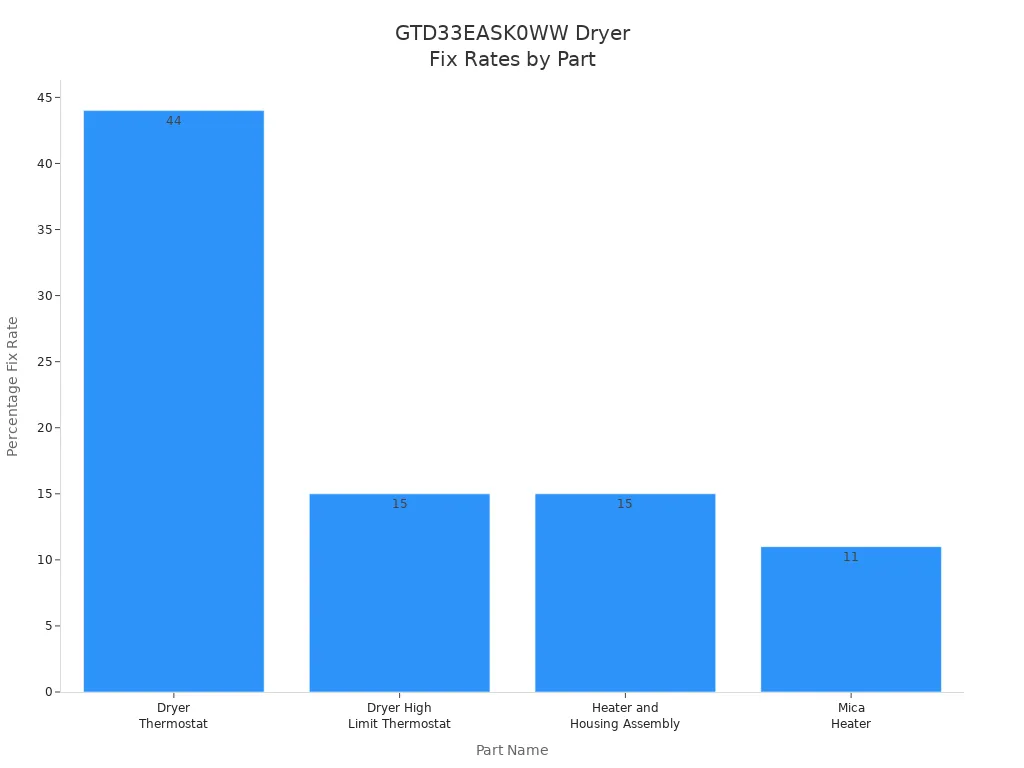
Common Causes and Fix Rates
The table below shows the most common parts responsible for the GTD33EASK0WW not heating, along with their fix rates:
Part Name | Percentage Fix Rate |
|---|---|
Dryer Thermostat | 44% |
Dryer High Limit Thermostat | 15% |
Heater and Housing Assembly | 15% |
Mica Heater | 11% |
You should also consider other possible causes if the heating element appears intact. These include a blown thermal fuse, faulty thermostat, or blocked lint filter. Testing these components with a multimeter helps confirm the source of the problem.
Typical symptoms of a bad heating element in this model:
Dryer not getting hot or not heating properly.
Clothes remain wet after a full cycle.
Drum spins, but no heat is produced.
If you confirm 220V power at the outlet and the dryer drum starts but no voltage reaches the heating element, suspect the element or its wiring. Intermittent heating that resumes after arcing also points to a faulty heating element or related wiring.
Напоминание: Always check the lint filter, drum, and vent system before replacing any parts. Regular maintenance prevents many common heating issues in GE dryer models.
Safety Precautions for GTD33EASK0WW Heating Element Repair

Before you begin any repair on your GTD33EASK0WW, you must prioritize safety. Handling electrical parts and working around the motor or switch can pose risks if you do not follow proper instruction. This section outlines the essential steps to keep you safe and organized during the process.
Disconnecting Power and Ensuring Safety
Unplug the Dryer Completely
Always unplug your dryer before you touch any internal parts. This step prevents accidental electric shock. Even if you only plan to inspect the heating element or switch, disconnect the power cord from the wall outlet. Never rely on the control switch alone to cut off electricity.
Double-Check for Live Electrical Connections
After unplugging, double-check that no electrical current remains. Use a voltage tester on the terminal block or near the motor. Some dryers can retain a small charge in certain parts. Confirming the absence of power ensures you avoid injury while handling the switch, motor, or heating element.
Tools and Safety Gear for Element Replacement
Required Tools for GTD33EASK0WW Dryer Repair
You need the right tools to complete the repair efficiently. Most individuals use a Philips screwdriver to remove the top and front panels. A nutdriver helps with the screws securing the heating element and other parts. For some screws, a Torx screwdriver may be necessary, especially around the bearing assembly. Mark each wire before disconnecting it from the switch or motor. This practice helps you reconnect all parts correctly during reassembly.
Common tools for this repair:
Philips screwdriver
Nutdriver
Torx screwdriver (for bearing assembly)
Voltage tester
Camera or phone (for taking reference photos)
Recommended Protective Equipment
While most instruction guides do not mention specific safety gear, you should still take precautions. Wear gloves to protect your hands from sharp edges on metal parts. Safety glasses can shield your eyes from dust or debris when you remove panels. Always handle the drum, motor, and switch with care to avoid pinching your fingers.
Tip: Keep a small container nearby for screws and small parts. This habit prevents loss and confusion during reassembly.
Preparing Your Workspace for Dryer Repair
Clear and Organize the Area
Choose a well-lit, spacious area for your repair. Remove clutter and keep the floor dry. Lay out a towel or mat to protect both the dryer and your floor from scratches. Organize all parts and tools before you start. This preparation reduces the risk of losing screws or mixing up parts like the switch or motor.
Keep Parts and Tools Accessible
Arrange your tools and parts within easy reach. Place removed screws, panels, and small parts in labeled containers. Take photos of wire connections to the switch and motor before disconnecting them. These reference images help you follow the instruction manual accurately during reassembly.
Note: Careful preparation and organization make the repair process smoother and safer. You will spend less time searching for parts and avoid mistakes when reconnecting wires or switches.
Accessing the GTD33EASK0WW Heating Element
Removing the Dryer Back Panel
Locate and Remove All Screws
Start by moving your dryer away from the wall to access the back panel. You will see several screws securing the panel in place. Use a Philips screwdriver or a nutdriver to remove each screw. Work methodically, starting from one corner and moving around the panel. Keep track of all screws by placing them in a small container. This step prevents you from losing any parts during the repair.
Safely Set Aside the Panel
Once you remove all screws, gently lift the back panel away from the dryer. Set the panel aside in a safe spot where it will not get scratched or bent. Make sure the area remains clear so you can access the internal parts without obstruction. A clean workspace helps you avoid damaging the panel or other components.
Identifying the Heating Element Assembly
Spot the Heating Element and Housing
After removing the back panel, look inside the dryer cabinet. The heating element assembly sits near the lower section, often inside a metal housing. You will recognize it by its coiled wire or metal casing. To ensure you identify the correct part, use the exact model number, gtd33eask0ww, on the official GE Appliance parts website. This approach gives you access to model-specific diagrams and part lists. You can also search authorized distributor sites like PartSelect for genuine OEM heating element assemblies. These resources help you match the part visually and confirm compatibility.
Шаг | Описание | Назначение |
|---|---|---|
1 | Use the exact model number GTD33EASK0WW on official GE Appliance parts website | To access model-specific parts and diagrams |
2 | Review the parts sections and assemblies listed (e.g., BACKSPLASH, BLOWER & MOTOR ASSEMBLY, FRONT PANEL & DOOR, TRAP DUCT ASSEMBLY, CABINET & TOP PANEL, DRUM) | To locate the heating element assembly or related parts visually and by section |
3 | Identify the heating element assembly part number or name from the parts diagram or list | To ensure the correct heating element assembly is selected for replacement or testing |
4 | Contact GE Appliance Parts support if the heating element assembly is not explicitly named | To get direct assistance in identifying the correct part |
Recognize Connected Wires and Components
You will see several wires connected to the heating element assembly. These wires supply power and connect to thermostats or thermal fuses. Take note of the wire colors and their attachment points. You may also see other parts nearby, such as the blower or motor assembly. Recognizing these connections ensures you can reassemble the dryer correctly after replacing the heating element.
Documenting Wire Connections
Take Reference Photos Before Disassembly
Before you disconnect any wires, use your phone or camera to take clear photos of each connection. Capture multiple angles to show where each wire attaches to the heating element and other parts. These reference images serve as a guide during reassembly. You will avoid confusion and reduce the risk of wiring errors. This step saves time and helps maintain the safety and performance of your dryer.
Tip: Label wires with masking tape and a marker if you want extra clarity during reassembly.
Testing the GTD33EASK0WW Heating Element and Related Parts
When your dryer drum spins but fails to produce heat, you need to test the heating element and related parts. This process helps you identify the exact cause of the heating problem in your GTD33EASK0WW.
Using a Multimeter to Test the Heating Element
Setting the Multimeter for Continuity
You should set your multimeter to the continuity or lowest resistance setting. This function allows you to check if electrical current can flow through the heating element. Place the multimeter on a stable surface near the dryer drum. Make sure the dryer remains unplugged before you begin.
Testing the Heating Element Terminals
Locate the terminals on the gtd33eask0ww heating element. Touch one probe to each terminal. If the multimeter beeps or shows a reading close to zero, the heating element has continuity. A reading of infinite resistance or no beep means the heating element is faulty. You must replace it if you see this result.
Checking Thermostats and Thermal Fuses
Locate and Test Each Thermostat
You will find several thermostats inside the dryer drum assembly. The most important are the dryer thermostat and the high limit thermostat. Remove the wires from each thermostat. Place the multimeter probes on the thermostat terminals. A working thermostat will show continuity. If you see no continuity, the thermostat has failed and needs replacement.
Inspect and Test Thermal Fuses
Thermal fuses protect the dryer from overheating. Find the fuses near the drum or heating element housing. Remove the wires and test the fuse with your multimeter. No continuity means the fuse has blown. Replace any blown fuses before running the dryer drum again.
Understanding Test Results for Not Heating Issues
What Continuity or Resistance Readings Mean
You can use the following table to interpret your test results:
Part Tested | Expected Reading | Необходимо действие |
|---|---|---|
Нагревательный элемент | Continuity (0-50Ω) | Element is good |
Нагревательный элемент | No continuity (∞) | Заменить элемент |
Thermostat | Continuity | Thermostat is good |
Thermostat | No continuity | Replace thermostat |
Тепловой предохранитель | Continuity | Fuse is good |
Тепловой предохранитель | No continuity | Replace fuse |
Note: Symptoms like the dryer not heating often point to a faulty thermostat, blown fuse, or failed heating element. Always test the high limit thermostat with a multimeter during diagnosis.
Решение о необходимости замены элемента
Replace the heating element if you find no continuity or see visible damage. If the thermostats or fuses fail the test, replace those parts as well. You should also check other parts such as the start switch, door switch, and main knob assembly. Dirty lint filters or blocked drainage can also cause heating problems, so inspect these areas during your diagnosis.
Common test results indicating a failed part:
No continuity in the heating element
Faulty dryer thermostat or high limit thermostat
Blown thermal fuse
Issues with the start switch or door switch
By following these steps, you ensure that your dryer drum heats properly and all parts work together for safe operation.
GTD33EASK0WW Heating Element Replacement Step-by-Step
Replacing the heating element in your GTD33EASK0WW dryer requires careful attention to detail and a methodical approach. You can complete this element replacement at home with the right tools, patience, and a clear understanding of each step. Follow these instructions to ensure a safe and successful repair.
Извлечение неисправного нагревательного элемента
Disconnect Wires from the Element
Before you begin, make sure you have unplugged the dryer and, if applicable, shut off the gas and water supplies. Wait until the dryer cools down. Wear insulated gloves to protect your hands from sharp edges and electrical hazards. Use non-conductive tools when handling wires. Take reference photos of all wire connections. Gently disconnect each wire from the heating element terminals. Avoid pulling on the wires directly; instead, grip the connectors to prevent damage to the parts.
Совет: Handle all parts gently and keep your workspace clean and well-lit. This reduces the risk of accidental damage during the repair.
Unscrew and Remove the Element Assembly
Locate the screws securing the heating element assembly to the dryer. Use the appropriate screwdriver or nutdriver to remove them. Set the screws aside in a labeled container. Carefully slide the heating element assembly out of its housing. Move slowly and avoid bumping other components inside the dryer. If you encounter resistance, double-check for any hidden screws or clips. Handle the assembly with care to prevent bending or breaking any parts.
Installing the New Dryer Heating Element
Match and Position the Replacement Part
Compare the new heating element with the old one to confirm compatibility. The replacement should match the original in size, shape, and connector type. Position the new heating element assembly in the same orientation as the old one. Align it with the mounting holes and ensure it fits securely within the housing.
Secure the New Element in Place
Insert the screws you removed earlier and tighten them to secure the new heating element. Do not overtighten, as this can damage the mounting points or the element itself. Check that the assembly sits firmly and does not move when you gently press on it. A stable installation helps prevent future heating issues.
Reconnect Wires Properly
Refer to your reference photos or labels to reconnect each wire to the correct terminal on the new heating element. Push the connectors on firmly, but do not force them. Double-check that all wires are attached securely and that none are loose or touching other parts. Proper wire connections are essential for safe and effective heating.
Tips for a Smooth Element Replacement
Avoid Common Mistakes During Installation
Allocate at least two hours for the element replacement. Rushing increases the risk of mistakes.
Never work with wet hands or in a damp environment. This reduces the risk of electric shock.
Keep children and pets away from your workspace.
Follow the official GE instructions and consult the user manual for model-specific guidance.
Watch video guides for similar GE dryers to visualize each step.
Handle all parts gently to avoid damaging the appliance.
Double-Check All Connections
Before reassembling the dryer, inspect every connection. Make sure all wires are attached to the correct terminals and that no parts are left loose inside the cabinet. Confirm that the heating element sits securely in its housing. Review your reference photos to verify accuracy. A careful final check ensures your GTD33EASK0WW operates safely and restores proper heating.
Примечание: Patience and attention to detail are your best tools during this repair. A well-executed element replacement extends the life of your dryer and improves its performance.
Reassembling and Testing Your GTD33EASK0WW Dryer
Reattaching the Back Panel
Align and Secure All Screws
After you install the new heating element, you need to reattach the back panel. Align the panel with the edges of your dryer cabinet. Insert each screw into its original hole. Tighten the screws in a crisscross pattern to ensure even pressure. This method helps prevent warping and keeps all parts secure. Use a nutdriver or screwdriver for a snug fit, but avoid overtightening. Double-check that the panel sits flush and does not interfere with the door or other moving parts.
Tip: Keep a small tray nearby for screws during reassembly. This habit prevents losing any parts and speeds up the process.
Powering On and Running a Test Cycle
Check for Proper Heat Output
Plug your dryer back into the outlet. Open and close the door to confirm it latches securely. Set the controls to a standard heat cycle. Press the start button. Wait for the drum to begin spinning. After a few minutes, open the door and feel inside for warm air. If you notice heat, your repair succeeded. If the air remains cold, stop the cycle and check the connections to the heating element and related parts.
Listen and Smell for Any Issues
During the test cycle, listen for unusual noises. Squeaks or rattles may indicate loose parts or misaligned panels. Pay attention to any burning smells. A faint odor is normal for new parts, but a strong burnt smell signals a problem. If you detect this, stop the dryer, unplug it, and inspect the heating element and wiring. Always check the door area for proper closure and smooth operation.
Final Safety and Function Checks
Inspect for Loose Parts or Wires
Before you use the dryer for regular loads, perform a thorough inspection. Open the door and look inside the drum. Check that no parts remain loose or out of place. Examine the wiring near the heating element and other components. Tug gently on each connection to confirm it stays secure. Close the door and press start again to verify smooth operation.
Ensure Proper Dryer Ventilation
Proper ventilation protects your dryer and home. Inspect the exhaust duct for tight seals. Use duct or aluminum tape to secure joints. Choose rigid metal or UL-listed flexible metal ducts for safety. Make sure the vent path remains clear of blockages. Check that the duct length and number of elbows match manufacturer recommendations. This step prevents overheating and reduces fire risk.
Note: Level your dryer by adjusting the legs. A stable appliance prevents tipping and ensures the door opens and closes smoothly.
You should also follow these steps for a complete safety check:
Test for gas leaks with a soapy solution if your dryer uses gas. Never use an open flame. If you find leaks, close the valve, retighten joints, and repeat the test.
Confirm the exhaust duct is installed correctly and sealed tightly.
Verify the exhaust system is free of blockages and venting properly.
Level the dryer by adjusting the legs side-to-side and front-to-back.
Plug in the dryer only after all mechanical and ductwork checks are complete.
Press start and confirm the dryer operates correctly, including the display and controls.
Vacuum the lint filter area if you notice changes in dryer performance.
Inspect and clean the exhaust duct and hood at least once a year. Make sure the vent flaps move freely and prevent wildlife from entering.
By following these steps, you ensure your GTD33EASK0WW dryer operates safely and efficiently. You protect your investment and extend the life of all parts, from the door to the heating element.
If Your GTD33EASK0WW Dryer Is Still Not Heating
Even after replacing the heating element, your GTD33EASK0WW may still refuse to heat. This situation can be frustrating, but you can troubleshoot other common causes before seeking professional repair.
Other Causes Beyond the Heating Element
Faulty Thermostats or Fuses
You may find that a malfunctioning thermostat or a blown fuse prevents your dryer from heating. The thermostat regulates the temperature inside the drum, and a failure can stop the heating cycle. Thermal fuses act as safety devices. If they blow, the model will not produce heat. You should test these components with a multimeter. Replace any faulty parts to restore proper function.
Wiring or Control Board Problems
Wiring issues or a defective control board can also cause heating failures. Damaged wires may interrupt the power supply to the heating element, drum, or motor. The control board manages the dryer’s cycles and heating commands. If you notice the drum spins but the door does not latch properly, or the motor does not start, wiring or board faults may be the cause. These problems often require advanced diagnostic skills.
Blocked Dryer Vents or Ducts
A blocked vent or duct can prevent your GE dryer from heating efficiently. Lint buildup restricts airflow, causing the drum to overheat or the thermostat to trip. You should inspect the vent system and remove any obstructions. Clean the filter after every load to maintain optimal airflow. Regular vent cleaning helps prevent future heating issues in your general electric dryer.
When to Call a Professional for Dryer Repair
Signs of Complex Electrical Issues
You should contact a professional if you encounter persistent problems with your GTD33EASK0WW. Look for these signs:
Clothes remain wet after a full cycle.
The dryer produces unusual noises during operation.
You may also notice the following:
The drum does not tumble, even though the dryer heats up.
The dryer stops running as soon as you release the door or start button.
Moisture remains inside the door after each cycle.
These symptoms often indicate electrical or mechanical faults involving the motor, drum, or control board. Professional technicians have the tools and expertise to diagnose and repair these complex issues.
Warranty and Service Options for GTD33EASK0WW
When you purchase parts for your model through PartSelect, you receive a one-year warranty. PartSelect also offers same-day shipping and a price match guarantee. You can access free repair guides and videos online to help with troubleshooting. Community repair stories and instructions provide additional support for your GE dryer. Manufacturer warranty coverage and direct service plans may vary, so check your documentation for details.
Preventing Future Not Heating Problems
Regular Dryer Maintenance Tips
You can prevent many heating issues by following a simple maintenance routine. Always clean the lint filter after every load. This step keeps the drum and motor running efficiently. Regularly inspect the exhaust duct for lint buildup. Clean the exterior of your dryer to keep it looking new and to spot any potential problems early.
Cleaning and Inspection Schedule
To maintain your GTD33EASK0WW model, follow this checklist:
Clean the lint filter after each use.
Inspect and clean the exhaust duct regularly to ensure proper airflow.
Wipe down the exterior of the dryer occasionally.
Check the door for a secure seal and smooth operation.
Listen for unusual noises from the drum or motor during operation.
Tip: Consistent maintenance extends the life of your GE dryer and reduces the risk of unexpected breakdowns.
By staying proactive with care and inspection, you help your model deliver reliable performance and keep your laundry routine on track.
You can often solve heating issues in your GE dryer by performing a heating element replacement. This process works for your GTD33EASK0WW model and other GE dryer models. Always check the door for a secure fit before starting any repair. If your dryer door closes but the model still does not heat, review all steps. You may need to inspect the door switch or seek professional help. Remember, a well-maintained GE dryer model with a working door ensures reliable performance.
For further support, contact a certified technician if your GE dryer model continues to have problems after replacement.
ЧАСТО ЗАДАВАЕМЫЕ ВОПРОСЫ
What should you check first if your GTD33EASK0WW dryer is not heating?
Start by confirming the power supply and inspecting the lint filter. Examine the dryer settings to ensure you selected a heat cycle. These steps help you rule out simple issues before moving to more complex repairs.
How do you know if the heating element is faulty?
You may notice the dryer runs but produces no heat. Clothes remain wet after a cycle. A multimeter test showing no continuity at the element terminals confirms a failed heating element.
Можете ли вы самостоятельно заменить нагревательный элемент?
Yes, you can replace the heating element at home with basic tools. Follow the step-by-step instructions in your dryer’s manual. Always unplug the dryer before starting any repair to ensure safety.
What tools do you need for GTD33EASK0WW heating element replacement?
You need a Phillips screwdriver, nutdriver, voltage tester, and possibly a Torx screwdriver. Keep a camera or phone handy for reference photos. Gloves and safety glasses protect your hands and eyes during the process.
Why does your dryer overheat or shut off during a cycle?
A blocked vent or clogged lint filter restricts airflow, causing overheating. The thermal fuse may blow as a safety measure. Clean the vent and filter regularly to prevent this issue.
Как часто следует чистить фильтр для ворса и вентиляционное отверстие?
Clean the lint filter before every load. Inspect and clean the vent system at least once a year. Regular maintenance ensures efficient drying and reduces fire risk.
What if your dryer still does not heat after replacing the element?
Check the thermostats, thermal fuses, and wiring. Faulty components or control board issues may cause continued heating problems. If you cannot identify the issue, contact a professional technician for further diagnosis.
Tip: Always keep your workspace organized and refer to your manual for model-specific guidance.

