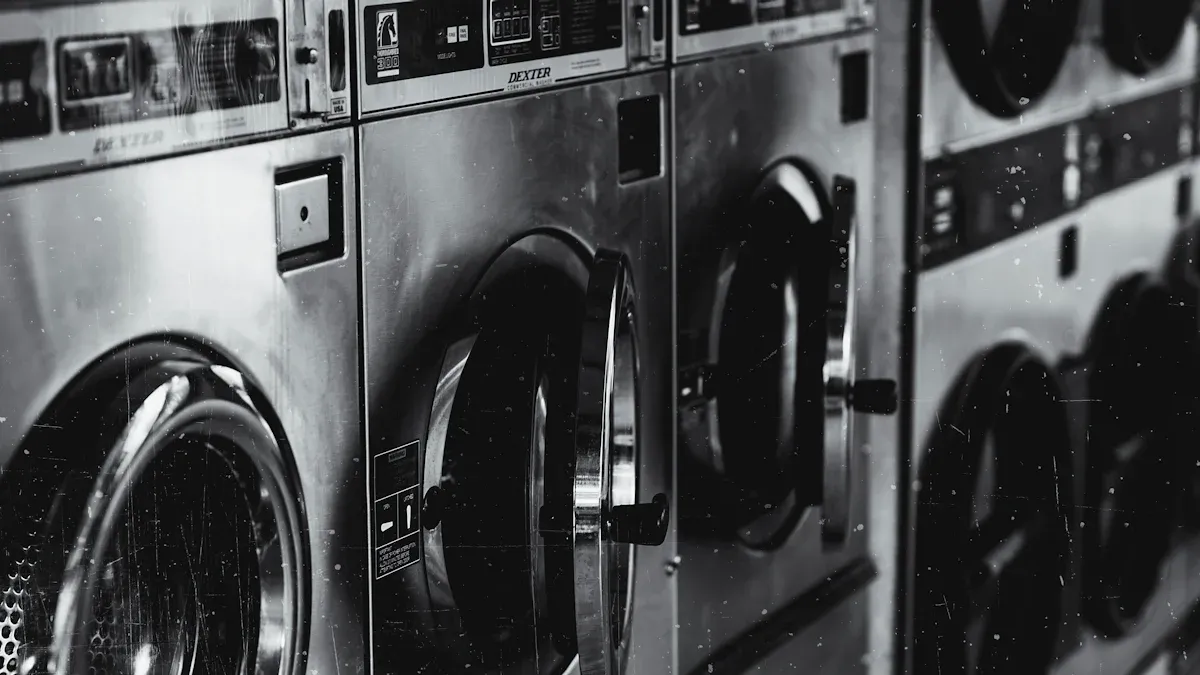
To repair heating element issues in your Whirlpool dryer, start by unplugging the dryer and allowing it to cool. You often notice a faulty heating element when the dryer produces no heat, clothes remain damp, or the appliance stops mid-cycle. A faulty heating element in a Whirlpool dryer can also cause longer drying times. Always use proper tools and safety gear before you begin any dryer heating element repair. You must inspect the Whirlpool dryer heating element for visible damage or test it with a multimeter. Address faulty parts promptly to restore your dryer’s performance.
Recognizing Whirlpool Dryer Heating Element Failure
Common Signs of a Faulty Heating Element
Dryer not heating
You may notice your Whirlpool dryer stops producing heat even though the drum still turns. This symptom often points directly to a faulty heating element. When the dryer heating element fails, the appliance cannot generate the necessary heat to dry your clothes. You might also observe that the dryer heats up at first but then loses heat while still running. This pattern signals a malfunctioning whirlpool dryer or a failing component inside the heating system.
Clothes take too long to dry
If your clothes remain damp after a full cycle, you should suspect a faulty heating element. The dryer may run for its usual duration, but the lack of heat extends drying times significantly. This issue can waste energy and increase utility costs. You may also notice that the dryer drum turns as expected, but the clothes never reach the desired dryness. In many cases, this symptom appears before the dryer stops heating altogether.
Dryer shuts off mid-cycle
A faulty heating element can cause your Whirlpool dryer to shut off unexpectedly during a cycle. Overheating or electrical issues within the dryer heating element may trigger safety mechanisms, leading to premature shutdowns. Sometimes, the dryer may blow a fuse or trip a thermal fuse as a secondary effect. If your dryer stops mid-cycle, you should inspect the heating element and related components for faults.
Tip: Always check the lint filter and ventilation system. Blockages can cause overheating and contribute to heating element failure.
Visual and Diagnostic Clues
Burn marks or broken coils
You can often identify a faulty heating element through visual inspection. Unplug your Whirlpool dryer and locate the heating element assembly. Look for visible signs of damage, such as burn marks, broken coils, or discoloration. These clues indicate that the dryer heating element has failed and requires replacement. A broken or burnt coil disrupts the flow of electricity, preventing the dryer from producing heat.
Error codes or warning lights
Modern Whirlpool dryers may display error codes or warning lights when a component fails. If you see an error code related to heating or temperature, consult your user manual for guidance. These alerts often point to a faulty heating element or related parts, such as thermostats or thermal cut-offs. You can confirm the diagnosis by using a multimeter to test the dryer heating element for continuity. Infinite resistance on the meter means the element is faulty and must be replaced.
Note: Before replacing the heating element, check the thermostat and other safety devices. Sometimes, a faulty thermostat can mimic heating element failure.
Tools and Safety for Repair Heating Element
Required Tools for Whirlpool Dryer Repair
To repair or replace the heating element in your Whirlpool dryer, you need the right tools for the job. Using the correct equipment ensures a smooth process and helps prevent damage to your appliance.
Screwdrivers (Phillips and flathead)
You need both Phillips and flathead screwdrivers. The Phillips screwdriver removes screws that secure the heating element and other internal components. The flathead screwdriver helps disconnect wires and handle small parts during disassembly and reassembly.
Nut driver or socket set
A 1/4-inch nut driver or a compatible socket set is essential. You use this tool to remove screws from the dryer’s back panel and to access the heating element assembly. The nut driver also helps with mounting or removing the heating element itself.
Multimeter (ohms setting)
A multimeter set to the ohms setting allows you to test the heating element for electrical continuity. This test confirms whether the heating element has failed and needs replacement. You can also use the multimeter to check other electrical components, such as thermostats and fuses.
Work gloves and safety glasses
Work gloves protect your hands from sharp edges and hot surfaces inside the dryer. Safety glasses shield your eyes from dust and debris during the repair. Always wear protective gear to reduce the risk of injury.
Tip: Always gather all necessary tools before you begin. This preparation saves time and helps you avoid unnecessary interruptions during the repair.
Safety Precautions Before You Replace Heating Element
You must follow strict safety procedures when working on your Whirlpool dryer. These steps protect you from electrical hazards and prevent damage to your appliance.
Unplugging the dryer from power
Always disconnect the dryer from its power source before starting any repair. Unplug the dryer or turn off the circuit breaker. This step prevents electrical shock and keeps you safe while you work.
Turning off gas supply (for gas models)
If you own a gas dryer, turn off the gas supply before you begin. This precaution prevents gas leaks and reduces the risk of fire or explosion during the repair.
Avoiding sharp edges and hot components
Dryer interiors often contain sharp metal edges and hot components. Wear gloves and safety glasses to protect yourself. Allow the dryer to cool completely before you start disassembly. Handle all parts carefully to avoid cuts or burns.
Note: If you feel unsure about any repair step, consult your Whirlpool user manual or seek help from a qualified appliance technician. Your safety should always come first.
Diagnosing the Whirlpool Dryer Heating Element
Accessing the Heating Element Assembly
Removing top, front, and drum panels
To repair heating element issues in your Whirlpool dryer, you must first access the internal components. Begin by unplugging the dryer and wearing protective gloves and safety glasses. This step ensures your safety and prevents electrical hazards. Follow these steps to reach the dryer heating element:
- Open the dryer door and remove the screws securing the front panel.
- Carefully lift off the front panel to expose the interior.
- If your model requires it, remove the screws along the back top edge to release the top panel. Slide the panel back and lift it off.
- Remove the control panel by sliding it up or unscrewing it, depending on your model.
- Disconnect the door switch wiring harness to prevent accidental damage.
- Remove screws near the lint filter and at the bottom of the front panel.
- Take off the front panel completely.
- In some Whirlpool dryer models, you may need to remove the drum for full access. Gently lift the drum out after disconnecting the belt.
Tip: Take a photo or label the wiring connections before disconnecting them. This step helps you reconnect everything correctly during reassembly.
Locating the heating element in your model
Once you remove the necessary panels, locate the whirlpool dryer heating element. In most Whirlpool dryers, you will find the heating element at the bottom right side of the cabinet, often attached to a metal housing. Some models place the element near the blower housing or connect it to the vent system at the back. The heating element looks like a coiled wire or spring inside a metal casing. Identify the wires connected to the terminals and note their positions for later reinstallation.
Testing the Heating Element for Continuity
Using a multimeter to check for continuity
After you access the whirlpool dryer heating element, you need to test heating element continuity. Set your multimeter to the ohms setting. Disconnect the wires from the heating element terminals. Touch one probe to each terminal. A functioning dryer heating element should show a low resistance reading, typically between 10 and 50 ohms. If the multimeter displays infinite resistance or no movement, the element has failed.
Interpreting test results to confirm failure
A faulty heating element remains one of the most common reasons for a dryer not heating. Use the table below to help you identify the cause and confirm your diagnosis:
| Cause | Identification Method | Notes |
|---|---|---|
| Faulty Heating Element | Visual check for broken coils; test with multimeter for continuity | Disconnect power before inspection; broken coils may not always show |
| Blown Thermal Fuse | Multimeter test for continuity; fuse on heater or blower housing | Replace if blown; prevents overheating |
| Faulty Thermostat | Multimeter test for continuity; near heating element | Regulates temperature; failure stops heating |
| Faulty Control Board | Observe error codes; dryer runs but does not heat | Controls heating; less common cause |
If your test confirms a faulty heating element, you should replace it to restore proper dryer function. Always check related components, such as thermal fuses and thermostats, since these can also cause heating problems in your Whirlpool dryer.
Note: Clogged vents or lint buildup can cause overheating and lead to repeated dryer heating element failure. Clean the vent system regularly to prevent future issues.
How to Replace Heating Element in Whirlpool Dryer
Removing the Faulty Heating Element
Disconnecting wires and mounting screws
You must begin by ensuring the dryer is unplugged from the power source. This step eliminates electrical hazards and keeps you safe during the repair heating element process. Remove the lint filter and the screws that secure its housing. Use a putty knife or paint scraper to release the spring clips, then lift the top panel. Locate the heating element terminals inside your Whirlpool dryer. Carefully disconnect the wires from the heating element, making sure to note their positions for reassembly. Take a photo or label the wires if needed.
Next, remove the screws that secure the front panel. Lift the panel off its mounting clips to expose the internal components. Access the heating element assembly, which you will typically find at the bottom of the dryer cabinet. Remove the screws or clips that hold the heating element assembly to the duct. Gently pull the assembly out, taking care not to damage any surrounding parts.
Tip: Handle all parts gently. Avoid using excessive force, as this can damage brackets, hooks, or other components inside the dryer.
Extracting the old heating element safely
Once you have the assembly out, locate the dryer heating element inside its metal housing. Remove the screws or clips that secure the heating element. Note the orientation of the element before removal. Gently lift the gray casing if needed, and avoid breaking any hooks or brackets. Carefully extract the old heating element, making sure not to bend or damage the coil. Inspect the area for any lint buildup or debris, and clean as necessary.
Note: Always use your Whirlpool dryer manual to confirm the location and orientation of the heating element. This step reduces the risk of accidental damage during the repair.
Installing the New Whirlpool Dryer Heating Element
Transferring the high limit thermostat
Before you install the new heating element, transfer the high limit thermostat from the old unit. Begin by removing the wires connected to both the heating element and the thermostat. Note the positions of each wire. Identify the high limit thermostat, usually attached to the left side of the heating element. Remove the mounting screws or, for newer models, gently pry up the thermostat to detach it. Move the metal bracket from the old thermostat to the new one if necessary. Attach the thermostat to the new heating element, ensuring it sits in the same position as before.
Tip: Connect the two red wires to the thermostat terminals. The exact terminal does not matter as long as the wire reaches securely.
Positioning and securing the new element
Place the new whirlpool dryer heating element into the assembly, matching the orientation of the old one. Secure it with the appropriate screws or clips. Make sure the element sits firmly in place and does not touch any other metal parts. Slide the heating element assembly back into the duct and fasten it with the original screws or clips.
Reconnecting wires and terminals
Reconnect the wires to the heating element terminals, following the notes or photos you took earlier. Ensure each connection is tight and secure. If your model uses a jumper wire or piggyback connector, attach these as needed to maintain proper electrical flow. Double-check all connections before proceeding.
⚡ Alert: Loose or incorrect wiring can cause the dryer heating element to malfunction or create a safety hazard. Always verify each connection.
Reassembling the Whirlpool Dryer
Reattaching panels and drum
Begin reassembly by reversing the removal steps. If you removed the drum, carefully set it back into place and reconnect the belt. Reattach the front panel by aligning it with the mounting clips and securing it with screws. Slide the top panel back into position and press down to engage the spring clips. Replace the lint filter housing and insert the lint filter.
Double-checking all connections
Before restoring power, perform a final visual inspection. Confirm that all wires are connected to the correct terminals and that no components are loose. Check the continuity of the heating element and thermostats with a multimeter to ensure proper function. Take a moment to review any photos you took during disassembly to avoid errors.
Tip: After you reassemble the dryer, plug it in and run a short test cycle. Listen for unusual noises and check for proper heat output. This step confirms a successful heating element replacement.
By following these steps, you can repair heating element issues in your Whirlpool dryer safely and efficiently. Proper installation and careful reassembly ensure your dryer operates at peak performance.
Testing and Troubleshooting After Heating Element Repair
Running a Test Cycle on Whirlpool Dryer
Checking for proper heat output
After you install the new whirlpool dryer heating element, you need to confirm that your dryer heats correctly. Start by plugging in your whirlpool dryer and powering it on. Run an empty cycle first. This step helps you observe the heating element without any laundry blocking your view or airflow. Follow these steps to check for proper heat output:
- Turn on the dryer and listen for any unusual sounds.
- Open the door after a few minutes and feel for warm air inside the drum.
- Check the vent outside your home to ensure hot air flows freely.
- Use your hand to feel the temperature rise near the vent. The air should feel hot, not just warm.
- Run a small load of laundry and monitor the drying time. Clothes should dry within a normal cycle.
- Repeat the process for a second cycle to confirm consistent heating.
Tip: If you notice the dryer overheating or shutting off, stop the cycle immediately and begin troubleshooting.
Monitoring for unusual noises or smells
You should always pay attention to any new noises or odors during the first few cycles after repair. A properly installed whirlpool dryer heating element should not produce burning smells or loud sounds. If you detect a burning odor, turn off the dryer and inspect the wiring and connections. Listen for rattling, scraping, or buzzing. These sounds may indicate loose parts or improper installation. Address any issues before using the dryer for regular laundry loads.
If the Dryer Still Doesn’t Heat After Replacement
Checking thermal fuse and cut-offs
If your whirlpool dryer does not heat after you replace the heating element, you need to check additional components. Start with the thermal fuse and thermal cut-off. These safety devices prevent overheating. Use a multimeter to test for continuity. A blown fuse or cut-off will show no continuity and must be replaced. Always disconnect power before testing.
Inspecting thermostats and wiring
Next, inspect the operating thermostat and high-limit thermostat. Both should show continuity when tested with a multimeter. Replace any thermostat that fails this test. Examine all wiring connections at the heating element, thermostats, and terminal block. Look for burned, loose, or disconnected wires. Secure any loose connections and replace damaged wires.
Verifying correct installation of the heating element
Sometimes, the dryer will not heat because of incorrect installation. Double-check that you installed the whirlpool dryer heating element in the correct position. Confirm that all wires connect to the right terminals. Test the heating element resistance; it should measure around 10 ohms. Make sure the dryer receives the correct voltage at the outlet and terminal block. If you find any issues, correct them before running another test cycle.
⚡ Alert: Never run the dryer with suspected wiring or component faults. Unresolved issues can cause further damage or create safety hazards.
A thorough troubleshooting process ensures your whirlpool dryer operates safely and efficiently. By following these steps, you can identify and resolve most heating problems after a repair.
Maintenance Tips for Whirlpool Dryer Heating Element Longevity
Cleaning and Preventive Care
Regular lint trap and vent cleaning
You can extend the life of your whirlpool dryer by making lint removal a regular habit. Clean the lint filter before and after every load. Lint buildup restricts airflow, which can cause the dryer heating element to overheat and fail. Deep clean the lint screen every six months by washing it with warm water and a soft brush. This step removes residue from dryer sheets and fabric softeners.
Inspect and clean the dryer vent and ductwork at least once a year. If you notice longer drying times or reduced airflow, increase the cleaning frequency. Use a vent brush or vacuum attachment to remove lint and debris from the vent hose and exterior vent cap. Proper airflow prevents overheating and reduces the risk of fire.
| Component | Cleaning Frequency | Purpose/Effect on Dryer Performance and Heating Element |
|---|---|---|
| Lint Screen (Lint Trap) | After every load, deep clean every 6 months | Prevents lint buildup, improves airflow, reduces overheating |
| Dryer Vent and Ductwork | At least once a year, more if needed | Maintains airflow, prevents overheating, protects heating element |
Tip: Schedule annual professional vent cleaning if you have a long or complex vent system.
Inspecting for lint buildup around the heating element
You should check for lint accumulation around the dryer heating element during routine maintenance. Unplug your whirlpool dryer and remove the back panel or lower front panel to access the interior. Use a vacuum or soft brush to clear lint from the heating element housing and surrounding areas. Lint near the heating element increases the risk of overheating and shortens the component’s lifespan. Address minor issues promptly to prevent escalation and costly repairs.
Routine Checks to Prevent Future Issues
Monitoring drying times and performance
Pay attention to how long your whirlpool dryer takes to dry clothes. If you notice longer drying times or damp laundry after a cycle, inspect the lint filter, vent, and heating element. These signs often indicate restricted airflow or a failing dryer heating element. Avoid overloading the dryer, as heavy loads strain the motor and heating element, leading to premature wear.
- Clean the lint filter after each use.
- Rotate clothes for even drying.
- Level the dryer to ensure optimal performance.
Promptly address any decline in performance to prevent further damage to your whirlpool dryer.
Listening for unusual sounds or operation changes
Stay alert for new noises or changes in your dryer’s operation. Squeaking, rattling, or buzzing may signal loose parts or worn components. Burning smells or unusual heat levels can indicate lint buildup or a malfunctioning dryer heating element. Inspect wiring and connections for signs of wear or damage. Schedule professional inspections if you suspect hidden issues.
Note: Routine checks and preventive care help you catch problems early, keeping your whirlpool dryer running safely and efficiently.
Cost, Parts, and Repair Considerations for Whirlpool Dryer
Cost to Repair Heating Element vs. Replace Dryer
Average price range for heating element replacement
When you plan a heating element replacement for your Whirlpool dryer, you should understand the typical costs involved. The price depends on your dryer’s type, age, and model complexity. Review the table below for a clear breakdown of average expenses in 2025:
| Cost Aspect | Cost Range / Average Cost |
|---|---|
| Average cost to replace heating element (all dryers) | $230 (average) |
| Typical cost range for heating element replacement | $100 – $350 |
| Labor cost per hour | $60 – $150 |
| Electric dryer heating element parts replacement | $90 – $250 |
| Gas dryer burner assembly replacement | $100 – $350 |
You can expect most Whirlpool dryer repairs to fall within these ranges. The total cost includes both the part and labor if you hire a professional.
Labor costs for professional repair
If you choose professional repair, labor charges usually range from $60 to $150 per hour. The final bill depends on your location and the complexity of your Whirlpool dryer model. Some repairs may require more time if the dryer is older or has hard-to-access components.
Where to Buy Genuine Whirlpool Dryer Heating Element Parts
Authorized retailers and online sources
You should always purchase genuine Whirlpool dryer heating element parts from trusted sources. Authorized online retailers, such as ApplianceParts4All and AppliancePartsPros, specialize in authentic OEM parts. These retailers guarantee part quality, safety compliance, and compatibility with your specific dryer model. When you buy from authorized sellers, you receive:
- Assurance of quality and safety standards
- Perfect fit for your Whirlpool dryer
- Manufacturer warranties and technical support
- Reduced risk of fire hazards and premature failure
Genuine parts also undergo strict quality checks and often come with fast shipping and hassle-free returns.
Using your model number for compatibility
Before you order, locate your Whirlpool dryer’s model number. Use this number to verify compatibility on the retailer’s website. Many authorized sellers offer cross-reference tools to help you select the correct part. This step ensures you receive a heating element that fits and functions as intended.
Tip: Using genuine parts protects your investment and helps your dryer operate efficiently for years.
Deciding If You Should Repair or Replace Your Whirlpool Dryer
Considering age and condition of the appliance
You need to weigh several factors before deciding to repair or replace your Whirlpool dryer. Most dryers last 10 to 15 years. If your appliance is less than 10 years old and in good condition, a heating element replacement often restores full function. For dryers older than 10 years or those with frequent breakdowns, replacement may offer better value and improved energy efficiency.
Frequency and cost of past repairs
Review your dryer’s repair history. If you have paid for multiple repairs in recent years, investing in a new Whirlpool dryer may be more practical. Newer models offer advanced features, better energy savings, and improved reliability. Always consult a certified technician for an accurate assessment. This approach helps you make an informed decision based on your budget, the appliance’s age, and long-term needs.
Note: Professional repair services provide accurate diagnosis, proper tools, and warranties, giving you peace of mind.
- Unplug your dryer before repair, inspect the heating element, and test with a multimeter for continuity.
- Replace faulty parts with genuine Whirlpool components to maintain safety and efficiency.
- Clean lint filters and vents regularly to extend your dryer’s lifespan and prevent overheating.
- Evaluate repair costs against your dryer’s age and history; replacement may be wiser for older or unreliable units.
Regular maintenance and careful diagnosis help your dryer run safely and efficiently for years.
FAQ
How do you know if your Whirlpool dryer heating element is bad?
You notice your dryer runs but does not heat. Clothes stay damp after a full cycle. You may see error codes or smell burning. Test the element with a multimeter for continuity to confirm failure.
Can you replace a Whirlpool dryer heating element yourself?
You can replace the heating element if you have basic tools and follow safety steps. Always unplug the dryer first. Use your model number to order the correct part. If you feel unsure, contact a professional technician.
How long does a Whirlpool dryer heating element last?
Most heating elements last 8 to 15 years with regular maintenance. Lint buildup, overloading, or poor airflow can shorten lifespan. Clean the lint filter and vent often to help your element last longer.
What causes a Whirlpool dryer heating element to burn out?
Lint buildup, blocked vents, and overloading cause overheating. These conditions stress the heating element and lead to failure. Faulty thermostats or power surges can also damage the element.
Is it safe to use a dryer with a faulty heating element?
No, you should not use a dryer with a faulty heating element. Continued use can cause electrical hazards or fire risks. Always repair or replace the element before using the dryer again.
How much does it cost to replace a Whirlpool dryer heating element?
You usually spend $100 to $350 for parts and labor. DIY replacement costs less, often between $90 and $250 for the part. Professional repair adds labor charges.
Where can you find your Whirlpool dryer model number?
You find the model number on a sticker inside the dryer door, on the door frame, or behind the control panel. Use this number to order compatible parts and check repair instructions.
What should you check if your dryer still does not heat after replacing the element?
Check the thermal fuse, thermostats, and wiring. Test each with a multimeter for continuity. Make sure you installed the new element correctly. If problems continue, consult a qualified technician.

