Your powder coating oven isn’t heating, and production has stopped. A faulty Heating Element is the most likely problem. The fix is often straightforward. You can test the heating elements for continuity and replace any bad ones. Many principles from household appliance heating elements also apply here. Leading Heating element manufacturers, like Jinzhong Electric Heating, build these components for reliability. This guide gives you the exact steps to diagnose the issue and install a replacement, getting you back to curing parts quickly.
Is a Bad Heating Element Your Real Problem?

Before you order a replacement part, you must confirm that one of the heating elements is the true source of your oven’s failure. A few key symptoms point directly to a bad element, but other electrical issues can mimic the same problem. This diagnostic approach saves you time and money.
Telltale Signs of a Failing Element
Look for these four common indicators. The presence of one or more strongly suggests an element has reached the end of its service life.
Oven Fails to Reach Target Temperature
Your oven struggles to reach its set curing temperature or cannot maintain it. This is the most common sign of a failed or weakened element. The remaining functional elements cannot produce enough heat to compensate for the dead one.
Curing Times Are Getting Longer
You notice that parts require more time in the oven to cure properly. A failing element loses efficiency before it breaks completely. This gradual decline in heat output forces you to extend cycle times, leading to inconsistent finishes like the “orange peel” effect or poor adhesion.
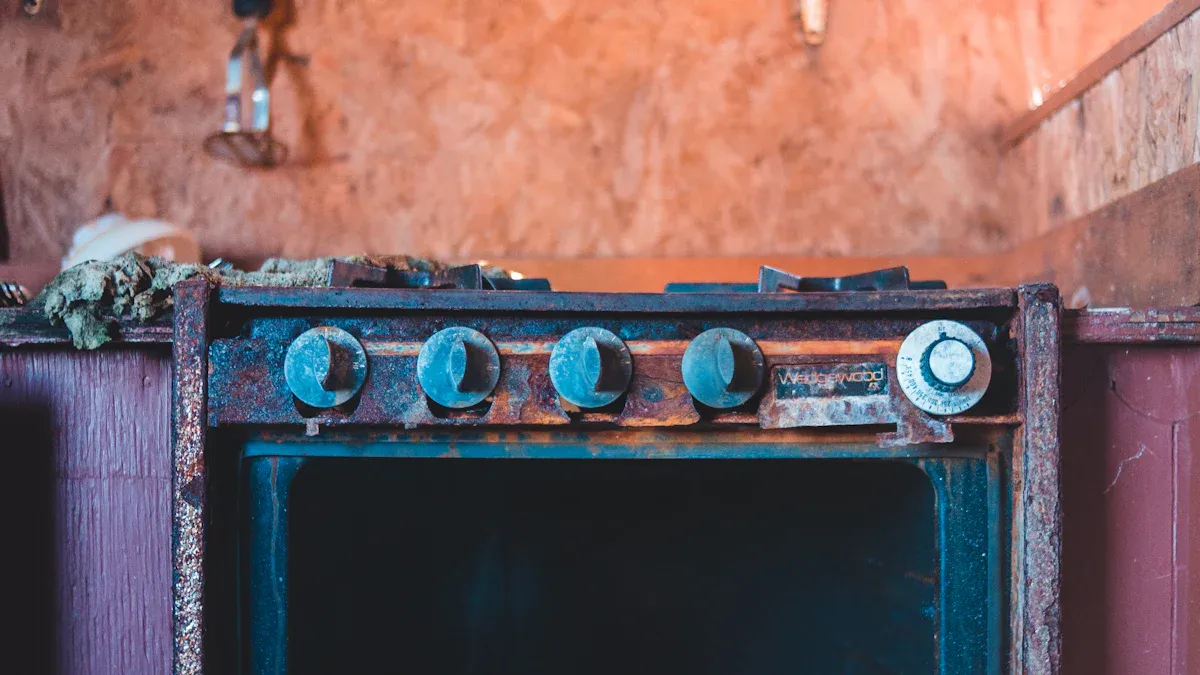
Visible Damage: Cracks, Blisters, or Breaks
A quick visual inspection can reveal obvious failure. Power down the oven and look for any physical defects on the element’s surface.
- Cracks or breaks in the element sheath are a definitive sign of failure.
- Blisters or bulging spots indicate internal overheating and imminent failure.
The Element Doesn’t Glow Red
During a normal heating cycle, you should see your calrod-style elements glow a dull to bright red. If you can safely view the elements and notice one remains dark while others are glowing, you have found your culprit.
Ruling Out Other Common Culprits
Do not assume the element is bad without checking these other components first. A simple electrical fault can easily be mistaken for a major hardware failure.
Checking the Power Supply and Breaker
Start with the simplest solution. Confirm your oven is plugged into a live outlet. Then, locate the dedicated circuit breaker for the oven in your electrical panel. Ensure it is in the “On” position and has not tripped. A tripped breaker points to an electrical overload or short circuit that you must investigate.
Inspecting Fuses and Solid State Relays (SSRs)
Your oven’s control box contains fuses and relays that manage power flow. A blown fuse or a faulty Solid State Relay (SSR) will stop power from ever reaching the element.
Pro Tip: Quick SSR Check You can perform a basic test on an SSR. First, verify the input LED lights up when the controller calls for heat. Next, use a multimeter to check for voltage on the output side to confirm it is switching power correctly.
Verifying Thermostat and PID Controller Function
The thermostat or PID controller is the oven’s brain. If it malfunctions, it may not send the signal to turn the elements on. Issues like faulty temperature sensors or incorrect controller settings can cause uneven curing or prevent the oven from heating, even with perfectly good elements.
Understanding Your Powder Coating Oven Heating Elements
To properly diagnose and replace a faulty component, you must first understand the hardware you are working with. Your oven’s heating elements are more than just simple wires; their type, power, and wiring configuration all dictate your oven’s performance.
Types of Heating Elements Used in Ovens
Ovens use different types of elements, each with unique characteristics. Identifying yours is the first step.
Calrod (Sheathed) Elements
These are the most common type you will encounter. A Calrod element has a resistive wire encased in a protective metal sheath. They are known for their durability, versatility, and quick heat-up times. Manufacturers value them because they are both economical and efficient, offering precise heat transfer for consistent curing.
Infrared (IR) Halogen Elements
Infrared heaters provide rapid, direct heating. Instead of warming the air, they emit infrared radiation that directly heats the surface of the part. This technology offers excellent conversion efficiency from electrical power to radiant energy, making it a fast and effective option for certain applications.
Open Coil Elements
You are unlikely to find these in modern equipment. Open-resistor heating elements are an older design with exposed resistive coils. The industry has largely phased them out due to their inefficiency and significant safety hazards, including risks of electric shock and short circuits.
How Wattage and Size Impact Performance
The power of your elements must match the size of your oven for efficient operation.
The 100-150 Watts Per Cubic Foot Rule
As a general guideline, most powder coating ovens require between 100 and 150 watts of heating power for every cubic foot of interior space. This range ensures the oven can reach and maintain curing temperatures effectively.
Calculating Your Oven’s Needs
You can easily calculate your oven’s volume. This helps you verify if your elements are sized correctly.
Oven Volume Calculation
Interior Length (ft) x Interior Width (ft) x Interior Height (ft) = Cubic Feet (ft³)
Cubic Feet x 125 (watts) = Target Total Wattage
Why Voltage (208V vs. 240V) Matters
You must match your replacement element to your building’s power supply. While many elements are rated for 240V, many commercial buildings supply 208V. A 240V element running on 208V will only produce about 75% of its rated wattage, leading to slower heat-up times.
| Element Rating | Power Supply | Actual Heat Output |
|---|---|---|
| 240V | 240V | 100% |
| 240V | 208V | ~75% |
Element Configuration and Wiring
How the elements are wired together directly impacts total heat output.
Series vs. Parallel Wiring Explained
- Series Wiring: Elements are connected end-to-end, like old holiday lights. The electrical current flows through one element before moving to the next.
- Parallel Wiring: Each element is connected directly to the power source. The current is divided among the elements.
How Configuration Affects Heat Output
Wiring elements in series increases the total resistance, which reduces the overall power and heat output. Conversely, wiring them in parallel decreases the total resistance, allowing each element to draw more current and produce its full rated heat. Most ovens use a parallel configuration for maximum performance.
Gathering Your Tools and the Right Replacement Part
A successful repair begins with proper preparation. You must gather the correct tools and source the exact replacement part before you start disassembling your oven. This approach ensures a smooth, efficient process and prevents unnecessary downtime.
The Essential Tool and Safety Checklist
Having these items on hand will make the job significantly easier and safer. You likely have most of these in your shop already.
Digital Multimeter
This is your most critical diagnostic tool. You will use a digital multimeter to test for continuity and confirm that power is disconnected from the oven.
Screwdriver and Nut Driver Set
You need a good set of drivers to remove the oven’s access panels and the mounting hardware that secures the element in place. Magnetic tips are a helpful bonus.
Needle-Nose Pliers and Wrenches
These tools are essential for electrical work. You will use pliers to handle wires and small connectors. Wrenches are necessary for loosening the nuts on the element’s terminal posts.
Safety Gloves and Glasses
Always prioritize your safety. 🛡️
- Insulated Gloves: Protect you from potential electrical shock.
- Safety Glasses: Shield your eyes from debris or accidental electrical arcs.
How to Source the Correct Replacement Heating Elements
You must install a replacement element that matches the original’s specifications. Using the wrong part can lead to poor performance, damage to your oven, or a safety hazard.
Finding the Part Number on the Old Element
The easiest way to find a match is by using the part number. Inspect the old element’s metal base or mounting flange. Manufacturers often stamp or engrave the part number, voltage, and wattage information directly onto this surface.
Pro Tip: If the numbers are faint, use a wire brush and a flashlight to make them more legible. Take a clear photo of the information with your phone for reference.
Measuring Dimensions and Mounting Brackets
If you cannot find a part number, you must take precise measurements. Note the element’s length, width, terminal spacing, and the configuration of its mounting brackets. These details are crucial for finding a compatible replacement.
Where to Buy: OEM vs. Aftermarket Parts
You can purchase Original Equipment Manufacturer (OEM) parts directly from your oven’s manufacturer or an authorized dealer. Aftermarket heating elements offer a cost-effective alternative. For specific parts, The Fab Shop offers 5,000-watt elements designed for powder coat ovens. If you are searching for a wider range of suppliers, online directories can be very useful.
- Heating-Elements.com provides lists of various manufacturers and suppliers.
- PowderCoatingOnline.com is a directory focused on coating equipment and replacement parts.
The Definitive Guide to Testing Your Heating Elements
You have identified the potential problem. Now you will perform a definitive test to confirm a faulty element. This process is methodical and requires a focus on safety. Follow these steps precisely to get an accurate diagnosis.
Step 1: Safety First—Kill the Power
You must never work on electrical equipment while it is energized. De-energizing your oven is the most critical step. Professionals use a formal Lockout/Tagout (LOTO) procedure to ensure safety. You can follow a simplified version of this industrial standard.
- Inform Others: Notify any personnel near the oven that you are shutting it down for maintenance.
- Power Down: Turn off the oven using its main power switch or controls.
- Isolate Energy: Unplug the oven and shut off the breaker.
- Verify Isolation: Use your multimeter to confirm the oven is fully de-energized.
Unplug the Oven from the Wall Outlet
Your first action is to physically disconnect the oven from its power source. Unplug the main power cord from the wall receptacle. This step immediately removes the primary flow of electricity.
Shut Off the Dedicated Circuit Breaker
Next, locate your building’s main electrical panel. Find the circuit breaker dedicated to the powder coating oven. Flip the breaker to the “Off” position. This action provides a second layer of protection, ensuring no power can reach the outlet. You can apply a lock or tag to the breaker to prevent anyone from accidentally turning it back on.
Use Your Multimeter to Confirm Zero Power
This is your final safety verification. Set your multimeter to measure AC voltage (V~). Carefully touch the meter’s probes to the terminals inside the oven’s power connection box.
A proper reading for a de-energized circuit is 0 volts. Your multimeter should display ‘0’ or a value very close to it. Any other reading indicates the presence of dangerous voltage. You must stop and re-verify the previous steps before proceeding.
Step 2: Gaining Access to the Element Terminals
With the power safely disconnected, you can now access the element’s connection points. These are typically located behind a removable panel on the back or top of the oven.
Removing the Oven’s Access Panels
Use your screwdriver or nut driver to remove the screws holding the main access panel in place. Set the panel and its screws aside in a safe location. This will expose the oven’s internal wiring, relays, and the terminals for the heating elements.
Identifying the Element’s Connection Points
Look for the ends of the elements protruding through the oven’s interior wall. Each element will have two threaded posts with wires attached by nuts or connectors. These are the terminals you need to access for testing.
Tip: Use a Magnetic Tray for Screws
An organized workspace is a safe workspace. Place all screws, nuts, and small hardware into a magnetic parts tray. This simple trick prevents lost fasteners and makes reassembly much faster. 🧲
Step 3: Performing the Continuity Test
The continuity test determines if the internal wire of an element is intact or broken. A complete, unbroken wire allows electricity to flow and generate heat. A broken wire creates an open circuit, and the element will not work.
Setting Your Multimeter to Ohms (Ω)
Turn the dial on your digital multimeter to the resistance setting, marked with the omega symbol (Ω). If your meter has multiple ranges, select the 200 ohms setting. Before you begin, touch the two probes together. The meter should read 0.0 or very close to it, confirming it is working correctly.
How to Correctly Place the Probes
First, you must disconnect the wires from the element you are testing. Use a wrench or nut driver to carefully remove the nuts and pull the wire connectors off the two terminals. Now, firmly press one multimeter probe against each of the two bare terminals on the element. The polarity of the probes does not matter for this test.
What the Reading Means: Continuity vs. Open Loop
The number on your multimeter’s display tells you the element’s condition.
- Continuity: A specific numerical reading indicates the internal coil is complete. Electricity can flow through it.
- Open Loop: An “OL” or infinity (∞) reading means the internal coil is broken. Electricity cannot pass through.
Step 4: Interpreting the Results
The numbers on your multimeter screen provide the final verdict on your heating element’s health. A correct interpretation is crucial. It tells you whether to proceed with a replacement or to continue your diagnosis elsewhere.
A Good Reading (10-50 Ohms)
You have a good element if your multimeter displays a specific resistance value. For most powder coating oven elements, this reading will fall somewhere between 10 and 50 ohms (Ω).
A reading in this range confirms that the element’s internal coil is intact. It provides a complete, unbroken path for electricity to flow and generate heat. The element is electrically sound.
Pro Tip: Why Isn’t It Zero? The resistance value is determined by the length and gauge of the wire inside the element. A longer or more powerful element will have a different resistance than a smaller one. The key takeaway is that a specific, low-ohm reading indicates a healthy, continuous circuit.
If you get a good reading, your heating problem likely lies elsewhere. You should re-examine other components like the SSR, controller, or wiring connections.
A Bad Reading (OL or Infinity)
You have found the culprit if your multimeter screen shows “OL” (Open Loop), an infinity symbol (∞), or simply does not change from its default reading.
This result means the internal wire has broken. Think of it as a bridge being out on a highway; traffic (electricity) cannot get across. No current can flow through the element, so it cannot produce any heat. This element has failed and must be replaced.
| Multimeter Reading | Interpretation | Action Required |
|---|---|---|
| 10-50 Ω | ✅ Good Element (Continuity) | Investigate other components. |
| OL or ∞ | ❌ Bad Element (Open Loop) | Replace the heating element. |
How to Test for a Ground Fault
A ground fault is a dangerous condition where the element’s internal hot wire makes contact with its outer metal sheath. This can cause a short circuit, trip breakers, or create a serious shock hazard. You must test for this fault before installing a new element or reusing an old one.
⚠️ A ground fault presents a significant safety risk. You must identify and replace any grounded element immediately.
Follow this process to test for a ground fault:
- Ensure the wires are still disconnected from both element terminals.
- Set your multimeter to its highest resistance (Ohms Ω) setting.
- Touch one multimeter probe firmly to one of the element’s terminals.
- Touch the other probe to a clean, unpainted spot on the element’s metal sheath or mounting bracket. This sheath is the ground.
- Observe the reading. A healthy, un-grounded element should show “OL” or infinity (∞). This indicates no electrical connection between the internal wire and the outer sheath.
- Repeat the test using the other terminal on the same element.
If you get any numerical resistance reading during this test—especially a low one—the element has a ground fault. It is compromised and unsafe. You must discard and replace it, even if it passed the initial continuity test.
Step-by-Step: Replacing the Faulty Heating Element

You have successfully confirmed a bad element. Now you will perform the replacement. This procedure is methodical and requires careful attention to detail. Working systematically ensures a safe and effective repair, restoring your oven to full operational capacity.
Step 1: Document and Disconnect the Old Element
Before you remove any parts, you must create a clear record of the existing connections. This documentation is your most valuable tool during reassembly.
Take a Clear Photo of the Wiring
Your smartphone is an essential tool here. Take several clear, well-lit photographs of the element’s wiring from different angles. Capture exactly how the wires connect to the terminal posts. This visual reference eliminates any guesswork when you install the new part.
Label Wires if Connections Are Complex
For ovens with multiple heating elements or complex wiring, photos alone may not be enough. Use painter’s tape and a marker to create small labels for each wire. A simple numbering system (e.g., “1A,” “1B”) corresponding to each terminal will prevent confusion.
Carefully Loosen and Remove Wires
Use a wrench or nut driver to loosen the nuts on the element’s terminal posts. The ring terminals connecting the wires are likely made of nickel-plated steel. This material is rated for continuous use at high temperatures up to 482°C (900°F), preventing them from melting or corroding. Once the nuts are off, gently pull the wire terminals away from the posts.
The wires themselves are also specialized for high-heat environments. Your oven likely uses one of the following types:
| Wire Type | Insulation/Jacket | Max Temperature |
|---|---|---|
| MG (Hi-Temp) | Glass reinforced mica tape, Fiberglass braid jacket | 450°C (842°F) |
| TGGT (Standard) | Wrapped fiberglass yarn over Teflon, Fiberglass braid jacket | 250°C (482°F) |
Step 2: Remove the Old Element from the Oven
With the electrical connections safely disconnected, you can now remove the failed element from the oven chamber.
Unscrew the Interior Mounting Brackets
Move to the inside of the oven. Locate the screws or bolts that secure the element’s mounting brackets to the oven wall. Use the appropriate screwdriver or nut driver to remove this hardware. Remember to place all fasteners in your magnetic tray.
Gently Slide the Old Element Out
Grasp the old element firmly and slide it out of the oven. Be gentle during this process. An old element can be brittle, especially near welded joints, and you want to remove it in one piece. Pull it straight out to avoid damaging the mounting holes.
Clean the Mounting Area and Terminals
Before installing the new part, take a moment to clean the area. Use a wire brush to remove any rust, soot, or debris from the interior mounting surfaces. Also, clean the area around the terminal pass-through holes on the exterior. A clean surface ensures a solid mechanical and electrical connection.
Step 3: Install the New Heating Element
You are now ready to install the replacement part. Handle the new element with care to prevent damage that could lead to premature failure.
Carefully Guide the New Element into Place
Gently slide the new element into the oven through the mounting holes. Align the terminal posts so they pass cleanly through the exterior wall. Ensure the element’s mounting brackets line up perfectly with the screw holes on the interior wall.
Secure the Mounting Brackets Firmly
Reinstall the screws or bolts to secure the interior mounting brackets. Tighten them until they are snug and firm. This ensures the element is held securely and will not vibrate or shift during operation. Avoid over-tightening, which could strip the screws or damage the bracket.
Ensure It Doesn’t Touch Oven Walls
Visually inspect the newly installed element from inside the oven. Confirm there is adequate clearance on all sides. The element must not touch the oven’s interior walls or any other components. Direct contact can create a hot spot, cause a short circuit, and lead to uneven curing.
Installation Best Practices 💡 To ensure a long service life for your new element, follow these professional handling tips:
- Provide Slack: Leave a small amount of slack in the element’s lead wires. This allows for expansion and contraction during heat cycles, preventing stress on the connections.
- Avoid Stressing Welds: Handle welded areas with special care. Do not twist or flex the element’s rods when tightening connections, as this can crack the brittle joints.
- Bend Wires Carefully: If you need to bend a lead wire, use soft-nose pliers to avoid damaging the internal connections.
Step 4: Reconnect the Wires Securely
You have now reached the final and most critical phase of the installation. A proper electrical connection is paramount for both safety and performance. You must reattach the wires correctly to ensure your oven operates reliably.
Refer to Your “Before” Photo
This is the moment your earlier documentation becomes invaluable. Pull up the photographs you took before disconnecting the old element. Your photo serves as the definitive blueprint for reassembly.
Your Visual Guide 📸 Compare your photo to the current state of the wiring. Confirm the path of each wire and its designated terminal. This simple verification step prevents incorrect wiring, which could damage the new element or the oven’s control system.
Attach Wires to the New Terminals
You will now reconnect the high-temperature wires to the new element. Work methodically to replicate the original setup.
- Retrieve the wire for the first terminal, referencing your photo or label.
- Place the wire’s ring terminal over the new element’s threaded post.
- Thread the corresponding nut onto the post. Hand-tighten it first to ensure it is not cross-threaded.
- Repeat this process for the second terminal.
Ensure the wires are not stretched or twisted. They should rest naturally without putting stress on the connection points.
Ensure All Connections Are Tight
A loose connection is a primary cause of electrical failure. It creates high resistance, which generates intense heat at the terminal instead of inside the element. This can melt wires, damage the new element, and create a fire hazard.
Use your wrench or nut driver to tighten the nuts on both terminals. The connection should be snug and firm. You want to compress the ring terminal securely against the post. Avoid excessive force, as over-tightening can strip the threads or break the terminal post.
The “Snug-Tight” Rule 🔩 Tighten the nut until it stops, then give it a final quarter-turn. The wire terminal should not be able to wiggle or rotate on the post.
| Connection Quality | Result |
|---|---|
| ✅ Tight Connection | Low resistance, efficient power flow, safe operation. |
| ❌ Loose Connection | High resistance, heat buildup, risk of arcing and failure. |
After tightening, perform one last visual check. Confirm that the bare metal of the wire terminals is not touching the oven chassis or any other nearby wires. Proper clearance is essential for preventing a short circuit.
Final Checks and Powering Up
You have successfully installed the new component. Now, you will perform the final checks to ensure a safe and successful startup. This careful, step-by-step process validates your work and prepares your oven to return to service.
Reassembling Your Powder Coating Oven
Proper reassembly is just as important as the repair itself. You must restore the oven to its original condition to ensure safe operation and thermal efficiency.
Replace All Panels and Covers
Begin by reinstalling the access panel you removed earlier. Align the panel correctly with its screw holes. Insert all the screws and tighten them until they are snug. A properly sealed oven maintains its internal temperature more effectively and contains the heat.
Perform a Final Check on All Screws
Take a moment to give the oven a final once-over. Confirm that you have tightened all fasteners on the access panel and the element’s mounting brackets. A secure assembly prevents vibrations and ensures all components remain safely in place during operation.
The Moment of Truth: Testing Your Work
With the oven fully reassembled, you are ready to restore power and test the new element. This is where you see the result of your efforts.
Safely Restore Power to the Oven
Follow a deliberate power-up sequence to maintain safety.
- First, plug the oven’s main power cord back into the wall outlet.
- Next, go to your electrical panel and flip the dedicated circuit breaker back to the “On” position.
Safety First ⚠️ Before proceeding, ensure the area around the oven is clear of tools, flammable materials, and personnel. You are about to energize the equipment.
Set a Low Temperature (e.g., 200°F)
Turn on the oven’s main controls. Set the PID controller or thermostat to a low temperature, such as 200°F (93°C). This allows the new element to warm up gradually and gives you a chance to observe its initial operation.
Visually Confirm the New Element Glows
If you can safely view the oven’s interior, look for the new element to begin glowing a dull red. This visual confirmation is the clearest sign that your repair was successful. The element is receiving power and converting it into heat as intended.
Running a Full Test Cycle
A glowing element is a great sign, but a full test cycle is necessary to confirm the oven is ready for production.
Bring the Oven to a Standard Curing Temperature
Increase the setpoint on your controller to a typical curing temperature, like 400°F (204°C). Let the oven come up to temperature completely.
Monitor for Stable and Even Heating
Watch the controller’s display to ensure the oven reaches the target temperature and holds it steady. A stable temperature reading indicates that the controller, relays, and new element are all working together correctly. Your oven is now repaired and ready to get back to curing parts.
Congratulations. You have successfully diagnosed and replaced your oven’s heating element. You mastered a critical piece of equipment maintenance. This DIY repair saves you money and eliminates costly downtime. It also empowers you with a deeper understanding of your powder coating setup. Your oven now runs like new. It is time to get back to creating those durable, flawless finishes.
FAQ
How often should I expect to replace a heating element?
Element lifespan varies based on usage and environment. With regular use, you can expect elements to last several years. Heavy, continuous operation or frequent power cycling may shorten this lifespan. You should perform annual inspections to catch potential failures early.
Can I upgrade to a higher wattage element for faster heating?
You should avoid this. Your oven’s wiring, relays, and controller are rated for a specific electrical load. Installing a higher wattage element can overload these components. This creates a serious fire hazard and can damage your equipment. Always match the original part’s specifications.
Why did my brand-new heating element fail so quickly?
Premature failure often points to an installation issue or an external problem.
Common Causes:
- A loose electrical connection created a hot spot.
- The element was damaged during installation.
- Your oven’s voltage is incorrect for the part.
Is it ever safe to repair a cracked heating element?
No. You must never attempt to repair a cracked or broken element. A damaged sheath exposes the live internal coil, creating a severe risk of electric shock and short circuits. You should always replace a physically damaged element immediately for safety.
What if all elements test good but the oven still won’t heat?
If your elements show good continuity, you should investigate other components in the heating circuit. Re-check the Solid State Relays (SSRs), fuses, and wiring connections. The problem may also originate from a faulty PID controller or temperature sensor.
How do I know if my shop has 208V or 240V power?
You can use your multimeter to determine your voltage. Set it to AC Voltage (V~). Carefully test the wall outlet your oven uses. A reading around 208V indicates a three-phase power source, while a reading near 240V signifies single-phase power.

