
You can begin your diagnosis by finding the dryer’s wiring diagram. Access the control panel using a 1/4-inch nut driver to locate this essential map. This schematic shows you how electricity travels to the Maytag dryer heating element. You can save significantly on repairs; a professional service call often costs $100-$150 before labor. The diagram traces the complete circuit through several safety components.
Pro Tip: Fewer than half of all heating failures involve the Heating Element itself. This makes a full circuit diagnosis critical. Reputable Heating element manufacturers, such as Jinzhong Electric Heating, produce reliable household appliance heating elements, but connected parts can fail first.
How to Read the Maytag Dryer Wiring Diagram
The wiring diagram is your roadmap to a successful diagnosis. You must first learn its language of symbols, lines, and codes. This knowledge empowers you to trace the electrical circuit and pinpoint the exact point of failure.
Decoding Key Symbols and Lines
You will see several standard symbols on the diagram. Each one represents a specific component in the heating circuit. Recognizing them is the first step.
The Heating Element Symbol
The heating element symbol typically looks like a resistor—a zigzag or rectangular box. This symbol represents the coil that produces heat. The diagram shows two connection points for this component.
Thermostat and Thermal Fuse Symbols
Thermostats and thermal fuses act as safety switches. Their symbols reflect this function.
- Thermal Fuse: You will see a simple line with a small, wavy “S” shape breaking it. This represents a one-time safety device.
- Thermostats (High-Limit & Cycling): These are represented by a line with a break and a small, curved line above it. This symbol indicates a switch that opens and closes based on temperature.
Understanding Wire Color Codes
The diagram uses abbreviations for wire colors. You can use this chart to match the diagram’s codes to the physical wires in your dryer.
| Abbreviation | Wire Color |
|---|---|
| BLK or BK | Black |
| WHT or W | White |
| RED or R | Red |
| BLU or BU | Blue |
| YEL or Y | Yellow |
Tracing the Path of Electricity
You can trace the flow of 240-volt power through the heating circuit. The diagram shows this path as a continuous line connecting multiple components in a series.
From the Power Source to the Timer
Your trace begins where power enters the dryer. The L1 (Line 1) and L2 (Line 2) legs of power travel to the timer or control board. The timer must be set to a heated cycle to send voltage toward the heating circuit.
Through the Safety Components
From the timer, electricity flows through a series of safety devices. You will follow the wire from the timer to the high-limit thermostat, then to the thermal fuse, and finally to the cycling thermostat. A break in any of these components will stop power from reaching the Maytag dryer heating element.
To the Heating Element and Neutral
After passing all safety checks, the electricity reaches one terminal of the heating element. Power flows through the element’s coil, generating heat. The circuit completes as electricity exits the second terminal and returns to the neutral (N) line, finishing its path.
Identifying Components on the Diagram and in Your Dryer
You can now translate the schematic into a real-world repair plan. This involves matching the symbols on your wiring diagram to the physical parts inside your dryer. You will need to remove the dryer’s rear panel to access these components.
Locating the Heating Element Assembly
The heating element is the heart of your dryer’s heating system. Finding it is your first objective.
Matching the Diagram Symbol to the Physical Part
The zigzag symbol on your diagram represents the heating element coil. You will look for a component with this distinct coiled structure. Key visual characteristics help you identify it correctly.
- Coiled Design: The element uses a tightly wound coil to maximize surface area for efficient heat distribution.
- Insulation: You will see ceramic or mica insulators that support the coil and prevent it from touching the metal housing.
- Material: The coil itself is made of a high-resistance material like nichrome or stainless steel, designed to glow red hot.
- Signs of Damage: A visual inspection may reveal breaks, cracks, or melted spots on a failed element.
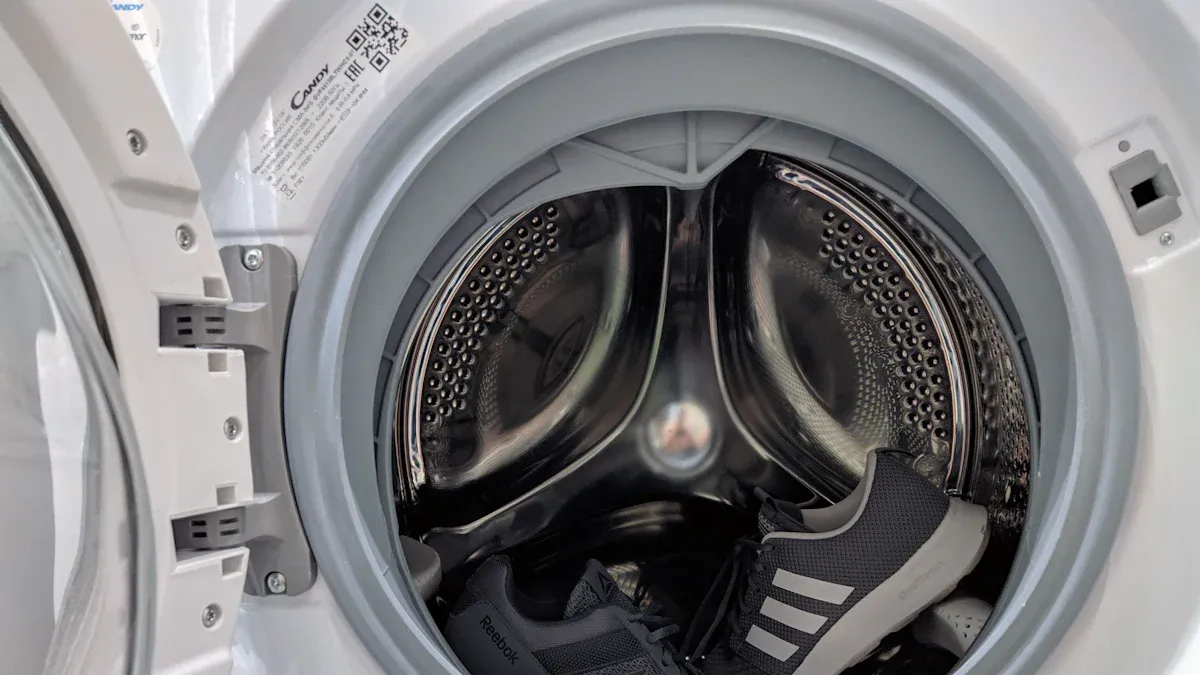
Physical Location Inside the Dryer Cabinet
You will find the Maytag dryer heating element housed within a large, cylindrical metal canister. This assembly is typically mounted to the base or rear wall of the dryer cabinet, directly behind the drum. The entire canister, known as the heater housing, contains the element and several key safety devices.
Pinpointing the Safety Controls
Your diagram shows several safety components in the circuit. Engineers strategically place the high-limit thermostat and thermal fuse near the heating element. This placement serves a critical engineering purpose. It allows them to quickly detect dangerous overheating conditions if another component fails, shutting off power to prevent a fire hazard.
Finding the High-Limit Thermostat
The high-limit thermostat is a small, round component mounted directly on the heater housing. It has two wire terminals. This device acts as a final safety cutoff if temperatures exceed a safe maximum.
Finding the Thermal Fuse
You will find the thermal fuse also mounted on the heater housing, often near the high-limit thermostat. It is a small, plastic-bodied component with two terminals. This is a one-time use fuse that blows to cut power permanently if the dryer severely overheats.
Note: A blown thermal fuse often indicates a separate problem, such as a clogged vent line. You must investigate the root cause before simply replacing the fuse.
Finding the Cycling Thermostat
The cycling thermostat regulates the drum temperature during a normal cycle. You can locate it on the blower housing, which is the housing surrounding the fan that moves air through the dryer. This component looks similar to the high-limit thermostat but may have four terminals instead of two.
Essential Tools and Safety Precautions
A successful diagnosis requires the right tools and a strict commitment to safety. You must prepare your workspace and equipment before you begin any diagnostic tests. This preparation ensures an efficient and, most importantly, safe repair process. Skipping these steps can lead to incorrect diagnoses, equipment damage, or serious personal injury.
Gathering Your Diagnostic Tools
You should assemble all necessary tools before you open the dryer cabinet. This simple action prevents you from having to stop mid-repair to find a missing instrument. Your toolkit for this job is straightforward and focuses on one key diagnostic device.
Your Multimeter is Key
Your multimeter is the most critical tool for this task. You cannot accurately diagnose an electrical fault without one. This device allows you to test for continuity, confirming whether electricity can flow through a component.
- It definitively tells you if a part is good or bad.
- It eliminates guesswork from your diagnosis.
- It helps you pinpoint the exact broken component in the circuit.
Basic Hand Tools (Nut Drivers, Screwdrivers)
You will need a few basic hand tools to access and remove the dryer’s components. Most Maytag repairs require only a small selection of common tools.
| Tool | Primary Use |
|---|---|
| 1/4-inch Nut Driver | Removing the rear and lower access panels. |
| 5/16-inch Nut Driver | Securing some internal components or terminal blocks. |
| Phillips Screwdriver | Loosening wire terminal screws. |
| Pliers | Gripping and removing tight wire connectors. |
Critical Pre-Test Safety Steps
You must follow these safety procedures without exception. Electric dryers operate on a 240-volt circuit, which is extremely dangerous. Your personal safety is the top priority.
Unplug the Dryer from the Wall Outlet
This is the most important step of the entire process. You must physically disconnect the dryer’s power cord from the wall outlet before you touch any internal components. Never rely on the dryer’s power button or timer dial to de-energize the machine.
⚠️ DANGER: Electrical Shock Hazard Never attempt to test or replace any component while the dryer is plugged in. Direct contact with a 240-volt circuit can cause severe injury or death. Always confirm the appliance is completely disconnected from its power source.
Wear Protective Gloves
You should always wear protective gloves during the repair. The thin sheet metal inside a dryer cabinet often has sharp edges that can easily cut your hands. Gloves provide a necessary barrier against these hazards. They also offer a minor, additional layer of insulation, though they should never be considered a substitute for unplugging the appliance.
Setting Up Your Multimeter for Testing
With your tools ready and safety precautions in place, you can now prepare your multimeter. This device is your eyes and ears for seeing electricity’s path. You will use it to perform a simple yet powerful diagnostic procedure called a continuity test. Properly setting up your meter and understanding its readings are essential for an accurate diagnosis.
Understanding the Continuity Test
The continuity test is the core of your diagnostic process. It answers one simple question: can electricity flow from one point to another through a component? This test helps you determine if a part is working correctly or if it has failed.
What “Continuity” Means for a Circuit
Continuity describes a complete, unbroken electrical path. A good component, like a new fuse or a functional heating element, should have continuity. It allows electricity to pass through it with very little resistance. The opposite of this is an open circuit. An open circuit is a break or interruption in the path. This break creates what is effectively infinite resistance, making it impossible for current to flow. Your test will determine if a component provides a continuous path or if it is open.
How a “No Continuity” Result Pinpoints a Failure
When you test a component and your multimeter does not detect a complete path, you have found the point of failure. This result is called “no continuity” or an open circuit. Most digital multimeters will display OL on the screen in this situation.
Pro Tip: The
OLon your multimeter’s screen typically means “Open Loop” or “Open Line.” It signifies that the component has infinite resistance because it is broken internally. This reading is definitive proof that the part needs replacement.
Configuring Your Multimeter
You must select the correct setting on your multimeter to perform a continuity test. Most digital multimeters make this process straightforward.
Selecting the Continuity or Ohms (Ω) Setting
You have two primary options for this test. Look for one of the following settings on your multimeter’s dial:
- Continuity Setting: This mode is often marked with a symbol that looks like a sound wave or a series of parallel arcs (🔊). In this mode, the meter will emit an audible beep if it detects a complete circuit, providing instant feedback.
- Ohms (Ω) Setting: You can also use the resistance setting, marked with the Greek letter omega (Ω). A good component will show a low resistance reading (e.g., 10-30 ohms for a heating element), while a failed one will show no change or
OL.
How to Confirm Your Meter is Working
You should always verify your multimeter is functioning correctly before testing any components. This simple check prevents a faulty meter from giving you a false diagnosis.
- Set your multimeter to the continuity or lowest Ohms (Ω) setting.
- Touch the metal tips of the two probes firmly together.
- Your meter should beep and/or display a reading very close to zero (e.g., 0.0 to 0.5 Ω).
- Separate the probes. The display should return to
OL, confirming it can correctly identify an open circuit.
If your meter passes this test, you can proceed with confidence.
Testing the Maytag Dryer Heating Element and Circuit
You are now ready to perform the hands-on tests. This process systematically checks each component in the heating circuit. Remember, your dryer must remain completely unplugged for all of these continuity tests. You will use your multimeter to send a tiny electrical signal through each part to see if the path is complete.
How to Test the Heating Element for Continuity
Your first test targets the main component, the heating element itself. A visual inspection might reveal a break, but the multimeter test provides definitive proof of its condition.
Accessing the Element’s Terminals
You must first isolate the heating element from the rest of the circuit. This ensures you are only testing the element and not getting a false reading from other components.
- Locate the two wire terminals on the end of the heater housing. These are the connection points for the element.
- Carefully pull the wire connectors off each terminal.
- If a connector is tight, you can use a pair of pliers to gently wiggle it free. Grip the metal connector, not the wire itself, to avoid causing damage.
Placing the Multimeter Probes
With the wires disconnected, you can now test the element.
- Set your multimeter to the continuity (🔊) or Ohms (Ω) setting.
- Firmly press one multimeter probe onto each of the two element terminals. The polarity of the probes does not matter for this test.
- Observe the reading on your multimeter.
| Test Result | What It Means |
|---|---|
| Audible Beep / 10-30 Ω | The element has continuity and is likely good. The circuit path is complete. |
No Beep / OL Reading | The element has no continuity. It is broken internally and must be replaced. |
Advanced Diagnosis: Sometimes, a failing element gives confusing results. You might see resistance readings that jump around from high to low values without ever settling. This instability suggests the element has a poor internal contact that fails under a full electrical load, even if it doesn’t show a complete break during a simple test. This kind of erratic reading also points to a bad Maytag dryer heating element.
How to Test the Safety Components
If your heating element shows good continuity, the problem lies elsewhere in the circuit. You will now test the safety components in the same manner. A failure in any one of these parts will create an open circuit, preventing power from reaching the element.
Testing the High-Limit Thermostat
The high-limit thermostat is a simple switch that should be closed at room temperature.
- Disconnect the two wires from its terminals.
- Place one multimeter probe on each terminal.
- A good high-limit thermostat will show continuity (beep and/or a reading near zero ohms). An
OLreading indicates it has failed and needs replacement.
Testing the Thermal Fuse
The thermal fuse is another critical safety device. Like the thermostat, it should have continuity when in good condition.
- Disconnect the wires from the two terminals on the fuse.
- Test for continuity by placing a probe on each terminal.
- You must get a continuity reading for the fuse to be good. If your meter displays
OL, the fuse has blown and must be replaced.
Important Note: A functional fuse or thermostat is a closed switch. Your multimeter reading should reflect this.
- A reading of zero Ohms (or very close to it) indicates no resistance, which is the correct state for these parts.
- Any reading of
OL(Open Line) confirms the component has failed open.
Testing the Cycling Thermostat
The cycling thermostat regulates the drum temperature and is also tested for continuity. It may have two or four terminals.
- For a two-terminal thermostat: Disconnect the wires and test across the terminals just like the high-limit thermostat. It should show continuity at room temperature.
- For a four-terminal thermostat: You will typically test between the two larger terminals. Disconnect the wires from these main terminals and check for continuity between them.
If any of these safety components fail the continuity test, you have successfully identified the source of your heating problem.
Common Failure Scenarios Based on Your Test Results
Your multimeter tests provide clear, actionable data. You can now use these results to make a definitive diagnosis and identify the correct solution. Each test result points to a specific failed component, removing all guesswork from the repair.
Diagnosis: Bad Heating Element
Test Result: No continuity across the element terminals.
Your multimeter displayed OL or did not beep when you tested the heating element. This result confirms the internal coil is broken. Electricity cannot pass through it to generate heat. You may also see visible signs of failure on the coil itself.
- Burns or scorch marks: These dark spots on the heater housing indicate severe overheating.
- Blistering: The surface of the coil may look bubbled or blistered from age and heat stress.
- Cracks or breaks: You might see a physical gap or snap in the coil, which is a clear sign of failure.
The Fix: Replace the heating element assembly.
You must replace the entire heating element assembly. This part is not repairable. A new Maytag dryer heating element will restore the machine’s ability to produce heat. You can typically purchase the element as a standalone part or as part of a kit that includes new thermostats and fuses.
Diagnosis: Blown Thermal Fuse
Test Result: No continuity across the fuse terminals.
Your multimeter showed an OL reading when you tested the thermal fuse. This means the fuse has done its job and blown to prevent a dangerous overheating event. A blown fuse is a symptom, not the root cause. You must investigate why it blew before replacing it.
⚠️ Critical Safety Warning Never just replace a thermal fuse without finding the cause of the failure. Doing so creates a serious fire hazard. The most common cause is restricted airflow from a clogged vent, but other system malfunctions can also be the culprit.
Other potential causes for a blown fuse include:
- A faulty cycling thermostat that fails to turn the heat off, causing temperatures to rise past safe limits.
- A heating element that has shorted to the metal cabinet, causing it to heat continuously even when it should be off.
The Fix: Replace the fuse and inspect for a clogged vent.
Your primary task is to find and clear the airflow obstruction. You must clean the entire vent path from the dryer to the outside of your home.
- Clean the Lint Trap Housing: Remove the lint screen. Use a long, flexible brush to loosen lint inside the housing, then vacuum it out with a narrow attachment.
- Access the Vent Hose: Pull the dryer away from the wall. Unplug the dryer for safety.
- Disconnect and Clean the Hose: Use a screwdriver to loosen the clamps holding the vent hose to the dryer and the wall. Detach the hose and clean its interior with a dryer vent brush.
- Clean the Dryer Duct: Insert the cleaning brush into the duct in the wall. Work it back and forth to dislodge trapped lint, then vacuum it out.
- Check the Exterior Vent: Go outside and inspect the vent cap. Remove any lint, nests, or debris blocking the opening.
- Reassemble and Test: Reconnect the vent hose securely. Plug the dryer back in and run a short cycle to confirm strong airflow from the exterior vent.
After you clear the vent system, you can safely install the new thermal fuse.
Diagnosis: Failed High-Limit or Cycling Thermostat
Test Result: No continuity across the thermostat terminals.
Your multimeter displayed OL when you tested either the high-limit or cycling thermostat. This indicates the internal switch has failed in the open position, breaking the electrical circuit. These components are essential for both temperature regulation and safety. Understanding their distinct roles helps clarify the failure.
| Thermostat Type | Primary Function | Operating Range/Purpose |
|---|---|---|
| Cycling Thermostat | Regulates heat during the drying cycle | Turns the heating element on and off to maintain a consistent drying temperature. |
| High-Limit Thermostat | Safety mechanism to prevent overheating | Cuts power to the heater if temperatures spike, preventing a fire. |
A failure in either thermostat will stop the heating element from receiving power.
The Fix: Replace the faulty thermostat.
You must replace the specific thermostat that failed the continuity test. These parts are inexpensive and easy to swap.
- Purchase the correct replacement thermostat for your Maytag dryer model.
- Unscrew the old component from its mounting location on the heater or blower housing.
- Secure the new thermostat in its place.
- Reconnect the wires to the terminals, ensuring a snug fit.
Once you replace the faulty component, you will restore the complete electrical path, allowing your dryer to heat correctly again.
Correctly Wiring Your New Components
You have successfully diagnosed the problem and have the new part ready for installation. Correctly wiring your new components is the final, critical step. This process ensures your dryer operates safely and effectively. Improper connections can lead to repeat failures or create significant safety hazards.
Always double-check that the dryer is unplugged before you touch any internal parts. If your dryer is hardwired, switch off the circuit breaker at the main panel.
Reconnecting the Heating Element
Your new Maytag dryer heating element is ready to be installed in the heater housing. You will now connect the main power wires that deliver 240 volts to the component.
Connecting the Two Wires to the Terminals
The heating element is a simple resistive load, so the polarity of the wires does not matter. You can connect either wire to either terminal. The most important factor is ensuring a tight, secure connection.
Loose electrical connections on high-wattage heating elements pose significant fire hazards due to increased resistance. A connection that is not mechanically tight develops resistance. This resistance dissipates power as heat when current flows through it. Even a small amount of resistance can generate enough heat to burn the connection and surrounding wires.
To connect the wires correctly:
- Align the female wire connector with the male terminal on the element.
- Push the connector firmly onto the terminal until it is fully seated.
- Gently tug on the wire to confirm it is secure and will not vibrate loose.
Reconnecting Thermostats and Fuses
You will reconnect thermostats and fuses using the same method. These components complete the safety circuit, so their connections are just as important.
Ensuring Wires are Secure on the Correct Terminals
For two-terminal components like the high-limit thermostat and thermal fuse, the wire order does not matter. For a four-terminal cycling thermostat, you must reconnect the wires to their original positions. Taking a photo before disassembly can be a helpful reference. A secure connection on every component is non-negotiable. It prevents serious electrical risks.
Potential electrical risks you avoid with proper installation include:
- Electric shock or electrocution from exposure to high voltage.
- Short circuits or damage to internal components.
- Accidental activation of the appliance while working on it.
- Creation of a fire hazard if tools bridge electrical contacts.
After attaching each wire, give it a light pull. This simple check confirms the connector is gripping the terminal tightly, ensuring a safe and lasting repair.
You now possess the knowledge to tackle this common appliance issue. Your Maytag dryer’s wiring diagram is the most valuable tool for an accurate diagnosis. A systematic testing process provides the fastest way to find the fault.
- You can trace the circuit with the diagram.
- You can test each component logically.
- You can confidently identify and replace the broken part.
This guide empowers you to complete the repair and restore your dryer’s heating function. You’ve got this! ✅
FAQ
Why did my new heating element fail so quickly?
A new element failing quickly almost always points to poor airflow. You must ensure your entire vent system is completely clear. A clogged vent causes the element to overheat and burn out prematurely. This is the most common reason for repeat failures.
Can I repair a broken heating element coil?
No, you cannot repair a broken heating element coil. The nichrome wire requires a specific resistance to function safely and effectively. You must replace the entire heating element assembly to ensure a safe and proper repair.
How much does a new Maytag heating element cost?
You can expect to pay between $40 and $80 for a new Maytag dryer heating element. Prices vary based on your specific dryer model and whether you purchase an OEM (Original Equipment Manufacturer) part or a compatible aftermarket version.
Is it safe to use the dryer if I bypass the thermal fuse?
⚠️ DANGER: Never bypass a thermal fuse. This action removes a critical safety feature and creates an extreme fire hazard. You must replace a blown fuse and find the root cause of the failure, which is usually a clogged vent.
What does an OL reading on my multimeter mean again?
The OL reading on your multimeter stands for “Open Line” or “Open Loop.” It indicates infinite resistance. This result confirms the component you are testing is broken internally and cannot complete an electrical circuit. The part requires replacement.
Why does my dryer heat but take too long to dry clothes?
This issue also points to an airflow problem. Your heating element is working, but a clogged vent traps moist air inside the drum. You should perform a thorough cleaning of the entire vent path from the dryer to the outside.
Do I need to replace all safety components with the element?
You only need to replace the components that fail a continuity test. However, many technicians recommend replacing the high-limit thermostat and thermal fuse with the element. These parts are inexpensive and have been exposed to the same heat stress.

