You can replace a faulty air fryer 電熱線 by unplugging your air fryer, accessing the Heating Element, removing the damaged part, installing a new one, and running a test cycle. 金中電熱 produces 家電製品の加熱素子 that meet industry standards, so always choose components from reputable 発熱体メーカー.
Tip: Unplug your air fryer before starting any repair and follow the manufacturer’s instructions for safety.
Identifying a Faulty Air Fryer Heating Element

Signs Your Air Fryer Heating Element Needs Replacement
Recognizing when your air fryer heating element requires replacement helps you maintain optimal cooking performance and safety. Manufacturers report several frequent symptoms that signal a failing component. Review the table below for common signs and their descriptions:
| Symptoms | 説明 |
|---|---|
| Uneven or Inconsistent Heating | Food cooks unevenly or takes longer than usual, indicating poor heat distribution. |
| Air Fryer Not Heating at All | The unit powers on but does not generate heat, likely due to a burnt-out heating coil. |
| Visible Damage or Discoloration | Signs of wear such as dark spots or cracks on the heating element indicate degradation. |
| Burning Smell During Operation | A burnt smell suggests overheating or debris on the heating coil, requiring potential replacement. |
| Frequent Overheating or Auto Shut-Off | Unexpected shut-offs may indicate thermal overload or electrical faults in the heating element. |
| Strange Noises or Sparks | Unusual sounds or sparks from the heating element suggest electrical failure needing immediate attention. |
No Heat or Inconsistent Heating
You may notice your air fryer struggles to reach the desired temperature or fails to heat at all. If the fan operates but the unit does not produce heat, the electric heating coil likely needs attention. Inconsistent heating often results in food that remains undercooked or takes longer than expected.
Uneven Cooking or Burnt Food
Uneven cooking or burnt food points to poor convection heating. When the heating element cannot distribute heat evenly, you will see some areas of your meal overcooked while others remain raw. This symptom often appears alongside longer cooking times.
Visible Damage, Cracks, or Discoloration
Inspect the heating element for physical damage. Cracks, burn marks, or dark discoloration indicate significant wear. Manufacturers recommend checking for these signs regularly to prevent further appliance damage.
Troubleshooting the Air Fryer Before Replacement
Before you replace the air fryer heating element, perform a thorough troubleshooting process. Appliance repair experts suggest several steps to confirm the issue and rule out other causes.
Checking Power Supply and Settings
- Ensure the air fryer plugs into a functioning outlet.
- 電源コードとプラグに目に見える損傷がないか検査します。
- Reset the air fryer if your model features a reset button.
Inspecting Other Air Fryer Components
- Listen for the fan when you power on the unit.
- Check for obstructions blocking airflow vents.
- Look for grease coating or black residue on internal parts.
マルチメーターによる発熱体のテスト
Use a multimeter to test the heating element’s continuity. Disconnect the air fryer from power, then access the heating element terminals. Place the multimeter probes on the terminals and check for a reading. A lack of continuity confirms the heating element has failed and needs replacement.
Tip: Always consult your manufacturer’s manual for specific troubleshooting instructions and safety guidelines.
Preparing Your Air Fryer for Heating Element Replacement
安全に関する重要な注意事項
Unplugging the Air Fryer
You must always disconnect your air fryer from the power source before starting any repair. Unplugging the appliance prevents electric shock and ensures your safety. For added protection, turn off the power at the circuit breaker if your kitchen setup allows.
Allowing the Appliance to Cool Completely
After unplugging the air fryer, wait until the appliance cools down. Touching internal parts while they are hot can cause burns. Manufacturers recommend allowing the unit to sit for at least 30 minutes before you begin handling any components.
Working in a Safe, Well-Lit Area
Choose a workspace that is dry, clutter-free, and well-lit. Good lighting helps you see small screws and connectors clearly. A tidy area reduces the risk of losing parts or tools. You should wear protective gloves and safety goggles to guard against sharp edges and debris.
ヒント If you feel unsure about any step, consult a professional technician. Safety should always come first when working with electrical appliances.
Recommended Safety Standards for Handling Electrical Appliances:
- Turn off the power at the circuit breaker or unplug the appliance to prevent electric shock.
- Allow the appliance to cool completely before touching internal parts.
- Wear protective gloves and safety goggles to guard against sharp edges and debris.
- Keep your workspace dry and clutter-free to avoid hazards.
- Ensure all power sources are disconnected before starting.
- If unsure about any step, consult a professional.
Tools and Parts Needed for Air Fryer Heating Element Replacement
Compatible Replacement Heating Element
Select a replacement heating element that matches your air fryer model. Compatibility ensures proper fit and function. For convection heating systems, using the correct part maintains efficient airflow and heat distribution.
ドライバーとプライヤー
が必要だ。 プラスドライバー to remove and secure screws on the lid and heating element. Needle-nose pliers help you grip small parts and reach tight spaces. Replacement screws may be necessary if any original screws are lost or damaged.
Manufacturer’s Manual or Guide
Keep your manufacturer’s manual nearby. The manual provides diagrams and step-by-step instructions specific to your air fryer. It may also indicate if you need a heating element cover or a new lid for certain models, such as the PowerXL MFC-AF-6.
Essential Tools and Parts Checklist:
- プラスドライバー
- ニードルノーズプライヤー
- Safety gloves
- Compatible replacement heating element
- Replacement screws (if needed)
- Heating element cover (if applicable)
- Manufacturer’s manual
You will find that preparing properly for the replacement of your air fryer heating element makes the process smoother and safer. Handling the electric heating coil with care and following these guidelines helps you avoid common mistakes.
Accessing the Air Fryer Heating Element
When you prepare to access the air fryer heating element, you must follow a systematic approach. This ensures you avoid damage and maintain safety throughout the process.
Opening the Air Fryer Safely
Removing Basket, Trays, and Accessories
Start by removing all detachable components from your air fryer. Take out the basket, trays, and any accessories. This step gives you clear access to the internal structure and prevents accidental damage to removable parts. Place these items aside in a safe area.
Locating and Removing Outer Casing Screws
Next, locate the screws securing the outer casing. Most air fryers use Phillips screws, so you need a compatible screwdriver. Carefully unscrew each fastener. Keep the screws organized, as you will need them during reassembly. If your model has hidden screws under rubber feet or stickers, check the manual for guidance.
Tip: Photograph the screw locations before removal. This helps you remember where each screw belongs during reassembly.
Follow these recommended steps for safely opening your air fryer:
- Power off and unplug the air fryer to eliminate the risk of electric shock.
- Remove the basket, trays, and accessories.
- Use a Phillips screwdriver to open the casing, handling all components gently.
- Set aside screws and small parts in a labeled container.
Exposing the Heating Element Assembly
Detaching the Outer Casing
Once you remove the screws, gently lift or slide off the outer casing. Some models may require you to disconnect piping or wiring, so proceed with caution. Avoid using excessive force, as this can crack the casing or damage internal components. If you encounter resistance, consult your manufacturer’s manual for specific instructions.
Identifying Heating Element Location and Connections
Inside most air fryers, you will find the heating element positioned at the top of the cooking chamber. The electric heating coil generates heat, which the fan distributes throughout the chamber for effective convection heating. Look for the metal coil or plate near the fan assembly. You may see wires connected to the element, which you will need to disconnect during replacement.
- In many designs, the heating element sits above the food basket, allowing rapid heat transfer.
- The element typically reaches temperatures between 180°F and 450°F, depending on your cooking settings.
Note: Always inspect the connections and mounting points before proceeding. This ensures you understand how the heating element integrates with the rest of the air fryer.
By following these steps, you can safely access the air fryer heating element and prepare for the next phase of replacement.
Removing the Faulty Air Fryer Heating Element
When you reach the stage of removing the faulty air fryer heating element, precision and attention to detail become essential. You must handle each step with care to avoid damaging internal components or misplacing connections.
Disconnecting Wires and Connectors
Labeling or Photographing Connections for Reference
Before you disconnect any wires, take a moment to document their arrangement. Use your smartphone to photograph each connection point. If you prefer, label each wire with masking tape and a marker. This step helps you remember the correct placement during reassembly.
ヒント A clear photo or label prevents confusion and ensures you reconnect wires accurately. You reduce the risk of electrical faults or improper heating performance.
Safely Detaching Wires and Connectors
Begin by gripping each connector firmly with needle-nose pliers. Pull gently to release the wire from its terminal. Avoid yanking or twisting, as this can break the connector or damage the wire insulation. If you encounter resistance, check for locking tabs or clips that require pressing before removal.
- Inspect each wire for signs of wear or corrosion.
- Set aside detached wires in an organized manner.
- Keep connectors away from metal surfaces to prevent accidental short circuits.
You maintain safety and organization by following these steps. Proper wire management simplifies the installation of the new air fryer heating element.
Extracting the Damaged Heating Element
Removing Mounting Screws or Fasteners
Locate the screws or fasteners securing the heating element to the air fryer’s internal frame. Use a Phillips screwdriver to loosen and remove each screw. Place the screws in a small container or magnetic tray for safekeeping.
| ステップ | アクション | Tool Needed |
|---|---|---|
| Identify fasteners | Find all screws or clips holding the element | プラスドライバー |
| Remove fasteners | Unscrew or unclip each one | プラスドライバー |
| Store fasteners | Place in labeled container | Magnetic tray |
注: Some models use brackets or clamps in addition to screws. Refer to your manufacturer’s manual for specific instructions.
Carefully Lifting Out the Faulty Element
Once you remove all fasteners, gently lift the damaged heating element from its mounting position. Hold the element by its edges to avoid bending or cracking the coil. If the element feels stuck, wiggle it slightly to loosen it from the brackets.
You must avoid touching the coil surface directly, as oils from your skin can affect future heating performance. Place the faulty element on a non-conductive surface for inspection or disposal.
You have now completed the removal process. This step prepares your air fryer for the installation of a new heating element, restoring efficient convection heating and reliable operation.
Installing the New Air Fryer Heating Element

Positioning the Replacement Heating Element
Aligning with Mounting Points and Brackets
Begin by holding the new heating element by its edges. Position it inside the air fryer so that the mounting holes on the element line up with the brackets or posts inside the unit. You should avoid touching the coil surface directly. Oils from your skin can affect the performance of the new part. Take your time to ensure the element sits flat and does not press against any wires or other components. Proper alignment prevents future vibration and ensures even heat distribution.
Securing the Element with Screws or Fasteners
Once you have aligned the heating element, secure it using the screws or fasteners you set aside earlier. Insert each screw by hand to avoid cross-threading. Tighten them with a screwdriver until the element feels stable. Do not overtighten, as this can strip the threads or crack the mounting brackets. Check that the element does not move when you gently press on it. A secure fit ensures safe operation and reliable heating.
ヒント Place all screws in their original positions. Using the correct screws helps maintain the structural integrity of your air fryer.
Reconnecting Wires and Connectors
Matching Each Connection Correctly
You must reconnect the wires to the new air fryer heating element exactly as they were before. Use the photos or labels you made during disassembly as a guide. Each wire should attach to its original terminal. This step is critical for both safety and performance. If your model includes a high-limit thermostat or thermal fuse, reinstall these components now. They protect your appliance from overheating.
Ensuring Tight and Secure Connections
After matching each wire, check that every connector fits tightly onto its terminal. Loose connections can cause electrical arcing or poor heating. Inspect each connector for signs of corrosion or damage. Replace any that look worn. Keep all wires clear of moving parts and sharp edges to prevent wear over time. If your manufacturer provides a wiring diagram, review it to confirm your work.
Here is a checklist to help you ensure correct reconnection:
- Match each wire to its original terminal using your photos or notes.
- Confirm all connectors are tight and free from corrosion.
- Reinstall the high-limit thermostat and thermal fuse.
- Keep wires clear of moving parts and sharp edges.
- Review the wiring diagram if available.
注: Double-check every connection before moving to the next step. Careful attention now prevents problems later.
You have now installed the new air fryer heating element and reconnected all necessary wires. This careful process restores your air fryer to safe, efficient operation.
Reassembling and Testing the Air Fryer
Reattaching the Outer Casing and Components
Securing All Screws and Panels
You have installed the new heating element. Now, you need to reassemble your air fryer. Begin by following the disassembly steps in reverse order. This approach helps you avoid missing any critical components. Place the outer casing back onto the unit. Align all panels carefully to prevent gaps or misalignment. Use your screwdriver to secure each screw in its original location. Tighten the screws until the panels feel stable, but avoid overtightening. You want to maintain the integrity of the casing and ensure a snug fit.
Tip: Organize your screws and panels during reassembly. This habit saves time and reduces the risk of losing small parts.
Reinstalling Basket and Trays
Once you secure the outer casing, reinstall the basket, trays, and any accessories you removed earlier. Slide each piece into its designated slot. Make sure everything fits smoothly and locks into place. Proper installation of these components supports optimal airflow and enhances cooking performance. You should check that the basket and trays move freely and do not obstruct the heating element.
Testing the Air Fryer Heating Element
Plugging In and Powering On
After reassembly, plug your air fryer into a reliable outlet. Power on the unit and observe the control panel. Confirm that the digital display or control knobs respond as expected. You want to see clear indicators that the appliance is ready for use.
Running a Test Cycle for Proper Heating
You need to verify the effectiveness of your new heating element. Start by running a preheating cycle. Watch the display and note how quickly the air fryer reaches the set temperature. Use a food thermometer to compare the actual temperature inside the chamber with the setting. The table below shows the expected temperature ranges for a properly functioning heating element:
| Temperature (°F) | Temperature (°C) | 説明 |
|---|---|---|
| 180 | 80 | Minimum setting for air fryers |
| 400 | 200 | Maximum setting for effective cooking |
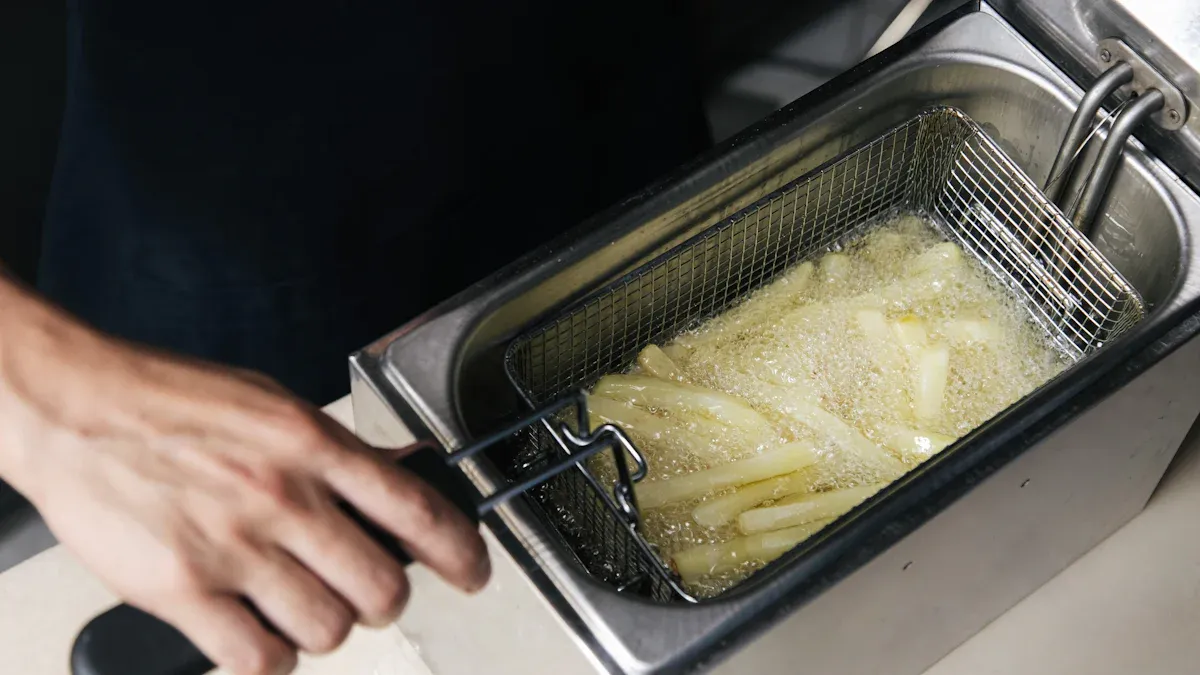
Test the cooking process by preparing a batch of frozen French fries. Observe whether the fries cook evenly and within the expected time frame. Check each button or dial for responsiveness. You want to confirm that the air fryer maintains accurate temperatures and times throughout the cycle. These steps help you assess the quick cooking capabilities of your appliance and ensure reliable operation.
Note: If you notice any issues during testing, review your connections and assembly. Proper installation supports safe and efficient cooking.
Safety Tips and Troubleshooting After Replacement
Double-Checking All Connections
After you finish installing the new heating element, you need to inspect every wire and connector. Loose or misconnected wires can cause your air fryer to malfunction or pose safety risks. You should use your reference photos or labels to verify each connection. If you notice a wire that feels loose, gently press it into place until it clicks or fits snugly. Secure connections help maintain proper electrical flow and prevent overheating.
Avoiding Loose or Misconnected Wires
You can follow these steps to avoid common wiring mistakes:
- Match each wire to its original terminal using your notes.
- Tug each connector lightly to check for a firm fit.
- Keep wires away from moving parts and sharp edges.
- Inspect for signs of corrosion or damage before powering on.
Tip: Double-checking your work now saves you time and prevents future repairs.
What to Do If the Air Fryer Still Doesn’t Work
If your air fryer does not operate after you replace the heating element, you need to troubleshoot further. Sometimes, a new part does not solve the problem due to other internal issues.
Consulting Manufacturer Support
You should contact the manufacturer’s support team if your appliance fails to heat or power on. Provide details about your repair and any troubleshooting steps you have completed. Manufacturer support can guide you through advanced diagnostics or recommend authorized service centers. You may need to check the thermal fuse, as a blown fuse will stop the fryer from heating. The support team may also ask you to inspect the heating element for proper installation.
Considering Professional Repair or Replacement
If manufacturer support does not resolve the issue, you have several options to consider:
- Place the air fryer on a flat, stable surface to ensure proper operation.
- Insert the basket securely and avoid overcrowding food.
- Set the temperature to the recommended level for your recipe.
- Request a heating element inspection from the manufacturer if problems persist.
You may need to seek help from a professional technician. Sometimes, internal electrical faults or damaged components require expert attention. If your appliance remains unreliable, replacing it with a newer model can improve energy efficiency and cooking performance.
Note: Professional repair ensures your air fryer operates safely and efficiently.
| Troubleshooting Step | Action to Take |
|---|---|
| Check heating element | Confirm correct installation and function |
| Inspect thermal fuse | Replace if blown |
| Verify basket placement | Ensure basket is inserted properly |
| Adjust temperature setting | Set to appropriate level |
| Contact manufacturer | Request further inspection or support |
You protect your investment and maintain safe cooking by following these troubleshooting steps.
You can replace a faulty heating element in your air fryer with careful attention to safety and manufacturer guidelines. This approach offers several long-term benefits:
- You save money by repairing instead of buying a new appliance.
- You improve energy efficiency, which may lower your utility bills.
- You help reduce environmental impact by minimizing waste.
Patience and precision restore your appliance’s performance, allowing you to enjoy safe and reliable cooking.
よくあるご質問
How do you know if your air fryer heating element is faulty?
You notice uneven cooking, no heat, or visible damage on the coil. If food burns or remains raw despite correct settings, the heating element likely needs replacement.
Can you replace the heating element in any air fryer model?
You can replace heating elements in most air fryer models. Always check your manufacturer’s manual for compatibility and specific instructions before starting the repair.
What safety precautions should you follow during replacement?
Unplug the air fryer and let it cool. Wear gloves and safety goggles. Work in a dry, well-lit area. Always follow the manufacturer’s guidelines for safe handling.
Do you need special tools to replace an air fryer heating element?
You need a Phillips screwdriver, needle-nose pliers, and the manufacturer’s manual. Some models may require additional tools. Organize all parts and tools before beginning the process.
Will replacing the heating element affect cooking techniques?
Replacing the heating element restores your air fryer’s performance. You can continue using your preferred cooking techniques once the appliance heats evenly and reliably.
How does hot air circulation impact air fryer performance?
Hot air circulation ensures even cooking and crisp results. A faulty heating element disrupts airflow, leading to poor food texture and inconsistent results.
What should you do if your air fryer still does not work after replacement?
Check all wire connections and review your installation steps. If problems persist, contact manufacturer support or consider professional repair for further diagnosis.
Can you clean the heating element instead of replacing it?
You can clean minor debris from the heating element. If you see cracks, discoloration, or persistent issues, replacement remains the safest option.

