You might wonder if you can install an electric heating element on your own. Many DIY projects succeed, especially with low-voltage designs that use safe power supplies between 1.5 and 12 volts. For safety, you need accurate resistance calculations and reliable connections. Review the table below for typical DIY project data:
| アスペクト | Statistic/Result | Practical Insight |
|---|---|---|
| Heating comfort temperature | 40°C–55°C | Safe, effective home heating |
| Power supply safety voltage | 1.5–12V typical | Reduces electrical risk |
| Battery life for DIY | >2 hours, reusable 100+ times | Supports daily use |
If you feel unsure about wiring, code compliance, or high-voltage systems, contact a licensed professional.
Understanding Electric Heating Elements
電気ヒーターとは?
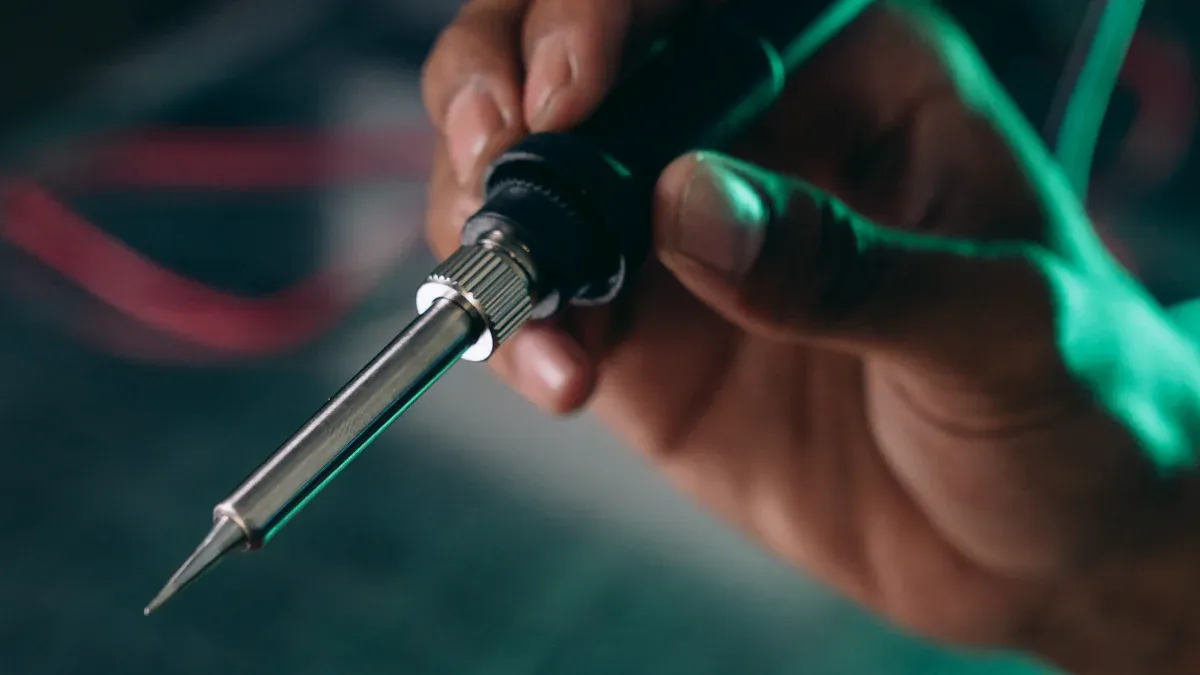
You encounter electric heating elements in many devices at home and work. An electric heating element is a component that converts electrical energy into heat through the process of resistive heating. When you pass an electric current through the element, it resists the flow, causing the material to heat up. Manufacturers design these elements using materials like nichrome or other alloys that withstand high temperatures and provide consistent performance. You rely on electric heating elements for precise, reliable, and efficient heat delivery in a wide range of applications.
Common Uses of Electric Heating Elements in Homes and Appliances
You find electric heating elements in almost every room of your house. Their versatility and efficiency make them essential for modern living. Here are some of the most common uses:
- Water heaters use heating elements to provide hot water for showers, dishwashing, and laundry.
- Ovens and stovetops rely on heating elements for cooking and baking.
- Toasters and irons use electric heating elements for quick, even heat.
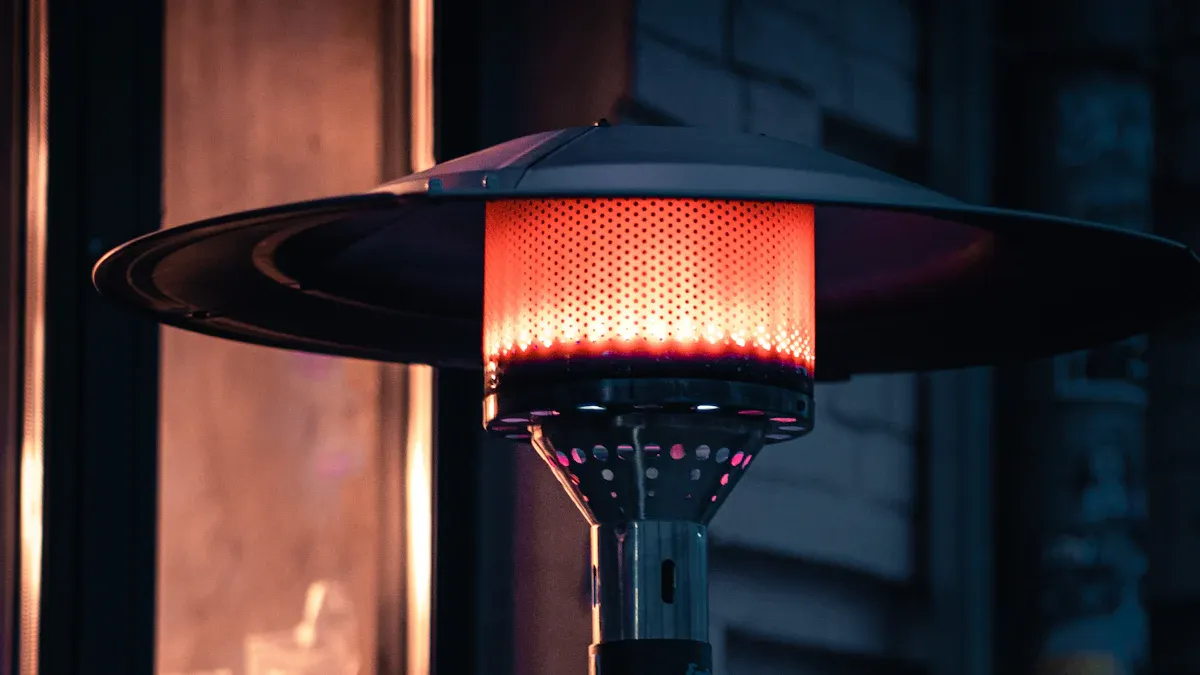
- Space heaters and electric radiators deliver warmth during cold months.
- Many appliances now feature smart technology, allowing you to control heating elements remotely and optimize energy use.
You benefit from advances in materials and design, which improve the durability and efficiency of heating elements. 管状発熱体, for example, offer precise temperature control and long service life. The growing demand for energy-efficient appliances and the integration of smart home features drive innovation in electric heating. As urbanization and disposable income increase, more households adopt modern appliances that use electric heating elements.
ヒント Regularly check your appliances for signs of wear on heating elements. Early detection helps you avoid costly repairs and ensures safe operation.
How Electric Heating Elements Work
You experience the effects of electric heating every day, but understanding the process helps you make informed choices. Electric heating elements operate on the principle of resistive heating. When you switch on an appliance, electricity flows through the heating element. The resistance in the material converts electrical energy directly into heat, which then transfers to air, water, or another medium.
In residential settings, heating and cooling account for about 43% of total home energy use. Upgrading to efficient electric heating systems, including modern heating elements, can reduce your energy consumption by 20–50%. You can further improve efficiency by using programmable thermostats and sealing drafts. These steps lower your energy bills and reduce your environmental impact.
The efficiency of electric heating varies by climate and technology. For example, a study found that replacing older electric heat pumps with efficient models reduced electricity use by 8% per month in colder climates. In warmer climates, electricity use sometimes increased due to additional cooling needs. However, overall energy consumption, including non-electric sources, decreased with the adoption of efficient electric heating.
| Study (Year) | Impact on Annual Electricity Consumption per Household | Percentage Change | Effect Size (Hedges’ g) |
|---|---|---|---|
| Alberini et al. (2016) | Reduction in electricity use in colder climates | -8% monthly | -0.36 |
| Grimes et al. (2016) | Increase in electricity use in warmer climates (due to cooling use) | +140 kWh | 0.09 |
You see that electric heating elements play a crucial role in energy management and comfort. By understanding how heating elements work, you can choose the right solutions for your home and maximize efficiency.
Electric Heating Element Installation: DIY or Professional?
Assessing Your Skills and Comfort Level for Installation
Before you begin any installation, you need to evaluate your own abilities. Ask yourself if you have experience with electrical work. You should feel comfortable using tools like screwdrivers, wire strippers, and voltage testers. If you have never worked with electrical systems, you may find electric radiator installation challenging. Safety must come first. You must understand how to turn off power at the breaker and verify that no electricity flows to the wires. If you feel unsure at any step, you should consider calling a professional. Many homeowners can handle basic tasks, but electric radiator installation often requires more advanced skills.
ヒント Always read the manufacturer’s instructions before starting any installation. These guides help you avoid common mistakes and ensure safe operation.
Legal, Code, and Permit Considerations for Electric Heating Element Installation
You must follow local building codes and regulations for any installation involving electricity. Many areas require permits for electric radiator installation or for adding new circuits. Codes exist to protect you and your property from hazards like electrical fires. You should check with your local building department before starting work. Some jurisdictions allow homeowners to perform their own installation, but others require a licensed electrician. If you ignore these rules, you risk fines or problems with insurance claims. Always document your installation and keep records of permits and inspections.
| タスク | Permit Required? | Who Can Perform? |
|---|---|---|
| Replace existing element | Sometimes | Homeowner or Electrician |
| New electric radiator | Usually | Licensed Electrician |
| Add new circuit | はい | Licensed Electrician |
When to Hire a Licensed Electrician for Electric Radiator Installation
You should hire a licensed electrician for electric radiator installation in several situations. If your project involves high-voltage wiring or new circuits, a professional ensures the work meets code. You also need an electrician if you feel uncomfortable with any part of the installation. Electric radiator installation often requires knowledge of load calculations, grounding, and circuit protection. A licensed electrician can troubleshoot issues and guarantee safe operation. You protect your home and your family by choosing a qualified expert for complex or unfamiliar tasks.
注: Never attempt electric radiator installation if you are unsure about electrical safety. Professional help prevents accidents and costly repairs.
Choosing the Right Electric Heating Element
Selecting the right electric heating element for your project requires understanding the different types of electric heating systems and their performance. You will encounter several types of heating elements, each designed for specific applications and environments. Your choice depends on the location, the required temperature, and the compatibility with your electric heating system.
Types of Electric Heating Elements
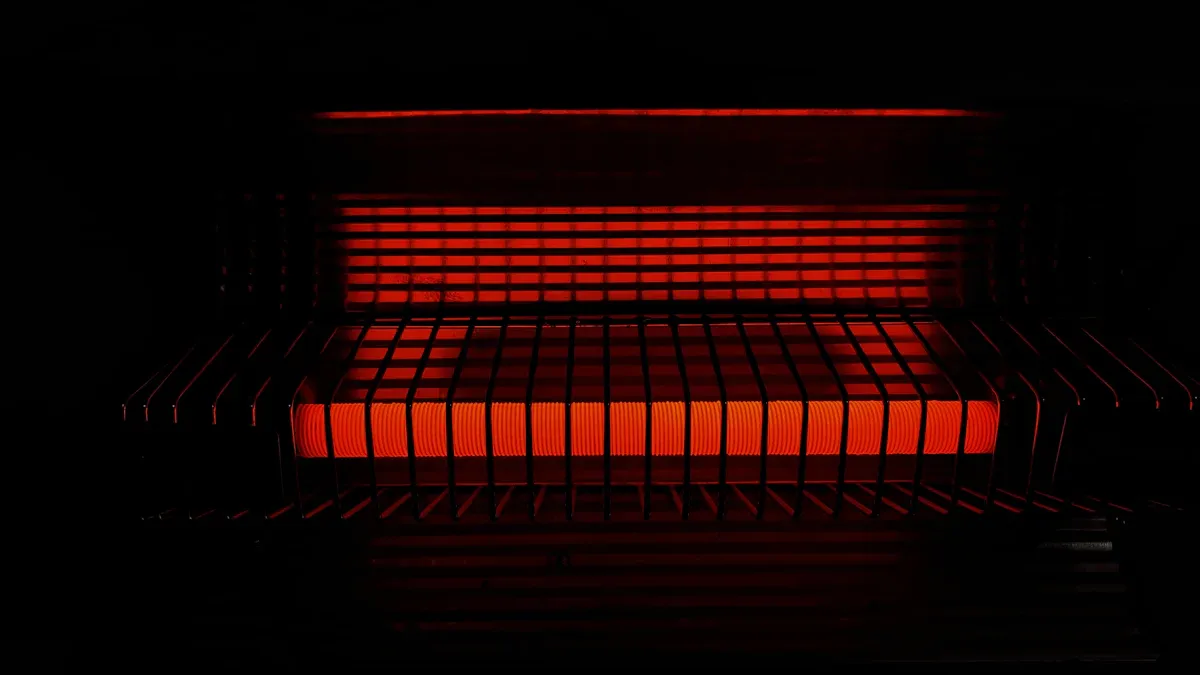
Tubular Electric Heating Elements
You often find tubular heating elements in ovens, water heaters, and industrial equipment. These elements use a metal sheath to protect the internal coil, which provides durability and efficient heat transfer. Tubular elements work well in both air and liquid heating applications. Their versatility makes them a popular choice in many types of electric heating systems.
Cartridge Electric Heating Elements
Cartridge heating elements fit into drilled holes and deliver concentrated heat to a specific location. You use them in molds, dies, and packaging equipment. Their compact design allows for precise temperature control. Cartridge elements are essential in types of electric heating systems that require localized heating.
Immersion Electric Heating Elements
Immersion heating elements heat liquids directly. You see them in water heaters, boilers, and chemical tanks. These elements offer rapid heat transfer and high efficiency. Immersion elements are critical in types of heating elements used for fluid heating.
Radiant Panel and Strip Electric Heating Elements
Radiant panel and strip heating elements provide surface heating. You install them in ceilings, floors, or walls to create comfortable room temperatures. These elements distribute heat evenly across a large area. Radiant panels are common in modern types of electric heating systems for residential and commercial spaces.
Flexible and Band Electric Heating Elements
Flexible and band heating elements wrap around pipes, barrels, or irregular surfaces. You use them for freeze protection, process heating, or maintaining temperature in storage tanks. Their adaptability suits many types of heating elements required in industrial settings.
ヒント Review the performance statistics of each heating element type before making your selection. The table below summarizes key properties:
| 発熱体タイプ | Key Performance Statistics | Typical Operating Temperature (°C) | 耐酸化性 | Mechanical Properties | 代表的な用途 |
|---|---|---|---|---|---|
| Nickel-Chromium (Nichrome) | High resistivity, good oxidation resistance, moderate temperature coefficient of resistance | 1100 – 1200 | Forms protective oxide layer (Cr) | Ductile, good tensile strength | Toasters, hair dryers, kilns, industrial ovens |
| Iron-Chromium-Aluminum (FeCrAl) | Higher operating temperature, excellent oxidation and sulfur resistance | 1300 – 1400 | Protective oxide layer (Al2O3) | High creep resistance, durable | Industrial furnaces, glass kilns, heat treat furnaces |
| Molybdenum Disilicide (MoSi2) | Exceptional oxidation resistance, very high melting point (>2000°C), brittle at room temp | Up to 1900 | Forms protective oxide scale (SiO2) | Brittle at ambient, tough above 1000°C | High-temp furnaces, glass processing, ceramics sintering |
| Silicon Carbide (SiC) | High temperature capability, oxidation resistant ceramics | High (similar to MoSi2) | Naturally forms protective oxide | Ceramic properties, brittle | High-temp industrial heating, vacuum furnaces |
| Graphite, Molybdenum, Tungsten | Ultra-high temperature refractory metals, poor oxidation resistance in air | Very high (used in vacuum) | Not suitable for oxidizing atmospheres | Refractory metals, specialized use | Vacuum furnaces, metallurgy, crystal growth |
Sizing and Compatibility for Electric Heating Element Installation
You must consider sizing metrics and compatibility when installing electric heating elements. The number of conductive coils, resistance, and the physical dimensions of the heating wire all affect performance. For example, a configuration with eight coils and precise coil dimensions ensures effective heating and minimizes electromagnetic interference. Flexible printed circuit technology with polyimide insulation supports safe operation in sensitive locations. You can optimize the design by adjusting coil size and current direction, which reduces magnetic field interference. This approach is especially important in types of electric heating systems used for scientific or medical equipment.
Matching Electric Heating Elements to Your Application
You need to match heating elements to your specific application for optimal performance. Consider the following:
- Adaptive control methods adjust heating based on predicted water usage, improving efficiency in electric heating systems.
- Using MPPT controllers with PV water heaters increases energy generation by up to 35%, which benefits locations with variable sunlight.
- Multi-objective optimization can achieve high self-consumption rates and reduce auxiliary energy needs by nearly half, making your electric heating system more cost-effective.
- Real-time control strategies that forecast PV generation, ambient temperature, and water demand can save up to 18.63% in energy costs.
- Direct coupling of PV panels to heating elements offers a cost-effective solution for certain types of electric heating systems, especially when daily hot water demand and seasonality are considered.
You should always evaluate your location, usage patterns, and the types of heating elements available. Simulation models and experimental validation help you optimize resistance values and maximize efficiency for your electric heating element installation.
Tools and Materials Needed for Electric Heating Element Installation
Before you start any electric heating element installation, you need to gather the right tools and materials. Careful planning ensures you work efficiently and safely. The following guide outlines what you need for a successful project.
Essential Tools for Installation
Screwdrivers and Nut Drivers
You will use screwdrivers and nut drivers to secure terminals, mounting brackets, and covers. Choose insulated handles for extra safety. These tools help you tighten or loosen screws and nuts during installation.
Wire Strippers and Cutters
Wire strippers and cutters allow you to remove insulation from wires and cut them to the correct length. Accurate stripping prevents damage to the conductor, which is critical for safe wiring.
Voltage Tester or Multimeter
A voltage tester or multimeter helps you verify that the circuit is de-energized before you begin. You can also use these tools to check connections and troubleshoot issues after installation.
Drill and Drill Bits
You may need a drill and the correct drill bits to create holes for mounting brackets or running cables. Select bits that match the material you are working with, such as wood, drywall, or masonry.
Level and Measuring Tape
A level and measuring tape help you position the heating element accurately. Proper alignment ensures even heat distribution and a professional finish.
Required Materials and Parts
When selecting materials and parts, you must follow recognized safety standards. For example, UL 2683 defines requirements for heating elements and installation locations. UL 44 and UL 83 specify standards for insulated wires and cables, while UL 94 addresses flammability of plastic parts. These standards guide your choices and support safe, code-compliant installation.
| UL Standard | Focus Area | Role in Installation |
|---|---|---|
| UL 2683 | Heating systems for floor and ceiling | Defines requirements for elements and locations |
| UL 44 | Thermoset-insulated wires and cables | Ensures safe wiring materials |
| UL 94 | Flammability of plastics | Guides selection of safe plastic parts |
Electrical Cable (Rated for 240V or Higher)
You need electrical cable rated for the voltage of your system. Most electric heating elements require cables rated for 240V or higher. Always check the manufacturer’s recommendations.
Cable Clamps and Connectors
Cable clamps and connectors secure cables and prevent strain on connections. They also help maintain a neat and organized installation.
Circuit Breaker (Appropriate Amperage)
Install a circuit breaker with the correct amperage for your heating element. This protects your system from overloads and short circuits.
Wall Anchors or Mounting Brackets
Wall anchors or mounting brackets hold the heating element securely in place. Use anchors suitable for your wall type to ensure stability.
Wire Nuts and Electrical Tape
Wire nuts and electrical tape provide safe, insulated connections. UL 486C and UL 510 set the standards for these components.
Safety Gear Checklist for Electric Heating Element Installation
You must protect yourself during installation. Wear the following safety gear:
Insulated Gloves
Insulated gloves protect your hands from electric shock and sharp edges.
Safety Glasses
Safety glasses shield your eyes from debris and accidental sparks.
Non-conductive Footwear
Non-conductive footwear reduces the risk of electric shock if you step on a live wire.
Personal Protective Equipment (PPE)
PPE includes items like long sleeves and face shields. These protect you from burns and other injuries.
ヒント Careful planning and the right safety gear help you avoid accidents and ensure a smooth installation process.
Safety Precautions for Electric Heating Element Installation
Turning Off Power and Lockout Procedures
You must always turn off the power before starting any electric heating element installation. This step protects you from electrical shock and prevents accidental activation of the equipment. Use the main circuit breaker to disconnect power to the area where you will work. After switching off the breaker, verify that the circuit is de-energized with a voltage tester.
Lockout/tagout (LOTO) procedures add another layer of safety. Place a lock or tag on the breaker to warn others not to restore power while you work. This method is not just best practice—it saves lives and prevents injuries. Consider these important facts:
- Implementing lockout/tagout procedures led to a 75% reduction in injuries related to equipment maintenance at a manufacturing facility.
- OSHA estimates that proper compliance with LOTO standards can prevent over 120 fatalities and more than 50,000 injuries annually.
- Lockout/tagout violations ranked as the fourth most cited OSHA violation in 2019, with 2,975 violations reported.
- In 2019, 147 workplace fatalities resulted from contact with electrical current, machinery, or other equipment—risks that LOTO procedures directly address.
ヒント Always keep the key to your lockout device with you until the job is complete. This simple habit ensures your safety and prevents accidental re-energization.
Checking for Electrical Hazards Before Installation
Before you install an electric heating element, you need to check for electrical hazards in your work area. Careful inspection helps you avoid shocks, fires, and equipment damage. Follow these steps to ensure a safe environment:
- Install electrical equipment according to manufacturer specifications to prevent hazards such as shorts and shocks.
- Use proper insulation materials like glass, rubber, or plastic to protect wiring from contact and short circuits.
- Guard energized components with enclosures or barriers to reduce accidental contact risks.
- Ground and bond electrical systems to safely direct electrical surges to the earth.
- Install ground fault circuit interrupters (GFCIs) to detect current leakage and prevent shocks or fires, especially near water sources.
- Use overcurrent protection devices, such as circuit breakers, to prevent overloads and short circuits.
- Practice safe work habits, including de-energization, lockout/tagout, and use of personal protective equipment.
Regular maintenance and inspection of your tools also play a key role in safety. Trained personnel should lead a comprehensive safety program and follow OSHA standards for safe work practices. Electrical fires caused by malfunctions are the second leading cause of home fires in the US. Following the National Electrical Code (NEC) and scheduling regular inspections help you identify hazards early and comply with local laws.
Using Personal Protective Equipment (PPE) for Safety
You must wear personal protective equipment (PPE) every time you work with electric heating elements. PPE shields you from burns, shocks, and flying debris. Choose insulated gloves to protect your hands from electric current and sharp edges. Safety glasses guard your eyes against sparks and dust. Non-conductive footwear reduces the risk of shock if you step on a live wire.
Long sleeves and face shields offer extra protection, especially in confined spaces or when working with high-voltage systems. Always inspect your PPE before use to ensure it is in good condition. Replace any damaged gear immediately. By using the right PPE, you create a safer work environment and reduce the risk of injury.
Remember, your safety depends on your preparation and attention to detail. Never skip PPE, even for quick tasks.
Understanding and Following Manufacturer Instructions
You should always begin your electric heating element installation by reading the manufacturer’s instructions. These documents provide step-by-step guidance tailored to your specific product. Manufacturers design their instructions to address unique features, wiring requirements, and mounting methods. By following these directions, you avoid common mistakes that can lead to equipment failure or hazardous conditions.
Careful adherence to manufacturer instructions plays a critical role in safety. Industry experts highlight that the safe operation of explosion-proof heating equipment depends on proper installation and ongoing maintenance. When you follow the manufacturer’s guidelines, you significantly reduce installation risks. This approach prevents unsafe conditions and helps you avoid incidents that could threaten your home or workplace.
You should never assume that all electric heating elements install the same way. Each model may have different voltage ratings, connection points, or mounting hardware. The instructions will specify the correct torque for terminals, the type of insulation required, and any special considerations for your environment. If you skip these steps, you increase the risk of malfunction or even fire.
ヒント Keep the instruction manual nearby during installation. Refer to it at each stage to confirm you are meeting all requirements for safety and performance.
Inspecting Electric Heating Elements and Components for Defects
Before you install any electric heating element, you need to inspect it for defects. This step ensures reliability and supports long-term safety. Many manufacturers test their heaters at the factory, but damage can occur during shipping or storage. You should never skip this inspection, even if the product appears new.
Consider these important inspection facts:
- Electric heaters and heat trace products undergo factory testing up to 5000 VDC. A low megohm reading signals a high risk of failure.
- が必要だ。 megohm reading of 20 megohms or higher to safely energize a heater.
- Resistive heaters degrade over time, which causes megohm values to drop and increases the chance of failure.
- Many heat trace products arrive defective before commissioning, so inspection is essential.
- Perform megger testing at several stages: before use (“meg in the box”), after cutting and installation (pre-insulation), after insulation, at commissioning, and annually as part of preventive maintenance.
- Skipping megger testing can result in costly shutdowns and process interruptions due to heater failures.
You should use a megohmmeter to check insulation resistance before connecting the heater to power. If you find any physical damage, corrosion, or low resistance readings, do not proceed with installation. Replace defective components immediately to maintain safety and system reliability.
Regular inspection and testing protect your investment and help you avoid unexpected failures. This habit ensures your electric heating elements deliver consistent performance and support a safe environment.
Step-by-Step Electric Heating Element Installation Guide
Preparing the Work Area for Installation
Clearing Obstructions and Ensuring Accessibility
You start every electric heating element installation by preparing your workspace. Remove any objects or debris that could block your access to the installation area. Make sure you have enough room to move tools and materials safely. Good accessibility helps you avoid mistakes and reduces the risk of accidents. You should check that the floor is dry and free from tripping hazards. If you work in a tight space, use portable lighting to improve visibility. Careful preparation sets the stage for a successful installation and supports safe handling of heating elements.
Planning Cable Routing and Heater Placement
Planning is essential for a safe and efficient installation. Begin by reviewing the manufacturer’s instructions and your building’s layout. Identify the best path for cables, keeping them away from water sources and sharp edges. You should avoid running cables near high-traffic areas to prevent damage. When choosing the right location for your heating elements, consider both safety and performance. Place the heater where it can distribute heat evenly and reach the desired area. Mark the mounting points and cable routes before you start drilling or attaching hardware. Good planning ensures you meet code requirements and achieve proper installation.
Removing the Old Electric Heating Element (If Applicable)
Disconnecting Power and Verifying with a Voltage Tester
Before you remove any heating elements, always disconnect the power at the main breaker. Use a voltage tester to confirm that the circuit is de-energized. Never rely on just flipping a switch. You must check every wire you plan to touch. This step protects you from electric shock and ensures a safe work environment. If you find any signs of damage or exposed wiring, stop and address these issues before proceeding.
Detaching Wiring and Mounting Hardware
Once you confirm the power is off, begin detaching the wiring from the old heating element. Take note of the wire connections or take a photo for reference. Loosen the terminal screws or remove wire nuts as needed. Carefully disconnect each wire and set them aside. Next, remove any mounting hardware, such as brackets or screws, that hold the heating element in place. Keep all hardware organized in a small container to avoid losing parts. Remove the old element and inspect the area for corrosion or debris. Clean the mounting surface to prepare for the new installation.
Installing the New Electric Heating Element
Positioning and Securing the Electric Heating Element
Proper positioning of heating elements is critical for both safety and efficiency. When you install heating elements, always follow the manufacturer’s recommendations for orientation and placement. For immersion tank heaters, horizontal mounting near the tank bottom improves convective circulation. This method enhances heat transfer and extends the life of the heater. Vertical mounting can lead to incomplete immersion and sludge buildup, which reduces performance and may cause early failure. Avoid placing heating elements where debris can collect, as this can cause overheating and damage.
- Horizontal mounting near the tank bottom increases efficiency and heater lifespan.
- Vertical mounting risks incomplete immersion and sludge accumulation.
- Keeping elements free from sludge and debris prevents overheating and premature failure.
- Using PID controllers and safety limit protection reduces temperature cycling and thermal stress.
- Voltage regulation prevents wattage fluctuations and rapid heater failure.
When choosing the right location, make sure the heating element is accessible for future maintenance. Secure the element using the correct brackets or anchors. Tighten all fasteners to the manufacturer’s specified torque. Double-check alignment with a level to ensure even heat distribution.
Making Electrical Connections Safely
You must connect the wiring according to the installation guide and the manufacturer’s instructions. Strip the wire ends to the correct length and attach them to the terminals or connectors. Use wire nuts or terminal blocks rated for the voltage and current of your electric heating system. Tighten all connections securely to prevent arcing or loose wires. If your installation requires grounding, attach the ground wire to the designated terminal. Check that all connections are tight and free from exposed copper. Good wiring practices support safe operation and reliable performance.
Sealing, Insulation, and GFCI Protection
After you complete the electrical connections, focus on sealing and insulation. Apply proper insulation to all exposed wires and terminals. Use electrical tape or heat-shrink tubing to cover connections and prevent accidental contact. For installations in damp or wet locations, use weatherproof enclosures and gaskets to keep moisture out. Install a ground fault circuit interrupter (GFCI) if required by code or if the heating element is near water. GFCI protection detects current leakage and shuts off power to prevent shocks. Double-check all seals and insulation before restoring power. Proper insulation and GFCI protection are essential for a safe and code-compliant installation.
Tip: Always review your installation guide before restoring power. A final inspection helps you catch any missed steps and ensures a safe, successful installation.
Testing the Electric Heating Element Installation
After you complete the wiring and secure the heating element, you need to test your work. Careful testing ensures your electric heating element operates safely and efficiently. This step confirms that you followed the installation guide correctly and helps you catch any issues before regular use.
Restoring Power Safely
You must restore power with caution. First, double-check all connections and confirm that no tools or debris remain in the work area. Stand clear of the heating element and switch the circuit breaker on. Use a voltage tester or multimeter to verify that the system receives power. If you installed a ground fault circuit interrupter (GFCI), press the test button to make sure it trips and resets properly. This step protects you from electrical hazards and confirms that your safety devices work as intended.
⚡ ヒント Always keep your hands dry and wear insulated gloves when restoring power. Never touch exposed wires or terminals.
Checking for Proper Operation and Heating
Once you restore power, observe the heating element as it begins to operate. You should feel the unit warming up within a few minutes, depending on the type and application. Use a thermometer or an infrared temperature gun to measure the surface temperature. Compare your readings to the manufacturer’s specifications.
To verify proper operation, you can perform several industry-standard tests. The table below summarizes the most important checks:
| Test Type | Purpose / Description | Key Parameters / Criteria |
|---|---|---|
| Power Test | Verify power output deviation is within industry standard limits | Power deviation within +5% to -10% of rated power |
| 漏れ電流テスト | Check insulation integrity and detect impurities or cracks in oxidized magnesia insulation | Leakage current limit ≤ 0.5 mA; stable digital reading |
| 電気強度試験 | Confirm insulation withstand voltage without breakdown | 1000 V for 60 min (industry standard); up to 2000-2500 V for enterprise acceptance |
| Heating Wire Uniformity | Assess evenness of heating wire by observing color uniformity and temperature distribution | Uniform red color when heated; minimal temperature difference across surface |
| Hydrostatic Test | Detect physical damage or leaks after production processes | Passes safety performance standards |
You should also perform a megohm test to measure insulation resistance. This test uses a megohm tester at 500 VDC. Acceptable readings are above 500 megohms. Lower values may indicate moisture inside the heater, which can cause short circuits or failure. If you see low readings, you need to dry out the heater before using it.
A successful installation will show stable power output, low leakage current, and uniform heating. If your results match these criteria, your system is ready for use.
Monitoring for Issues and Unusual Noises
After you confirm proper operation, continue to monitor the heating element during its first full cycle. Listen for any unusual noises, such as buzzing, popping, or crackling. These sounds may signal loose connections, debris, or internal faults. Watch for signs of overheating, such as discoloration or a burning smell. Check the area around the heating element for leaks, especially if you installed an immersion heater.
You should also look for uneven heating or cold spots on the element’s surface. Use your thermometer to check for temperature differences. If you notice any problems, turn off the power immediately and inspect your work. Address any issues before returning the system to service.
🔍 注: Careful monitoring during the first use helps you prevent damage and ensures long-term reliability. Early detection of problems supports safe operation and protects your investment.
Common Mistakes and Troubleshooting in Electric Heating Element Installation
Frequent Installation Errors to Avoid
You can prevent many issues with electric heating elements by understanding the most common installation mistakes. These errors often lead to system failures, safety hazards, or voided warranties. Review the following list to avoid costly setbacks:
- Buying from unauthorized sellers often voids warranties and complicates returns. Always purchase from authorized distributors.
- Ordering the wrong amount of heating product results in improper installation and uneven heating. Plan carefully and consult with experts if needed.
- Inconsistent wire spacing causes uneven heating. Maintain uniform spacing or use pre-spaced mats for best results.
- Skipping a thermostat with GFCI protection creates a safety hazard and violates electrical codes. Light switches do not provide the necessary protection.
- Failing to test the resistance of heating elements before and after installation increases the risk of malfunction and voids warranties. Use resistance meters and fault alarms to verify system integrity.
Tip: Careful planning and adherence to manufacturer guidelines help you avoid these frequent errors and ensure your electric radiator operates safely and efficiently.
How to Identify and Fix Problems with Electric Heating Elements
When your electric heating element fails to perform, you need a systematic approach to troubleshooting. Start by checking the thermostat settings. If the thermostat is set correctly but the heater remains cold, the heating element may require replacement. Many baseboard heaters include safety features such as high-temperature shutoff sensors. If the unit overheats, these sensors will cut power, so check them during your inspection.
Follow these steps to resolve common issues:
- Ensure the unit is turned on. If it was switched off manually or after a power outage, press the reset button if available.
- Check circuit breakers. Reset any tripped breakers. If they trip again, consult a professional.
- Inspect fuses and replace any that are blown.
- Adjust the thermostat by raising the temperature 3–5°F and observe if heat output improves.
- Clean or replace filters, as clogged filters reduce heat production.
- Examine the fan and blower for poor airflow, unusual noises, or smells. These problems may require professional repair.
- Verify blower operation. If it runs continuously, check that the thermostat is set to AUTO. A faulty relay may need technician attention.
- Address noisy operation by tightening loose panels or adjusting belts.
Note: Consistent troubleshooting and maintenance extend the life of your electric radiator and improve overall performance.
When to Stop and Call a Professional for Electric Radiator Installation
You should recognize when a problem exceeds your skill level. If you encounter persistent electrical issues, repeated breaker trips, or signs of overheating, stop and contact a licensed electrician. Complex wiring, unfamiliar noises, or malfunctioning safety features also signal the need for professional help. Attempting repairs without proper expertise can create safety hazards and may void your warranty. Trust a qualified technician to handle advanced diagnostics and repairs, especially for electric radiator systems.
Maintenance and Care Tips for Electric Heating Elements
Regular Cleaning Procedures for Electric Heating Elements
You ensure the reliability of electric heating by following a regular cleaning schedule. Sediment and dust accumulate on heating elements over time. This buildup insulates the surface, forcing the element to work harder and reducing heat transfer efficiency. You notice slower heating, inconsistent temperatures, and even strange noises when sediment remains unchecked. Cleaning not only prevents these issues but also extends the lifespan of your electric heating system.
専門家の推奨 flushing water heaters at least once a year, especially in areas with hard water. You should also inspect heating elements for visible damage or deterioration during de-energized maintenance. Clean enclosures, vents, and fan grills to prevent dust-related failures. Keep electrical equipment rooms free of dirt and moisture. Address any water seepage around enclosures immediately to avoid damage.
ヒント Maintain a detailed record of all cleaning and inspections. Regular maintenance of electric heating systems reduces the risk of electrical shock and supports long-term safety.
- Regular flushing removes sediment buildup, improving heating speed and energy efficiency.
- Cleaning prevents noise, inefficiency, and premature wear.
- Annual inspections help you identify wear or damage early.
- Timely replacement of components reduces electrical hazards.
Preventing Limescale and Corrosion in Electric Heating Elements
Limescale and corrosion present major challenges for electric heating elements, especially in hard water regions. Limescale acts as an insulating barrier, reducing heat transfer and increasing energy consumption. You may experience up to a 48% decrease in efficiency if limescale accumulates. Tankless water heaters can fail in as little as 1.6 years under hard water conditions. Excessive buildup also exposes metal surfaces, accelerating corrosion and equipment degradation.
You can prevent these problems by adopting several strategies:
- Use water softeners or chemical dosing (such as polyphosphates) to inhibit mineral precipitation.
- Schedule regular flushing and cleaning to remove deposits before they become problematic.
- Consider advanced technologies like template-assisted crystallization or integrated systems that minimize limescale formation.
- Monitor and reapply chemical treatments as needed for continued protection.
| Problem | インパクト | 解決 |
|---|---|---|
| Limescale buildup | Up to 48% efficiency loss, early failure | Water softening, regular flushing |
| 腐食 | Accelerated equipment degradation | Polyphosphate dosing, advanced controls |
| Hard water effects | 75% showerhead capacity loss in 18 months | System design improvements, maintenance |
By taking these steps, you protect your electric heating elements and maintain an energy efficient heating system.
Ensuring Long-Term Efficiency and Performance
You maximize the performance of electric heating by combining regular maintenance with smart system management. Schedule inspections and cleaning as part of your routine. Replace worn or damaged heating elements promptly to avoid unexpected failures. Keep detailed records of all maintenance activities. This practice supports reliability and helps you track the effectiveness of your energy efficiency measures.
Implementing a maintenance schedule for electric heating systems reduces the risk of electrical hazards. Clean equipment operates more efficiently, saving you money on energy bills. You also extend the lifespan of your electric heating investment. By following these best practices, you ensure your installation and maintenance efforts deliver consistent comfort and safety.
Consistent care and proactive maintenance of electric heating systems keep your home comfortable and your equipment running at peak efficiency.
Signs Your Electric Heating Element Needs Replacement
You rely on electric heating for comfort and efficiency, but even the best systems wear out over time. Recognizing when to replace heating elements helps you avoid unexpected breakdowns and maintain safe operation. You should watch for several clear warning signs that indicate your electric heating system needs attention.
1. Inconsistent or Insufficient Heat Output
If you notice that your electric heating system no longer warms your space evenly, or if it takes much longer to reach the desired temperature, you may have a failing heating element. You might also find cold spots in areas that previously heated well. This symptom often signals that the heating elements have degraded or developed internal faults.
2. Unusual Noises During Operation
Electric heating systems should operate quietly. If you hear buzzing, popping, or crackling sounds, you need to investigate. These noises can result from damaged heating elements or loose electrical connections. Ignoring these sounds can lead to further damage or even safety hazards.
3. Visible Damage or Corrosion
You should inspect your electric heating components regularly. Look for signs of corrosion, discoloration, or physical damage on the heating elements. Rust or mineral buildup can reduce efficiency and cause premature failure. If you see any of these issues, replacement is often the safest option.
4. Frequent Tripping of Circuit Breakers
A healthy electric heating system should not overload your electrical circuits. If your breaker trips repeatedly when you use your electric heating, you may have a short circuit or a failing heating element. This problem requires immediate attention to prevent electrical fires.
5. Increased Energy Consumption
If your energy bills rise without a clear reason, your electric heating system may be working harder to compensate for failing heating elements. Inefficient elements draw more power and deliver less heat, which increases your costs.
6. Failure to Respond to Thermostat Adjustments
When you adjust your thermostat and see no change in temperature, your electric heating system may have a faulty heating element. This issue can also point to wiring problems, but heating elements are often the root cause.
ヒント Schedule regular inspections for your electric heating system. Early detection of these signs helps you avoid costly repairs and ensures reliable performance.
| 症状 | 考えられる原因 | 推奨される措置 |
|---|---|---|
| 不均一な加熱 | Degraded heating elements | Replace elements |
| Strange noises | Damaged components | Inspect and replace |
| Corrosion or discoloration | Moisture or mineral buildup | 清掃または交換 |
| Breaker trips | Electrical fault | 専門家に電話する |
| 高いエネルギー料金 | Inefficient electric heating | Inspect and upgrade |
| No response to thermostat | Failed heating elements | Test and replace |
You should never ignore these warning signs. Prompt replacement of faulty heating elements keeps your electric heating system safe and efficient. If you feel unsure about diagnosing or replacing components, always consult a licensed electrician.
You achieve safe and effective electric heating element installation by planning carefully and following best practices. Always respect safety guidelines and local codes. These rules exist to prevent accidents and protect your home.
- Legislation and industry standards, such as ISO 45001, set clear frameworks for safety and environmental protection.
- Local building codes ensure your installation meets health, fire safety, and structural requirements.
- Trained inspectors and third-party reviews help maintain high standards.
If you feel uncertain at any stage, contact a licensed professional. Your safety and comfort depend on expert installation.
よくあるご質問
What is the typical lifespan of an electric heating element?
You can expect most electric heating elements to last between 5 and 10 years. Lifespan depends on usage, water quality, and maintenance. Regular cleaning and inspection help extend service life.
Can you install an electric heating element without a permit?
You may replace an existing element without a permit in some areas. For new installations or added circuits, you usually need a permit. Always check your local building codes before starting any work.
How do you know if your electric heating element is faulty?
You notice symptoms like uneven heating, tripped breakers, or strange noises. Use a multimeter to test for continuity. If you see visible damage or get no reading, you should replace the element.
Is it safe to use an electric heating element in wet areas?
You must use GFCI protection and weatherproof enclosures in wet locations. Always follow manufacturer instructions and local codes. These steps help prevent electrical shock and equipment failure.
What maintenance does an electric heating element require?
You should clean heating elements regularly to remove dust or limescale. Inspect for corrosion or damage during each cleaning. Schedule annual checks to ensure safe and efficient operation.
Can you use any wire type for electric heating element installation?
You must use wire rated for the voltage and amperage of your system. Look for UL-listed, heat-resistant cables. Using the wrong wire type increases fire risk and may violate code requirements.

