
You can repair or replace your jacuzzi heater element when you follow proper safety steps. Always shut off power and drain the water before you work on any heater. Many 家電製品の加熱素子, including those from 金中電熱 その他 発熱体メーカー, share similar repair principles. The heater plays a vital role in spa comfort, so careful handling of the 加熱エレメント ensures safe operation and extends the life of your equipment.
⚠️ Safety Tip: Use insulated tools and wear protective gear every time you work on your heater.
Can You Repair or Replace a Jacuzzi Heater Element Yourself?
DIY Feasibility
You can repair or replace a Jacuzzi heater element yourself if you have basic mechanical skills and follow clear instructions. Many homeowners find this task manageable with the right preparation and attention to detail. You need to understand how your spa heater works and feel comfortable handling electrical connections.
To complete this project, you should gather a few essential tools and supplies:
- 電気テスト用のマルチメーター
- Spanner or wrench
- Screwdrivers
- Replacement parts such as O-rings or gaskets
You must also know how to safely disconnect and reconnect wires. Always match the replacement heater element’s voltage and wattage to the original. Testing the Ground Fault Circuit Interrupter (GFCI) before you begin ensures your hot tub has proper protection. If you notice complex wiring or feel unsure about any step, you should consult a licensed professional.
⚠️ 注:
Call a professional… water + electricity + amateur electrician = trouble.
安全に関する重要な注意事項
Working on a Jacuzzi heater involves both water and electricity, so safety must come first. You should always disconnect all electrical power before you inspect or repair the heater. Use a multimeter to confirm that no voltage remains. Isolate the heater element by disconnecting the heater leads before testing.
Follow these industry-standard safety steps:
- Shut off power at the breaker and verify with a multimeter.
- Test the GFCI to ensure it trips properly.
- Drain water below the heater level or close valves to keep electrical parts dry.
- Inspect wiring and connectors for corrosion or damage.
- Use an ohm meter to check heater resistance and look for shorts to ground.
- Avoid bending or twisting electrical terminals, which can cause water ingress and damage.
- Purge air from plumbing to prevent airlocks that may cause overheating or dry firing.
- Maintain balanced spa water chemistry to prevent corrosion and extend heater life.
- Monitor the first heat cycle after repair for leaks or error codes.
- Bending or twisting electrical terminals can cause water ingress and damage.
- Improper chemical balance in the spa water can lead to corrosion of metal heater elements.
- Airlocks in the plumbing may cause overheating or dry firing of the heater element.
- Proper handling and testing of the heater element is critical to avoid damage.
- Maintaining balanced spa chemistry is essential to prevent metal-dissolving bacteria that corrode elements.
You should never rush through these steps. Careful handling and thorough testing of the heater element protect both you and your spa. If you ever feel uncertain, hiring a professional ensures your safety and the proper function of your heater.
Safety Steps for Working on a Spa Heater

Shutting Off Power and Verifying It’s Off
How to Turn Off the Breaker
Before you begin any work on your heater, you must disconnect all electrical power to the spa. Locate your main service panel and shut off the breaker that supplies power to the spa heater. This step is essential for your safety. As an added precaution, disconnect power directly at the spa if possible. You should never attempt electrical repairs unless you have the proper qualifications. Power must remain disconnected before you remove or test the heater.
⚡ ヒント Always label the breaker for your spa heater. This helps you and others identify it quickly in the future.
Double-Checking with a Voltage Tester
After you turn off the breaker, you need to confirm that no electricity remains. Use a voltage tester or multimeter to check the terminals and wires connected to the heater. Place the probes on the terminals and verify that the reading shows zero voltage. This step ensures you avoid accidental electrical shock. Never skip this verification, even if you feel confident that the power is off.
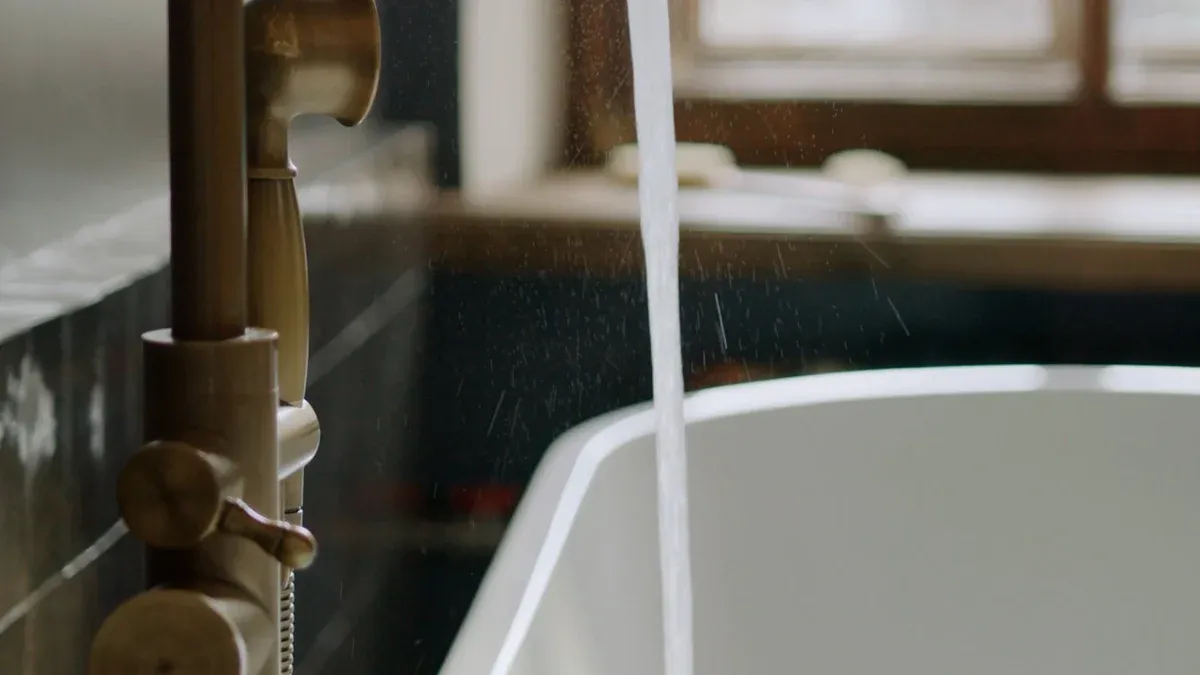
Draining the Jacuzzi Properly
Steps to Drain Water Safely
You must drain the water from your Jacuzzi before you access the heater. Start by サーキットブレーカーで電源を切る. Remove the filters to prevent damage and allow for thorough cleaning. Attach a garden hose to the drain valve and open it to let water flow out slowly. If you want to speed up the process, use a submersible pump placed in the deepest part of the tub. This method can drain the water in 15 to 30 minutes. Use a wet/dry vacuum to remove any remaining water from jets and the footwell. Always direct the drainage hose into a sanitary sewer drain to avoid contaminating soil or storm drains.
Preventing Water Mess and Damage
Monitor the draining process closely to prevent overflow or accidental spills. Ensure the drainage hose remains leak-free and properly positioned. After draining, clean the tub interior with a gentle, non-abrasive cleaner. Rinse thoroughly and dry the tub and cover to prevent mold and mildew. Keep the area around the hot tub clear and safe during draining. Only refill the Jacuzzi after you close all valves and balance the water chemistry.
💧 注: Follow local regulations for disposing of chemically treated water to protect the environment.
Personal Protective Equipment and Tools
Gloves, Eye Protection, and Insulated Tools
You should always wear the right protective gear when working on your heater. Use insulated gloves to protect your hands from electrical hazards. Wear safety glasses to shield your eyes from splashes or debris. Choose insulated tools designed for electrical work. These precautions reduce your risk of injury and help you handle the heater safely. Keep your workspace organized and dry to further minimize hazards.
| 保護具 | 目的 |
|---|---|
| Insulated Gloves | Prevent electrical shock |
| Safety Glasses | Protect eyes from debris and splashes |
| 絶縁工具 | Reduce risk of electrical accidents |
🛠️ プロのアドバイス Always inspect your tools and gear before use. Damaged equipment can compromise your safety.
Understanding the Jacuzzi Heater Element
What Is a Jacuzzi Heater Element?
Role in Heating Water
You rely on the jacuzzi heater element as the core component that warms your spa water. This electrical resistance part sits inside a stainless steel housing. As water flows through, the heater element converts electrical energy into heat, raising the water temperature to your desired level. The heater element works in tandem with thermostats and high-limit switches, which regulate temperature and protect against overheating. Sensors, such as pressure switches, ensure the heater only activates when water flow is sufficient, preventing damage from dry firing.
- The jacuzzi heater element is central to the spa heating system.
- Water must flow properly to avoid overheating or element failure.
- Control systems and sensors work together to keep your spa safe.
Note: Even if your heater element functions, a faulty sensor can prevent heating. Always check the entire system during troubleshooting.
How the Heater Element Works
When you turn on your spa, electrical current passes through the heating element. The resistance inside the element generates heat, which transfers directly to the water. The heater operates only when safety sensors confirm proper conditions. This integration ensures efficient and safe operation every time you use your spa.
Types and Materials of Heater Elements
Incoloy vs. Titanium Elements
Choosing the right material for your heater element impacts durability and performance. Incoloy and titanium are the most common options. Review the table below to compare their properties:
| 素材 | Key Advantages | Key Disadvantages |
|---|---|---|
| チタン | Exceptional corrosion resistance, lightweight, robust, resists scale buildup | Higher cost, needs careful installation and maintenance |
| インコロイ | Excellent resistance to oxidation, good for acidic/alkaline water, cost-effective | Less resistant to saltwater, potential for scale buildup |
Incoloy heater elements perform well in spas with balanced water chemistry and offer cost efficiency. Titanium elements excel in harsh or saltwater environments, providing superior corrosion resistance and longevity.
Flo-Thru and Bolt-On Designs
You will find two main designs for spa heater elements: flo-thru and bolt-on. Flo-thru elements allow water to pass directly over the heating element, ensuring rapid and even heating. Bolt-on elements attach to the heater housing and may suit older or specific spa models. Always match the design to your spa’s requirements for optimal performance.
Compatibility and Sizing for Spa Heaters
Matching Power Ratings and Dimensions
Selecting the correct heater element requires attention to compatibility and sizing. You must match the power rating (measured in kilowatts) and voltage to your spa’s specifications. For example, a 5.5kW element heats water faster than a 4.0kW element but uses more energy. Some elements share physical dimensions despite different power ratings, so always check your spa’s make and model.
- Ensure the heater element fits your Jacuzzi system’s electrical and plumbing connections.
- Review wattage, voltage, and dimensions before purchasing.
- Proper maintenance prevents issues like rust, mineral buildup, or faulty connections.
ヒント Jacuzzi heater elements are designed for specific systems, but many spa heater elements offer universal compatibility. Always verify specifications for a perfect fit.
Common Symptoms and Causes of Heater Element Failure
Signs Your Jacuzzi Heater Element Is Faulty
Water Not Heating Up
You may notice your spa water stays cold or only warms up slightly. This symptom often points to a broken or burned-out heater element. When the heating coil fails, your Jacuzzi heater element cannot transfer enough heat to the water. Reduced heat output can also result from scale buildup or poor water flow. If you operate the heater without enough water, you risk burning out the element, which leads to visible damage and a complete loss of heating.
Tripped Breakers or GFCI
A faulty heater element can cause your spa’s breaker or GFCI to trip repeatedly. Electrical shorts inside the heater often result from water intrusion or corrosion in the element’s sheath. When this happens, the safety system cuts power to prevent hazards. You should always investigate frequent breaker trips, as they indicate a deeper electrical issue within the heater.
⚡ 安全に関する注意喚起 If your GFCI trips every time you turn on the heater, disconnect power and inspect the element for damage or corrosion.
Error Codes on Spa Control Panel
Modern Jacuzzi systems display error codes when they detect heater problems. You might see codes related to overheating, low water flow, or electrical faults. These alerts help you pinpoint the issue quickly. Always consult your spa’s manual to interpret error codes and guide your troubleshooting process.
| 症状 | 考えられる原因 |
|---|---|
| No heat | Burned-out coil, dry firing |
| Reduced heat | Scale buildup, poor water flow |
| GFCI tripping | Electrical short, water intrusion |
| エラーコード | Overheating, flow issues, shorts |
Typical Causes of Heater Element Problems
Scale and Calcium Buildup
Mineral deposits, especially calcium, can accumulate on the heater element over time. Hard water or improper water chemistry accelerates this process. Scale acts as an insulator, reducing heat transfer and forcing the heater to work harder. You may notice reduced heating efficiency or uneven water temperatures. Regular cleaning and water balancing help prevent scale buildup and extend the life of your heater.
Corrosion and Wear
Corrosion attacks the metal sheath of the heater element, often due to unbalanced water chemistry or the presence of metal-dissolving bacteria. Over time, corrosion creates pinholes or cracks, allowing water to reach electrical components. This process weakens the heater and increases the risk of electrical shorts. You should inspect the heater regularly for signs of rust or pitting.
Electrical Shorts and Overheating
Electrical shorts occur when water contacts the internal wiring of the heater element. Cracks from mineral buildup or age allow this intrusion. Dry firing, which happens when you run the heater with little or no water, can melt the coil or sheath and lead to shorts. Improper installation, such as twisting terminals, may fracture seals and let water in. Overheating also damages the heater, causing it to fail prematurely. Routine maintenance, including balancing water chemistry and checking sanitizer levels, helps prevent these issues.
🛠️ ヒント Schedule regular inspections and maintenance to catch early signs of heater element problems before they lead to costly repairs.
Diagnosing a Faulty Spa Heater Element
Visual Inspection of the Heater Element
Checking for Burnout, Corrosion, or Damage
You should always begin your diagnosis with a thorough visual inspection. Start by ensuring all power to the spa heater is disconnected. Remove the access panel and locate the heater element. Look for any obvious signs of burnout, such as blackened or melted spots on the element. Corrosion often appears as white, green, or rust-colored deposits on the metal sheath. Cracks, pitting, or bulges also indicate damage. If you see water stains or mineral buildup, this suggests leaks or scale accumulation. Any of these issues can compromise the performance of your heater element and may require replacement.
🔍 ヒント Use a flashlight to inspect hard-to-see areas around the heater element. Even small cracks or corrosion can lead to failure.
Testing the Heater Element with a Multimeter
マルチメーターの設定
After your visual inspection, you need to test the heater element electrically. First, confirm that all electrical power to the spa is off. Disconnect both power leads from the heater terminals. Set your multimeter to the lowest resistance (ohms) setting. This prepares the device to measure the resistance across the heater element accurately.
Measuring Resistance (Ohms)
Place one probe of the multimeter on each terminal of the heater element. A properly functioning heater element typically shows a resistance reading between 9 and 12 ohms for most 4.0 to 5.5 kW models. Some elements may read up to 14 ohms, but values outside this range signal trouble. If your multimeter displays a very low reading (close to zero), the element has a short circuit. An infinite or very high reading means the element is open or has lost conductivity.
| Resistance Reading | Condition of Heater Element |
|---|---|
| 9–12 ohms | Normal, functioning element |
| 0オーム | Short circuit, replace element |
| Infinite/High | Open circuit, replace element |
⚠️ 警告だ: Always disconnect the heater element from the circuit before testing. This ensures you get an accurate reading and avoid false results from other components.
検査結果の解釈
You must interpret your test results carefully. A reading within the normal range (9–12 ohms) indicates the heater element is likely in good condition. Zero or infinite resistance means the element is faulty and needs replacement. If you measure normal resistance but the spa still does not heat, check the high limit switch and thermostat. Test the high limit switch for continuity between its terminals. If you find no continuity, press the reset button and retest. For the thermostat, turn the dial fully clockwise and check for continuity. Continuity here means the thermostat works. No continuity when fully counter-clockwise is normal, as this opens the circuit.
- Normal resistance: Heater element is good.
- Zero or infinite resistance: Replace the heater element.
- Normal resistance but no heat: Test high limit switch and thermostat.
Checking for Shorts to Ground
To ensure the heater element is not shorted to ground, set your multimeter to the highest resistance range. Place one probe on a heater terminal and the other on the metal sheath of the element. An infinite reading means there is no short to ground, which is what you want. Any measurable resistance here indicates a short, and you must replace the heater element immediately. Shorts to ground can trip breakers and pose safety hazards.
🛡️ 注: Shorts to ground often result from corrosion or cracks in the heater element sheath. Regular inspection helps prevent unexpected failures.
Removing and Replacing the Jacuzzi Heater Element
Preparing for Removal
Gathering Tools and Supplies
You need to gather all necessary tools and supplies before you begin. This preparation helps you work efficiently and safely. Collect the following items:
- 電気テスト用のマルチメーター
- Insulated screwdrivers and wrenches (1/4 inch and 3/8 inch sizes recommended)
- Replacement heater element with new O-rings or gaskets
- Labels or masking tape for marking wires
- Safety gloves and eye protection
- Towels or a wet/dry vacuum for water cleanup
🧰 ヒント Organize your tools within easy reach to avoid unnecessary movement during the process.
Ensuring a Safe Work Area
You must create a safe environment before you start. Follow these safety preparations:
- Disconnect all electrical power to the hot tub at both the service panel and spa disconnect.
- Drain the water below the heater element level, following the manufacturer’s instructions.
- Remove access panels to reach the heater assembly.
- Wear rubber-soled shoes and remove any jewelry to reduce the risk of electrical shock.
- Never work on electrical components near water unless you have fully disconnected the power.
⚠️ 安全に関するお知らせ: Only perform electrical repairs if you have proper training. If you feel unsure, contact a professional.
Disconnecting and Removing the Old Heater Element
Labeling and Disconnecting Wires
You should label each wire before disconnecting it from the heater element. Use masking tape or pre-printed labels to mark wire colors and terminal positions. This step ensures you reconnect everything correctly later. Carefully disconnect the electrical wires using insulated tools. Avoid bending or twisting the heater element terminals, as this can cause damage or water ingress.
Unscrewing or Unbolting the Element
Once you have disconnected the wires, remove the mounting hardware that secures the heater element. Use two wrenches when loosening terminal nuts to prevent the terminals from turning. Unscrew or unbolt the element gently, taking care not to damage surrounding parts. If your heater has a temperature sensor attached, use a wrench to loosen and remove it from its housing.
🛠️ 注: Gently extract the heater element from its housing. Do not force it, as this can damage the assembly.
Handling Seals and Gaskets
Inspect all seals and gaskets as you remove the old heater element. Look for signs of wear, cracks, or leaks. Replace any damaged O-rings or gaskets with new ones. When tightening unions in the heater plumbing, hand-tighten only to avoid cracking plastic parts. If you notice leaks at unions, replace the union gaskets or O-rings. For best results, lubricate O-rings and valve surfaces with a suitable lubricant to maintain sealing integrity.
💡 ヒント Apply a thin layer of silicone sealant to both sides of new gaskets before installation for a better seal.
Installing the New Heater Element
Selecting the Correct Replacement Part
Choose a replacement heater element that matches your spa’s specifications. Check the voltage, wattage, and physical dimensions to ensure compatibility. The correct part will fit your system and provide reliable performance.
新しい要素の配置と固定
Prepare the new heater element by installing new O-rings and gaskets. Insert the element carefully into the housing, making sure it sits in the correct position. Avoid over-tightening the mounting hardware, as this can damage threads, O-rings, or seals. Hand-tighten unions and fittings to prevent cracking plastic parts.
After installation, inspect the area for any signs of moisture or leaks. If you see any, address them before proceeding.
Reconnecting Electrical Wires
Reconnect the electrical wires to the new heater element, matching each wire to its original terminal based on your labels. Double-check that all connections are tight and secure. Do not bend or twist the terminals, as this can lead to water ingress and electrical hazards. Use a multimeter to test resistance and verify proper voltage at the heater terminals before restoring power.
🔌 Checklist:
- Confirm the spa water is drained and power is absolutely off.
- Mark or label wires before disconnecting.
- Reconnect wires exactly as they were originally connected.
- Secure the control system cover after reconnection.
- Test the heater element with a multimeter before powering up.
After you finish, restore power and monitor the heater’s operation. Purge air from the plumbing system to prevent dry firing. Watch for leaks and confirm the jacuzzi heater element heats the water properly.
Testing the Spa Heater After Installation
Restoring Power and Refilling Water
You have installed the new heater element. Now, you must restore power and refill your Jacuzzi to begin the testing process. Start by closing all drain valves and ensuring every union and gasket is secure. Use a garden hose to refill the spa. Fill the tub until the water level reaches the recommended mark, usually above the highest jet. Monitor the water level as you fill to prevent overflow.
Before you restore power, double-check that the spa is completely dry around all electrical components. Inspect the heater compartment for any signs of moisture. Confirm that all wires are connected correctly and that the control panel cover is in place.
When you are ready, follow these steps to safely restore power and test the heater element:
- Turn off all power to the spa at the breaker and spa pack.
- Detach the wires or copper tabs from the heater element terminals.
- Set your Ohm meter to its lowest resistance setting.
- Place the meter leads on each terminal of the heater element.
- A resistance reading between 10 and 14 Ohms means the heater element is functioning properly.
- If the reading is zero or shows “Open,” the heater element is defective and needs replacement.
⚡ 安全のヒント: Always confirm that power is completely off before testing. This step protects you from electrical hazards.
After you verify the heater element’s resistance, reconnect the wires to the terminals. Restore power at the breaker. Activate the spa’s control panel and set the desired temperature. Allow the system to run for several minutes. Listen for the sound of water circulating and heating.
Checking for Leaks and Proper Operation
You must check for leaks and confirm proper operation before you use your Jacuzzi. Inspect the heater assembly and surrounding plumbing for any signs of water seepage. Focus on unions, gaskets, and O-rings. Use a flashlight to examine hard-to-see areas. If you notice any drips or moisture, turn off the power and address the issue immediately.
Monitor the spa as it heats. Watch the control panel for error codes or warning lights. Feel the water near the heater outlet to confirm that it warms up gradually. Check the temperature rise over 15 to 30 minutes. If the water does not heat or the breaker trips, recheck your wiring and test the heater element again.
Use this checklist to ensure proper operation:
- Water level is correct and above jets.
- No leaks at unions, gaskets, or heater housing.
- Heater element shows correct resistance.
- Control panel displays normal operation.
- Water temperature rises steadily.
| Inspection Point | 何を探すべきか | Action if Issue Found |
|---|---|---|
| Heater Assembly | Drips, moisture, corrosion | Tighten fittings, replace seals |
| Control Panel | Error codes, warning lights | Consult manual, retest element |
| Water Temperature | Gradual increase | Recheck wiring, retest heater |
🛠️ プロのアドバイス Always monitor the first heating cycle after installation. Early detection of leaks or electrical issues prevents costly damage.
You have now completed the essential steps to test your Jacuzzi heater after installing a new element. Careful attention during this phase ensures safe operation and extends the life of your spa heater.
Preventative Maintenance for Your Jacuzzi Heater Element
Regular Cleaning and Scale Removal
How to Clean the Heater Element
You can extend the life of your Jacuzzi heater element by cleaning it regularly. Mineral deposits, especially calcium scale, build up over time and reduce heating efficiency. To clean the heater element, first disconnect all power and drain the spa below the heater level. Remove the heater element following the steps outlined earlier. Use a soft brush or non-abrasive pad to gently scrub away visible scale. For stubborn deposits, soak the element in a solution of white vinegar and water for several hours. Rinse thoroughly with clean water before reinstalling.
💡 ヒント Use a spa system flush product during routine maintenance. This helps break down internal scale and keeps plumbing clear.
You should never use harsh chemicals or metal tools on the heater element. These can damage the protective sheath and lead to premature failure.
Balancing Water Chemistry in Your Spa Heater
Preventing Corrosion and Scale Buildup
Maintaining balanced water chemistry protects your heater element from corrosion and scale. You should monitor water chemistry every week. Focus on these key parameters:
- Keep pH levels between 7.4 and 7.6.
- Maintain alkalinity within 80 to 120 ppm.
- Use sanitizers such as chlorine, bromine, or mineral systems to control bacteria.
- Perform periodic shock treatments to remove organic contaminants.
These practices help prevent both corrosion and scale buildup, which are leading causes of heater element failure. When you keep water chemistry in the recommended range, you reduce the risk of pinholes, rust, and mineral deposits on the heater element.
⚠️ 注: Imbalanced water can quickly damage even high-quality heater elements. Test your water with reliable test strips or a digital meter.
Routine Inspections and Early Warning Signs
What to Look for During Maintenance
You should inspect your Jacuzzi heater element and related components regularly. Early detection of problems helps you avoid costly repairs. Follow these steps during routine maintenance:
- Check for calcium scale buildup on the heater element. Scale reduces efficiency and can cause overheating.
- Inspect the heater sheath for corrosion or pinholes. These defects allow water intrusion and may lead to electrical shorts.
- Test the electrical resistance of the heater element with an ohm meter. Disconnect power, then measure resistance between terminals. A reading between 9 and 12 ohms is typical.
- Test for shorts to ground by measuring resistance between each terminal and the sheath. Any continuity indicates a short and requires replacement.
- Monitor for GFCI breaker tripping. Frequent trips often signal water intrusion or a damaged element.
- Verify the high limit switch and thermostat function. The high limit switch should remain closed unless overheating occurs. The thermostat should show continuity when set to maximum.
- Maintain proper water chemistry to prevent corrosion and scale.
- Purge air from the plumbing after servicing or refilling. This prevents dry fire damage.
- Avoid bending or twisting heater terminals during installation. Damaged seals can lead to water leaks and electrical faults.
🛠️ プロのアドバイス Keep a maintenance log. Record inspection dates, test results, and any corrective actions. This helps you track trends and catch issues early.
By following these preventative steps, you protect your Jacuzzi heater element and ensure reliable spa performance year-round.
You can repair or replace your Jacuzzi heater element by following clear instructions and prioritizing safety. Always disconnect power and drain water before you begin. Test the heater element both before and after replacement to confirm proper function. Regular maintenance extends the life of your heater. With proper care, most Jacuzzi heater elements last 5 to 10 years.
- Maintain balanced water chemistry to prevent damage.
- Seek professional help for complex electrical issues, persistent breaker trips, or if you feel unsure about any step.
よくあるご質問
How often should you replace your Jacuzzi heater element?
You should inspect your heater element every year. Replace it if you see corrosion, scale buildup, or electrical faults. Most elements last 5 to 10 years with proper maintenance.
Can you use any heater element in your Jacuzzi?
No. Always match the voltage, wattage, and size to your Jacuzzi’s specifications. Using the wrong element can cause damage or unsafe operation.
ヒーターエレメントの交換にはどのような工具が必要ですか?
You need a multimeter, insulated screwdrivers, wrenches, safety gloves, and new O-rings or gaskets. Label wires before disconnecting them for easier reassembly.
Why does your Jacuzzi heater keep tripping the breaker?
A tripped breaker often signals a shorted heater element, water intrusion, or wiring issues. Inspect the element for corrosion or cracks. Test with a multimeter to confirm the problem.
Is it safe to repair a Jacuzzi heater element yourself?
You can safely repair or replace the element if you follow all safety steps. Always disconnect power and drain water first. If you feel unsure, contact a licensed professional.
How do you prevent scale buildup on the heater element?
Maintain balanced water chemistry. Test pH and alkalinity weekly. Use a spa system flush product during routine maintenance to reduce mineral deposits.
What should you do if your Jacuzzi water is not heating?
Check the heater element for visible damage. Test resistance with a multimeter. Inspect the control panel for error codes. Address any wiring or sensor issues before replacing the element.
Can you clean a heater element without removing it?
You can use a spa system flush to help clean internal surfaces. For heavy scale, remove the element and soak it in a vinegar solution. Never use metal tools or harsh chemicals.

