You can test heating elements in your electric water heater quickly and safely at home. To test heating elements, follow these simple steps:
- Turn off power to the hot water heater at the breaker.
- Remove the access panel and insulation.
- Use a multimeter to test heating elements for continuity and ground faults.
Most homeowners find that learning how to test heating elements only requires a few basic tools and careful attention to safety.
Safety Precautions Before You Test Heating Elements
Before you begin any work on your electric water heater, you must take safety seriously. Electrical shock and injury remain the most common incidents reported during testing. You can avoid these risks by following strict safety procedures and using the right protective equipment.
Turning Off Power to the Water Heater
Locating and switching off the circuit breaker
You should always disconnect power at the source before touching any internal parts of your water heater. Electric water heaters require a dedicated circuit breaker or switch. This breaker allows you to safely cut off electricity during maintenance or emergencies. Locate the correct breaker in your electrical panel. The label should indicate which breaker controls your water heater. Flip the switch to the “off” position to ensure no power flows to the unit.
Tip: Never rely on the thermostat or unplugging the unit. Only the circuit breaker guarantees complete disconnection.
Verifying power is off with a non-contact voltage tester
After switching off the breaker, you must confirm that the power is truly off. Use a non-contact voltage tester to check the wires and terminals inside the access panel. Hold the tester near the electrical connections. If the tester does not light up or beep, you can proceed. This step prevents accidental contact with live wires, which can cause severe injury.
Personal Safety Measures
Using insulated tools and wearing safety gear
You should always use insulated tools when working on electrical equipment. Insulated screwdrivers and pliers reduce the risk of electrical shock. Safety organizations recommend wearing rubber and leather protective sleeves together to shield your arms. Leather EH-rated footwear protects your feet from electrical hazards. Choose clothing made from natural fibers like cotton or wool to minimize fire risk. Remove all jewelry and metal accessories before starting work.
- Wear nonconductive head protection if there is any risk of head injury.
- Use eye protection to guard against electric arcs or flying debris.
- Inspect all personal protective equipment for damage before use.
Double-checking for electricity before starting
Before you touch any heating elements or wiring, double-check for electricity. Use your voltage tester again on all exposed terminals. This extra step ensures your safety and aligns with industry standards such as NFPA 70E. Protective shields or barriers can also help prevent accidental contact with energized parts.
Note: Most safety incidents happen when someone skips these checks. Take your time and verify every step.
By following these precautions, you protect yourself from the most common hazards associated with testing a water heater. Proper preparation and attention to detail make the process safe and straightforward.
Tools Needed to Test Heating Elements in a Water Heater
Before you begin testing, you need the right tools and supplies. Using the proper equipment ensures accurate results and keeps you safe throughout the process.
Essential Tools for the Job
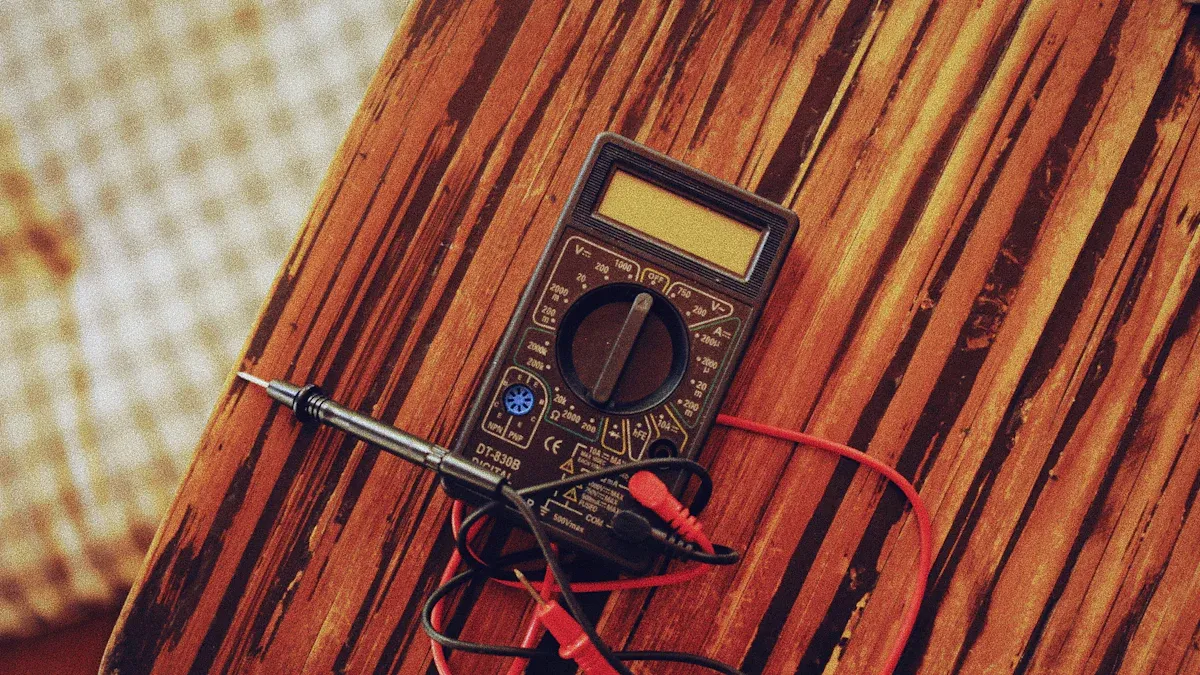
Multimeter (set to ohms/resistance)
A multimeter is the most important tool for this task. You use it to measure resistance and check for continuity in the heating elements. Set your multimeter to the ohms or resistance setting. This allows you to determine if the element conducts electricity as it should. Industry experts recommend using the multimeter not only for testing the element but also for checking thermostat continuity and voltage across terminals. This step helps you identify faulty components quickly.
Screwdriver for removing access panels
You need a screwdriver to remove the access panels on your water heater. Most models require a Phillips or flathead screwdriver. Some situations call for a 4-in-1 screwdriver or even needle-nose pliers to handle stubborn screws or tight spaces. Removing these panels gives you access to the internal wiring and the heating elements.
Non-contact voltage tester for safety
A non-contact voltage tester is essential for your safety. Before you touch any wires or terminals, use this tool to confirm that the power is off. Hold the tester near the electrical connections. If the tester does not light up or beep, you can proceed. This simple check prevents accidental shocks and keeps you safe during the inspection.
Tip: Always test the voltage tester on a known live circuit before and after use to ensure it works properly.
Helpful Supplies
Work gloves for protection
Work gloves protect your hands from sharp edges and hot surfaces inside the water heater. Choose gloves that fit well and allow you to grip tools securely. Wearing gloves also reduces the risk of cuts or scrapes when handling insulation or metal parts.
Flashlight for better visibility
A flashlight helps you see inside the dark spaces of your water heater. Good lighting makes it easier to spot wiring issues, loose connections, or signs of corrosion. You avoid mistakes and work more efficiently when you can see every detail clearly.
Here is a quick checklist of what you need:
| Tool/Supply | Purpose |
|---|---|
| Multimeter | Test resistance and continuity |
| Screwdriver | Remove access panels |
| Non-contact voltage tester | Confirm power is off |
| Work gloves | Protect your hands |
| Flashlight | Improve visibility inside the unit |
Gathering these tools before you start saves time and helps you complete the job safely. You follow industry best practices and reduce the risk of injury or error by preparing properly.
How to Locate and Access Water Heater Elements
Finding the Access Panels on Your Water Heater
Identifying upper and lower element panels
You need to find the access panels before you can test or replace any components. Most residential electric water heaters have two access panels—one for the upper element and one for the lower element. Manufacturers often place these panels on the front of the tank. You may notice that the upper panel sits higher, usually near the top third of the unit, while the lower panel sits closer to the bottom.
Access panels can appear in several locations throughout your home. You might find them near the furnace in manufactured homes. Some homes place them in the primary bedroom closet or inside a utility closet. Laundry rooms often contain these panels as well. In certain layouts, you may discover access panels hidden behind wall-like panels in hallways. If your home uses wallboards, look for batten strips around the panel. Homes with drywall construction often hide access panels inside closets or utility rooms. Newer homes typically keep all access panels inside, never on exterior walls.
Tip: If you cannot find the access panels right away, check closets, utility rooms, and laundry areas first. These spots are the most common locations for water heater access.
Safely Removing Panels and Insulation
Handling insulation without damage
Once you locate the access panels, you need to remove them to reach the internal parts. Use a screwdriver to loosen and remove the screws holding the panel in place. Set the screws aside in a safe spot so you do not lose them. Gently pull the panel away from the water heater. Behind the panel, you will see a layer of insulation. This insulation helps the unit retain heat and operate efficiently.
Carefully peel back the insulation. Try not to tear or compress it. Damaged insulation can reduce the efficiency of your water heater. If the insulation uses a vapor barrier, fold it back gently. Avoid using sharp tools near the insulation to prevent accidental rips.
Exposing the heating element terminals
After you move the insulation, you will see the heating element terminals. These terminals connect the element to the electrical wiring. You should see two screws or bolts with wires attached. Make sure you do not touch any wires until you confirm the power is off. Good lighting helps you see the terminals clearly. A flashlight can make this step easier, especially in dimly lit spaces.
Note: Always keep the insulation and access panel nearby. You will need to reinstall them after you finish testing or replacing parts.
By following these steps, you can safely reach the components you need to test. Careful handling of panels and insulation protects both you and your water heater from unnecessary damage.
How to Test Heating Elements with a Multimeter
Testing electric water heater elements with a multimeter gives you clear answers about their condition. You can follow these steps to ensure accurate results and keep your water heater running efficiently.
Setting Up Your Multimeter
Selecting the correct ohms/resistance setting
Before you begin, make sure you have turned off the power to your water heater at the circuit breaker. Remove one wire from the heating element to isolate it. This step prevents interference from other electrical components and ensures your safety.
To set up your multimeter:
- Turn on your multimeter.
- Select the ohms (Ω) or resistance setting. Choose a range such as 200 ohms or 1k ohms. The lowest setting works best for most water heater elements.
- Confirm the display reads zero when you touch the two probes together. This check ensures your multimeter works correctly.
Tip: Avoid using the continuity or diode test modes for this procedure. The ohms setting provides the most accurate reading for resistance.
Testing Heating Element Continuity
Placing probes on element terminals
To test heating elements, place one probe on each terminal (screw) of the heating element. Make sure you have removed at least one wire from the terminal. This step isolates the element and prevents false readings.
Reading and understanding the display
When you test the resistance, your multimeter should display a value between 10 and 30 ohms for most functional elements. The exact number depends on the voltage and wattage of your water heater. For example, a 1000-watt element at 120 volts should show about 14 ohms. You can use the formula R = (V²) / P to calculate the expected resistance, where V is voltage and P is power in watts.
If your multimeter shows a reading in the normal range, the element works properly. If you see a reading of zero, very low, or infinite (often displayed as “OL” or “open”), the element is faulty and needs replacement.
Here is a quick reference table for typical resistance values:
| Source | Typical Resistance Range (Ohms) | Notes |
|---|---|---|
| JustAnswer | 12-16 | 240V water heater element typical reading |
| SpaDepot Guide | 9-12 (up to 20) | Acceptable range for most heaters |
| CorroProTec Blog | 10-30 | Typical range for properly functioning units |
Note: If your water heater has two heating elements, repeat the test on the second element.
Checking for Ground Faults in the Water Heater
Testing between element terminal and metal tank
A ground fault occurs when electricity escapes from the element to the metal tank. This problem can cause tripped breakers or unsafe operation. To check for ground faults, follow these steps:
- Set your multimeter to the resistance setting (Rx1k or similar).
- Touch one probe to a terminal screw on the heating element.
- Touch the other probe to any bare metal part of the water heater tank.
- Repeat this test for the other terminal screw.
If your multimeter shows any resistance reading during this test, the element has a ground fault and you must replace it. A properly working element will show no reading (infinite resistance) between the terminal and the tank.
⚠️ Alert: Always disconnect the wires from the element terminals before you test for ground faults. This step prevents false readings and ensures your safety.
By following these steps, you can confidently test a heating element and diagnose most common problems. Accurate testing helps you decide if you need to replace the element or look for other issues in your water heater.
Interpreting Multimeter Results
What a normal resistance reading looks like
When you test a heating element with your multimeter, you want to see a resistance value that falls within the expected range. For most residential water heaters, a healthy element will show a resistance reading between 10 and 30 ohms. This range depends on the wattage and voltage of your specific unit. You can find the exact specifications on the label attached to your water heater or in the manufacturer’s manual.
A normal reading means the heating element can conduct electricity properly. If you see a value like 12, 15, or 18 ohms, you can feel confident that the element is in good working order. The element will heat water efficiently and safely. You should always compare your reading to the expected value for your model. If you are unsure, use the formula:
Resistance (ohms) = (Voltage × Voltage) ÷ Wattage
For example, a 4500-watt element on a 240-volt system should read about 12.8 ohms. If your reading matches this calculation, you have confirmed the element’s integrity.
Tip: Always test both the upper and lower heating elements if your water heater has two. One faulty element can affect the entire system’s performance.
Signs of a faulty or shorted heating element
When you test heating elements, you may encounter readings that signal a problem. If your multimeter shows a resistance of zero or very close to zero, the element has shorted internally. This condition means electricity flows through the element without resistance, which can cause rapid failure or even trip your circuit breaker.
If the display reads “OL,” “open,” or infinite resistance, the circuit inside the element has broken. The element cannot heat water because electricity cannot pass through. You must replace the element to restore proper function.
Another critical test involves checking for a ground fault. Place one probe on the element terminal and the other on the metal tank. If you see any resistance value, the element has shorted to ground. This situation is dangerous and requires immediate replacement.
Here is a quick reference table for interpreting your results:
| Multimeter Reading | What It Means | Action Needed |
|---|---|---|
| 10–30 ohms | Normal, element is healthy | No action required |
| 0 or near zero | Shorted element | Replace immediately |
| Infinite/OL/open | Broken circuit (open) | Replace immediately |
| Any value to tank | Ground fault detected | Replace immediately |
⚠️ Alert: Never continue using a water heater with a faulty or shorted heating element. You risk electrical hazards and further damage to your system.
By learning how to interpret these readings, you can quickly diagnose issues and decide when to replace components. You protect your home and ensure reliable hot water by acting on these results.
Troubleshooting Water Heater Element Problems
No Reading or Infinite Resistance
Possible causes and next steps
When you test a heating element and see no reading or infinite resistance on your multimeter, you face a clear sign of trouble. This result means the circuit inside the element is open or broken. You may encounter this issue for several reasons:
- The coil inside the element has broken, creating an open circuit.
- Corrosion or pinhole leaks in the element sheath allow water to enter, damaging the coil.
- Sediment or mineral buildup inside the tank causes unstable or fluctuating resistance readings.
- A visible hole in the sheath confirms the element has failed and needs no further testing.
- If the resistance reading falls outside the normal 10–30 ohms range, the element is defective.
To troubleshoot, follow these steps:
- Turn off power to the water heater.
- Disconnect the wires from the element terminals.
- Set your multimeter to the ohms setting.
- Place one probe on each terminal.
- If you see infinite resistance, replace the element.
- Test both upper and lower elements.
- If both elements test fine, check the thermostat or look for sediment buildup.
Tip: Always note the position of wires before disconnecting them for easy reassembly.
Shorted Heating Element to Ground
What it means and safety concerns
A shorted heating element to ground occurs when electricity flows from the element directly to the metal tank. You detect this by measuring resistance between a terminal and the tank. Any reading less than infinite resistance confirms a short. This fault creates a dangerous situation. The water heater may produce excessively hot water, risking severe burns or injury. The Energy Cutoff (ECO) safety device may trip to prevent overheating, but you should not rely on this alone. A shorted element can also lead to early tank failure and compromise the safety of your home. Immediate replacement of the faulty element is necessary.
⚠️ Alert: Never ignore a ground fault. This condition poses a serious risk and requires prompt action.
Other Signs of Element Failure in a Water Heater
Unusual noises or inconsistent water temperature
You may notice symptoms of element failure before you even test with a multimeter. Watch for these common signs:
- Only cold water comes from the tap, often due to upper element failure.
- Lukewarm water signals a problem with the upper element.
- Hot water runs out quickly, pointing to a lower element malfunction.
- The circuit breaker trips when the heater turns on, which may mean the element draws too much current.
- Insufficient hot water or water that never reaches the desired temperature.
- Popping or rumbling sounds from the tank, often caused by mineral buildup.
- Scale or corrosion on the element, sometimes from dry firing or sediment.
If you observe any of these issues, inspect the heating elements and address problems quickly to restore reliable hot water.
What to Do If Your Water Heater Element Is Faulty
Replacing a Faulty Heating Element
Deciding if DIY replacement is right for you
You might consider replacing a faulty heating element yourself if you feel comfortable working with electrical systems and have basic tools. Many homeowners handle this repair, especially when the problem is clear and the steps are straightforward. However, you must weigh your experience and safety. If you lack confidence or notice complex issues, you should seek professional help. Attempting repairs without proper knowledge can lead to electrical shock, fire hazards, or damage to your equipment. Always review your water heater’s warranty, as DIY repairs may void coverage.
⚠️ Tip: If you see signs of electrical malfunction, major leaks, or if the unit does not respond after basic troubleshooting, contact a licensed technician.
Basic steps for replacing the element
You can follow these steps to replace a faulty heating element safely:
- Turn off power at the circuit breaker and confirm with a voltage tester.
- Wear insulated gloves and safety goggles.
- Make sure the work area is dry and free from water hazards.
- Gather tools: screwdriver, adjustable or socket wrench, multimeter, needle-nose pliers, and voltage tester.
- Prepare replacement parts: new heating element, gasket or O-ring, wire nuts, and a cleaning cloth.
- Test the heating element with a multimeter to confirm it is faulty.
- Shut off the cold water supply to the heater.
- Attach a garden hose to the drain valve and drain the tank. Open a hot water faucet to let air in.
- Remove the access panel and disconnect wires from the heating element.
- Use the appropriate wrench to remove the faulty element.
- Clean the gasket seating area and install the new gasket.
- Insert and tighten the new heating element securely, but do not overtighten.
- Close the drain valve and turn on the cold water supply to refill the tank. Keep a hot water faucet open to release air.
- Check for leaks around the new element.
- Restore power at the breaker and verify proper operation.
🛠️ Note: Always check for leaks before restoring power to avoid electrical hazards.
When to Call a Professional for Water Heater Repairs
Situations that require expert help
Some situations require a licensed professional. If you encounter electrical malfunctions, persistent leaks, or if the unit fails to heat after basic checks, you should not attempt repairs yourself. Professionals ensure repairs comply with building codes and safety standards. They have the expertise to identify hidden risks and use specialized tools for precise work. If you suspect a gas leak or notice unusual noises, call a technician immediately.
Risks of DIY replacement
DIY replacement carries several risks. You may void the manufacturer’s warranty, leading to higher costs if future issues arise. Improper installation can cause electrical shock, fire, or water damage. You might misdiagnose the problem, resulting in temporary or ineffective fixes. Professionals offer warranty protection, liability coverage, and efficient service. They follow local codes and provide peace of mind with safe, reliable repairs.
⚠️ Alert: Attempting complex repairs without proper training can result in costly mistakes and safety hazards. When in doubt, trust a licensed plumber or electrician.
Preventing Future Water Heater Element Issues
Regular Maintenance Tips for Your Water Heater
Flushing the tank to reduce sediment
You can extend the life of your heating elements by flushing the tank at least once a year. Sediment buildup at the bottom of the tank causes elements to overheat and fail early. To flush the tank, turn off the power and water supply, attach a hose to the drain valve, and let the water run until it flows clear. This simple step removes minerals and debris that collect over time. You also prevent strange noises and improve heating efficiency.
Tip: Flushing the tank not only protects the elements but also helps maintain consistent water temperature and reduces energy costs.
Checking elements periodically
Regular inspections keep your system running smoothly. You should check the heating elements and other components at least once a year. Use a multimeter to test for electrical continuity and look for signs of corrosion or wear. Tighten any loose electrical connections and verify that insulation wraps remain in place. Inspect the anode rod every 3-5 years and replace it if it is heavily corroded or less than half an inch thick. Adjust the thermostat to the recommended 120°F to prevent overheating. Schedule a professional inspection annually, especially if your unit is over ten years old.
Recommended maintenance checklist:
- Flush the tank yearly to remove sediment.
- Inspect and replace the anode rod as needed.
- Test the pressure relief valve every few months.
- Check and adjust the thermostat setting.
- Tighten electrical connections.
- Insulate the tank and pipes to reduce heat loss.
- Schedule annual professional inspections.
Early Warning Signs of Heating Element Problems
What to watch for to catch issues early
You can spot heating element problems before they cause major failures. Watch for these early warning signs:
- Lukewarm water or water that never gets fully hot.
- Hot showers that suddenly turn cold.
- Strange hissing, popping, or sizzling noises from the tank.
- Higher energy bills without increased usage.
- Cloudy or rusty water from your taps.
- Frequent tripping of the circuit breaker or reset button.
If you notice any of these symptoms, inspect your system promptly. Listen for unusual sounds while the heater runs and monitor water temperature consistency. Check for puddles or leaks around the unit. Addressing these issues early helps you avoid costly repairs and keeps your water heater operating safely.
Testing electric water heater elements becomes straightforward when you follow each step carefully. Always prioritize safety by turning off the power, verifying with a tester, and using insulated tools. If you feel unsure at any point, contact a professional for help. Regular maintenance, such as flushing the tank and inspecting the anode rod, prevents major problems and extends your heater’s lifespan.
Remember: Consistent checks and timely repairs keep your water heater running efficiently and safely for years to come.
FAQ
How often should you test your water heater elements?
You should test your water heater elements at least once a year. Regular checks help you catch problems early and keep your system running efficiently.
Can you test a water heater element without removing it?
Yes, you can test the element without removing it. You only need to disconnect one wire from the terminal before using your multimeter.
What does it mean if your water heater trips the breaker?
A tripped breaker often means a shorted heating element or a ground fault. You should test the elements and wiring for faults before resetting the breaker.
Do you need to drain the tank to test the elements?
You do not need to drain the tank to test the elements. Draining is only necessary if you plan to replace a faulty element.
What tools do you need to test a water heater element?
You need a multimeter, a screwdriver, and a non-contact voltage tester. Work gloves and a flashlight also help you work safely and see clearly.
Can a faulty thermostat cause similar symptoms as a bad element?
Yes, a faulty thermostat can cause no hot water or inconsistent temperatures. You should test both the thermostat and the elements to find the real problem.
Is it safe to replace a water heater element yourself?
You can replace a water heater element if you follow safety steps and feel confident with electrical work. If you feel unsure, you should call a licensed professional.
Tip: Always turn off power at the breaker and verify with a voltage tester before starting any repairs.

