You can test a heating element plug by unplugging your appliance and inspecting the physical condition of the plug before using a multimeter for resistance checks. Safety always comes first when you handle any Heating Element, especially those found in household appliance heating elements. Jinzhong Electric Heating recommends that you stay alert during testing. Heating element manufacturers design these components for easy troubleshooting, so you can confidently examine them with basic tools.
Tip: Always work in a well-lit area to spot any signs of damage quickly.
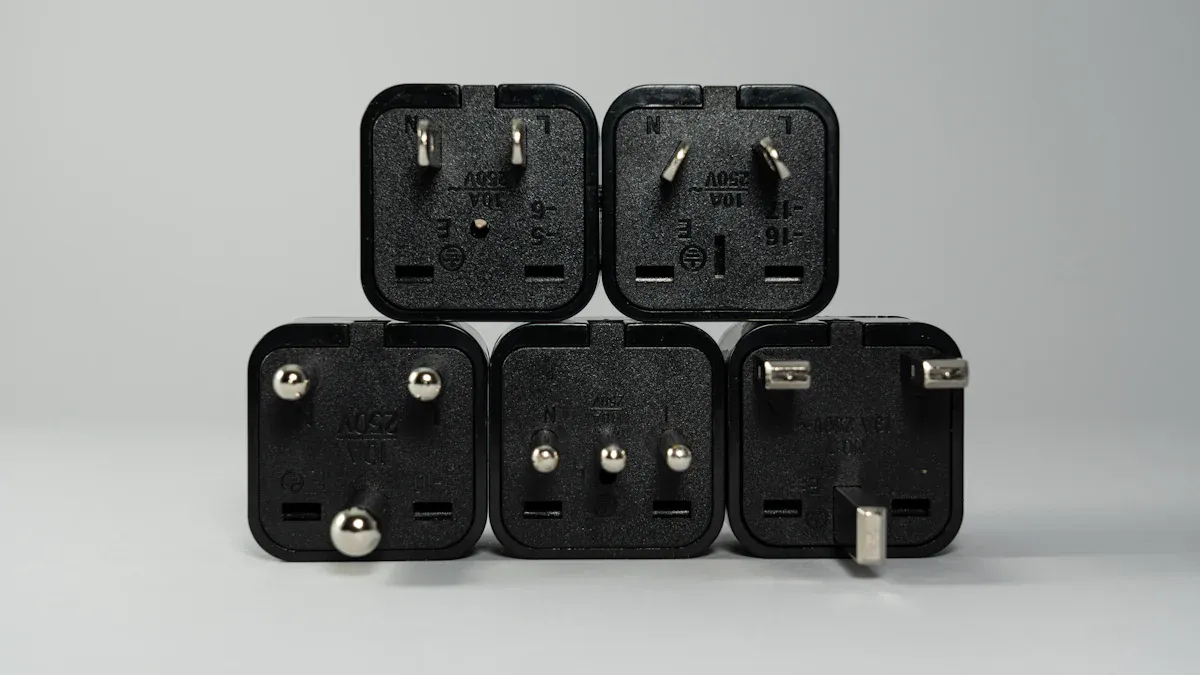
Essential Tools and Safety for Heating Element Plug Testing
Tools Needed for Testing a Heating Element Plug
When you prepare to test a heating element plug, you need the right tools to ensure accuracy and safety. Each tool serves a specific purpose during the inspection and testing process.
Multimeter for Measuring Resistance
A multimeter allows you to measure the resistance of the heating element. You can quickly identify if the heating element is functioning properly or if there is a break in the circuit. Always check that your multimeter is set to the correct range before you begin.
Screwdriver for Accessing the Plug
You often need a screwdriver to open panels or remove covers that protect the plug. Choose a screwdriver that fits the screws on your appliance to avoid stripping them. This tool helps you reach the heating element plug without damaging the power cord or other components.
Flashlight for Better Visibility
A flashlight improves visibility, especially in dimly lit areas behind appliances. You can spot signs of damage or discoloration on the heating element and cord more easily. Good lighting reduces the risk of missing critical issues during your inspection.
Protective Gloves for Safety
Protective gloves shield your hands from sharp edges and electrical contacts. You lower your risk of injury when handling the plug or heating element. Gloves also help prevent accidental contact with live wires if the power cord is not fully disconnected.
Safety Precautions When Handling a Heating Element Plug
Testing a heating element plug requires strict attention to safety. You must follow recommended guidelines to avoid electrical shock and injury.
Unplugging the Appliance Before Testing
Always disconnect the power cord from the outlet before you begin. This step ensures that no electricity flows to the heating element plug during your inspection. You eliminate the risk of electrical shock by removing the power source.
Avoiding Water and Moisture Near the Plug
Keep water and moisture away from the plug and heating element. Wet conditions increase the risk of electrical hazards. You should work in a dry area and avoid placing the cord near sinks or damp surfaces.
Wearing Protective Gear During Inspection
Wear appropriate personal protective equipment, such as gloves and safety glasses. You should avoid wearing conductive jewelry and stay clear of large metal objects. Use tools designed for electrical work with non-conductive handles. Employ the one-hand technique to minimize the risk of electrical shock.
Note: Implement Lockout-Tagout (LOTO) procedures to secure equipment during maintenance. Use the correct plug and receptacle combinations to prevent hazards.
The most frequently reported injuries during heating element testing include electrical shock and burns. You can avoid these risks by following strict safety procedures and using the right protective equipment.
| Safety Tip | Why It Matters |
|---|---|
| Unplug before testing | Prevents accidental shock |
| Wear gloves | Protects against sharp edges |
| Avoid water | Reduces risk of electrical hazards |
| Use proper tools | Ensures safe and accurate testing |
Preparing to Test the Heating Element Plug
Locating the Heating Element Plug in Appliances
Common Locations in Stoves, Dryers, and Heaters
You need to find the heating element plug before you begin any testing. In most stoves, you will see the heating element plug at the back of the oven cavity, often behind a removable panel. Dryers usually place the heating element near the rear or side, with the plug accessible after you remove the back panel. Heaters often house the heating element plug near the base or inside the main compartment. You should consult your appliance manual for diagrams that show the exact location.
Tip: Use a flashlight to illuminate dark spaces behind or inside your appliance. This helps you spot the plug and any attached cords quickly.
Identifying the Correct Heating Element Plug
You must identify the correct plug to avoid testing the wrong component. Look for a plug that connects directly to the heating element. It usually has two or more wires attached and may show signs of heat exposure, such as discoloration. Avoid confusing the heating element plug with other electrical connectors or the main power cord. If you see multiple plugs, trace the wires back to the heating element itself.
Ensuring Power is Completely Off
Double-Checking for Live Current
Safety remains your top priority when working with any heating element. Appliance manufacturers recommend several steps to ensure no live current flows to the plug:
- Always power off and unplug your appliance.
- Switch off the circuit breaker before attempting any maintenance or replacement work.
You should never rely on simply turning off the appliance. The power cord may still carry electricity if the circuit breaker remains on. Wait for the heating element to cool down before you touch any part of the plug or cord.
Using a Voltage Tester for Extra Safety
A voltage tester provides an extra layer of safety. After you unplug the appliance and switch off the circuit breaker, use the tester to check for any remaining voltage at the plug terminals. Place the tester probes on the plug contacts and confirm that no current is present. This step protects you from accidental shock and ensures the heating element is safe to handle.
Note: For ovens, turn off the appliance and wait 30–60 minutes for the heating element to cool. Pull the oven away from the wall and unplug it before you begin any inspection.
You should always follow these steps before you test the heating element plug. Careful preparation reduces risk and helps you complete the job safely.
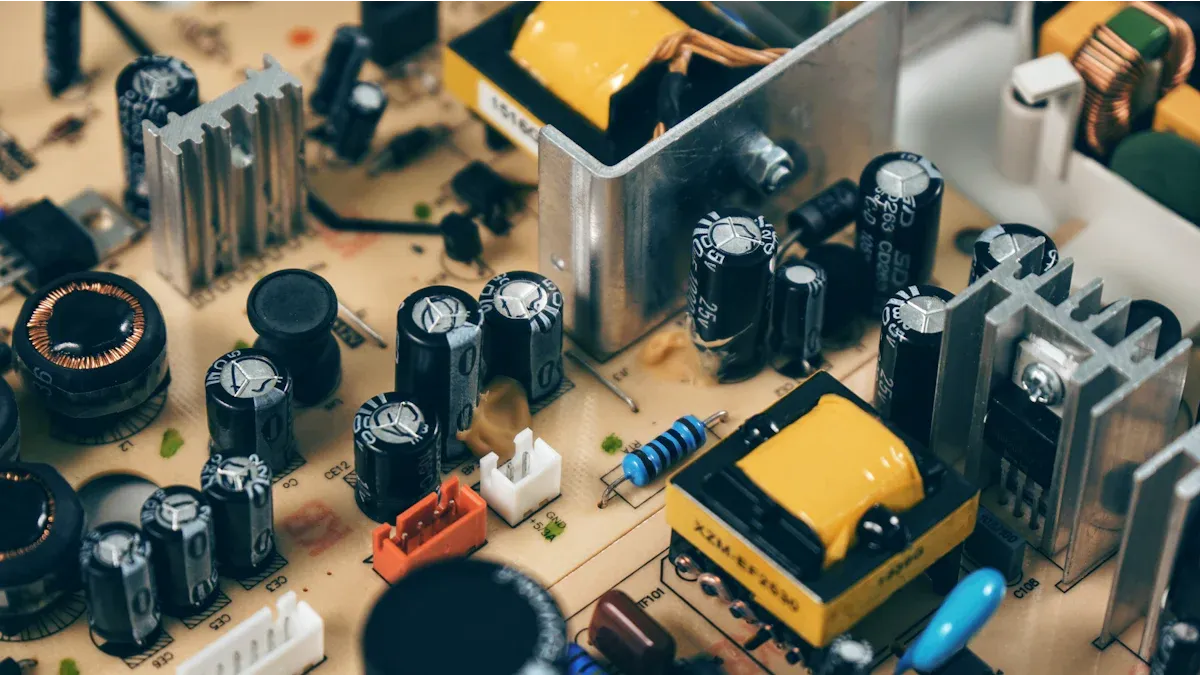
Visual Inspection of the Heating Element Plug
Visual inspection plays a critical role in identifying problems before you begin electrical testing. You should always start by examining the heating element plug for visible signs of damage or wear. This step helps you catch issues early and prevent further complications.
Checking for Physical Damage on the Plug
Physical damage often signals a deeper problem with the heating element or its connections. You need to look closely at the plug and surrounding area.
Burn Marks or Discoloration on the Heating Element Plug
Burn marks and discoloration indicate overheating or electrical faults. You may notice dark spots, brown stains, or even blackened areas on the plug. These marks often appear near the terminals or where the cord connects. Discoloration can also show up as yellowing or fading, which suggests prolonged exposure to heat. If you see any of these signs, you should avoid using the appliance until you address the issue.
Tip: Use a flashlight to inspect hard-to-see areas. Burn marks and discoloration are easier to spot under bright light.
Cracks, Breaks, or Deformation
Cracks, breaks, or warping on the heating element plug point to physical stress or overheating. You might find blistering on the surface or visible splits in the plastic. Warping often causes the plug to lose its original shape, making it difficult to fit securely. If you detect any breaks in the heating element or deformation, you should consider replacing the plug immediately. Physical damage can lead to unsafe operation and further electrical problems.
Common Visual Signs of Plug Failure:
- Burn marks
- Warping
- Breaks in the heating element
- Physical damage
- Scorch marks
- Blistering
- Cracks
Inspecting for Loose or Corroded Connections
Loose or corroded connections can disrupt the flow of electricity and cause intermittent heating issues. You need to check both the plug and the cord for stability and signs of corrosion.
Signs of Corrosion on the Heating Element Plug
Corrosion appears as green, white, or rust-colored deposits around the plug terminals. These deposits form when moisture interacts with metal contacts. Corroded connections reduce conductivity and may cause the heating element to fail. You should clean minor corrosion with a contact cleaner, but severe corrosion requires replacement of the plug or cord.
| Corrosion Color | Possible Cause | Recommended Action |
|---|---|---|
| Green | Copper oxidation | Clean or replace |
| White | Aluminum oxidation | Clean or replace |
| Rust | Iron oxidation | Replace immediately |
Gently Wiggling the Plug to Test Stability
You should gently wiggle the plug where it connects to the heating element. A secure plug remains firmly in place, while a loose plug moves easily or feels unstable. Loose connections can cause the cord to overheat or the heating element to work intermittently. If you notice excessive movement, you should tighten the connection or replace the plug. Always ensure the appliance remains unplugged during this test.
Note: Never force the plug or cord. Excessive pressure can cause further damage.
Careful visual inspection helps you identify problems before they become hazardous. You protect your appliance and ensure safe operation by addressing issues promptly.
Using a Multimeter to Test the Heating Element Plug
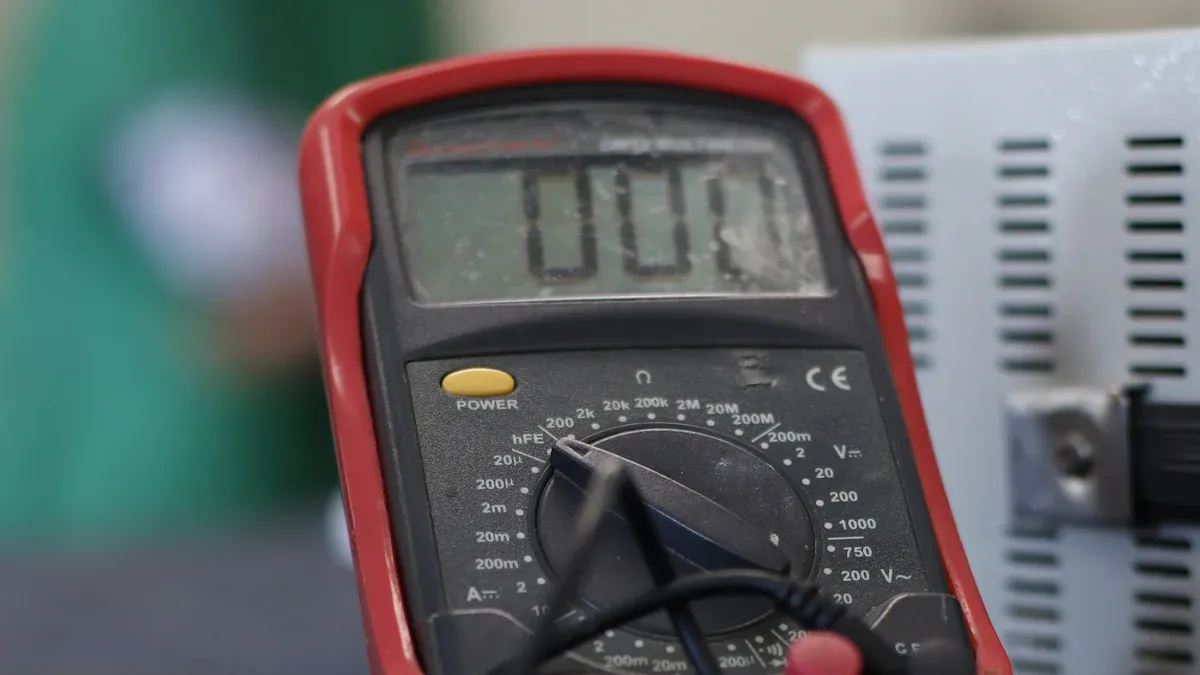
Testing the heating element plug with a multimeter gives you a clear picture of the component’s health. You can quickly determine if the heating element works as intended or if you need to replace it. Follow these steps to ensure accurate and safe results.
Setting Up the Multimeter for Heating Element Testing
Selecting the Correct Resistance (Ohms) Setting
You must set your multimeter to the resistance (ohms) setting before you begin. Most digital multimeters have a dial or button for this purpose. Choose a range that covers the expected resistance of a heating element, usually between 100 and 200 ohms. This range allows you to detect both normal and abnormal readings.
Tip: Always disconnect the heating element from any power source before testing. This step prevents inaccurate readings and protects your equipment.
Testing the Multimeter on a Known Source First
Before you test the heating element, check your multimeter’s accuracy. Touch the probes together and confirm the display reads zero or close to zero. You can also test the multimeter on a known resistor. This step ensures your tool works correctly and gives you confidence in your measurements.
Measuring Resistance of the Heating Element Plug
Placing the Multimeter Probes on the Plug Terminals
After you confirm the multimeter works, insert the leads into the correct ports. Place one probe on each terminal of the heating element plug. Make sure you have a firm connection. Avoid touching the metal parts of the probes with your fingers, as this can affect the reading.
Reading and Recording the Displayed Value
Once you connect the probes, read the value displayed on the multimeter. Write down the number for reference. If your heating element has more than two terminals, repeat the process for each pair. Move the red probe to the third wire if present and note the result. Consistent readings across all pairs indicate a healthy heating element.
Note: Always turn off the multimeter after use to prevent battery drain.
Step-by-step process for measuring resistance:
- Turn off power to the circuit and unplug the power cord.
- Set up the digital multimeter to test resistance (ohms).
- Insert the leads into the multimeter.
- Connect the leads to the heating element plug terminals.
- Read and record the resistance measurement.
- Turn off the multimeter.
Understanding Multimeter Readings for Heating Element Plugs
Normal Resistance Range for a Heating Element
A functional heating element should show low resistance, typically between 10 and 30 ohms. This range means the element can conduct electricity and produce heat. If your reading falls within this range, your heating element likely works as intended.
| Reading (Ohms) | Condition |
|---|---|
| 10–30 | Normal, functional |
| 0 or OL | Faulty or open circuit |
| >30 | Possible degradation |
Identifying Open or Short Circuits
Abnormal readings can signal specific problems. If your multimeter displays ‘OL’ (open loop) or a very high resistance, the heating element has an open circuit and cannot heat. A reading of zero or near zero means a short circuit, which can cause the cord or plug to overheat and fail. If the readings differ by more than 20% between terminals, the heating element may be failing.
⚠️ Caution: Never measure resistance on a live circuit. This mistake can damage your multimeter and give false readings.
Common mistakes include:
- Measuring resistance while the circuit is live.
- Exceeding voltage ratings for your multimeter.
- Confusing settings, such as millivolts with volts.
By following these steps, you ensure accurate results and protect both your appliance and yourself. Regular testing helps you catch problems early and maintain safe heating performance.
Interpreting Results and Identifying Heating Element Plug Problems
Common Issues Detected During Testing
When you finish testing your heating element, you need to interpret the results. The readings from your multimeter reveal the health of the heating element and its plug. You can spot problems early and decide on the best course of action.
High Resistance Readings and Their Meaning
High resistance readings often signal trouble inside the heating element. If your multimeter shows a value much higher than the normal range, you may have a degraded or failing heating element. High resistance means the element struggles to conduct electricity, which leads to poor heating performance. You might notice your appliance takes longer to heat up or fails to reach the desired temperature.
Tip: Compare your reading to the manufacturer’s specifications. If the resistance exceeds the recommended range, you should consider replacing the heating element.
Common causes of high resistance include:
- Internal corrosion inside the heating element
- Build-up of debris or oxidation on the plug terminals
- Loose connections between the plug and the heating element
You can sometimes clean the plug terminals to lower resistance. If cleaning does not help, you likely need a new heating element.
Zero or Infinite Resistance Indications
Zero resistance or infinite resistance readings point to serious electrical faults. If your multimeter displays zero ohms, you have a short circuit. This condition allows electricity to flow without restriction, which can cause overheating and damage to the cord or appliance. Infinite resistance, often shown as “OL” on digital meters, means the circuit is open. The heating element cannot conduct electricity, so it will not produce heat.
| Multimeter Reading | Possible Issue | Action Needed |
|---|---|---|
| 0 ohms | Short circuit | Replace immediately |
| OL/infinite ohms | Open circuit | Replace heating element |
You should never use an appliance with a shorted heating element. The risk of fire or electrical shock increases. An open circuit means the heating element has failed and needs replacement.
Deciding on Repair or Replacement of the Heating Element Plug
After you interpret your test results, you must decide whether to repair or replace the heating element plug. Your choice depends on the severity of the problem and the condition of the plug and cord.
When Cleaning the Plug is Sufficient
You can often fix minor issues by cleaning the plug terminals. If you see light corrosion or debris, use a contact cleaner and a soft brush. Cleaning restores good electrical contact and improves heating performance. You should always let the plug dry completely before reconnecting it to the heating element.
Note: If the cord feels secure and the plug shows no signs of melting or severe damage, cleaning is usually enough.
Follow these steps for safe cleaning:
- Unplug the appliance and disconnect the cord.
- Apply contact cleaner to the plug terminals.
- Gently scrub with a brush.
- Wipe dry and inspect for improvement.
If resistance readings return to normal after cleaning, you can continue using the appliance.
When to Replace the Heating Element Plug Entirely
You must replace the heating element plug if you find severe damage. Signs include melted plastic, deep cracks, or persistent high resistance after cleaning. If the cord feels loose or the plug wobbles, replacement is the safest option. You should also replace the plug if you detect a short or open circuit during testing.
⚠️ Alert: Never attempt to repair a plug with melted or burned areas. Replacement ensures safe heating and prevents electrical hazards.
Replacement steps:
- Purchase a compatible heating element plug from a trusted supplier.
- Disconnect the cord and remove the damaged plug.
- Install the new plug according to the manufacturer’s instructions.
You protect your appliance and your safety by replacing faulty components. Regular inspection and prompt action keep your heating element working efficiently.
Addressing Safety Concerns with Heating Element Plugs
Handling Damaged Heating Element Plugs Safely
Avoiding Further Use of Faulty Plugs
You should never continue using a damaged heating element plug. Even minor damage can lead to serious risks. If you notice melting, burning smells, or visible wear, unplug the appliance immediately. Continuing to use a faulty plug can result in hazardous situations.
The twist tie is going to melt, eventually. At best, it will smell terrible. At worst it could start a small fire.
As a Fire Damage Restoration contractor, I have done many restorations where the fire was caused by a heat producing appliance that its electrical circuit has somehow failed. A heat producing appliance of any type, left plugged in, cannot be trusted with the safety of your home.
You protect your home and family by removing the plug from service as soon as you spot a problem.
Proper Disposal of Damaged Heating Element Plugs
Dispose of damaged heating element plugs responsibly. Do not throw them in regular household trash. Take them to an electronic waste facility or a recycling center that accepts electrical components. Proper disposal prevents environmental harm and keeps hazardous materials out of landfills. If you replace the plug, follow manufacturer guidelines for safe removal and disposal.
Preventing Future Heating Element Plug Problems
Regular Inspection and Maintenance Tips
You can prevent most heating element plug problems with routine inspection and maintenance. Schedule basic safety checks at least once a year. Some property managers inspect high-use appliances bi-annually or quarterly. Follow manufacturer instructions for inspection frequency.
- Basic safety checks should occur at least annually.
- More frequent inspections may be necessary based on manufacturer instructions or usage levels.
- Annual safety inspections are mandated by code.
- NFPA 86 Section 7.4.3 states users must establish and enforce inspection frequency.
- Safety interlocks must be tested for function at least annually (Section 7.4.4).
Use this maintenance schedule to keep your heating element plugs in top condition:
| Maintenance Task | Frequency | Benefit |
|---|---|---|
| Clean heater and area | Every few weeks | Prevents dust build-up and overheating |
| Inspect for wear or damage | Annually | Early detection of issues |
| Tighten electrical connections | Annually | Ensures safety and functionality |
| Remove sludge or build-up | During shutdowns | Enhances performance and lifespan |
Regular cleaning and inspection help you catch problems early. Tightening electrical connections keeps your heating element working safely.
Safe Usage Practices for Heating Elements
You reduce risk by following safe usage practices. Always use outlets designed for high-power appliances. Avoid overloading circuits. Keep heating appliances and their plugs away from water sources to prevent electrical hazards.
- Inspect electrical cords regularly for damage.
- Use outlets properly to prevent overloads.
- Maintain safe distances from water sources.
Never operate a heating element with a damaged plug or cord. Store appliances in dry areas and avoid running cords under rugs or furniture. These habits extend the life of your heating element and protect your home from fire or electrical shock.
When to Seek Professional Help for Heating Element Plug Issues
Signs That Require a Professional Electrician
Complex Wiring or Persistent Electrical Problems
You may encounter situations where the wiring inside your appliance appears complicated or you notice ongoing electrical issues. If you see tangled wires, unfamiliar connections, or modifications involving high-temperature wire, you should not attempt repairs yourself. Persistent problems, such as repeated failures after replacing a cord or plug, also signal the need for expert attention. A professional electrician can safely diagnose and resolve these issues, ensuring your heating element operates correctly.
Unusual Noises, Smells, or Smoke from the Heating Element Plug
Certain warning signs mean you should stop troubleshooting and call a professional immediately. These include:
- Burning smells coming from the plug or outlet, which indicate overheating or burning inside the electrical system.
- Scorch marks or brown discoloration around outlets, suggesting the plug or cord has overheated.
- Outlets that feel warm to the touch, which can point to overloaded circuits or faulty wiring.
- Frequent circuit breaker trips when you plug into wall power, showing deeper electrical problems.
⚠️ If you notice smoke, loud buzzing, or a persistent burning odor, unplug the appliance right away and do not use it until a professional inspects it.
Finding Qualified Help for Heating Element Repairs
Choosing a Licensed Electrician for Heating Element Work
Selecting the right professional ensures your safety and the longevity of your appliance. You should verify several qualifications before hiring someone for heating element plug repairs. Use the table below to guide your decision:
| Qualification | Description |
|---|---|
| Certification | Proper electrical or appliance repair certification is essential. |
| Experience | Relevant experience with your specific smoker brand or similar models is important. |
| Reputation | Positive ratings on trusted platforms or references should be checked. |
| Insurance | Liability insurance is necessary for your protection. |
A licensed electrician understands the risks involved with heating elements and can recommend the correct replacement element if needed. Always ask for proof of certification and insurance before any work begins.
What to Expect During a Professional Inspection
When you schedule a professional inspection, the electrician will examine the plug, cord, and all connections. They will test the heating element for proper resistance and check for safe installation of high-temperature wire. If they find damage or unsafe conditions, they may suggest a replacement element or repairs to restore safe operation.
You should expect to pay for this expertise. The average cost to replace a dryer heating element is $230. Most repairs fall between $100 and $350, depending on the appliance’s age and the type of repair required. The electrician will explain the costs and provide a clear estimate before starting work.
Note: Professional help protects your home from electrical hazards and ensures your appliance meets safety standards.
Testing a heating element plug requires careful attention to detail and safety. You can follow these essential steps for effective results:
- Turn off the breaker and unplug the appliance.
- Remove covers and insulation to access the plug.
- Use a voltage detector to confirm power is off.
- Locate the heating element terminals.
- Set your multimeter to the lowest ohms setting and test the terminals.
- Replace the element if you find faults, then restore power.
You can address minor issues with cleaning or tightening connections. For complex wiring or persistent problems, contact a licensed electrician. Regular inspections offer key benefits:
- Catch problems early and prevent costly repairs.
- Maintain safe, efficient operation by spotting wear or damage.
Staying proactive keeps your appliances safe and reliable.
FAQ
How often should you test a heating element plug?
You should test your heating element plug at least once a year. If you notice performance issues or visible damage, test it immediately. Regular checks help you catch problems early and maintain safe operation.
Can you test a heating element plug without a multimeter?
You can perform a visual inspection for damage or corrosion. However, you need a multimeter to accurately measure resistance and confirm electrical integrity. Visual checks alone cannot guarantee the plug’s safety.
What resistance reading indicates a faulty heating element plug?
A reading of zero ohms or “OL” (infinite resistance) signals a problem. Zero means a short circuit. “OL” means an open circuit. Both require immediate replacement of the heating element plug.
Is it safe to clean a corroded heating element plug?
You can clean minor corrosion using contact cleaner and a soft brush. Always unplug the appliance first. If corrosion is severe or the plug feels loose, replace the plug to ensure safety.
What should you do if the plug feels hot during use?
Stop using the appliance immediately. A hot plug often means a loose connection or internal fault. Unplug the device and inspect the plug for damage. Replace the plug if you find any signs of overheating.
Can you replace a heating element plug yourself?
You can replace a simple plug if you have basic electrical skills and follow safety guidelines. For complex wiring or if you feel unsure, hire a licensed electrician. Safety should always come first.

