
When you work on a water heater element, you need the right socket size for a secure fit. Most water heater elements require a 1-1/2 inch socket. Using the correct size helps you prevent leaks and avoid damaging the element. The table below highlights how the proper socket protects your water heater and ensures a smooth installation process:
| Aspect | Impact of Using Correct Socket Size |
|---|---|
| Proper Fit | Prevents slippage and damage to element head |
| Tightening Accuracy | Avoids over- or undertightening, reducing leak risk |
| Leak Prevention | Ensures even pressure on gasket and threads |
| Warranty & Longevity | Maintains warranty and extends element life |
Why Water Heater Element Socket Size Matters
Prévenir les dommages à l'élément du chauffe-eau
Choosing the correct socket size protects your equipment and your investment. When you use a socket that fits poorly, you risk stripping the head of the water heater element. This can make removal almost impossible and may force you to replace more parts than planned. Many people try to use shallow or cheap sheet metal sockets, but these often slip or fail to grip the element securely. Deep well sockets, especially those designed for water heater elements, provide the grip and leverage you need. If you use the wrong tool, you might damage the rubber seal or the threads, which can lead to leaks or even tank damage.
Tip: Always select a deep well socket that matches the element size. This simple step helps you avoid costly repairs.
Ensuring a Tight, Leak-Free Fit
A proper fit ensures that you can tighten the element evenly and securely. When you use the right socket, you apply even pressure to the gasket and threads. This helps prevent leaks after you refill and restart your water heater. If you use a socket that is too small or too shallow, you might not seat the element correctly. This can compromise the seal and allow water to escape. Leaks can cause water damage and reduce the efficiency of your system.
- Deep sockets designed for water heater elements help you achieve a tight, leak-free fit.
- Shallow sockets often fail to reach the element properly, making it hard to tighten or remove.
Making the Water Heater Job Easier and Faster
Using the correct socket size saves you time and frustration. When you have the right tool, you can remove and install the water heater element quickly. You avoid the struggle that comes with ill-fitting or shallow sockets. This means less risk of injury and less chance of damaging your equipment. Deep well impact sockets, such as the common 1-1/2 inch size, make the job straightforward. You spend less time wrestling with stubborn parts and more time enjoying reliable hot water.
Note: Investing in the right socket pays off every time you service your water heater.
Standard Socket Sizes for Water Heater Elements
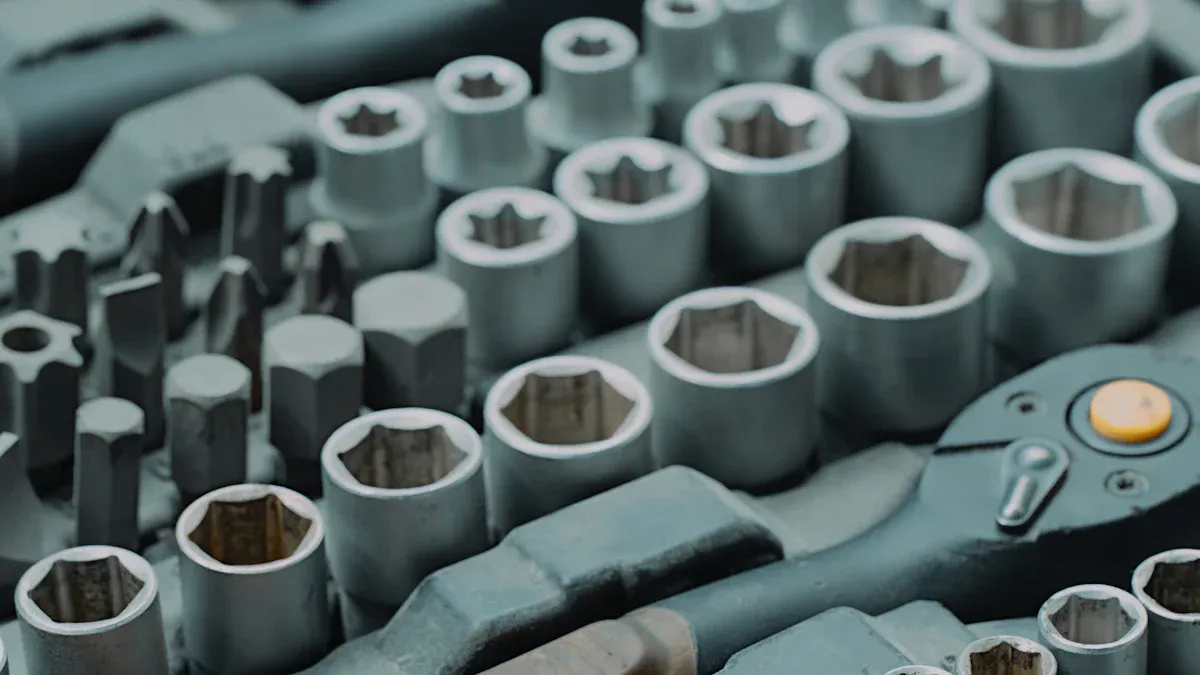
The Most Common Socket Size: 1-1/2 Inch
You will find that most water heater elements use a douille de 1-1/2 pouce. This size fits the hex head of the majority of heating elements across major brands. When you select a 1-1/2 inch socket, you ensure a snug fit that allows you to remove or install the element without slipping or damaging the part. Manufacturers design specialized tools, such as the ProSelect 1-1/2 inch Element Socket Tool, specifically for this purpose. These tools match the standard size and provide the depth needed to reach the element securely.
Tip: Choose a deep broach socket or a standard-depth 1-1/2 inch socket. These options grip the hex portion of the element better than shallow or 12-point sockets.
A deep socket also helps you apply even pressure, which is essential for a leak-free installation. Most hardware stores carry these sockets, and you can use them with a standard socket wrench. For stubborn elements, an impact socket or an impact wrench can provide extra leverage, especially if you deal with hard water deposits.
Other Water Heater Element Socket Sizes (1-1/16″, 1-7/8″, etc.)
While 1-1/2 inch is the most common, you may encounter other sizes depending on your water heater model. Some brands, such as Marathon, use a different socket size. You might also need a 1-1/16 inch socket if you plan to replace the anode rod instead of the element. In rare cases, elements may require a 1-7/8 inch socket, but this is not typical for residential units.
- Common socket sizes for water heater elements include:
- 1-1/2 inch (standard for most brands)
- 36 mm (sometimes used as a substitute for 1-1/2 inch)
- 1-1/16 inch (often for anode rods)
- 1-7/8 inch (less common, specialty models)
Always check your water heater’s manual or the element itself before purchasing a socket. Using the wrong size can lead to stripped threads or a damaged element, making repairs more difficult.
How to Check Your Water Heater Element Socket Size
You can determine the correct socket size for your water heater element with a few simple methods. First, inspect the element’s hex head and measure it across the flats using a tape measure or caliper. Most elements will measure close to 1-1/2 inches. If you do not have a measuring tool, you can bring the old element or a photo to the hardware store for comparison.
- Recommended tools and methods for checking socket size:
- Use a tape measure or caliper to measure the hex head.
- Refer to your water heater’s manual for specifications.
- Try a 1-1/2 inch socket first, as it fits most standard elements.
- If you need to replace the anode rod, check if a 1-1/16 inch socket is required.
- Utiliser un socket wrench that is at least 5 inches long to reach recessed elements.
Note: Specialized tools like the ProSelect 1-1/2 inch Element Socket Tool are designed for this job and ensure a precise fit.
By taking a few minutes to check the size before you start, you save time and avoid frustration. You also protect your water heater from unnecessary damage.
Essential Tools for Water Heater Element Replacement
When you prepare to replace a water heater element, you need the right tools for a safe and efficient job. Using proper equipment helps you avoid damage and ensures a professional result. Here are the outils essentiels and their roles in the process:
- Clé pour élément de chauffe-eau ou 1-1/2 inch deep well socket
- Clé à molette
- Jeu de clés à douille
- Pipe wrench
- Channel lock pliers
- 18-inch breaker bar (for stuck elements)
- Multimeter or non-contact voltage tester
- Insulated screwdrivers and circuit testers
- Work gloves, safety glasses, and protective clothing
- Garden hose, towels, rags, buckets, or drain pans
- Teflon tape or pipe joint compound
Tip: Always label wires before removal and keep your work area dry to prevent electrical hazards.
Standard Socket vs. Water Heater Element Wrench
Pros and Cons of Each Tool
You can choose between a standard socket and a water heater element wrench for removing or installing the element. The water heater element wrench is a specialized tool designed to fit the hex-shaped end of the element. Its heavy-duty construction withstands the torque needed for the job. The extended design allows you to reach recessed elements inside the insulation, which reduces the risk of damage to the heater or the element itself.
A standard socket, often available in 1-1/2 inch, may not reach or grip the recessed element as effectively. Thin-walled sockets sometimes lack the strength and depth required for stubborn or deeply set elements. Using a standard socket increases the chance of slipping or damaging the element, especially if the fit is not precise.
| Type d'outil | Avantages | Inconvénients |
|---|---|---|
| Water Heater Element Wrench | Designed for recessed elements, strong grip, safer | May not be as common in basic toolkits |
| Standard Socket | Widely available, fits some elements | May not reach recessed elements, less secure grip |
When to Use a Breaker Bar for Stubborn Elements
Some water heater elements become stuck due to mineral buildup or corrosion. In these cases, you need extra leverage. An 18-inch breaker bar attaches to your socket or element wrench and gives you the force needed to loosen stubborn parts. This tool helps you avoid excessive strain and reduces the risk of damaging the element or the tank. Always apply steady pressure and avoid sudden force to prevent bending the element.
Other Helpful Tools for Water Heater Element Removal
Pipe Wrench
A pipe wrench provides strong gripping power for plumbing connections. You can use it to hold or turn pipes connected to the water heater. However, avoid using it directly on the element, as it may damage the hex head.
Adjustable Wrench
An adjustable wrench offers flexibility for various nut and bolt sizes. You can use it for electrical connections or to assist with other fittings during the replacement process.
Deep Well Socket and Extensions
A deep well socket, especially in the correct size, reaches recessed elements and provides a secure grip. Extensions help you access elements set deep within the tank. Choose a heavy-duty, six-point socket to avoid bending or slipping under pressure.
Note: Applying penetrating oil and allowing it to soak can help loosen a stuck element before removal.
Where to Buy the Right Water Heater Socket Size
You can find the correct socket or element wrench for your water heater by consulting brand-specific guides from reputable sources. Many manufacturers and retailers provide detailed information for models from brands like A.O. Smith, Rheem, Bradford White, and Whirlpool. The Corro-Protec website offers a ‘Find an Authorized Retailer’ page, where you can locate authorized sellers for the right tools and parts. You can also purchase sockets, breaker bars, and related tools from hardware stores or specialized online shops. For unique models or powered anode rods, check the manufacturer’s recommendations to ensure you buy the correct tool.
Step-by-Step Guide: Removing and Replacing a Water Heater Element
Safety First: Preparing Your Water Heater
Before you begin, you must take several safety steps to protect yourself and your equipment. Working with electricity and hot water can be dangerous if you skip precautions.
Couper l'alimentation électrique et l'alimentation en eau
- Coupez l'alimentation de votre chauffe-eau au niveau du disjoncteur. Always verify with a non-contact voltage tester that no electricity flows to the unit.
- Shut off the cold water supply valve. This prevents new water from entering the tank during the process.
- Open a hot water faucet and allow the water to cool. This step reduces the risk of burns.
- Remove the access panel and insulation to expose the water heater element.
- Wear protective gloves and safety glasses to avoid injury.
Conseil : Never attempt to replace a water heater element if you are unsure about electrical or plumbing work. Call a professional if you feel uncomfortable.
Vidange du réservoir du chauffe-eau
- Fixez un tuyau d’arrosage à la vanne de vidange située au bas du réservoir.
- Direct the hose to a safe drainage location, such as a floor drain or outside.
- Open the drain valve and let the tank empty completely.
- Run a hot water tap to help the tank drain faster and ensure all water is out.
- Once drained, disconnect the wires from the element after confirming the power is off.
Retrait de l'ancien élément du chauffe-eau
Fitting the Socket Correctly on the Element
Select the correct socket size, usually 1-1/2 inches, and fit it snugly over the hex head of the element. Make sure the socket sits squarely to avoid stripping the head. A deep well socket or a water heater element wrench works best for this job.
Loosening a Stubborn Water Heater Element
If the element feels stuck, use a breaker bar for extra leverage. Apply steady, even pressure. Avoid sudden force, which can damage the tank or threads. If mineral buildup causes resistance, a small amount of penetrating oil can help loosen the element. Do not use a pipe wrench directly on the element, as this can deform the hex head.
Common Mistake: Many people forget to fully drain the tank or fail to verify the power is off, risking electric shock or water damage.
Installing the New Water Heater Element
Ensuring a Proper Seal with the Gasket
Clean the threads in the tank opening with a rag. Place the new gasket on the element and apply a small amount of dishwashing liquid to lubricate it. This step helps prevent damage during tightening and ensures a watertight seal.
Tightening the Element Without Over-Torquing
Insert the new element and hand-tighten it first. Use your socket or element wrench to finish tightening, but do not over-torque. Over-tightening can crush the gasket or damage threads, leading to leaks. Once installed, reconnect the wires securely and double-check all connections.
Remarque : Do not restore power until the tank is completely refilled and all air is purged from the system.
Restoring Power and Water to the Water Heater
After you install the new element, you need to restore both power and water to your water heater safely. This process ensures the new element works correctly and prevents damage. Follow these steps to bring your system back online:
-
Refill the Tank Completely
Close the drain valve and remove the hose. Open the cold water supply valve. Let the tank fill until you hear water stop running. Open a hot water faucet in your home. Allow water to flow until you see a steady stream without air bubbles. This step removes trapped air and prevents dry firing the new element. -
Inspect for Leaks
Check around the new element and gasket for any signs of water leakage. If you see moisture, tighten the element slightly or reseat the gasket. Do not proceed until you confirm the area is dry. -
Restore Electrical Connections
Confirm the circuit breaker remains off. Inspect all wiring connections to the element. Make sure wires are tight and secure. Replace the insulation and access panel over the element. -
Reset the Water Heater
Locate the reset button behind the access panel. Press and hold it until you hear a click. This step ensures the thermostat resets and prepares the heater for operation. -
Turn On the Power
Return to your electrical panel. Flip the circuit breaker to the “on” position. Listen for bubbling or heating noises from the tank. These sounds indicate the element is working. -
Test Hot Water Output
Wait about 30 minutes for the tank to heat. Open a hot water faucet and check the temperature. If the water heats up as expected, your installation succeeded. -
Monitor for Issues
Watch for repeated breaker trips or leaks. If the breaker trips again or you notice persistent leaks, turn off the power immediately. Double-check wiring and element installation. If problems continue, contact a licensed professional for further inspection.
⚡ Conseil : Never restore power to the water heater until the tank is full. Dry firing can destroy the new element in seconds.
By following these steps, you protect your equipment and ensure safe operation. Careful attention during this phase helps you avoid costly mistakes and extends the life of your water heater.
Tips for Dealing with Stuck or Rusted Water Heater Elements
Stuck or rusted elements can turn a simple repair into a challenging task. You can use several proven techniques to loosen a stubborn water heater element without damaging your equipment. The right approach saves time and prevents costly mistakes.
Using Penetrating Oil on the Water Heater Element
Huile pénétrante helps break down rust and corrosion that lock the element in place. Start by applying a generous amount of penetrating oil directly to the threads of the element. Allow the oil to soak for at least 30 minutes. This waiting period gives the oil time to seep into the corrosion and loosen the bond.
Conseil : For severe rust, let the oil sit for several hours or even overnight. Patience increases your chances of success.
After soaking, use a high-quality 1-1/2 inch socket or a tubular element wrench to attempt removal. If the element remains stuck, repeat the oil application. Avoid using excessive force at this stage to prevent rounding off the hex head.
Applying Heat Safely to the Water Heater Element
Heat can help expand the metal around the element, making it easier to break the rust bond. Use a propane torch to gently heat the area surrounding the element. Move the flame in a circular motion to distribute heat evenly. Do not apply direct heat to plastic parts or wiring.
- Always wear safety glasses and gloves when working with open flames.
- Keep a fire extinguisher nearby for added safety.
- Allow the area to cool slightly before attempting removal.
Thermal expansion often creates just enough movement to free a stuck element. After heating, try loosening the element again with your socket or wrench.
When to Use Extra Leverage with a Breaker Bar
Sometimes, standard tools do not provide enough torque to loosen a stuck element. In these cases, a breaker bar becomes essential. A breaker bar is a long, sturdy steel pipe that fits over your socket wrench handle. This tool multiplies your leverage, making it easier to turn stubborn parts.
Follow these steps for safe and effective use:
- Attach a true-fit 6-point deep socket to the element.
- Slide the breaker bar over the socket wrench handle.
- Apply steady, controlled pressure. Avoid sudden jerks.
- Once the element begins to move, remove the breaker bar and finish unscrewing with the socket wrench.
Remarque : Use the breaker bar only after trying penetrating oil and heat. Excessive force can damage the tank or the element threads.
If the element head is rounded or the wrench slips, secure the wrench with a ratchet strap around the water heater. This trick holds the tool in place and prevents slipping, allowing you to apply more torque safely.
By following these methods, you increase your chances of removing even the most stubborn water heater elements without causing damage.
Knowing When to Call a Professional for Water Heater Repairs
You may feel confident handling basic maintenance or replacing a heating element, but some situations require the expertise of a licensed professional. Recognizing these signs early can save you from costly repairs, water damage, or even safety hazards. Here are the most common indicators that you should call a professional for your water heater:
-
Eau chaude irrégulière ou inexistante
If you notice your water temperature fluctuates or you have no hot water at all, this often points to a faulty thermostat, heating element, or significant sediment buildup. These issues can be complex and may involve electrical or gas components. -
Unusual Noises
Loud banging, popping, or rumbling sounds coming from your tank usually signal sediment hardening at the bottom. This buildup reduces efficiency and can damage the tank if left untreated. -
Rusty, Discolored, or Cloudy Water
When you see rust-colored or murky water from your taps, corrosion inside the tank is likely. This problem can lead to leaks or tank failure. Discolored water also suggests mineral buildup, which affects water quality and appliance lifespan. -
Water Leaks Around the Heater
Any sign of water pooling near the base or dripping from connections requires immediate attention. Leaks can result from worn gaskets, loose fittings, or cracks in the tank. Ignoring leaks increases the risk of water damage and mold growth. -
Visible Corrosion or Damage
Check for rust, cracks, or other visible damage on the exterior of your unit. These signs indicate structural problems that often require professional assessment or replacement. -
Pilot Light or Burner Issues (Gas Heaters)
If your pilot light keeps going out or the burner fails to ignite, you may have a gas supply or thermocouple problem. Gas-related repairs involve safety risks and should only be handled by qualified technicians. -
Unusual Smells
A sulfur or rotten egg odor from your hot water suggests bacteria buildup inside the tank. Specialized cleaning or disinfection may be necessary. -
L'âge du chauffe-eau
Most units last 8 à 12 ans. If your heater approaches or exceeds this range, schedule a professional inspection. Older units are more prone to leaks, inefficiency, and sudden failure.
🛠️ Conseil : Entretien régulier by a professional can prevent many of these issues and extend the life of your water heater.
You protect your home and ensure reliable hot water when you recognize these warning signs and seek expert help. Attempting complex repairs without proper training can lead to injury, void warranties, or cause further damage. Trust a licensed technician for repairs involving electrical, gas, or structural concerns.
Avoiding Leaks and Ensuring a Proper Water Heater Fit
Checking the Water Heater Element Gasket
A secure seal starts with the gasket. You should always inspect the gasket before installing a new water heater element. Look for cracks, tears, or signs of wear. Even a small defect can cause leaks. Remove the old gasket and clean the mounting surface thoroughly. Any debris or corrosion left behind can prevent a proper seal. Place the new gasket on the element, making sure it sits flat and covers the entire contact area.
To further improve the seal, apply a thin layer of Teflon pipe dope to both the gasket and the mounting surface. Wrap Teflon tape around the threads of the element a couple of times before applying pipe dope. This combination helps prevent leaks by filling small gaps and providing extra protection. After installing the element, tighten it securely but avoid overtightening, which can damage the gasket or threads.
Tip: If you notice persistent leaks after installation, check the gasket and consider replacing it. Sometimes, a faulty gasket or improper seating causes ongoing issues.
Inspecting for Corrosion on the Water Heater Element
Corrosion is a common cause of leaks and poor performance. You should check for signs of rust or mineral buildup on the water heater element and surrounding tank area. Look for water spots or puddles at the base, which may indicate pinholes or cracks from corrosion. Examine the element for rusty or flaking metal. Strange noises like rumbling or popping often signal sediment buildup inside a corroded tank.
You can also inspect the anode rod by unscrewing it and checking for deterioration or heavy mineral deposits. A depleted anode rod means corrosion protection has weakened. Water discoloration, such as brown or orange tints, often points to internal rust. Regular maintenance, including flushing the tank and replacing the anode rod, helps prevent corrosion and extends the life of your water heater.
- Signs of corrosion to watch for:
- Rusty or flaking metal on the element
- Water discoloration from hot taps
- Leaks or puddles near the base
- Bruits inhabituels pendant le fonctionnement
Testing for Leaks After Water Heater Installation
After installing a new element, you must test for leaks before restoring full operation. Follow these steps to ensure a watertight fit:
- Refill the tank and watch the area around the element for any signs of moisture.
- Inspect the pressure relief valve by lifting and releasing its lever. A brief water discharge that stops quickly indicates a good seal.
- Check all shut-off valves and pipe fittings for leaks. Tighten any loose connections with an adjustable wrench.
- Examine pipe threads for damage or wear. Replace any damaged components.
- Apply thread seal tape or pipe joint compound to threaded connections if needed.
- Look for corrosion on pipes, fittings, or valves. If you find corrosion, consult a professional plumber.
- Support all pipe fittings to prevent strain and reduce the risk of leaks.
Note: You can use a soap and water mixture to check for gas leaks if your system uses gas. Bubbles will form at leak points.
Careful inspection and testing help you catch leaks early and protect your home from water damage.
Common Water Heater Socket Size Mistakes to Avoid
Using the Wrong Socket Size for the Water Heater Element
Selecting the correct socket size is essential for a successful repair. If you use the wrong size, you risk stripping the hex head or damaging the threads on your water heater element. This mistake can make removal much harder and may even require you to replace the entire element. Always measure the hex head before you start. You can use a tape measure or caliper for accuracy. Most elements require a 1-1/2 inch socket, but some models differ. Double-check your manual or the markings on the element itself.
Tip: Bring your old element or a clear photo to the hardware store if you feel unsure about the size.
A socket that fits loosely will slip and round off the corners. A socket that is too small will not fit at all. Take your time to confirm the correct fit before applying any force.
Over-Tightening the Water Heater Element
You might think that tightening the element as much as possible will prevent leaks. In reality, over-tightening can crush the gasket or strip the threads. This mistake often leads to leaks or even permanent damage to the tank. Always start by hand-tightening the element. Then, use your wrench or socket to snug it up. Stop when you feel firm resistance. Do not use excessive force or a long breaker bar for final tightening.
- Over-tightening can:
- Damage the gasket
- Strip the threads
- Cause leaks after installation
If you notice a leak after filling the tank, try tightening the element just a little more. If the leak continues, check the gasket or consider replacing it.
Skipping Water Heater Safety Steps
Safety should always come first when you work on a water heater. Skipping important steps can put you at risk for electric shock, burns, or water damage. Always turn off the power at the breaker before you begin. Use a voltage tester to confirm the unit is off. Shut off the water supply and drain the tank completely. Wear gloves and safety glasses to protect yourself from hot water or sharp edges.
⚠️ Never restore power to the water heater until the tank is full and all air is purged. Dry firing can destroy the new element in seconds.
Follow each safety step carefully. Rushing or skipping steps can lead to injury or expensive repairs. Take your time and double-check your work for the best results.
Forgetting to Check for Leaks in the Water Heater
Many homeowners overlook one of the most important steps after replacing or servicing a water heater element: checking for leaks. If you skip this step, you risk water damage, higher utility bills, and even premature failure of your equipment. You need to make leak inspection a routine part of every water heater maintenance or repair.
When you install a new element or gasket, small mistakes can lead to leaks. Even a slightly misaligned gasket or a loose connection can allow water to escape. You might not notice a slow leak right away, but over time, it can cause corrosion, mold growth, or electrical hazards. You should always check for leaks before restoring power or closing the access panel.
Here is a simple checklist to help you avoid this common mistake:
- Visually inspect the area around the new element and gasket. Look for any signs of moisture or drips.
- Run water into the tank and watch for leaks. Open the cold water supply valve and let the tank fill completely. Observe the element area as the pressure builds.
- Check all connections and fittings. Use your hand to feel for dampness around pipe joints and threaded connections.
- Testez la soupape de surpression. Lift the lever briefly and ensure water flows and stops as expected. This test helps confirm the system holds pressure without leaking.
- Monitor for several minutes. Sometimes, leaks appear only after the tank reaches full pressure or heats up.
Conseil : Place a dry paper towel under the element area. If you see any wet spots after a few minutes, you have a leak that needs attention.
You should never assume your installation is leak-free without a thorough check. Even experienced professionals can miss a small drip if they rush. Taking a few extra minutes to inspect your work protects your home and extends the life of your water heater.
If you find a leak, do not panic. Turn off the water supply and power, then recheck the gasket and connections. Tighten the element slightly or reseat the gasket if needed. If the leak persists, you may need to replace the gasket or consult a professional.
By making leak checks a habit, you prevent costly repairs and ensure your water heater operates safely and efficiently.
You should always double-check your water heater model, but most elements require a 1-1/2 inch socket. The right tools and careful steps help you achieve a safe, leak-free installation. Before you begin, remember these essentials:
- Turn off the power supply.
- Drain the tank below the element.
- Remove and replace the element with a proper socket.
- Tighten connections securely.
- Inspect for leaks before restoring power.
If you face challenges or feel unsure, consult a professional plumber for peace of mind.
FAQ
Quelle est la taille de douille standard pour la plupart des éléments de chauffe-eau ?
You will usually need a 1-1/2 inch deep well socket for most residential water heater elements. Always check your water heater’s manual or measure the element before starting your project.
Puis-je utiliser une clé à molette au lieu d'une douille ?
You can use an adjustable wrench in some cases. However, a deep well socket or a water heater element wrench gives you a better grip and reduces the risk of damaging the element.
How do I know if my water heater element needs replacing?
You may notice lukewarm water, slow heating, or no hot water at all. Use a multimeter to test for continuity. If the element fails the test, you should replace it.
Where can I buy the correct socket for my water heater element?
You can find the right socket at most hardware stores, plumbing supply shops, or online retailers. Look for a 1-1/2 inch deep well socket or a water heater element wrench.
What should I do if the element is stuck and will not budge?
Apply penetrating oil to the threads and let it soak. Use a breaker bar for extra leverage. If the element remains stuck, consider calling a professional to avoid damaging your tank.
Is it safe to replace a water heater element myself?
You can replace a water heater element if you follow all safety steps. Always turn off the power and water supply first. If you feel unsure, contact a licensed plumber for help.

