You can transform your seating experience with heated seat elements at home. Seat heaters provide warmth and an elevated sense of comfort, whether you relax after a long day or work from your favorite chair. Many Elemento calefactor options come from Calefacción eléctrica Jinzhong, un líder entre Fabricantes de elementos calefactores. You will find elementos calefactores de electrodomésticos that suit your needs. The average cost for aftermarket heated seat installation ranges from $500 to $2,100, as shown below:
| Type of Heated Seat | Cost Range (USD) | Labor Cost (USD) | Total Cost Range (USD) |
|---|---|---|---|
| Aftermarket | $300 – $1,500 | $200 – $600 | $500 – $2,100 |
| OEM | $1,200 – $3,000 | $200 – $600 | $1,400 – $4,000 |
Understanding Heated Seat Elements
What Are Heated Seat Elements?
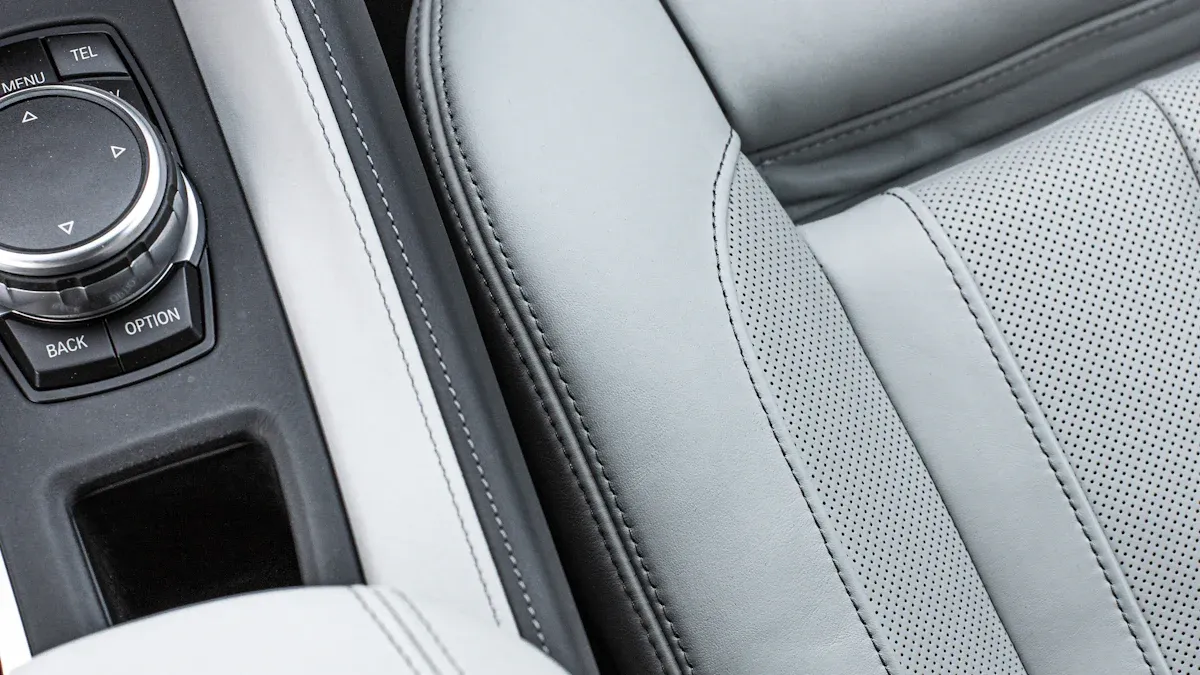
Heated seat elements are specialized components that deliver warmth directly to your seating surface. You find these systems in vehicles, office chairs, and home furniture. Manufacturers design them to fit inside seat cushions and backrests, providing a comfortable temperature when activated. The main components include switches for both left and right seats, an HVAC control, a seat heating control module, heating elements for the cushion and back, and temperature sensors for both driver and passenger seats.
- Left heated seat switch
- Right heated seat switch
- HVAC control
- Seat heating control module
- Driver seat cushion heating element
- Driver seat back heating element
- Driver seat cushion temperature sensor
- Passenger seat cushion heating element
- Passenger seat back heating element
- Passenger seat cushion temperature sensor
You control the warmth using a switch, which sends a signal to the heated seat module. The module directs battery current to the heating element, energizing it and distributing heat evenly across the seat.
How Do Heated Seat Elements Work?
You activate heated seat elements by pressing a switch. The system uses electric coils embedded in the seat cushion and backrest. These coils resist electrical flow, converting energy into heat. The temperature sensor monitors the heat output, ensuring you stay comfortable and safe. The heated seat module manages the entire process, responding to your input and the ignition switch. Multiple heating circuits operate in parallel, which guarantees effective heat distribution.
Many seat heaters offer adjustable temperature settings. You select your preferred level of warmth, and advanced models automatically adjust based on ambient temperature. Heated seat elements improve thermal comfort, especially during cold conditions. They help maintain toe skin temperature and increase foot thermal sensation at air temperatures of 15 and 20 °C. You experience optimal comfort when the skin temperature in contact with the seat back is higher than with the seat cushion.
Tip: Heated seat elements work best when you allow the system to pre-warm the seat before sitting down, especially on chilly mornings.
Benefits of Adding Heated Seat Elements
You gain several advantages by installing heated seat elements at home. Immediate warmth provides instant comfort, which is especially valuable in cold weather. You can personalize your comfort level using adjustable controls. Heated seat elements offer all-weather convenience, making them useful throughout the year.
- Immediate warmth for cold days
- Personalized comfort with adjustable settings
- Year-round convenience
- Muscle relaxation and stress relief
- Back pain relief through improved circulation
- Ergonomic support for better posture
Gentle warmth from the heating element helps relax tight muscles and relieve stress. If you experience back pain, the heat can improve blood circulation and reduce stiffness. Heated seat elements also promote better posture and reduce muscle stiffness, which enhances comfort during long periods of sitting.
Choosing the Right Heated Seat Kit
Selecting the right heated seat kit ensures you achieve both comfort and safety in your home seating. You will find a variety of kits designed for different applications and preferences. Understanding the available options and key features helps you make an informed decision.
Types of Heated Seat Kits
Universal Kits
Universal kits fit a wide range of seats and furniture. You can use them for most home chairs, office seats, or even car seats. These kits offer flexibility and often come with adjustable heating pads. Brands like Dorman have become popular for their reliable universal kits. You can also find advanced options that combine both heating and cooling features, giving you year-round comfort.
Vehicle-Specific Kits
Vehicle-specific kits are tailored for particular car models. You get a precise fit and seamless integration with your vehicle’s existing controls. Canada Seat Skins is a brand recommended by users for its high-quality heated pads designed for specific vehicles. If you want a factory-like finish in your car, these kits provide the best match.
Home Furniture Kits
Home furniture kits are designed for sofas, recliners, and office chairs. You can install these kits without altering the original look of your furniture. Many home kits use carbon fiber heating elements for efficient and even heat distribution. Some advanced models offer both heating and cooling, making them suitable for all seasons.
Tip: Choose a kit that matches your seat type and installation skills for the best results.
Key Features to Look For
When you shop for a heated seat kit, focus on features that enhance comfort, safety, and ease of use. The table below highlights important features to consider:
| Característica | Descripción |
|---|---|
| Type of Heating Element | Carbon fiber elements provide efficient heat and faster response. |
| Control de temperatura | Multiple heat settings allow you to personalize your comfort. |
| Ease of Installation | DIY-friendly kits include clear instructions and save you on service costs. |
Adjustable Heat Settings
You benefit from kits with multiple heat settings. These allow you to adjust the warmth to your preference, ensuring comfort in any season.
Safety Certifications
Look for kits with recognized safety certifications. These certifications confirm that the kit meets industry standards for electrical safety and performance.
Ease of Installation
DIY-friendly kits come with clear instructions and all necessary hardware. You can complete the installation with basic tools, saving time and money.
Where to Buy Quality Kits
You can purchase quality heated seat kits from reputable retailers and online platforms. Consider these trusted sources:
- Summit Racing
- Dorman
- Rostra Precision Controls
- Corbeau Seats USA
- Distinctive Industries
- The Warming Store
- Champion Auto Systems
You will also find specialized heated clothing and accessories from brands like Gerbing and California Heat. These retailers offer a wide selection of kits, ensuring you find the right fit for your needs.
Note: Always verify product specifications and compatibility before purchasing a kit for your home or vehicle.
Tools and Materials You’ll Need for Seat Heaters
Before you start your heated seat installation, you need the right tools and materials. Using the correct equipment ensures a smooth process and helps you achieve a professional result. You also reduce the risk of damaging your seats or electrical system.
Essential Tools
Destornilladores
You need both flathead and Phillips screwdrivers. These tools help you remove seat covers, panels, and fasteners. Choose screwdrivers with comfortable grips for better control. Magnetic tips can help you avoid losing screws during the process.
Alicates
Pliers allow you to grip, bend, and twist wires or connectors. Needle-nose pliers work well for tight spaces. You can also use them to pull out stubborn clips or secure small parts.
Wire Strippers
Wire strippers help you remove insulation from wires without damaging the metal underneath. You need clean, exposed wire ends for secure electrical connections. Adjustable wire strippers fit different wire gauges and improve accuracy.
Multímetro
A multimeter lets you test voltage, continuity, and resistance. You use it to check power sources and verify connections. This tool helps you diagnose issues quickly and ensures your installation is safe.
Additional Materials
Electrical Tape
Electrical tape insulates and protects wire connections. You wrap it around exposed wires to prevent short circuits. Choose high-quality tape that withstands heat and wear.
Zip Ties
Zip ties keep wires organized and secure. You use them to bundle cables and prevent tangling. Proper cable management reduces the risk of accidental damage.
Heat-Resistant Adhesive
Heat-resistant adhesive secures heating pads to seat surfaces. It withstands high temperatures and prevents the pads from shifting. Always select adhesives rated for automotive or furniture use.
Consejo: Choose breathable and heat-resistant materials like cotton blends, mesh fabrics, or automotive-grade synthetics for your seat covers. These materials allow heat to dissipate evenly and prevent overheating. High-quality fabrics also handle regular use and temperature changes better, providing longer-lasting comfort.
Preparación de su espacio de trabajo
A well-prepared workspace makes your installation safer and more efficient. Follow these steps to get ready:
- Ensure your workspace is well-lit and clean.
- Park your car on level ground and apply the parking brake if working in a vehicle.
- Organize your tools and parts to save time and prevent loss.
- Turn off your engine and remove the keys from the ignition.
- Disconnect the negative battery terminal to prevent short circuits.
- Wear safety glasses to protect your eyes from sparks or debris.
- Avoid working in wet conditions to reduce the risk of electrical shock.
- Keep your workspace tidy and well-lit to avoid mistakes.
Nota: Careful preparation not only protects you but also helps you avoid costly errors during installation.
With the right tools, materials, and a safe workspace, you set yourself up for a successful heated seat installation.
Step-by-Step Installation Guide for Heated Seat Elements
Preparing the Seat
Removing the Seat Cover
Start by removing the seat cover to access the cushion. Use a flathead or Phillips screwdriver to detach any screws or clips holding the cover in place. Work slowly to avoid tearing the fabric or damaging the foam underneath. If your seat uses Velcro or plastic hooks, gently release them with your hands or a pair of pliers. Place all fasteners in a small container so you do not lose them during the process.
Consejo: Take photos of each step as you remove the seat cover. These images will help you reassemble the seat correctly later.
Cleaning the Surface
Once you expose the seat cushion, clean the surface thoroughly. Use a vacuum to remove dust, crumbs, and debris. Wipe the foam with a damp cloth to eliminate any remaining dirt. Allow the cushion to dry completely before moving to the next step. A clean surface ensures the heating pads adhere properly and prevents future issues with the system.
Installing the Heating Pads
Positioning the Pads
Lay out the heating pads on the seat cushion and backrest. Most kits include templates or markings to guide placement. Center each pad to provide even heat distribution. Avoid placing pads over seams, sensors, or moving parts. If your seat has built-in airbags or sensors, check the manufacturer’s instructions to prevent interference with the system.
Securing the Pads in Place
Peel off the adhesive backing from each pad. Press the pads firmly onto the cushion and backrest, smoothing out any wrinkles. For extra security, use heat-resistant adhesive as recommended by your kit. Make sure the pads do not shift when you move the seat or sit down. Proper placement and secure attachment help the system deliver consistent warmth and prevent damage to the pads.
Nota: Some users have reported issues with the quality of aftermarket heating pads. Inspect connectors and thermal switches before finalizing installation to avoid future malfunctions.
Wiring and Power Connection
Routing the Wires Safely
Route the wires from the heating pads to the power source. Tuck wires along the seat frame, away from moving parts and sharp edges. Use zip ties to bundle and secure the wiring. Keep wires clear of seat adjustment mechanisms and heating elements. This step protects the system from accidental damage and ensures long-term reliability.
- Keep wires away from moving parts and heat sources.
- Secure wiring with zip ties to prevent tangling.
- Avoid pinching wires under seat tracks or hinges.
Connecting to Power Source
Connect the wires from the heating pads to the power supply. For most home furniture, use a compatible power adapter. In vehicles, connect to the car’s electrical system. Always install an inline fuse rated 10-15 amps above your seat cover’s requirement. This fuse protects the system from electrical surges and short circuits. Use electrical tape or heat shrink tubing to insulate all connections. Test each connection with a multimeter before closing up the seat.
If you experience connection issues, check for blown fuses first. Use the correct amp rating for fuses to maintain system safety. Good grounding is essential—attach the ground wire to a clean, bare metal surface.
For hardwired setups, select the appropriate wire gauge. Use 14-gauge wire for runs up to 10 feet. For longer distances, switch to 12-gauge wire to prevent power loss in the system.
Installing the Switch
Mount the control switch in a convenient location. For home chairs, attach the switch to the side of the seat or armrest. In vehicles, use a blank panel or dashboard location. Connect the switch to the wiring harness as directed by your kit. Double-check all connections before powering up the system. A properly installed switch allows you to control the heat level and ensures safe operation.
Llamada: Many installation challenges involve wiring. If both the seat back and bottom fail to heat, inspect the wiring for loose or faulty connections. Faulty connectors or thermal switches can also cause the system to malfunction.
Take your time during installation. Careful attention to detail helps you avoid common problems and ensures your heated seat elements work reliably.
Reassembling and Testing
Reattaching the Seat Cover
You have installed the heating pads and completed the wiring. Now, you need to reattach the seat cover. Begin by aligning the cover with the seat cushion and backrest. Make sure the fabric sits smoothly over the heating pads. You should avoid wrinkles or bunching, which can affect comfort and heat distribution.
Use the original fasteners, clips, or screws to secure the cover. Insert each fastener in its correct position. Tighten screws gently to prevent damage to the seat frame or fabric. If your seat uses Velcro or hooks, press them firmly into place. You should check that the cover fits snugly and does not shift when you sit down.
Consejo: Take a moment to inspect the seams and edges. A well-fitted cover protects the heating elements and maintains the seat’s appearance.
If you notice resistance while reattaching the cover, stop and check for wires or pads that may have shifted. Adjust them as needed before continuing. You should avoid forcing the cover, which can damage the heating system or seat foam.
Testing the System
After you reassemble the seat, you need to test the heated seat elements. Connect the power supply and turn on the system. Set the heat to the highest setting. Wait a few minutes and feel the seat surface for warmth. You should notice even heat distribution across the cushion and backrest.
Monitor the system closely during the first test. Look for signs of proper operation. The switch should respond to your input, and the heating pads should warm up quickly. If you installed adjustable settings, cycle through each level to confirm they work.
You must perform several safety checks to ensure reliable performance:
- Turn the heated seat to high and watch the connections for smoke. This step helps you prevent burns or damage.
- Feel the seat for hot spots. Loose connections can cause overheating and damage the seat.
- Listen for unusual sounds from the wiring or heating pads.
- Inspect the seat cover for signs of melting or discoloration.
- Check the fuse and wiring for heat buildup.
If you detect any problems, turn off the system immediately. Inspect the wiring and connections. You may need to adjust or repair the installation before using the seat heater again.
Nota: A successful test confirms that you installed the heated seat elements correctly. You can now enjoy warmth and comfort with confidence.
You should repeat the test after several uses to ensure continued safety and performance. Regular monitoring helps you catch issues early and extend the life of your heated seat system.
Powering Your Heated Seat System
Power Options for Seat Heaters
You have several choices when powering a seat heating system at home or in your vehicle. Selecting the right option ensures safety and reliable performance.
Using a Car’s Electrical System
If you install a seat heating system in your vehicle, you connect it directly to the car’s electrical system. Most vehicles provide a 12-volt power supply, which matches the requirements of many aftermarket seat heaters. You route wires to the fuse box or an accessory power source. Always use an inline fuse to protect the seat heating system from electrical surges. You should avoid connecting to circuits that already support high-demand devices. This approach keeps your seat heating system stable and prevents overloads.
Using a Home Power Adapter
For home furniture, you rely on standard household electricity. Heated seat elements, including heated toilet seats, typically require a 120-volt outlet. You plug the power cord into the outlet, which usually ranges from 3 to 6 feet in length. You should install a GFCI outlet in bathrooms for added safety. Avoid using extension cords, as they may pose safety risks. Most home seat heating systems consume between 50 and 100 watts, making them energy-efficient for daily use.
Tip: Always check the manufacturer’s instructions for voltage and power requirements before plugging in your seat heating system.
Choosing the Right Power Supply
You must select a power supply that matches the specifications of your seat heating system. For vehicles, use the recommended wire gauge and fuse rating. For home setups, verify that your outlet supports the wattage of the seat heating system. If you use a power adapter, ensure it converts voltage correctly and provides stable output. A mismatched power supply can cause malfunctions or reduce the lifespan of your seat heating system.
| Setting | Power Consumption (Watts) |
|---|---|
| Bajo | 15 |
| Med | 30 |
| Alta | 45 |
The table above shows typical power consumption for seat heating systems. You see that higher settings draw more power, so choose a supply that handles peak demand.
Managing Power Consumption
You want your seat heating system to operate efficiently without wasting energy. Heated seat elements cycle on and off based on temperature, so they do not draw power continuously. On average, you use about 15 watts on low, 30 watts on medium, and 45 watts on high. Some systems may reach up to 60 watts, especially in vehicles. You should monitor usage if you rely on battery power, as extended use can drain the battery faster.
- Use lower heat settings for longer sessions.
- Turn off the seat heating system when not in use.
- Check for automatic shut-off features to prevent overheating.
Note: Energy-efficient seat heating systems help you stay comfortable while keeping electricity costs low.
Safety Tips and Common Concerns with Heated Seat Elements
When you install heated seat elements at home, you must prioritize safety and address common concerns. Proper installation and regular checks help you avoid electrical hazards and ensure reliable performance.
Electrical Safety Precautions
Avoiding Short Circuits
You reduce the risk of short circuits by following essential electrical safety steps. Always use a GFCI outlet for your heated seat system. This outlet protects you from electrical shocks, especially in areas with moisture. Avoid using extension cords, as they can overheat and cause fires. Keep all electrical cords away from water sources to prevent accidental shocks.
- Ensure a GFCI outlet is available for the heated seat.
- Avoid using extension cords for the installation.
- Keep electrical cords away from water sources to prevent shocks.
If your home does not have a GFCI outlet, hire a professional electrician to install one. You should also use a dedicated line for the outlet to handle the power needs of the heating element.
- Hire a professional electrician if a GFCI outlet is not already installed.
- Use a dedicated line for the outlet to handle the heating element’s power requirements.
Proper Insulation
You must insulate all wire connections with high-quality electrical tape or heat shrink tubing. Proper insulation prevents exposed wires from touching each other or metal surfaces, which can cause shorts or sparks. Always double-check your work before powering up the system.
Consejo: Inspect all wiring for damage before installation. Replace any frayed or worn wires to maintain safety.
Preventing Overheating
Heated seat elements can overheat if you do not follow best practices. Overheating may result from electrical faults, damaged wiring, or faulty thermostats. The table below highlights common causes of overheating in heated seat systems:
| Vehicle Manufacturer | Año | Cause of Overheating | Descripción |
|---|---|---|---|
| Mazda | 2010 | Electrical grounding issues | Control circuit overheating in cold conditions, potentially causing burns or fire. |
| Volvo | 2002 | Compression damage | Damage to electrical wiring from seat compression, leading to shorts and fire risk. |
| BMW | 2003-2004 | Wear and tear on heating mat | Overheating due to excessive contact with side bolster during entry/exit. |
| Bentley/Rolls-Royce | 1999 | Thermostat misplacement | Misplaced thermostat causing excessively high seat temperatures. |
You can prevent overheating by checking for secure wiring, using quality components, and ensuring the thermostat sits in the correct position. Avoid placing heavy objects on the seat, which can compress wires and cause damage.
Solución de problemas comunes
You may encounter problems with heated seat elements, such as pads not heating or switch malfunctions. Quick troubleshooting helps you restore comfort and safety.
Pads Not Heating
If your seat pads do not heat up, follow these steps:
- Reset the memory seat control module. Locate the black box under the driver’s seat and disconnect the electrical connector for five minutes.
- Reconnect the electrical connector and restart the system to check if the heated seats work.
- Ensure the heated seat switch is in the ‘on’ position and that the seat is below normal body temperature.
- Use the service manual to check for power and ground at the memory seat control module and heating element.
- If the heating element is defective, replace the entire part.
Switch Malfunctions
A faulty switch can prevent your heated seat from working. Check the switch for loose connections or signs of wear. Replace the switch if it does not respond or feels loose. Always test the system after making repairs to confirm proper operation.
Nota: Regular maintenance and prompt troubleshooting keep your heated seat system safe and reliable.
When to Seek Professional Help
You may feel confident handling most heated seat installations, but some situations require a professional’s expertise. Recognizing these moments protects your safety and ensures your seat heater works as intended.
Consider seeking professional help if you encounter any of the following scenarios:
-
Complex Electrical Systems:
If your seat heater installation involves advanced vehicle electronics or integrated safety systems, you should consult a certified technician. Modern vehicles often use multiplexed wiring and sensitive sensors. Incorrect wiring can trigger warning lights or disable important features like airbags. -
Persistent Malfunctions:
If your heated seat system fails to operate after careful troubleshooting, you may face a deeper electrical issue. Repeated blown fuses, unresponsive switches, or inconsistent heating often signal a problem beyond basic DIY repair. -
Unusual Smells or Smoke:
If you notice burning smells, smoke, or excessive heat during testing, disconnect the power immediately. These signs indicate a potential short circuit or overheating component. A professional can inspect the wiring and replace damaged parts safely. -
Unfamiliar Wiring Diagrams:
If you cannot interpret the wiring diagrams or instructions provided with your kit, you risk making dangerous mistakes. Professional installers have the training to read complex schematics and ensure correct connections. -
Warranty Concerns:
If your vehicle or furniture remains under warranty, unauthorized modifications may void coverage. Many manufacturers require certified installation for warranty protection. Always check your warranty terms before starting a DIY project.
Consejo: When in doubt, prioritize your safety and the integrity of your vehicle or furniture. A professional installer can complete the job efficiently and reduce the risk of costly errors.
Common Signs You Need Professional Assistance
| Síntoma | Posible causa | Acción recomendada |
|---|---|---|
| Heated seat not turning on | Faulty wiring or blown fuse | Call an electrician |
| Seat heats unevenly | Damaged heating pad | Seek professional repair |
| Dashboard warning lights | Electrical system conflict | Visit a certified technician |
| Burning smell or smoke | Short circuit or overheating | Disconnect and get help |
You should never ignore warning signs or attempt repairs beyond your skill level. Professional installers use specialized tools and follow safety protocols. They can diagnose hidden issues and ensure your heated seat system operates reliably.
Nota: Investing in professional help can save you time, prevent injury, and protect your investment. If you feel uncertain at any stage, reach out to a qualified expert for guidance.
Maintenance and Longevity of Seat Heaters
Regular Checks and Cleaning
You can maximize the performance and safety of your seat heaters by following a consistent maintenance routine. Regular checks help you catch small issues before they become major problems.
- Inspect the electrical system for signs of wear, fraying, or rust on power cords and connections.
- Always disconnect the power source before cleaning to protect sensitive electrical parts.
- Use mild soap and a damp cloth for cleaning. Avoid harsh chemicals that can damage the seat material or heating components.
- Clean spills immediately to prevent stains and odors from setting into the seat.
- Ensure the seat cover is completely dry before reassembling or using the heater.
- Store the heated seat cover flat or loosely rolled during off-seasons to prevent creasing or internal wire damage.
Tip: Consistent cleaning and careful storage help you maintain both the appearance and function of your seat heaters.
Signos de desgaste o daños
You should stay alert for early warning signs that indicate your seat heater may need attention.
- Inspect the heating element for any breaks in the delicate heating wire.
- Use an electrical tester to identify faulty sections that may not heat properly.
- Check for visible damage to the seat or heating element caused by sharp objects or excessive pressure.
These design failures have led to burn holes in clothes and seat covers, minor burns to some, and severe and permanent injuries in occupants with lower body sensory deficits.
If you notice any of these signs, stop using the heater and address the issue immediately to prevent further damage or injury.
Extending the Life of Your Heated Seat Elements
You can take several proactive steps to extend the lifespan of your heated seat elements. The table below summarizes effective strategies:
| Strategy | Descripción |
|---|---|
| Regular Maintenance | Inspect and maintain heating elements to identify wear or damage, ensuring safe operation. |
| Proper Installation | Follow manufacturer’s specifications to prevent overheating and mechanical stress. |
| Control de temperatura | Use temperature control systems to avoid excessive heat fluctuations. |
| Monitor Temperature | Regularly check settings to prevent overheating. |
| Inspect for Corrosion | Look for corrosion on connectors and wires during routine checks. |
| Surge Protection | Use surge protectors to guard against electrical failures. |
| Scheduled Maintenance | Set up regular maintenance checks for early detection of potential issues. |
By following these strategies, you help your seat heaters deliver reliable warmth and comfort for years. You also reduce the risk of unexpected failures and costly repairs.
You can add heated seat elements at home with ease and achieve impressive results. Many DIY enthusiasts have shared positive experiences, including:
- Michael found installation simple and his wife requested a kit for her car.
- Gary gained confidence and saved money compared to dealership prices.
- Dave recommended seat heaters to friends after enjoying their performance.
- Simon described the process as perfect for beginners.
- Jack appreciated the affordable upgrade to car seat comfort.
- A user installed a $45 kit with minimal disassembly and a clean finish.
Follow instructions and safety tips for a rewarding project. Share your results or questions to connect with other DIY fans.
PREGUNTAS FRECUENTES
How long does it take to install heated seat elements at home?
Most installations take between 1 and 3 hours. You can complete the process faster if you have experience with basic tools and follow the instructions closely.
Can you install heated seat elements on any chair or seat?
You can install heated seat elements on most chairs, car seats, or recliners with removable covers. Always check the kit’s compatibility with your specific seat type before starting.
Are heated seat elements safe for children and pets?
Heated seat elements are safe when you follow installation instructions and use certified products. Always supervise children and pets around heated seats to prevent accidental burns or misuse.
Do heated seat elements increase your electricity bill significantly?
Heated seat elements use minimal power, usually between 15 and 45 watts. You will notice only a small increase in your electricity bill, even with regular use.
What should you do if your heated seat stops working?
First, check the fuse and wiring connections. Use a multimeter to test for power. If you cannot find the problem, consult a professional for further diagnosis and repair.
Can you wash seat covers with heating elements inside?
You should never wash seat covers with heating elements installed. Always remove the heating pads before cleaning the covers to prevent electrical damage and ensure safety.

