
You can change oven element in your electric oven without calling a professional. Many people complete this repair using only basic tools and careful attention to safety. Always stay alert to risks like electrical shock, fire from grease buildup, or burns caused by hot surfaces. Common mistakes include using the wrong tools or missing important steps. If you follow each instruction and keep your workspace clean, you can change oven element confidently and avoid accidents.
Safety First: Turn Off the Power Before You Start

Before you begin any work on your oven, you must turn off the power. This step protects you from serious hazards and ensures a safe repair process. Many people overlook this step, but it is the most important action you can take before handling any electrical component.
Why Turning Off the Power Matters
Preventing Electrical Shock
You face a real risk of electrical shock if you attempt to change an oven element while the appliance remains connected to power. The heating element stays live, even if the oven controls are off. Several incidents have shown that failing to disconnect power can result in electric shock or short circuits. In some cases, users have reported sparks or even fires when the element or wiring was faulty. You should always disconnect power at the breaker or oven control to avoid these dangers.
Ensuring Complete Power Disconnection
You cannot rely on simply turning off the oven at the control panel. Some ovens continue to supply electricity to the element, even when switched off. Only by shutting off the circuit breaker or unplugging the oven can you guarantee complete power disconnection. This step prevents accidental activation and reduces the risk of fire or damage to oven components. If you skip this step, you may also find it difficult to remove wires safely, increasing the chance of damaging the oven or causing a malfunction.
Essential Safety Precautions
Letting the Oven Cool Down
You should never work on a hot oven. Wait until the oven has cooled completely before starting any repair. Hot surfaces can cause severe burns, especially if you accidentally touch the element or the oven walls. Give the oven enough time to reach room temperature. This simple precaution keeps you safe from unnecessary injuries.
Llevar equipo de protección
Always wear protective gear when working on your oven. Use work gloves to protect your hands from sharp edges and electrical contacts. Safety glasses shield your eyes from dust or debris. Appliance manufacturers recommend several safety precautions before you begin:
1. Inspect the circuit breaker for scorch marks or corrosion. 2. Check the oven wiring for exposed wires or burn marks. 3. Confirm the oven uses a dedicated circuit to prevent overload. 4. If you notice any damage or if the breaker trips frequently, call a professional electrician.
Tip: If you feel unsure about any step or notice signs of electrical damage, stop and consult a professional. Your safety comes first.
By following these precautions, you reduce the risk of electrical shock, fire, and injury. You also protect your oven from further damage and ensure a successful repair.
Gather Tools and Materials to Change Oven Element
Before you begin the repair, you need to gather the right tools and materials. Having everything ready will help you work efficiently and avoid unnecessary delays. You also reduce the risk of mistakes or accidents by preparing your workspace in advance.
Tools You’ll Need
Screwdrivers and Work Gloves
You need a few basic hand tools for this project. Most ovens require a Phillips-head screwdriver to remove the screws that secure the element. Some models may use a flathead screwdriver or a nut driver. guantes de trabajo protect your hands from sharp edges and electrical contacts. Always wear gloves to prevent cuts and burns.
- Phillips-head screwdriver
- Flathead screwdriver (if required)
- Nut driver (alternative for screw removal)
- guantes de trabajo
Flashlight and Multimeter
A flashlight helps you see inside the oven, especially if your kitchen lighting is dim. You should also use a multimeter to test the oven heating element for continuity. This tool confirms whether the old element has failed and ensures the new one works before you reassemble the oven. Needle-nose pliers can help you handle wires and connectors safely.
| Herramienta | Purpose/Use |
|---|---|
| Multímetro | Testing the heating element for continuity |
| Alicates de punta fina | Handling wires and connectors |
| Flash | Illuminating the oven interior |
| Comprobador de tensión sin contacto | Checking for live wires before touching anything |
Tip: Electrical or masking tape can help you secure wires temporarily during the repair.
Choosing the Right Replacement Element
Identifying Your Oven Model
Usted debe identify your oven’s model and serial number before you buy a replacement oven element. Manufacturers often produce several versions of elements for the same oven model. You usually find the model number inside the oven door, on the frame, or near the bottom drawer. Write down the model and serial number, then check the type of element you need—bake (bottom) or broil (top). Measure the length, width, and connector spacing of the old element. Confirm the wattage and voltage requirements for your oven.
Manufacturers may produce multiple versions of heating elements for the same oven model due to design revisions. Therefore, the serial number or code is crucial to obtaining the correct part. It is recommended to provide the model and serial number to parts sellers and confirm compatibility before purchase to avoid returns.
Where to Buy the Correct Part
You should purchase your replacement oven element from a reputable dealer. Reliable Parts offers a wide selection of genuine OEM oven and range parts from top brands, both online and in-store. PartsFe is another trusted supplier in the USA, providing OEM and compatible parts with same-day shipping, secure payments, and easy returns. These sources help you avoid counterfeit or low-quality parts.
| Source Name | Descripción | Características principales | Purchase Options |
|---|---|---|---|
| Reliable Parts | Established since 1933, #1 source for appliance parts with unmatched quality. | Wide selection of genuine OEM oven and range parts from top brands. | Online and in-store |
| PartsFe | Trusted USA-based supplier of high-quality restaurant equipment parts including oven heating elements. | OEM and compatible parts, same-day shipping, secure payments, 24/7 support, easy returns. | Online shopping only |
Note: Always confirm compatibility with your oven’s model and serial number before making a purchase. OEM parts ensure the best fit and performance.
Prepare the Oven: Remove Racks and Access the Element
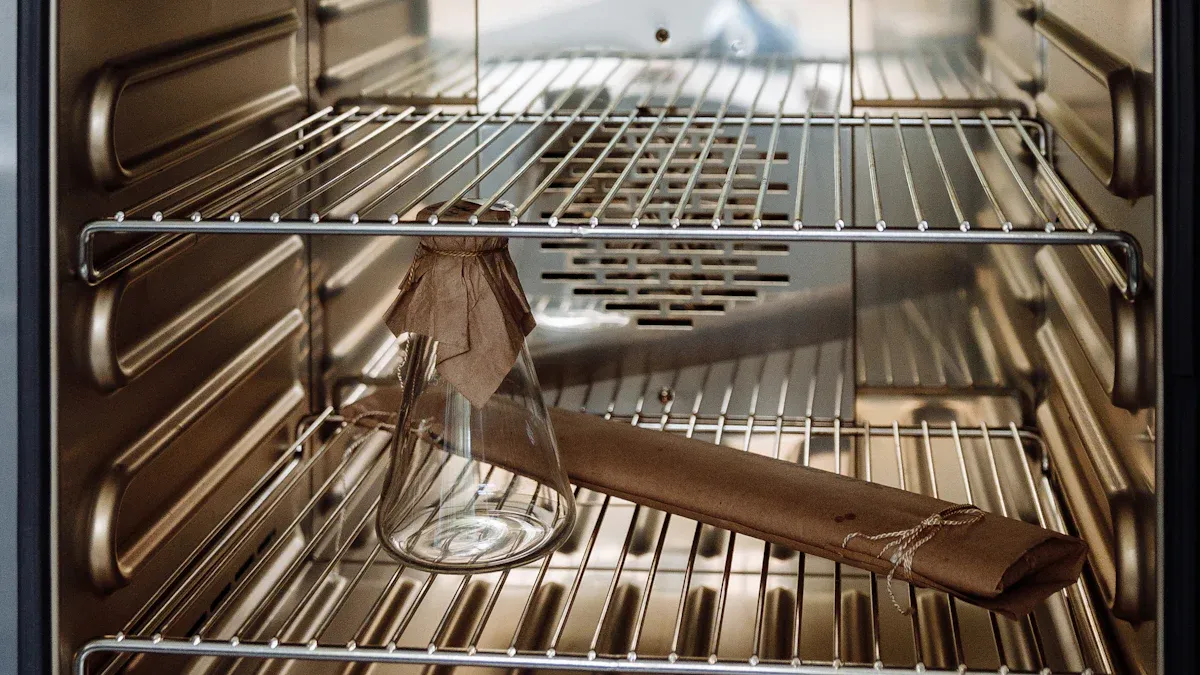
Before you begin working on your oven, you need to create a safe and organized workspace. This preparation helps you avoid accidents and makes the process of replacing the heating element more efficient.
Clearing the Workspace
Removing Oven Racks
Start by making sure the oven is completely cool. You should always remove racks before you access the heating element. Slide each rack out carefully and set it aside in a safe place. This step gives you clear access to the oven interior and prevents damage to the racks or your hands. If your oven design requires it, you may also need to remove the door. Most oven doors lift off their hinges when opened to a certain angle. Check your owner’s manual for specific instructions.
Protecting Kitchen Surfaces
You want to protect your kitchen surfaces from scratches, grease, or debris. Place a towel or a piece of cardboard on the floor in front of the oven. This barrier catches any screws or small parts you might drop. It also keeps your floor clean if you need to remove the door or set down the old heating element. Good lighting is essential. Use a flashlight or turn on extra lights to see inside the oven clearly.
Tip: Keep a small container nearby for screws and clips. This habit prevents you from losing important parts during the repair.
Locating the Oven Heating Element
Finding Mounting Screws or Clips
Once you clear the workspace, locate the heating element you plan to replace. In most electric ovens, the baking element sits at the bottom, while the broil element attaches to the top. Some convection ovens include a third element near the fan at the back. The table below shows typical locations for each type:
| Tipo de elemento calefactor | Typical Location in Oven | Función |
|---|---|---|
| Bake Element | Bottom of the oven | Generates steady heat for baking, ensuring even cooking. |
| Broil Element | Top of the oven | Provides intense heat for broiling and grilling. |
| Convection Element | Near the fan at the back | Circulates hot air for even cooking (in convection ovens). |
Look for mounting screws or clips that secure the heating element to the oven wall. These fasteners usually sit at the ends of the element, close to where the wires connect. Use a screwdriver or nut driver to remove them. If you need to remove the door for better access, do so now.
Checking for Obstructions
Inspect the oven interior for any obstacles that could block your access to the heating element. Sometimes, insulation or wiring may cover part of the element. Move these items gently aside if needed. Make sure nothing blocks your view or your hands as you work. Adequate lighting helps you spot hidden screws or clips. If you see any unusual parts or damage, stop and consult your oven’s manual or a professional.
Note: Always take a photo of the wiring before you disconnect anything. This step makes reassembly much easier and prevents mistakes.
By following these steps, you prepare your oven for a safe and efficient heating element replacement. You reduce the risk of injury and make the process smoother from start to finish.
Step-by-Step: Remove the Old Oven Element
Changing your oven element requires careful attention to detail and safety. You must follow each step closely to avoid damaging your oven or injuring yourself. This section guides you through the process of removing the old heating element, focusing on safe wire handling and proper disposal.
Unscrewing and Disconnecting Wires
Removing Mounting Screws or Clips
Begin by locating the screws or clips that secure the heating element to the oven wall. Most ovens use two screws at the ends of the element. Use a Phillips-head screwdriver or nut driver to remove screws holding the oven heating element. Place the screws in a small container so you do not lose them.
Tip: If the screws feel stuck, apply gentle pressure and avoid stripping the heads. A magnetic screwdriver can help you retrieve dropped screws from tight spaces.
Once you remove the fasteners, gently pull the heating element a few inches away from the oven wall. This movement exposes the wire connectors attached to the element terminals.
Carefully Detaching Wires
You must disconnect the wires from the oven heating element with caution. Follow these steps to ensure a safe and effective process:
- Double-check that the oven is completely powered off. Unplug the appliance or switch off the circuit breaker.
- Use a non-contact voltage tester to confirm there is no electricity in the wires.
- Put on insulated gloves and safety glasses for protection.
- Use insulated needle-nose pliers to grip the wire connectors. Pull them straight off the element terminals without twisting. Twisting can damage the wires or connectors.
- If you notice any burnt or oxidized wire ends, cut back the damaged section until you see shiny copper. If the wire becomes too short, extend it using high-temperature rated wire.
- Inspect the spade connectors. Clean or file the male lug carefully, holding the base to avoid damaging the ceramic insulator.
- Secure the wires with tape or a clip to prevent them from slipping back into the oven cavity.
- Avoid soldering. Use high-temperature ceramic wire connectors and proper crimping tools for any necessary splicing.
Note: If you see any signs of wire damage, such as discoloration, cracks, or burnt spots, consider replacing the wire or consulting a professional. Damaged wires can cause connection failure and overheating.
Handling the Old Element Safely
Avoiding Wire Loss Behind Oven Wall
When you remove wires from the oven heating element, you must prevent them from slipping back into the oven wall. If this happens, retrieving the wires can become difficult and may require additional disassembly. Secure each wire with a piece of tape or a small clamp as soon as you disconnect it. This precaution keeps the wires accessible for the new heating element replacement.
Pro Tip: Take a photo of the wire arrangement before disconnecting anything. This reference helps you reconnect the wires correctly during installation.
Disposing of the Old Element
After you change oven element, handle the old part with care. The heating element may have sharp edges or residue from previous use. Place the old element on a towel or cardboard to protect your surfaces. Do not throw the element in regular household trash. Many local recycling centers accept metal heating elements. Check your area’s guidelines for proper disposal.
- If the element shows signs of electrical damage, such as melted spots or exposed wires, avoid touching these areas directly.
- Wash your hands after handling the old element to remove any residue.
By following these steps, you ensure a safe and efficient removal process. You protect both yourself and your oven, setting the stage for a successful heating element replacement.
Step-by-Step: Install the New Oven Heating Element
Connecting and Securing the New Element
Attaching Wires Correctly
Usted debe connect the wires to the new heating element with care and precision. Begin by aligning the wire connectors with the terminals on the new element. Push each connector onto its terminal until you feel it click or fit snugly. If your oven uses spade connectors, ensure they grip the terminals tightly. Loose connections can cause arcing or poor heating performance.
Check the wire arrangement against the photo you took earlier or your oven’s manual. Each wire must return to its original position. If you notice any corrosion or damage on the connectors, clean them gently or replace them before proceeding. Secure the wires so they do not touch the oven walls or other metal parts. This step prevents short circuits and ensures safe operation.
Tip: Never force a connector onto a terminal. If it does not fit, double-check that you have the correct replacement part. Misaligned or incompatible elements can lead to installation failure.
Securing with Screws or Clips
Once you attach the wires, position the new heating element in the same spot as the old one. Align the mounting holes on the element with those on the oven wall. Insert the screws or clips and tighten them firmly, but avoid over-tightening. Excessive force can strip the threads or crack the mounting brackets.
A secure fit keeps the element stable during oven use. If the screw holes do not line up, stop and verify that you have the correct part. Installing the wrong element can create safety risks and may damage your oven. Always match the mounting features and screw hole positions before you change oven element.
Note: If you encounter resistance or the element feels loose after tightening, check for obstructions or debris in the mounting area. Remove any buildup before securing the element.
Reassembling the Oven
Replacing Oven Racks
After you install the new oven heating element, you need to reinstall racks to restore your oven’s functionality. Slide each rack back into its original position, making sure it sits level and moves smoothly. If you removed the oven door, reattach it according to your manufacturer’s instructions. Confirm that the door closes securely and the racks do not interfere with the new element.
A table below summarizes the recommended reassembly sequence:
| Paso | Acción | Propósito |
|---|---|---|
| 1 | Place new heating element and secure wires | Ensures correct electrical connection |
| 2 | Fasten mounting screws or clips | Provides stability and safety |
| 3 | Reinstall racks and oven door | Restores oven usability |
| 4 | Clean up workspace | Prevents debris and maintains safety |
Tip: If you notice any resistance when sliding racks in, check for misalignment or obstructions near the new element.
Cleaning Up the Workspace
You should always clean your workspace after completing the installation. Remove any tools, screws, or packaging materials from the oven interior and surrounding area. Wipe down surfaces to remove dust or fingerprints. Proper cleanup prevents foreign objects from interfering with oven operation and reduces fire risk.
Dispose of the old heating element according to local recycling guidelines. Wash your hands after handling the element or any electrical components. A tidy workspace also helps you spot any leftover parts or missed steps before you restore power to the oven.
Callout: Many installation mistakes occur during reassembly. Double-check that all screws are tight, wires are secure, and racks are in place before you move on to testing.
By following these steps, you ensure that you install the new oven heating element securely and safely. You minimize the risk of electrical hazards, poor performance, or premature failure. If you feel uncertain at any point, consult a professional technician for guidance.
Restore Power and Test the Oven
Powering Up Safely
Doble comprobación de todas las conexiones
Before you restore power, you need to perform a thorough inspection. This step ensures your safety and protects your oven from electrical damage. Follow this checklist to confirm everything is ready:
- Inspect all wiring and terminal connections for loose or burnt wires.
- Check the oven’s internal fuse with a multimeter. Replace it if faulty.
- Examine the control board for any signs of damage, such as burnt traces or metal slag.
- Make sure the oven clock or digital display is off. If it remains on, the breaker may not have tripped, and a fault could still exist.
- Confirm that all screws and connectors are secure and that no wires touch the oven walls.
Tip: If you notice a tripped breaker after installation, the fault is likely isolated. However, if the breaker continues to trip or the oven display goes black, you may need to replace the control board or consult a technician.
Turning Power Back On at Breaker
Once you complete your checks, you can safely restore power. Use this method to minimize risk:
- Ensure the oven door is closed and the workspace is clear.
- Turn off the circuit breaker supplying the oven for about one minute. This step resets the oven’s electrical system.
- Turn the breaker back on to restore power.
- Observe the oven’s display and listen for any unusual sounds.
- If the oven fails to power up or the breaker trips again, disconnect power immediately and seek professional help.
Note: Always disconnect power before any further inspection or repair. If you feel unsure at any point, contact a qualified technician.
Testing the New Element
Running the Oven to Burn Off Residue
After you restore power, you need to burn off any residue from the new heating element. Manufacturers often coat new elements with protective substances that can produce smoke or odors during initial use. To remove these residues:
- Set your oven to a high temperature, around 450–500°F.
- Run the oven for at least 30 minutes with good ventilation. Open windows or use an exhaust fan to clear fumes.
- If you still notice odors, repeat the process in several sessions. Some ovens may require multiple hours or repeated cycles to eliminate all residue.
- After the oven cools, wipe the interior to remove any remaining debris.
Callout: Self-cleaning cycles operate at higher temperatures and can speed up the burn-off process. Always follow your oven manufacturer’s recommendations for initial use.
Comprobación del calentamiento adecuado
You should now test new oven heating element for correct operation. Observe the element as the oven heats up. A functioning element glows orange or red and heats evenly. Use an oven thermometer to confirm the temperature matches your oven’s setting. This step helps you verify that the installation succeeded and that your oven is ready for regular use.
| Paso | What to Look For |
|---|---|
| Inspección visual | Element glows evenly, no sparks or smoke |
| Temperature Check | Oven thermometer matches set temperature |
| Actuación | Oven heats up within expected time |
If you notice any issues, such as uneven heating or persistent odors, turn off the oven and inspect your work. Persistent problems may indicate a faulty element or wiring issue.
Tip: Always monitor your oven during the first few uses after installation. Early detection of problems can prevent further damage.
Troubleshooting and When to Call a Professional
Common Problems After You Change Oven Element
Oven Not Heating Up
You may notice your oven does not heat up after installing a new element. This issue often points to problems beyond the element itself. Common causes include faulty wiring, incorrect wattage on the replacement part, or a malfunctioning control board. Sometimes, the relay that controls the bake element fails, even if the broil element works. You might also encounter slow heating or the oven not reaching the set temperature.
Para abordar estas cuestiones, siga un enfoque sistemático:
- Unplug the oven and test the old element with a multimeter. A healthy element usually shows about 10 ohms of resistance.
- Check thermal cut-off switches and thermostats for continuity. These parts should read zero ohms if they work correctly.
- Inspect the control board and relay board for visible damage or burnt areas.
- Ensure all wiring connections are secure and undamaged.
- Examine the oven door and locking mechanism. The oven will not heat if the door does not close properly.
Safety Tip: Always disconnect power before inspecting or testing electrical components. Ovens use high voltage, which can be dangerous.
Sparks, Noises, or Error Codes
After replacing the oven element, you might see sparks, hear unusual noises, or notice error codes on the display. Sparks or buzzing sounds often signal loose connections, damaged wiring, or a faulty control board. Error codes can indicate sensor failures, relay problems, or issues with the main PCB.
You should:
- Inspect all connections for tightness and signs of burning.
- Listen for clicking or buzzing when the oven turns on. These sounds may point to relay or control board faults.
- Check the oven manual for error code meanings and recommended actions.
- Observe for burning smells or chemical odors, which can indicate electrical hazards.
Callout: Ignoring these warning signs can lead to further damage or even fire risks. Address them promptly to keep your kitchen safe.
When to Get Professional Help
Persistent Electrical Issues
If you continue to experience electrical problems after replacing the oven element, you should seek professional assistance. Persistent issues such as frequent breaker trips, overheating, or repeated element failures suggest deeper electrical faults. Attempting further repairs without proper training can increase the risk of electric shock, fire, or voiding your appliance warranty.
Common warning signs include:
- Circuit breaker trips repeatedly when you use the oven.
- You notice burning smells or see scorch marks near wiring.
- The oven display remains blank or behaves erratically.
- You find damaged wiring or connectors inside the oven.
Note: Professional repairs ensure your oven operates safely and reliably. Technicians have the tools and expertise to diagnose hidden electrical problems.
Unresolved Installation Problems
Sometimes, installation problems persist even after careful work. If your oven still does not heat, cooks unevenly, or displays error messages, a professional can help. Other signs you need expert support include:
- The oven fails to reach or maintain the set temperature.
- You hear strange noises or notice unusual smells during operation.
- The control panel or timer malfunctions.
- The oven door seal appears damaged, causing heat loss.
Ignoring these issues can lead to more expensive repairs and safety hazards. A qualified technician can identify the root cause and restore your oven’s performance.
Tip: Regular professional inspections help catch problems early and prevent costly breakdowns.
You can change oven element at home with confidence when you follow each step and prioritize safety.
- Always disconnect power and use the right tools for the job.
- Document wiring before removal and check compatibility of replacement parts.
- If you feel unsure or encounter persistent issues, consult a professional.
Completing this repair yourself saves money, builds your skills, and gives you the satisfaction of a working oven.
PREGUNTAS FRECUENTES
How do you know if your oven element needs replacing?
You notice uneven cooking, visible damage, or the element does not glow red when the oven heats. If your oven takes longer to preheat or does not reach the set temperature, you likely need to replace the heating element.
Can you change an oven element without special tools?
You can complete this repair with basic hand tools. A Phillips-head screwdriver, work gloves, and a flashlight usually suffice. A multimeter helps confirm the element’s failure, but you do not need advanced equipment for most models.
Is it safe to change the oven element yourself?
You can safely change the oven element if you disconnect power at the breaker and follow safety precautions. Always let the oven cool and wear protective gear. If you see damaged wiring or feel unsure, consult a professional.
How long does it take to replace an oven element?
You can usually finish the replacement in 30 to 60 minutes. Preparation and careful work help prevent mistakes. If you encounter stuck screws or wiring issues, the process may take longer.
What should you do if the new element does not heat up?
Check all wire connections and confirm the breaker is on. Test the new element with a multimeter for continuity. If the oven still does not heat, you may have a control board or wiring issue that requires professional attention.
Can you use your oven immediately after installing a new element?
You should run the oven at a high temperature for 30 minutes to burn off any residue from the new element. Ventilate your kitchen during this process. Afterward, you can use your oven as usual.
Do all ovens use the same type of heating element?
Ovens use different elements based on brand, model, and function. Always check your oven’s model number and specifications before purchasing a replacement. Using the wrong element can cause poor performance or safety hazards.

