Replacing an electric heating element can seem intimidating, especially if you have never attempted a diy repair before. You need to approach every step with caution and respect for electricity. Always use proper tools and safety equipment. Take your time and double-check each connection. > Remember, following clear instructions keeps you safe and helps you achieve the best results.
Electric Heating Element Basics
What Is an Electric Heating Element?
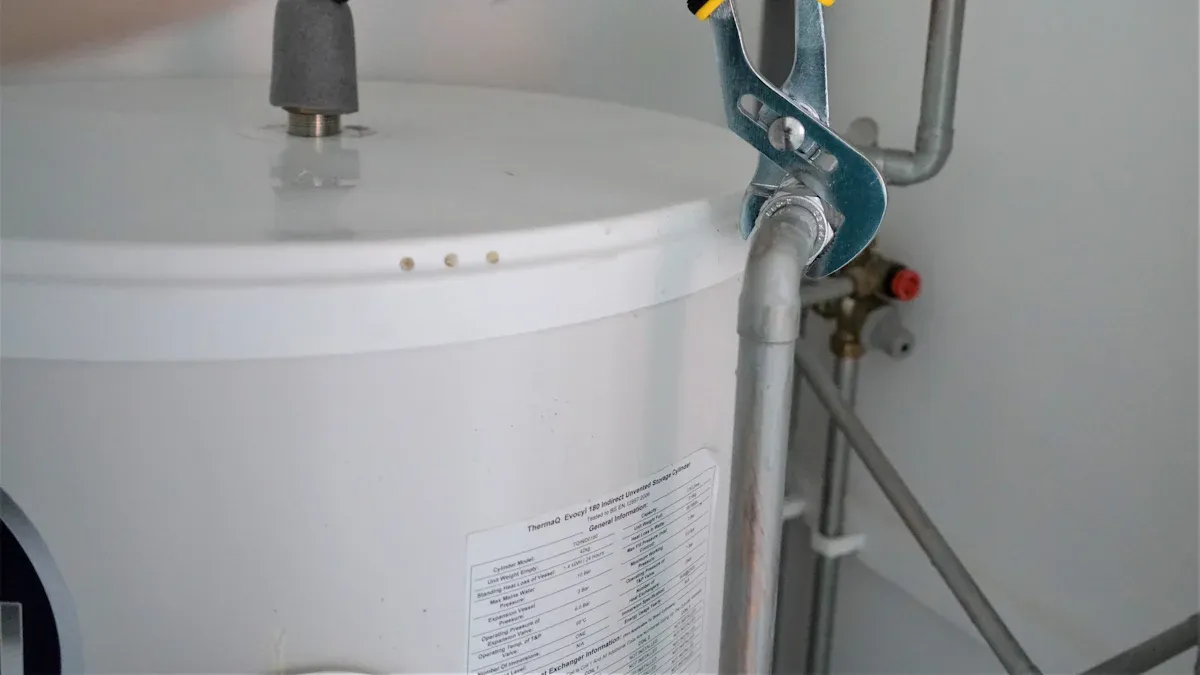
You rely on an electric heating element to convert electrical energy into heat. This component sits at the core of many household appliances, such as electric ovens and water heaters. The heating element consists of a metal coil or strip that resists the flow of electricity. When you turn on your appliance, electricity passes through the coil, generating heat. This heat then warms water in a tank or air in an oven. You will find that the water heater element is specifically designed to withstand constant exposure to water and high temperatures.
Why Electric Heating Elements Need Replacement
Over time, every heating element faces wear and tear. You may notice that the water heater element in your appliance does not last forever. Most electric heating elements have a typical lifespan of four to five years. Operational data collected over three years shows that only two unexpected fractures occurred, which means failures are rare. However, resistance in the element increases as it ages. When resistance rises by 10% to 20% above normal, the risk of failure grows. Predictive maintenance models, such as Support Vector Regression (SVR) and Long Short-Term Memory (LSTM), help forecast these changes. The table below shows how accurately these models predict the remaining useful life of heating elements:
| Model | Dataset | MAE (Test) | RMSE (Test) | R2 (Test) |
|---|---|---|---|---|
| LSTM | 9A | 1.21×10⁻⁵ | 0.00348 | 0.97864 |
| LSTM | 9B | 3.21×10⁻⁵ | 0.00567 | 0.45889 |
| SVR | 9A | 4.16×10⁻⁶ | 0.00204 | 0.99268 |
| SVR | 9B | 2.17×10⁻⁵ | 0.00466 | 0.63352 |
You should plan for replacement when you notice performance drops or when the element reaches its expected lifespan.
Signs Your Heating Element Is Failing
You can spot a failing heating element by watching for several warning signs. If your water heater element stops producing hot water or heats water unevenly, you likely have a problem. In ovens, you may see uneven cooking or longer preheat times. Sometimes, the heating element shows visible damage, such as cracks or burn marks. You might also notice tripped circuit breakers or blown fuses. If you use a multimeter, you can check for increased resistance, which signals the element is nearing failure.
Tip: Regularly inspect your water heater element and other heating elements for these signs. Early detection helps you avoid sudden breakdowns and costly repairs.
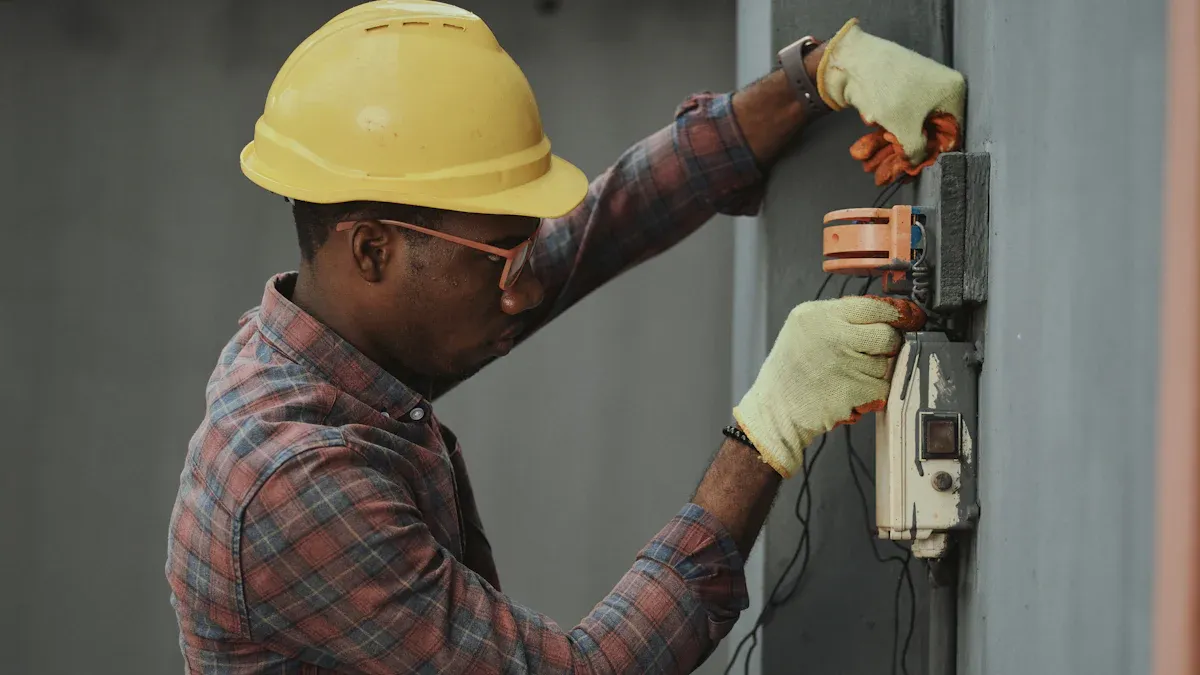
Safety Steps Before You Turn On Power
Before you begin any work on an electric heating element, you must prioritize your safety. Electricity poses serious risks, so you need to follow strict procedures. These steps help you avoid injury and prevent damage to your appliance.
Shutting Off Power at the Circuit Breaker
You must always turn off power before you touch any electrical component. Locate your home’s main electrical panel. Find the correct circuit breaker that controls the appliance you plan to repair. The panel usually has labels for each breaker. If you cannot find a label, trace the wiring or consult your appliance manual.
- Open the electrical panel door.
- Identify the circuit breaker for your water heater or oven.
- Flip the circuit breaker to the “off” position.
- Use a voltage tester to confirm that the appliance no longer receives power.
Tipp: Never rely on just turning off the appliance switch. Only the circuit breaker guarantees complete disconnection from electricity.
Personal Protective Equipment for Replacing a Heating Element
You need to wear the right personal protective equipment (PPE) to reduce the risk of injury. Proper PPE shields you from electrical shock, burns, and accidental contact with sharp parts.
- Insulated gloves protect your hands from electric shock.
- Safety goggles shield your eyes from sparks or debris.
- Closed-toe shoes prevent foot injuries.
- Long sleeves and pants add an extra layer of protection.
Always inspect your PPE before use. Replace any damaged gear immediately.
Avoiding Electrical and Water Hazards
Water and electricity create a dangerous combination. You must check for leaks or standing water near your appliance before you start. Dry the area completely. If you work on a water heater, drain the tank as instructed in your manual.
- Keep your work area dry and well-lit.
- Never stand in water while working with electrical parts.
- Store tools and replacement parts away from wet surfaces.
Alert: If you notice any water near the circuit breaker or electrical panel, stop immediately. Contact a licensed electrician for help.
You must always turn off power at the circuit breaker before you begin. This step protects you from accidental shocks and ensures a safe repair process.
Tools and Materials for Electric Water Heater and Oven Repairs
Essential Tools for Heating Element Replacement
You need the right tools to replace a heating element safely and efficiently. For most electric water heater and oven repairs, you should gather these essentials before starting:
- Screwdrivers (Phillips and flathead): You use these to remove access panels and disconnect wires.
- Adjustable wrench or socket wrench: This tool helps you loosen and tighten the heating element.
- Multimeter: You check for electrical continuity and confirm power is off.
- Needle-nose pliers: You grip and maneuver wires or small connectors.
- Voltage tester: You verify that the oven or electric water heater has no live current.
Tip: Always test your tools before use. A faulty tool can cause delays or safety hazards.
Replacement Parts and Materials Checklist
You must have all necessary replacement parts and materials ready. This checklist ensures you do not miss anything during the repair:
| Item | Purpose |
|---|---|
| New heating element | Replaces the faulty component |
| Gasket or O-ring | Seals the connection to prevent leaks |
| High-temperature wire nuts | Secures electrical connections |
| Teflon tape | Seals threads on water heater elements |
| Oven heating element screws | Fastens the new oven heating element |
| Cleaning cloth | Wipes away debris from the installation area |
You should always match the new heating element to your specific oven or electric water heater model. Check the manufacturer’s specifications for compatibility.
Optional Tools for Easier Installation
Some tools make the replacement process smoother, especially if you work in tight spaces or on older appliances. Consider these optional items:
- Element wrench: This specialty tool fits most electric water heater elements and provides extra leverage.
- Headlamp or portable work light: You improve visibility inside the oven or behind the water heater.
- Magnetic parts tray: You keep screws and small parts organized during the repair.
- Small vacuum or brush: You remove dust and debris from the oven cavity or around the heating element opening.
- Smartphone or camera: You take photos before disassembly, which helps you remember wire placements.
Note: Using the right optional tools can save you time and reduce frustration, especially when working on an electric oven or a hard-to-reach oven heating element.
Step-by-Step Guide to Replacing a Heating Element
Testing the Heating Element with a Multimeter
Identifying a Faulty Heating Element
You need to confirm that the heating element is the source of your appliance’s problem before you proceed with replacement. In an electric water heater, a faulty water heater element often causes a lack of hot water or inconsistent temperatures. In an oven, a malfunctioning oven heating element can lead to uneven baking or failure to reach the desired temperature. Begin by unplugging the oven or switching off the circuit breaker for your electric water heater. Remove any access panels to expose the heating element terminals.
Touch one probe of your multimeter to one terminal and the other probe to the opposite terminal. If you see no continuity or a reading far outside the manufacturer’s specified range, you have identified a faulty heating element. For ovens, you should also check for visible signs of damage, such as blistering or breaks in the oven heating element.
Interpreting Multimeter Results
A digital multimeter gives you a precise reading of the resistance in your heating element. Most electric heating elements in ovens and water heaters should show resistance between 10 and 50 ohms, depending on the model. A reading of infinite resistance or zero indicates a broken or shorted element. Digital multimeters provide superior accuracy compared to analog meters. You benefit from features like precise current sources and analog-to-digital conversion, which eliminate common errors such as scale compression and parallax. These features ensure you get reliable results when testing low-resistance components like a water heater element or an oven heating element. Calibration traceable to standards such as NIST further supports the reliability of your measurements. Always zero out lead resistance before testing to avoid false readings.
Tip: Always consult your appliance’s manual for the correct resistance range. If your reading falls outside this range, you should replace the heating element.
Removing the Old Heating Element
Draining the Electric Water Heater
If you work on an electric water heater, you must drain the tank before removing the water heater element. Attach a garden hose to the drain valve at the bottom of the tank. Open the valve and direct the water to a safe drainage area. Open a hot water faucet in your home to allow air into the system and speed up the draining process. Wait until the tank is empty before proceeding.
Accessing and Disconnecting the Heating Element
Remove the access panel covering the heating element. In an oven, you usually find the oven heating element at the bottom or top of the cavity. Unscrew any mounting brackets or screws holding the element in place. For an electric water heater, disconnect the wires attached to the water heater element terminals. Use needle-nose pliers if necessary. Take a photo of the wiring before disconnecting to help with reassembly.
Removing the Element Safely
Use an adjustable wrench or a special element wrench to loosen and remove the heating element from the electric water heater. In an oven, gently pull the oven heating element away from its connectors. Avoid bending or twisting the element, as this can damage the mounting hardware or wiring. Place the old heating element aside for proper disposal.
Note: Some heating elements may be stuck due to mineral buildup or corrosion. Apply steady pressure and avoid using excessive force.
Installing the New Heating Element
Preparing the New Heating Element and Gasket
Before installation, inspect the new heating element for any visible defects. For an electric water heater, fit a new gasket or O-ring onto the water heater element. This step prevents leaks after installation. For ovens, ensure the new oven heating element matches the original in shape and size. Clean the mounting area with a cloth to remove debris or mineral deposits.
Securing the Heating Element in Place
Insert the new heating element into the opening. In an electric water heater, thread the water heater element into the tank and tighten it with a wrench. Do not overtighten, as this can damage the threads or gasket. In an oven, align the oven heating element with the mounting holes and secure it with the provided screws. Make sure the element sits flush against the mounting surface.
Reconnecting Wires and Ensuring Proper Contact
Reconnect the wires to the terminals of the new heating element. Use high-temperature wire nuts if required. Double-check that each connection is tight and secure. Loose connections can cause arcing or poor performance. For ovens, ensure the connectors fit snugly onto the oven heating element terminals. For an electric water heater, confirm that the wires do not touch any metal surfaces other than the terminals.
Callout: Take a photo of the completed wiring before replacing any panels. This step helps you verify correct installation if you need to troubleshoot later.
Once you finish these steps, you are ready to refill your electric water heater or test new oven heating element performance. Always follow the manufacturer’s instructions for your specific appliance to ensure a safe and successful replacement.
How to Turn On Power and Test the New Heating Element
Refilling the Electric Water Heater and Checking for Leaks
After you install the new heating element, you need to refill your electric water heater before restoring power. Close the drain valve tightly. Remove the garden hose if you used one. Open a hot water faucet in your home. This step allows air to escape from the tank as it fills. Turn on the cold water supply to the water heater. You will hear water flowing into the tank. Wait until water flows steadily from the open faucet. This steady flow means the tank is full and all air has left the system.
Check around the new heating element for leaks. Use a dry cloth or paper towel to wipe the area. If you see water droplets or moisture, tighten the element slightly. Do not overtighten. If the leak continues, you may need to reseat the gasket or O-ring. Always fix leaks before you restore power.
Tipp: Never turn on power to the water heater if the tank is empty. Dry firing can damage the new heating element.
Replacing Insulation and Access Panels
Once you confirm there are no leaks, replace any insulation you removed during the repair. Fit the insulation snugly around the heating element and wiring. Proper insulation helps your appliance run efficiently and prevents heat loss. Next, reattach the access panel using the screws you set aside earlier. Make sure the panel sits flush and secure. For ovens, slide the racks back into place and close the door.
A clean and organized finish protects the internal components and keeps your appliance safe for daily use.
Safely Restoring Power and Testing Operation
Now you are ready to turn on power and test the new heating element. Go to your main electrical panel. Flip the circuit breaker for your appliance to the “on” position. For an electric water heater, allow the tank to heat for at least one hour. Then check the water temperature at a faucet. For ovens, set the temperature and observe if the element glows red or heats up as expected.
Monitor your appliance closely during the first cycle. Listen for unusual noises and watch for warning lights or error codes. If you notice any issues, turn off the power immediately and inspect your work.
Alert: If you smell burning or see smoke, disconnect power and contact a professional for help.
You have now completed the replacement process. Your appliance should operate safely and efficiently with the new heating element.
Troubleshooting Heating Element Replacement Issues
What to Do If the Heating Element Doesn’t Work
When your appliance fails to heat after installing a new heating element, you need to troubleshoot methodically. Start by checking the power supply. Confirm that the circuit breaker is on and that the appliance receives electricity. Inspect the thermostat settings and ensure they match the recommended temperature. If your appliance still does not operate, review the following table for common issues and their causes:
| Common Issue | Description / Cause | Frequency / Notes |
|---|---|---|
| Will not turn on | Power supply issues, tripped breaker, blown fuse, faulty thermostat | Most common issue |
| Heater blows cold air | Clogged filter, thermostat malfunction, faulty heating element | Common cause of heating inefficiency |
| Weird noises | Loose parts or screws causing vibration | Frequently reported symptom |
| Overheating | Blocked vents, faulty thermostat, poor clearance | Safety concern, less frequent but critical |
| Burnt smells or odors | Dust buildup, wiring problems, malfunctioning parts | Occasional but important for safety |
| Unreliable heating | Dirty thermostat, faulty heating element, airflow obstruction | Common cause of inconsistent heating |
| Frequent fuse blowing | Faulty wiring, faulty heating element causing overload | Occurs often, indicates electrical faults |
You should address the most common issues first. Reset the breaker, replace blown fuses, and verify that the thermostat functions correctly. If the problem persists, move on to inspecting the installation.
Fixing Loose or Faulty Connections
Loose or faulty connections often cause a new heating element to malfunction. You need to follow a systematic approach to resolve these issues:
- Follow the manufacturer’s guidelines for installation. This step ensures you avoid exposed wiring and loose connections.
- Perform regular maintenance. Clean and inspect the area around the heating element to remove debris and spot potential problems early.
- Inspect all wiring. Look for signs of wear, corrosion, or damage. Make sure every connection is tight and wires remain covered.
- Secure all connections. Use the correct wire nuts or terminal screws to prevent arcing and overheating.
- Seek professional help if you cannot identify or fix the problem. This action prevents further damage and keeps you safe.
Tip: Never operate your appliance if you suspect a wiring issue. Electrical faults can lead to overheating or fire.
Wann Sie einen Fachmann hinzuziehen sollten
You should recognize when a problem exceeds your skill level. If you notice persistent electrical issues, frequent fuse blowing, or burnt smells, stop troubleshooting. These symptoms may indicate deeper electrical faults or safety hazards. A licensed technician has the tools and expertise to diagnose complex problems and ensure your appliance operates safely.
⚠️ If you feel unsure at any point, prioritize your safety and contact a professional. Attempting advanced repairs without proper training can result in injury or further damage.
Maintenance Tips for Electric Heating Elements
Regular Inspection and Cleaning
You can extend the life of your electric heating elements by making regular inspection and cleaning part of your routine. When you check your oven or water heater at least once a year, you spot early signs of wear, corrosion, or cracks. Cleaning access panels twice a year removes dust and debris that can cause damage. For your oven, regular cleaning prevents grease buildup, which reduces fire hazards and keeps the heating element working efficiently. You should also inspect oven burners for blockages or signs of wear. Cleaning the fan and motor during maintenance reduces strain on the system. Studies show that regular cleaning and lubrication of HVAC components, including electric heating elements, reduce wear and tear, prevent breakdowns, and improve efficiency. Annual or bi-annual inspections and cleanings help ensure all components function correctly, which increases safety and reduces repair costs.
Tip: Schedule yearly inspections by a qualified technician to identify and fix minor issues before they become serious. This step ensures your oven and water heater perform at their best.
Preventing Future Heating Element Problems
You can prevent many heating element problems by following a few simple steps. Always check your oven and water heater for leaks, rust, or unusual sounds. Clean your oven regularly to prevent grease and debris from building up. Replace air filters every three months to maintain efficiency and reduce strain on your heating system. Vacuum air ducts monthly to remove dust that could obstruct airflow and damage components. For your oven, clean the range hood filters to maintain proper ventilation. Install safety accessories such as pressure release valves, anti-scald devices, and leak detectors to prevent hazards. Consistent care, like cleaning refrigerator coils and replacing hoses, also helps prevent early breakdowns in your kitchen appliances. Regular maintenance is one of the most critical factors affecting the durability and performance of electric heating elements.
- Have yearly inspections by HVAC professionals.
- Check electric heating elements for wear, corrosion, or cracks.
- Clean oven access panels and burners twice a year.
- Replace filters and vacuum ducts regularly.
- Install safety accessories for added protection.
Extending the Life of Your Electric Water Heater and Oven
You can significantly extend the operational life of your electric water heater and oven by adopting preventive maintenance practices. Research shows that regular professional maintenance can prevent up to 95% of breakdowns in HVAC systems, which include electric heating elements. Predictive maintenance practices, such as monitoring equipment health and scheduling timely interventions, can reduce equipment failures by 30-50% and extend asset lifespan by 20-40%. The following table highlights the impact of preventive maintenance:
| Metric / Case Study | Reduction / Improvement Range | Description / Impact |
|---|---|---|
| Equipment Failures | 30-50% | Fewer failures due to predictive maintenance |
| Unplanned Downtime | Up to 50% | Less unexpected downtime, better continuity |
| Maintenance Costs | 10-40% | Lower expenses for repairs and upkeep |
| Equipment Life Extension | 20-40% | Longer lifespan for water heaters and ovens |
For your oven, regular cleaning and inspection prevent grease buildup and ensure safe operation. Maintaining the water temperature between 50-55°C in your water heater balances safety and bacteria elimination. Professional duct cleaning every three to five years helps maintain air quality and system health. A well-maintained oven and water heater can last up to 20-30 years, saving you money and reducing the need for premature replacements.
Note: Maintenance not only improves energy efficiency and safety but also ensures your oven and water heater deliver reliable performance year after year.
You now have the knowledge to replace an electric heating element safely.
- Always turn off power, use the right tools, and follow each step carefully.
- Take your time and double-check every connection.
- If you feel uncertain, contact a licensed professional.
For more guidance, review your appliance manual or visit trusted manufacturer websites. Reliable online tutorials and local hardware stores can also provide valuable support.
FAQ
How often should you replace an electric heating element?
You should inspect your heating element every year. Most elements last four to five years. Replace the element if you notice reduced performance, visible damage, or if it fails a continuity test.
Can you replace a heating element without draining the water heater?
You must drain the water heater before removing the element. Draining prevents water leaks and protects you from burns. Always follow the manufacturer’s instructions for safe removal.
What tools do you need for heating element replacement?
You need a screwdriver, adjustable wrench, multimeter, and needle-nose pliers. Optional tools include an element wrench and a headlamp. Gather all tools before starting the repair.
Is it safe to replace a heating element yourself?
You can safely replace a heating element if you follow safety steps. Always turn off power at the circuit breaker. Wear protective gear and check for leaks or water near electrical parts.
Why does your oven take longer to heat up?
A faulty heating element often causes slow heating. You may also have a problem with the thermostat or wiring. Test the element with a multimeter and replace it if needed.
What should you do if the new heating element does not work?
Check all electrical connections. Make sure the circuit breaker is on. Test the thermostat and inspect for loose wires. If the problem continues, contact a licensed technician.
Can you use any heating element for your appliance?
You must use a heating element that matches your appliance’s model and specifications. Using the wrong part can cause poor performance or damage. Always check the manufacturer’s recommendations.
Tip: Keep your appliance manual handy during repairs. It provides model-specific guidance and safety information.

