
You may face these common water heater issues: no hot water, inconsistent temperatures, slow heating, tripped breakers, or strange noises and leaks. Each problem often ties back to the heating element, heating tubes, or even a hot tub heating element. You will find clear solutions and at least one solution for every situation, including how to check heating element in water heater.
Always put safety first. If you feel unsure, call a professional for help with solutions.
Water Heater Problems: Not Heating Water

Identifying the Problem
You turn on the tap and expect hot water, but nothing happens. No hot water is a clear sign that your water heater is not heating water. You might notice cold water coming from the hot tap or the water temperature never rising above lukewarm. These water heater issues often point to a problem with the heating element or the power supply.
Safety Tip: Always turn off the power at the circuit breaker before inspecting or repairing your water heater. Case studies in the Journal of Fire Sciences show that improper handling of heating elements can lead to fires, water damage, and serious injuries. Following safety guidelines and using lockout-tagout procedures during maintenance reduces these risks.
Common Causes
Several problems can cause your water heater to stop producing hot water. The most frequent issues include:
- A faulty heating element that no longer heats up.
- A tripped circuit breaker or blown fuse cutting off power.
- A malfunctioning thermostat failing to signal the element.
- Loose wiring or corroded electrical connections.
- Sediment buildup around the heating element, causing overheating and failure.
You can use specific measurements to help diagnose these problems:
- Heating element resistance should measure around 15 ohms.
- Voltage across the heating element terminals (L1 and L3) should read 240 volts.
- A voltage drop to 156 volts may indicate a wiring or supply issue.
- Continuity tests on thermostats confirm if they function correctly.
Troubleshooting Steps
Checking Power Supply
Start by checking the power supply. Make sure the circuit breaker for the water heater is in the ON position. If the breaker has tripped, reset it. Use a multimeter to verify that 240 volts reach the heater terminals. If you see a lower voltage, such as 156 volts, you may have a wiring problem that needs repair.
How to Check Heating Element in Water Heater
To check if you have a faulty heating element, first turn off the power. Remove the access panel and insulation to expose the element terminals. Use a multimeter to measure resistance across the terminals. A reading of 15 ohms means the element is working. If you get no reading or infinite resistance, you have a heating element failure. This step is essential for diagnosing no hot water and other water heater problems.
Replacing a Faulty Element
If you confirm a faulty heating element, you need to replace it. Drain the tank below the element level. Unscrew the old element using a heating element wrench. Install the new element, tighten it securely, and reconnect the wires. Refill the tank and restore power. This repair restores hot water and resolves most problems related to heating element failure.
Note: If you notice rust, major leaks, or persistent no hot water after these troubleshooting tips, call a professional. Manufacturer guidelines and expert advice recommend professional repair for serious or recurring problems.
When to Call a Professional
You may feel confident handling basic water heater troubleshooting. However, some situations require a licensed technician. Recognizing these scenarios protects your safety and prevents further damage to your water heater.
Consider calling a professional if you encounter any of the following:
Persistent No Hot Water:
If you have followed all troubleshooting steps and still have no hot water, the problem may involve complex electrical faults or internal wiring. These issues require specialized tools and expertise.Repeated Tripped Breakers:
When your circuit breaker trips repeatedly after resets, you likely face a deeper electrical issue. This could indicate a short circuit, faulty wiring, or a malfunctioning thermostat. Attempting repairs without proper training increases the risk of electric shock or fire.Visible Signs of Damage:
If you see burnt wires, melted insulation, or scorch marks near the heating element, stop all work immediately. These signs point to severe electrical hazards. Only a qualified technician should address these problems.Major Leaks or Corrosion:
Water pooling around the base of your heater or visible rust on the tank signals a serious problem. Leaks can damage your home and create mold risks. Corrosion often means the tank or element has failed. Professional assessment ensures safe and effective repairs.Unusual Noises After Repairs:
If your water heater makes loud popping, banging, or hissing sounds after you replace the element, sediment or pressure issues may exist. These problems can damage the tank or cause dangerous pressure buildup.Uncertainty About Electrical Work:
If you feel unsure about using a multimeter, disconnecting wires, or interpreting test results, do not proceed. Electrical repairs require knowledge and confidence. Mistakes can lead to injury or property damage.
Tip:
Always check your water heater’s warranty before attempting repairs. Many manufacturers require professional service to maintain coverage.
Table: When to DIY vs. Call a Professional
| Situation | DIY Possible | Professional Needed |
|---|---|---|
| Resetting breaker | ✅ | ❌ |
| Replacing heating element | ✅ | ❌ |
| Diagnosing electrical shorts | ❌ | ✅ |
| Repairing major leaks | ❌ | ✅ |
| Fixing persistent no hot water | ❌ | ✅ |
You protect your home and your safety when you recognize your limits. If you face any of these warning signs, contact a licensed plumber or electrician. Professional service ensures your water heater operates safely and efficiently.
Inconsistent Water Temperature: Common Water Heater Problems
Identifying the Problem
You may notice your water heater delivers hot water at different temperatures throughout the day. Sometimes, the water feels scalding; other times, it barely gets warm. This inconsistency can disrupt your daily routine and signal underlying problems. Many homeowners experience this issue. In fact, research shows that 41% of homes have unsafe hot water temperatures, even when thermostats are set to recommended levels. The study also found that electric water heaters tend to maintain safer temperatures than gas models. These findings highlight how common water heater problems like inconsistent temperature can affect your comfort and safety.
Common Causes
Several factors can lead to fluctuating water temperatures in your home. You might encounter:
- Limescale buildup inside the tank or on the heating element, which insulates the element and reduces its efficiency.
- Malfunctioning or aging heating elements that fail to heat water evenly.
- Thermostat hysteresis, where the on/off range is too wide, causing temperature swings of up to 20-30°F.
- Thermal stratification, which creates temperature differences between the top and bottom of the tank.
- Standby heat losses, especially overnight, resulting in cooler water for the first use in the morning.
- Environmental factors, such as changes in ambient air temperature, that impact water heater performance.
You can identify these problems by monitoring for reduced hot water duration, low water pressure, leaks, or unusual noises. Persistent limescale buildup often leads to inadequate hot water and further temperature fluctuations.
Troubleshooting Steps
Inspecting the Thermostat
Begin by checking your water heater’s thermostat. Make sure the setting matches your desired temperature, typically around 120°F. If you still experience inconsistent temperatures, the thermostat may have a wide hysteresis range or faulty calibration. Studies using temperature data loggers reveal that thermostats often cycle with a wide range, causing noticeable swings in water temperature. You may need to recalibrate or replace the thermostat to achieve more stable performance.
Checking for Sediment Buildup
Limescale and sediment buildup are leading causes of common water heater problems. Over time, minerals in your water settle at the bottom of the tank or coat the heating element. This buildup acts as an insulator, making it harder for the element to heat water efficiently. You can flush the tank to remove sediment and limescale buildup. This process involves draining several gallons of water from the tank until it runs clear. Regular flushing helps prevent limescale buildup and extends the life of your water heater.
Resetting or Replacing the Element
If you continue to experience inconsistent temperatures after addressing the thermostat and sediment, the heating element may be at fault. Limescale buildup on the element can cause it to overheat or fail intermittently. You can reset the element by pressing the reset button, usually located behind the access panel. If this does not resolve the problem, you may need to replace the heating element. Always turn off the power before performing any repairs. Persistent problems after these steps may indicate deeper issues, such as corrosion or electrical faults, which require professional attention.
Tip: Regular maintenance, including flushing the tank and inspecting for limescale buildup, helps prevent many common water heater problems and ensures consistent hot water.
When to Call a Professional
You may feel confident handling basic water heater maintenance. However, some situations require a licensed technician. Recognizing these moments protects your home, your safety, and your investment.
Consider calling a professional if you notice any of the following:
Persistent Temperature Fluctuations:
If you have flushed the tank, checked the thermostat, and replaced the heating element, but your water temperature still swings wildly, you likely face a deeper electrical or mechanical issue. These problems often involve complex wiring or faulty control boards.Thermostat Calibration Issues:
When your thermostat fails to maintain a steady temperature, even after adjustment or replacement, you may have a malfunctioning control system. Diagnosing and repairing electronic thermostats requires specialized tools and expertise.Visible Signs of Damage:
If you see scorch marks, melted insulation, or burnt wires near the thermostat or heating element, stop all work immediately. These signs indicate serious electrical hazards.Water Heater Age:
If your water heater is over 10 years old and you experience frequent temperature problems, the unit may have reached the end of its service life. Professionals can assess whether repair or replacement makes more sense.Unusual Noises or Leaks:
Loud popping, hissing, or banging noises after maintenance often signal sediment buildup or pressure issues. Leaks around the tank or fittings can cause water damage and mold growth.
Tip:
Always check your water heater’s warranty before attempting repairs. Many manufacturers require professional service to keep your coverage valid.
Table: DIY vs. Professional Help for Inconsistent Water Temperature
| Issue | DIY Possible | Professional Needed |
|---|---|---|
| Adjusting thermostat | ✅ | ❌ |
| Flushing tank for sediment | ✅ | ❌ |
| Replacing heating element | ✅ | ❌ |
| Diagnosing electrical faults | ❌ | ✅ |
| Repairing control board or wiring | ❌ | ✅ |
| Fixing persistent temperature swings | ❌ | ✅ |
You protect your family and your property when you know your limits. If you feel uncertain about electrical work or if problems persist after basic troubleshooting, contact a licensed plumber or electrician. Professional service ensures your water heater operates safely and efficiently.
Water Takes Too Long to Heat: How to Check Heating Element in Water Heater
Identifying the Problem
You may notice that your water heater takes much longer than usual to deliver hot water to your taps or shower. This slow heating can disrupt your daily routine and signal underlying problems with your system. For example, research shows that the average wait time for hot water at a kitchen sink is about 8 seconds, while an upstairs shower can take up to 34 seconds. If you experience delays much longer than these benchmarks, your water heater likely needs attention.
| Metric | Value | Description |
|---|---|---|
| Average wait time (kitchen sink) | 8 seconds | Time until hot water reaches the kitchen sink fixture |
| Average wait time (upstairs shower) | 34 seconds | Time until hot water reaches an upstairs shower fixture |
| Percentage of water below usable temperature | 19% | Portion of water delivered annually below the ASHRAE usable temperature threshold |
| Estimated energy loss in distribution system | 13% | Energy lost annually in the water distribution system due to heat loss in pipes |

Common Causes
Several factors can contribute to slow heating in your water heater:
- Improper installation or inconsistent setup, especially with tankless models, often leads to performance problems.
- Use of substandard parts or products that do not meet plumbing codes can cause premature failures.
- Mineral scale and sediment buildup inside the tank or on the heating element reduce heating efficiency.
- Lack of regular maintenance, such as flushing the tank, allows scale to accumulate and slow down heating.
- A faulty heating element or thermostat can result in inadequate hot water or slow heating.
- Flood damage or missing components, such as a combustion chamber door, can also impact performance.
You should also consider the age of your water heater. Most tank models last 8 to 12 years, while tankless units can last up to 20 years. Older units are more likely to experience heating element failure and slow heating.
Troubleshooting Steps
Examining the Heating Element for Wear
Start by learning how to check heating element in water heater. Turn off the power at the breaker. Remove the access panel and insulation to expose the element. Use a multimeter to test for continuity and resistance. A healthy element should show about 15 ohms. If you find no reading or infinite resistance, you have a faulty heating element. Replacing it can resolve slow heating and restore normal operation.
Flushing the Tank
Sediment and mineral scale buildup are common causes of slow heating. You can flush the tank to remove these deposits. Attach a hose to the drain valve and empty several gallons of water until it runs clear. This process improves heating efficiency and helps prevent future problems. Experts recommend flushing your tank every 12 months for optimal performance.
Adjusting the Thermostat
Check your thermostat settings. The recommended range is 120 to 140 degrees Fahrenheit. If the temperature is set too low, you will experience slow heating and possibly inadequate hot water. Adjust the thermostat to the correct range. If the problem persists, the thermostat itself may need replacement.
Tip: If you complete these steps and still have slow heating, call a professional. Attempting complex repairs without proper training can cause safety hazards or void your warranty.
When to Call a Professional
You may feel confident handling basic water heater maintenance. However, some situations require a licensed technician. Recognizing these moments protects your safety and prevents further damage to your water heater.
Consider calling a professional if you notice any of the following:
Persistent Slow Heating:
If your water heater continues to heat slowly after you flush the tank, check the thermostat, and replace the heating element, you likely face a deeper electrical or mechanical issue. These problems often involve complex wiring or faulty control boards.Electrical Issues:
If you see flickering lights, tripped breakers, or burnt wiring near your water heater, stop all work immediately. Electrical faults can cause fires or serious injury. Only a qualified electrician should handle these repairs.Visible Damage or Corrosion:
If you spot rust, corrosion, or water leaks around the tank or heating element, you need professional assessment. These signs often mean your water heater is near the end of its service life or has suffered internal damage.Unusual Noises After Repairs:
If your water heater makes loud popping, banging, or hissing sounds after you perform maintenance, sediment or pressure issues may exist. These problems can damage the tank or cause dangerous pressure buildup.Water Heater Age:
If your water heater is over 10 years old and you experience frequent heating delays, replacement may be more cost-effective than repair. Professionals can help you decide the best course of action.
Tip:
Always check your water heater’s warranty before attempting repairs. Many manufacturers require professional service to keep your coverage valid.
Table: DIY vs. Professional Help for Slow Heating
| Issue | DIY Possible | Professional Needed |
|---|---|---|
| Flushing tank for sediment | ✅ | ❌ |
| Adjusting thermostat | ✅ | ❌ |
| Replacing heating element | ✅ | ❌ |
| Diagnosing electrical faults | ❌ | ✅ |
| Repairing control board or wiring | ❌ | ✅ |
| Fixing persistent slow heating | ❌ | ✅ |
You protect your home and your safety when you know your limits. If you feel uncertain about electrical work or if problems persist after basic troubleshooting, contact a licensed plumber or electrician. Professional service ensures your water heater operates safely and efficiently.
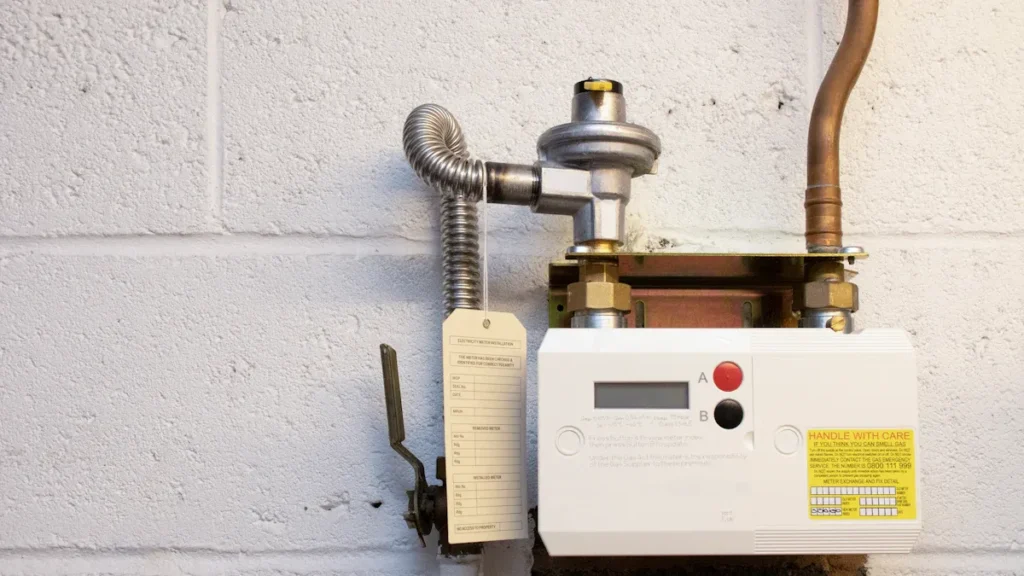
Tripped Circuit Breaker or Blown Fuse: Water Heater Problems
Identifying the Problem
When your water heater keeps shutting off, you may notice that the circuit breaker has tripped or a fuse has blown. You might find the breaker in the “off” position or see a blown fuse in your electrical panel. Sometimes, you reset the breaker, but it trips again as soon as the water heater starts. These signs point to electrical problems that require careful attention. You should always approach electrical issues with caution to avoid injury or further damage.
⚡ Safety Tip: Always turn off and lock out the power before you begin any inspection or repair. This step prevents accidental energizing and keeps you safe during water heater repair.
Common Causes
Several electrical issues can cause your water heater to trip a breaker or blow a fuse. Overheating from excessive current is a leading cause. When insulation inside the heater degrades, it can leak current and create unintended conductive paths. This leakage may result in arc tracking, where electricity jumps across damaged insulation, causing further overheating. Over time, these conditions lead to pyrolysis, which leaves behind conductive deposits. These deposits increase leakage current and make the problem worse. Circuit breakers and fuses act as protective devices, shutting off power when they detect overcurrent or short circuits. You can often identify these problems by examining physical evidence such as damaged insulation, beaded wires, or soot near the heating element.
Troubleshooting Steps
Resetting the Breaker
Start by locating your electrical panel. Find the breaker labeled for your water heater. If it has tripped, switch it fully to the “off” position, then back to “on.” If the breaker trips again immediately, do not continue resetting it. This behavior signals a deeper electrical fault that needs further investigation.
Inspecting for Electrical Shorts
After ensuring the power is off and locked out, remove the access panels and insulation from your water heater. Expose the thermostats, high temperature limit switch, and heating elements. Use a voltmeter to check for line voltage at the heating element terminals and thermostats. If you find no voltage, the problem may lie with the breaker or wiring. Inspect all wiring and connections for visible damage. Look for rust, melted insulation, or soot deposits, which indicate short circuits. Tighten all wire connections and replace any damaged wires or controls. Examine the interaction between the upper and lower thermostats to ensure proper voltage switching and heating element operation.
Replacing Damaged Components
If you discover damaged insulation, burnt wires, or faulty controls, you need to replace these components. Remove and replace any wires that show signs of overheating or arc tracking. Install new controls if you find evidence of electrical failure. Always use parts that meet manufacturer specifications to ensure safe and effective repair. If the circuit breaker continues to trip after you replace damaged components, suspect a short circuit or a defective breaker. In this case, contact a licensed electrician for further diagnosis.
🛠️ Note: If you feel unsure about any step or if the breaker trips immediately after resetting, seek professional help. Electrical repairs can be dangerous without proper training.
When to Call a Professional
You may feel comfortable resetting a breaker or inspecting your water heater’s wiring. However, some situations require you to call an expert water heater repair technician. Electrical issues can pose serious risks to your safety and your home. You should recognize when a problem goes beyond a simple fix.
Consider these warning signs that indicate you need professional help:
- The circuit breaker trips immediately after you reset it.
- You see burnt wires, melted insulation, or scorch marks near the water heater.
- The fuse blows repeatedly, even after you replace it.
- You smell burning or notice unusual heat around the electrical panel.
- The water heater does not turn on, even after you check the power supply.
- You hear buzzing, crackling, or popping sounds from the unit.
⚠️ Alert:
If you notice any of these signs, do not attempt further repairs. Electrical faults can cause fires or severe injuries. Only a licensed technician should handle these hazards.
You should also call for expert water heater repair if you feel unsure about using a multimeter or interpreting electrical readings. Water heater repair often involves working with high-voltage circuits. Mistakes can lead to electric shock or permanent damage to your system.
A professional technician will:
- Inspect all wiring and connections for hidden faults.
- Test the heating elements, thermostats, and control boards with specialized tools.
- Replace damaged components with parts that meet safety standards.
- Ensure your water heater operates safely and efficiently.
You protect your home and your family when you choose expert water heater repair for complex or persistent problems. Attempting advanced repairs without proper training can void your warranty and increase your risk of injury.
🛠️ Tip:
Always check your water heater’s warranty before starting any repairs. Many manufacturers require service by a licensed professional to keep your coverage valid.
If you experience repeated electrical issues, visible damage, or uncertainty about any step, contact a qualified technician. You gain peace of mind and restore your hot water safely when you trust an expert.
Strange Noises or Leaking Water Heater

Identifying the Problem
You may hear popping, hissing, or banging sounds coming from your water heater. Sometimes, you notice water pooling around the base or see visible leaks near the connections. These signs often point to a leaking water heater or internal issues. If you spot a moving water meter indicator without any taps running, you likely have a hidden leak. Unusual noises can also signal pressure problems or limescale buildup inside the tank.
If you feel warmth on the pipe connected to the temperature and pressure (T&P) relief valve or see water dripping from it, your system may be releasing excess pressure. Always check for visible leaks and listen for new or persistent sounds.
Common Causes
Several factors can lead to strange noises or a leaking water tank:
- Limescale buildup on the heating element causes popping or crackling sounds as trapped water turns to steam.
- Sediment and mineral deposits at the bottom of the tank increase pressure and force components to work harder.
- Faulty or constantly leaking T&P valves release water and create noise.
- Overheating from a failing thermostat raises pressure, causing the T&P valve to open.
- Corrosion, high water pressure, and faulty installations often result in leaks or a leaking water heater.
- Loose connections and air in the lines can also contribute to noise and leaks.
According to the United States Product Safety Commission, most water heater incidents involve leaks or pressure issues, not explosions. Regular maintenance and monitoring pressure levels help prevent dangerous conditions.
Troubleshooting Steps
Listening for Popping or Hissing Sounds
You should listen closely for popping or hissing noises. These sounds usually mean limescale buildup or sediment has formed on the heating element. The noise comes from water trapped under the limescale, which turns into steam and escapes suddenly. If you hear these sounds, your water heater needs attention.
Removing Sediment Buildup
To address limescale buildup, flush your tank. Attach a hose to the drain valve and let water flow until it runs clear. This step removes sediment and helps prevent future leaks. Regular flushing, at least once a year, keeps your system efficient and reduces the risk of a leaking water tank.
Inspecting the Heating Element for Damage
Turn off the power and remove the access panel. Check the heating element for signs of limescale or corrosion. If you see heavy limescale buildup or damage, replace the element. This action restores efficiency and reduces noise. Always inspect for visible leaks around the element and connections.
Addressing a Leaking Water Heater
If you find a water heater leak, first check all connections and fittings. Tighten any loose parts. If leaks persist, look for corrosion or cracks in the tank. A leaking water tank often signals the end of the unit’s life. Early detection of leaks prevents property damage and costly repairs. For complex leaks or if you cannot find the source, contact a professional. Specialized tools like inspection cameras help locate hidden leaks in hard-to-access areas.
Regular maintenance, such as annual professional servicing and following manufacturer guidelines, reduces the risk of leaks and noise. If you feel unsure or the problem continues, seek expert help to avoid further damage.
When to Call a Professional
You may feel comfortable tightening a loose fitting or flushing your water heater. However, some situations require expert attention. Recognizing these moments protects your home and ensures your safety.
Call a licensed plumber or technician if you notice any of these warning signs:
Persistent Leaks:
If water continues to pool around your heater after you tighten connections, you likely have a deeper issue. Corrosion or a cracked tank often causes ongoing leaks. Only a professional can assess and repair these problems safely.Visible Corrosion or Rust:
When you see rust on the tank or around fittings, your water heater may be near the end of its life. Corrosion can weaken the tank and lead to sudden failure. A professional can determine if repair or replacement is best.Unusual or Loud Noises After Maintenance:
If popping, banging, or hissing sounds persist after you flush the tank and inspect the element, you may have severe sediment buildup or pressure issues. These problems can damage the tank or create dangerous conditions.Water Heater Age Over 10 Years:
Older units are more likely to develop leaks or fail unexpectedly. If your heater is over a decade old and starts leaking or making noise, you should schedule a professional inspection.Signs of High Pressure or T&P Valve Leaks:
Water dripping from the temperature and pressure relief valve signals excess pressure or overheating. This situation can become hazardous. Only a qualified technician should address pressure-related issues.Uncertainty About Repairs:
If you feel unsure about any step, stop and call a professional. Water heaters involve high voltage and pressurized systems. Mistakes can cause injury or property damage.
⚠️ Alert:
Never ignore leaks, corrosion, or persistent noises. These signs often point to serious problems that require immediate attention.
Table: DIY vs. Professional Help for Noises and Leaks
| Issue | DIY Possible | Professional Needed |
|---|---|---|
| Tightening loose fittings | ✅ | ❌ |
| Flushing sediment | ✅ | ❌ |
| Replacing heating element | ✅ | ❌ |
| Repairing tank leaks | ❌ | ✅ |
| Addressing corrosion | ❌ | ✅ |
| Fixing persistent or severe noises | ❌ | ✅ |
You protect your investment and your safety when you know your limits. If you see any of these warning signs, contact a licensed plumber or technician. Professional service ensures your water heater operates safely and efficiently.
Preventive Maintenance for Common Water Heater Problems
Regular Inspection Schedule
You can prevent most water heater issues by following a regular inspection schedule. Monthly visual checks help you spot early signs of corrosion, leaks, or a leaking water tank. Look for rust, water stains, or moisture around the base and pipes. Listen for unusual noises, which may indicate limescale buildup or sediment inside the tank. Annual professional inspections go further. A technician will test the pressure relief valve, inspect the anode rod, and check for electrical or gas safety hazards. These steps catch minor problems before they become expensive repairs. Professional inspections also ensure your water heater maintenance stays within warranty requirements. By following these preventive tips for water heater maintenance, you extend the life of your system and avoid unexpected breakdowns.
Tip: Schedule professional maintenance at least once a year, or twice a year if you have hard water. Early detection of leaks or limescale can save you from costly emergencies.
Flushing the Tank Periodically
Flushing your water heater tank is one of the most effective preventive tips for water heater maintenance. Sediment and limescale settle at the bottom of the tank over time. This buildup reduces heating efficiency and increases the risk of leaks or a leaking water tank. You should drain and flush the tank at least once a year. In areas with hard water, consider flushing every six months. This routine maintenance removes mineral deposits, improves energy efficiency, and helps prevent limescale from damaging the heating element. Manufacturers recommend draining and flushing the tank annually to maintain performance and warranty coverage. Regular flushing also keeps your hot water clean and reduces the chance of unexpected repair needs.
- Shut off power or gas before flushing.
- Attach a hose to the drain valve and empty several gallons until the water runs clear.
- Inspect for signs of rust or corrosion during the process.
Note: Routine flushing and inspection can double the lifespan of your water heater and reduce emergency repair costs by up to ten times compared to unplanned fixes.
Checking Electrical Connections
You should check electrical connections as part of your water heater maintenance routine. Loose wires, burnt terminals, or faulty thermostats can cause heating element failure or even a leaking water tank. Inspect the wiring for damage and ensure all terminals are tight. Test the thermostat settings and replace any worn or corroded heating elements promptly. Monitoring electrical connections prevents unexpected breakdowns and supports safe operation. Regular checks also help you spot early signs of leaks or overheating, which can lead to major failures if ignored. By including electrical inspections in your preventive tips for water heater maintenance, you improve efficiency and extend the service life of your equipment.
Safety Reminder: Always turn off the power at the breaker before inspecting electrical components. If you notice burnt wires or persistent issues, call a professional for repair.
Monitoring Water Quality
You need to monitor your water quality to protect your water heater and extend its lifespan. Poor water quality can cause mineral buildup, corrosion, and early heating element failure. Hard water contains high levels of calcium and magnesium. These minerals settle inside your tank and coat the heating element. Over time, this buildup reduces efficiency and increases energy costs.
You can start by testing your water hardness. Many hardware stores sell simple test kits. If you see white, chalky deposits on faucets or showerheads, you likely have hard water. You may also notice cloudy or discolored water, which signals sediment or rust in your system.
To maintain good water quality, consider these steps:
- Install a whole-house water softener if you have hard water. This device removes minerals before they reach your water heater.
- Flush your tank regularly to remove sediment and prevent buildup.
- Inspect the anode rod during annual water heater maintenance. The anode rod attracts corrosive elements and protects the tank from rust.
- Use a sediment filter if your water supply contains sand or debris.
Tip: Schedule professional water testing every year. This helps you catch changes in water quality before they damage your heater.
If you ignore water quality, you risk frequent repairs and reduced hot water output. You also shorten the life of your heating element and tank. By monitoring water quality, you keep your system running efficiently and avoid costly breakdowns.
When to Replace the Heating Element
You should know when to replace the heating element to prevent unexpected loss of hot water. Heating elements wear out over time, especially in areas with hard water or poor maintenance. Signs of a failing element include lukewarm water, slow heating, or no hot water at all.
Look for these warning signs:
- Water does not reach the set temperature.
- Hot water runs out quickly.
- You hear popping or hissing noises from the tank.
- The circuit breaker trips when the heater runs.
- You see visible corrosion or scale on the element during inspection.
You can test the element with a multimeter. A healthy element shows about 15 ohms of resistance. If you get no reading or infinite resistance, the element has failed.
| Symptom | Likely Cause | Action Needed |
|---|---|---|
| No hot water | Burned-out element | Replace element |
| Slow heating | Scale buildup | Clean or replace |
| Tripped breaker | Shorted element | Replace element |
Note: Always turn off the power before inspecting or replacing the heating element. If you feel unsure, call a licensed technician for help.
Replacing the heating element at the first sign of trouble keeps your water heater efficient and reliable. Regular checks during water heater maintenance help you catch problems early and avoid emergency repairs.
You now know the five most common heating element issues in water heaters and the practical solutions for each. Always follow safety guidelines and attempt a DIY solution only when you feel confident. For complex or persistent problems, call a professional. Regular maintenance tasks, such as flushing the tank and checking the anode rod, help prevent future issues and keep your system efficient.
| Maintenance Task | DIY Suitable | Professional Help Required |
|---|---|---|
| Flushing the water heater tank (every 3 months) | Yes | No |
| Checking the anode rod (replace if >50% corroded) | Yes | No |
| Adjusting the pressure relief valve | Yes | No |
| Replacing the thermostat | No | Yes |
| Fixing major leaks | No | Yes |
Professional maintenance increases water heater lifespan by up to 20%, improves energy efficiency, and reduces costly repairs. You protect your investment and enjoy reliable hot water by choosing the right solutions and regular care.
FAQ
How often should you flush your water heater to prevent heating element issues?
You should flush your water heater at least once a year. If you have hard water, consider flushing every six months. Regular flushing removes sediment and helps your heating element last longer.
What are the signs of a failing heating element in your water heater?
You may notice lukewarm water, slow heating, or no hot water at all. Popping or hissing noises and frequent tripped breakers also indicate a failing heating element.
Can you replace a water heater heating element yourself?
You can replace a heating element if you feel comfortable with basic electrical work. Always turn off the power first. If you feel unsure, call a licensed technician for safety.
Why does your water heater make popping or hissing sounds?
Popping or hissing sounds usually mean limescale or sediment has built up on the heating element. Flushing the tank and cleaning or replacing the element can resolve these noises.
What should you do if your water heater keeps tripping the circuit breaker?
First, reset the breaker. If it trips again, turn off the power and inspect for damaged wires or a faulty element. Do not continue resetting. Call a professional if the problem persists.
How can you extend the life of your water heater’s heating element?
- Flush the tank regularly
- Check and replace the anode rod
- Monitor water quality
- Inspect electrical connections
- Set the thermostat to 120°F
Regular maintenance prevents most heating element failures.
Is it safe to use your water heater if you notice a small leak?
No, you should not use a leaking water heater. Even a small leak can cause water damage or electrical hazards. Turn off the power and water supply, then call a professional for inspection.

